Uncle Sam Legs Scarf
I finally finished my latest holiday legs scarf in time for the Fourth of July – meet my patriotic Uncle Sam Legs Scarf! Wear it as a cute and fun accessory while watching the fireworks! It is not solely meant for the Fourth of July, but for any day you want to display your patriotism. The blue section represents Uncle Sam’s jacket so I added my Cute and Quick Star as a fun button for the jacket. See below if you would like to make an Uncle Sam Legs Scarf for yourself. I hope you have fun with this pattern!
This scarf pattern is written for an adult-size scarf meant to fit most adults (and older children/teens). The length can be slightly adjusted when you attach the shoes to the scarf (moving them up for a shorter scarf or down for a longer scarf).
FINISHED MEASUREMENTS
The scarf is approximately 44½” long (it might be slightly longer or shorter depending on your shoe placement).
The blue (jacket) section of the scarf is approximately 3¾” wide and the striped (pants) section of the scarf is approximately 2½” wide.
MATERIALS
– Size H/8/5.00mm crochet hook or size needed to obtain gauge
– Worsted weight (4) yarn in Blue (I used Red Heart Super Saver yarn in Royal.)
– Worsted weight (4) yarn in Red (I used Red Heart Super Saver yarn in Cherry Red.)
– Worsted weight (4) yarn in White (I used Red Heart Super Saver yarn in White.)
– Worsted weight (4) yarn in Gold (I used Red Heart Super Saver yarn in Gold.)
– Scissors
– Tapestry needle
– Stitch markers (if needed for counting/marking rows/stitches)
– Straight pins (if needed for sewing shoes or stars in place on both sides of scarf)
– Measuring tape
ABBREVIATIONS
– ch = chain
– chs = chains
– dc = double crochet
– dc2tog = double crochet 2 together (double crochet decrease)
– fhdc = foundation half double crochet ***
– hdc = half double crochet
– sc = single crochet
– sc2tog = single crochet 2 together (single crochet decrease)
– slst = slip stitch
– sp = space
– st = stitch
– sts = stitches
SPECIAL STITCHES
***This special stitch is only used to complete Row 3 of the scarf. It is not used anywhere else in the pattern.
We will need to extend Row 3 of the scarf by using foundation half double crochet (fhdc) stitches. As soon as you pull through the red yarn to complete the last blue hdc of Row 3, you will begin the fhdc stitches. The first fhdc stitch is started in the base of the last blue hdc stitch. Follow the directions below.
Yarn over, insert the hook into the base of the last stitch made, yarn over, pull up a loop (you should now have 3 loops on your hook), yarn over, pull through the first loop (this creates the “chain-1” you will use to start the next fhdc), yarn over, pull through all three loops. (First fhdc made)
Now, repeat the general directions below to make each additional fhdc in the row.
– fhdc (foundation half double crochet): Yarn over, insert hook in chain-1 of the previous fhdc (through the v on the bottom of the stitch), yarn over and pull up a loop (you should have 3 loops on hook), yarn over and pull through 1 loop (this creates the “chain-1” for the next fhdc), yarn over and pull through all three loops.
Tamara Kelly of Moogly has a great video tutorial on foundation half double crochet. She also has a video on extending a row with foundation single crochet found here.
GAUGE
Middle Section (blue jacket/striped pants): 7 hdc = 2 inches; 3 rows = 1 inch
Shoe Section: 4 sc = 1 inch; 4 rows = 1 inch
PATTERN NOTES
- The jacket (blue section) and pants (striped section) are made first in rows of half double crochet.
- The yarn is cut after each color change. When you cut the yarn after changing color, leave a long enough tail to weave in the ends as you work.
- The first stitch of each row is always done in the same stitch as the turning chain unless otherwise stated (the turning chain does not count as a stitch).
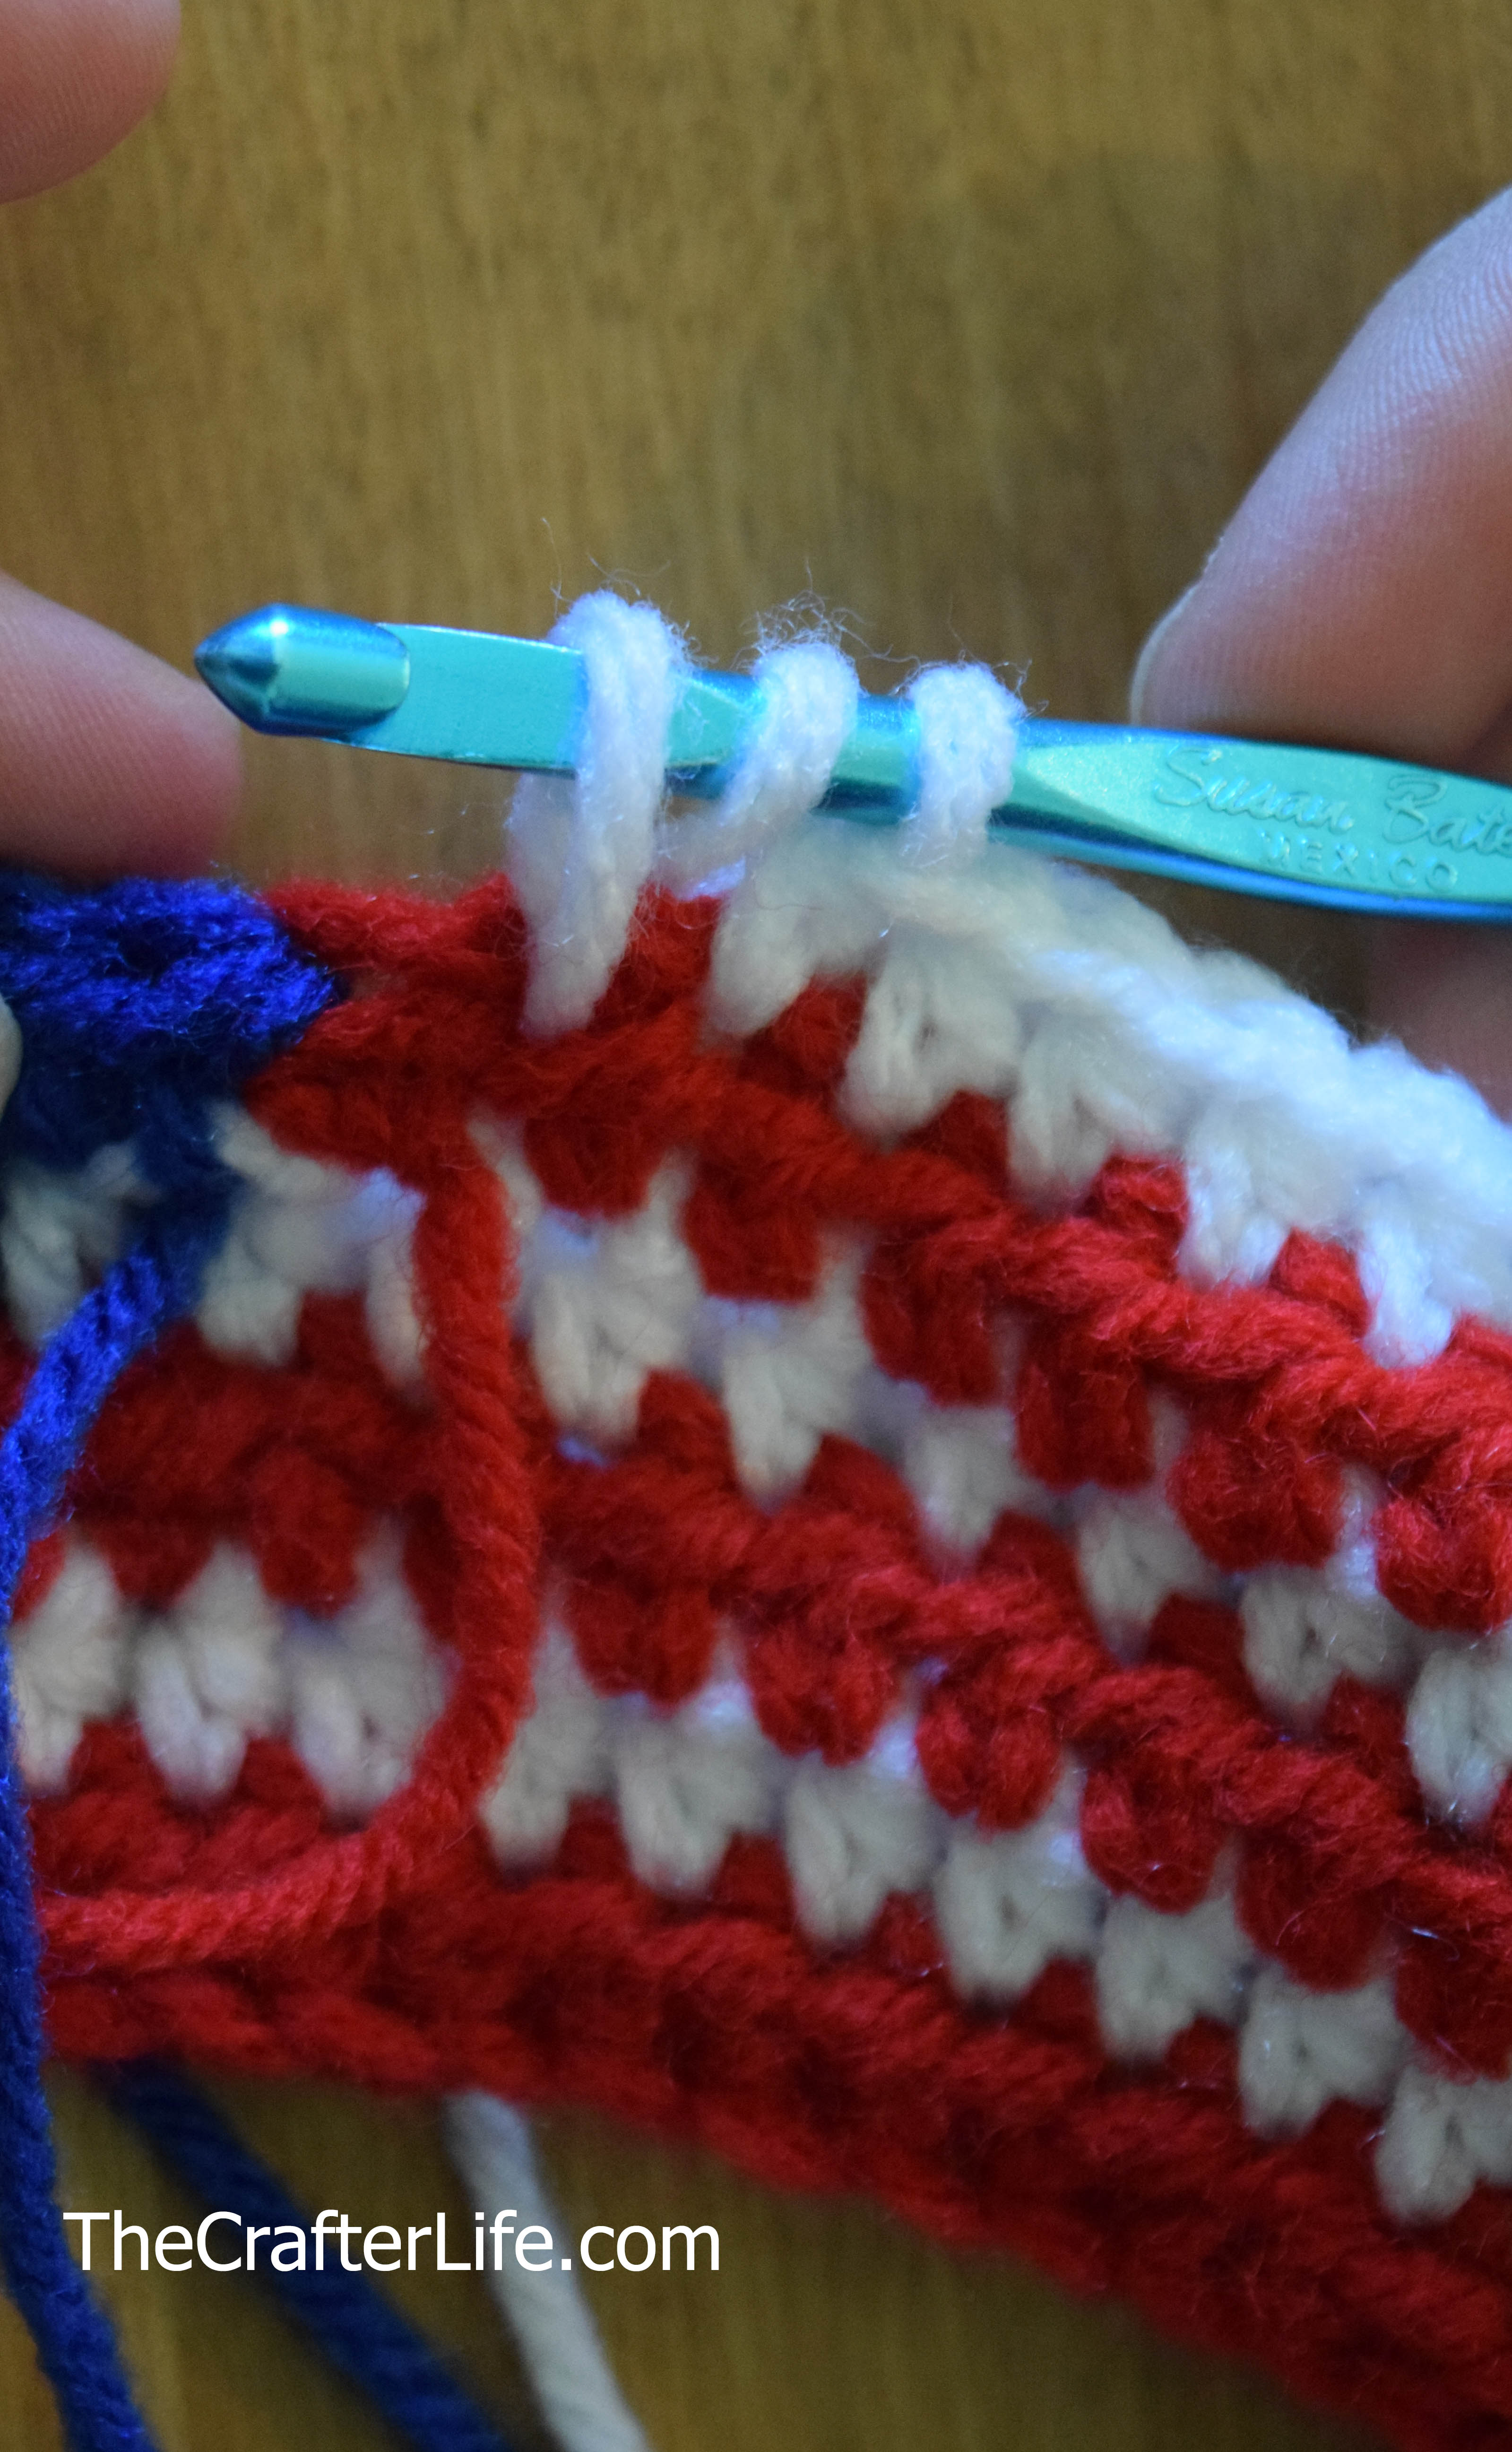
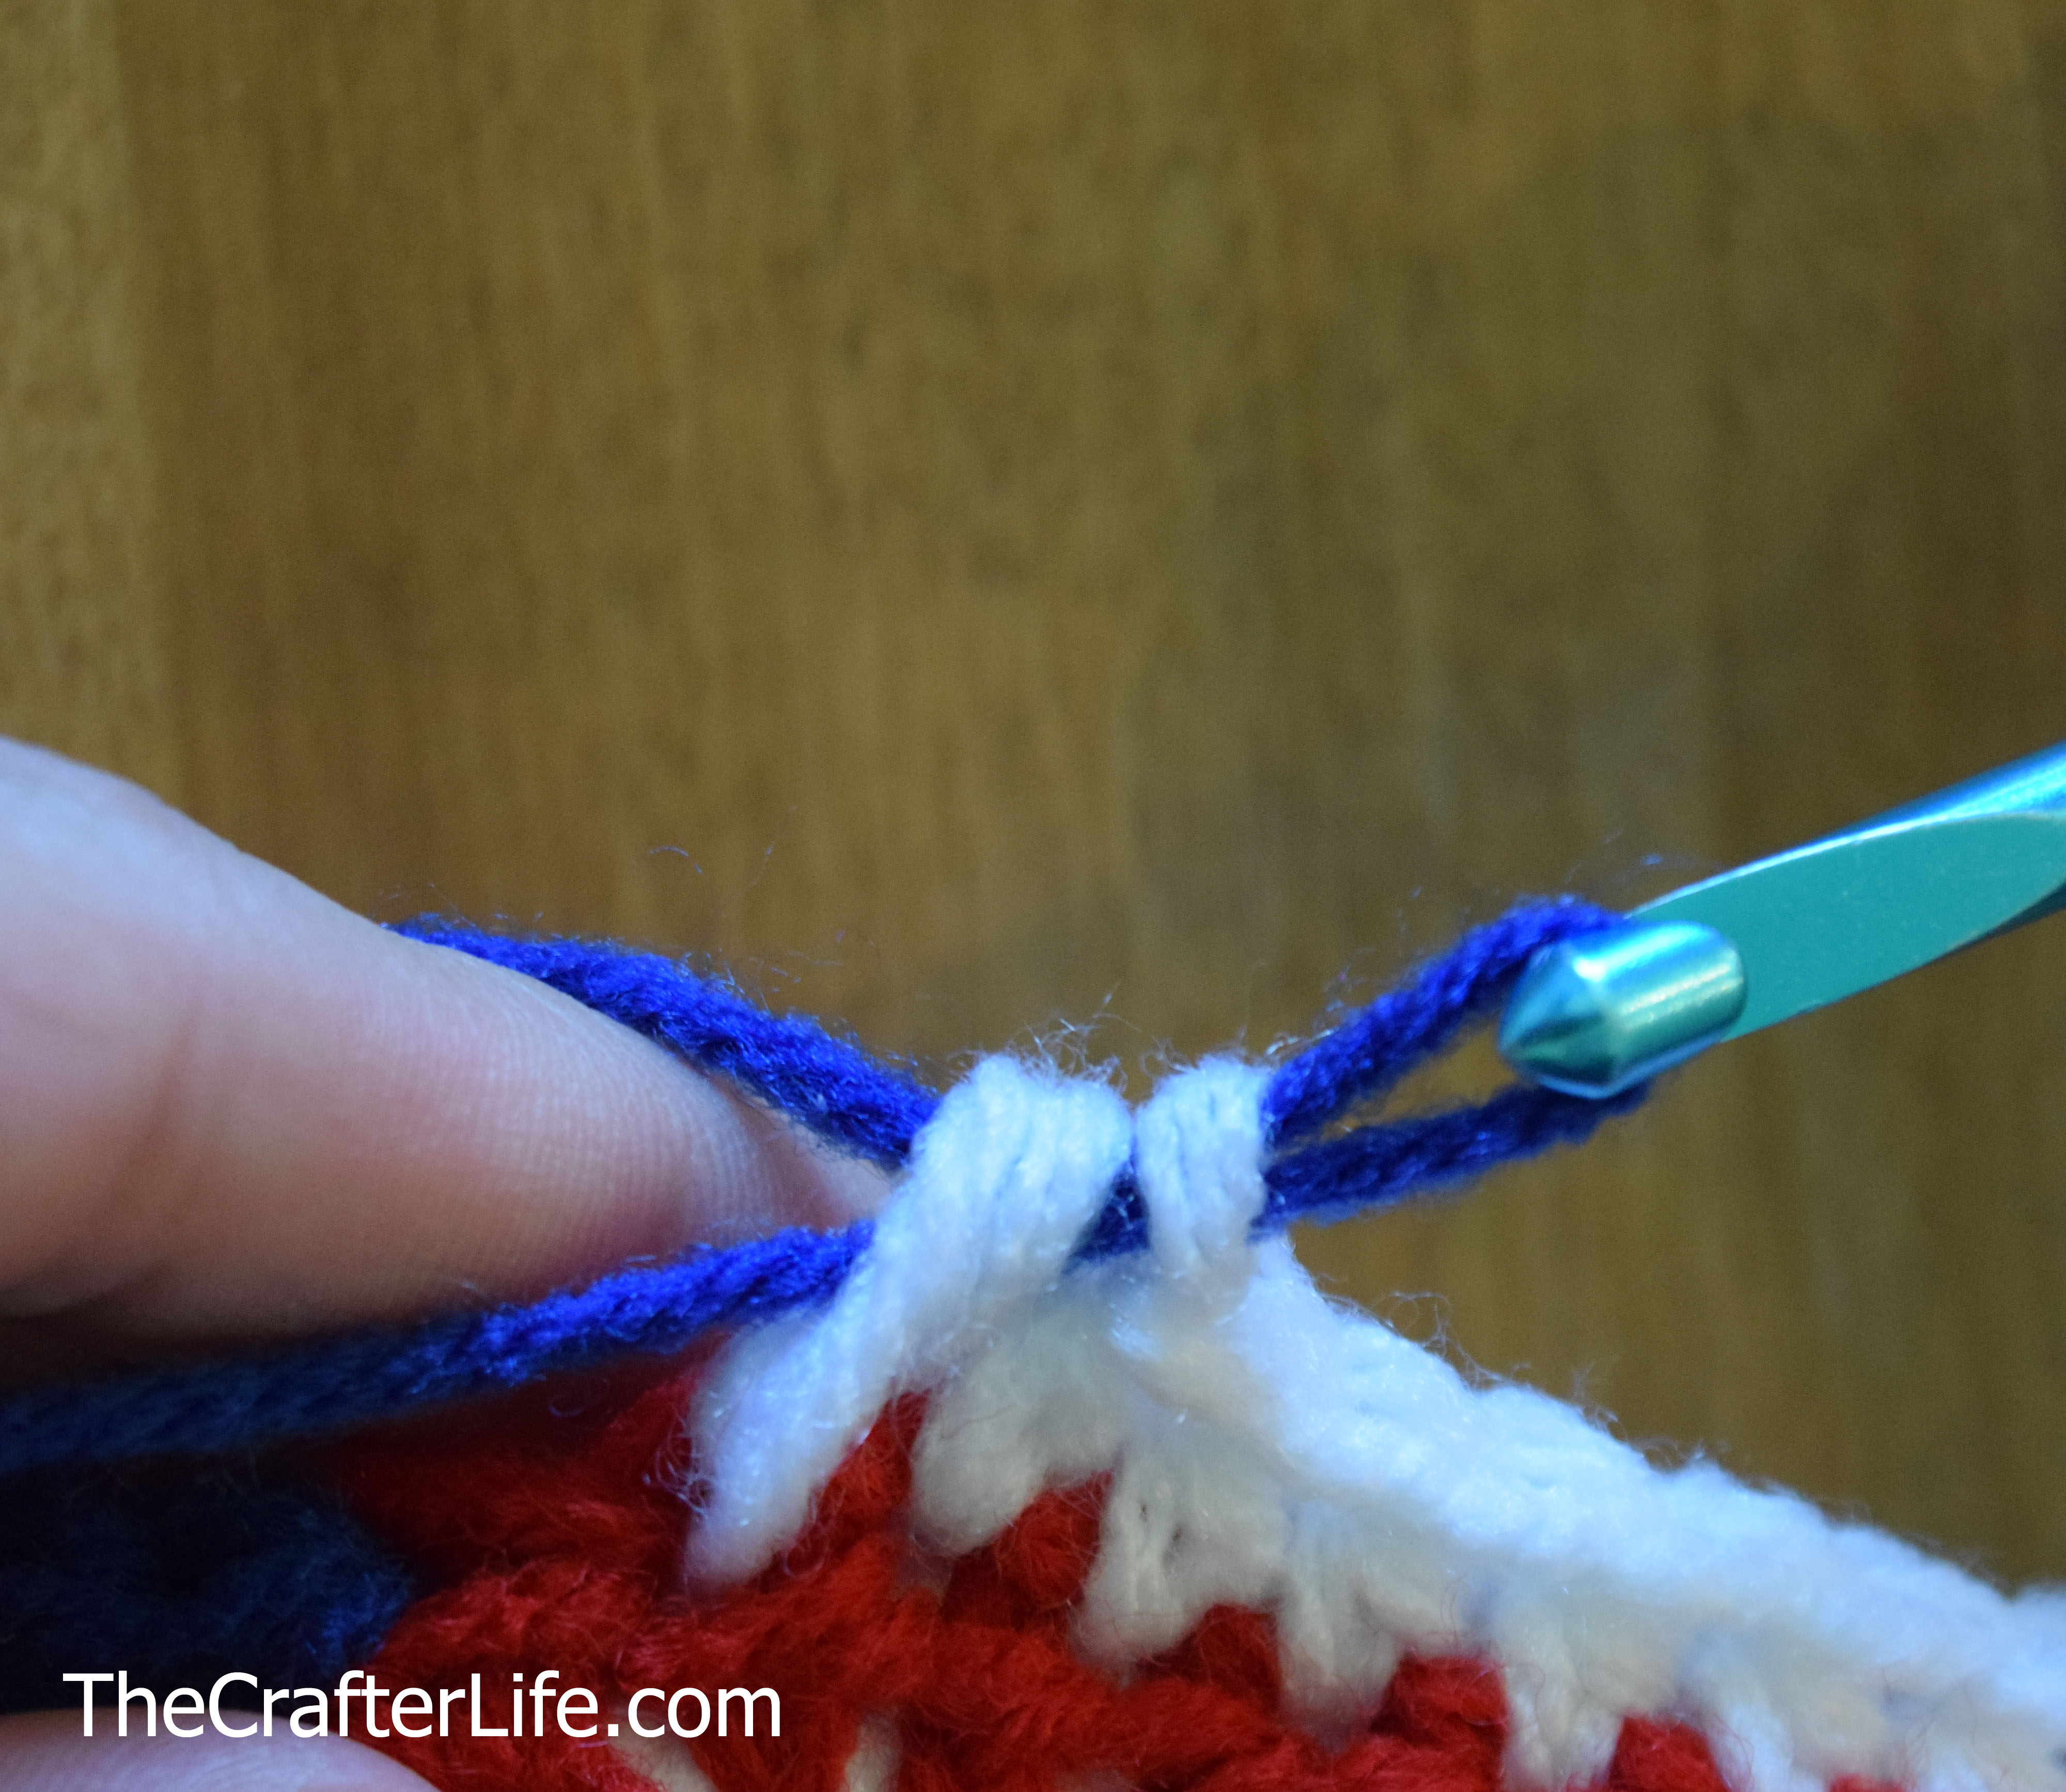
- When changing color, join the new color while completing the last hdc (half double crochet) of the previous color (by pulling through the new color when you have three loops on the hook in the previous color to complete the final hdc). See picture below.
DIRECTIONS
Middle Section of Scarf (Blue jacket/striped pants)
Use your blue yarn to begin. Remember to cut the yarn after each color change, leaving a tail long enough to weave in as you work.
Row 1: Ch 51, hdc in 2nd ch from hook and in each ch across. (50 hdc)
Row 2: Ch 1, turn, 2 hdc in first st, hdc in next 48 sts, 2 hdc in last st, pulling through red yarn to complete the last hdc (see pattern notes). (52 hdc)
*You should now have red yarn on your hook to begin Row 3. You will change color to blue and then back to red during this row. Pull through white yarn to complete the very last fhdc of this row.
*Try to make the two red sections of Row 3 as close to the same length as possible because you will want them to hang even when you wear the scarf. You will be able to adjust the height of each foot when you go to attach them, so there is a little room for error. Don’t worry too much if they aren’t exactly even, but try to pay extra attention to your gauge for both the red sections.
Row 3: Turn work, ch 51, hdc in 2nd ch from hook and in each ch across, pulling through blue yarn to complete the last red hdc, 2 hdc in next st, hdc in next 50 sts, 2 hdc in last st, pulling through red yarn to complete the final blue hdc, 50 fhdc (see special stitches for directions), pull through white yarn to complete the final fhdc. (104 hdc, 50 fhdc; 154 total sts)
*You should now have white yarn on your hook and the two red sections should be pretty close in length.
Row 4: Ch 1, turn, hdc in next 49 sts, change to blue, hdc in next 56 sts, change to white, hdc in last 49 sts, change to red at the end of the row. (154 hdc)
Row 5: Ch 1, turn, hdc in next 48 sts, change to blue, hdc in next 58 sts, change to red, hdc in next 48 sts, change to white at the end of the row. (154 hdc)
Row 6: Ch 1, turn, hdc in next 47 sts, change to blue, hdc in next 60 sts, change to white, hdc in next 47 sts, change to red at the end of the row. (154 hdc)
Row 7: Ch 1, turn, hdc in the next 46 sts, change to blue, hdc in next 62 sts, change to red, hdc in next 46 sts, change to white at the end of the row. (154 hdc)
Row 8: Ch 1, turn, hdc in next 45 sts, change to blue, hdc in next 64 sts, change to white, hdc in next 45 sts, change to red at the end of the row. (154 hdc)
Row 9: Ch 1, turn, hdc in next 44 sts, change to blue, hdc in next 66 sts, change to red, hdc in next 44 sts, fasten off and weave in loose ends. (154 hdc)
Row 10: Turn work, attach blue yarn to the 44th st over (this is the red stitch before the first blue stitch), ch 1, 2 hdc in 44th st (same st to which you attached yarn), hdc in next 66 sts, 2 hdc in next st (this should be first red stitch of next red section and is where you will stop for this row). (70 hdc)
Row 11: Ch 1, turn, 2 hdc in first st, hdc in next 68 sts, 2 hdc in last st, fasten off, leave a long tail for reference later. (72 hdc)
*You should now have the middle section of the scarf complete. Follow the directions below to make the shoes.
Shoe (Make 4)
You will need your white yarn to begin the shoe. Change to blue yarn after the first two rows.
Row 1: Ch 13, hdc in 2nd ch from hook and in each ch across. (12 hdc)
Row 2: Ch 1, turn, hdc in each st across, pulling through blue yarn to complete the last hdc.
***The pattern for the blue section of the shoe is the same pattern as the shoe of the LEPRECHAUN LEGS SCARF
Follow the directions from Row 33 to Row 48 of the First Leg of the Leprechaun Legs Scarf to make the rest of the shoe body.***
* Once you have made four shoes, follow the directions below for attaching them to the scarf. Two shoes will be sewn together with one end of the scarf in the middle of them to make one shoe on one end of the scarf.
Attaching Shoes
- Position your scarf as if you are wearing it around your neck. You might even want to place it around your neck or on the person who will be wearing it. The tail you let hang loose for reference should be on the outside of the scarf.
- Decide how high up you want to place your shoes. If you want a longer scarf, you would want to put your shoes lower on the leg. If you need the scarf to be shorter, place them higher on the leg, but be sure not to go so high so that the striped section of the scarf hangs out the bottom of the shoe.
- Decide which direction you want your shoes to point. The scarf shown in the main picture was made with both shoes pointing toward the outside of the scarf.
- Once you have your shoe position and orientation figured out, use your tapestry needle and yarn to sew two of the shoes together with one end of the scarf sandwiched in the middle of them so that when you are done, it appears as if it is one shoe on the end of the scarf. In other words, place one end of your scarf on top of one shoe, then place another shoe on top of the end of the scarf so the end of the scarf is in the middle of the shoes and the shoes are directly aligned with each other. Sew the shoes together around their perimeters using yarn of corresponding color (white for the top of the shoe and blue for the rest of the shoe). Make sure to go through all three layers with your needle (top shoe, striped end of scarf, and bottom shoe) across the top and whenever else you can to ensure the shoe is securely attached to the scarf. Use white yarn when sewing the top cuff of the shoe to the scarf and use blue yarn when sewing the rest of the shoe to the scarf. Secure all loose ends when finished.
- Once your first shoe is attached to one end of the scarf, attach the other shoe to the other end in the same way you attached the first shoe. Secure all loose ends, including the blue loose end you left for reference from the main section of the scarf.
***Once you are finished attaching both shoes to the legs of the scarf, follow the directions below to make and attach the star buttons to the top jacket of the scarf.
Star Button (Make 4)
Use your white yarn to make the star buttons. Follow my Cute and Quick Star Pattern for the star. Leave a long tail on two of the stars after fastening off to use for sewing them.
*Once you have four stars made, follow the directions below for attaching them to the scarf. You will be sewing the stars to the front and back of each side of the scarf so you can wear your scarf with either side as the front.
Attaching the Stars
- Position your scarf as if you are wearing it around your neck.
- Place your stars on the blue section toward the bottom so you can see them when wearing the scarf and so they appear to be like the bottom buttons on a jacket. You will place one star on the front of each side of the scarf (use the stars with the long tails on the front) and then place one star directly underneath each of those stars on the back side of the scarf. You may wish to use straight pins to hold them in place and ensure they are lined up with each other.
- Use your tapestry needle and the long tails left on the stars to sew the stars in place. Weave in and secure the ends.
**Once you have finished attaching the stars, your scarf is ready to wear!

The pattern and photos of this item are the property of TheCrafterLife. This pattern and design are subject to copyright, and are for personal, non-commercial use only. You may not distribute, sell this pattern, or claim it as your own under any circumstances.
You may not sell my patterns or claim them as your own. You may make items to sell (i.e. on Etsy) from my patterns but I ask that you link back to my site and provide credit for the pattern. You are welcome to share my patterns on social media as long as you link back directly to my site by providing the link. No copying and pasting of any patterns will be allowed under any circumstances.

CUTE AND QUICK STAR APPLIQUE PATTERN