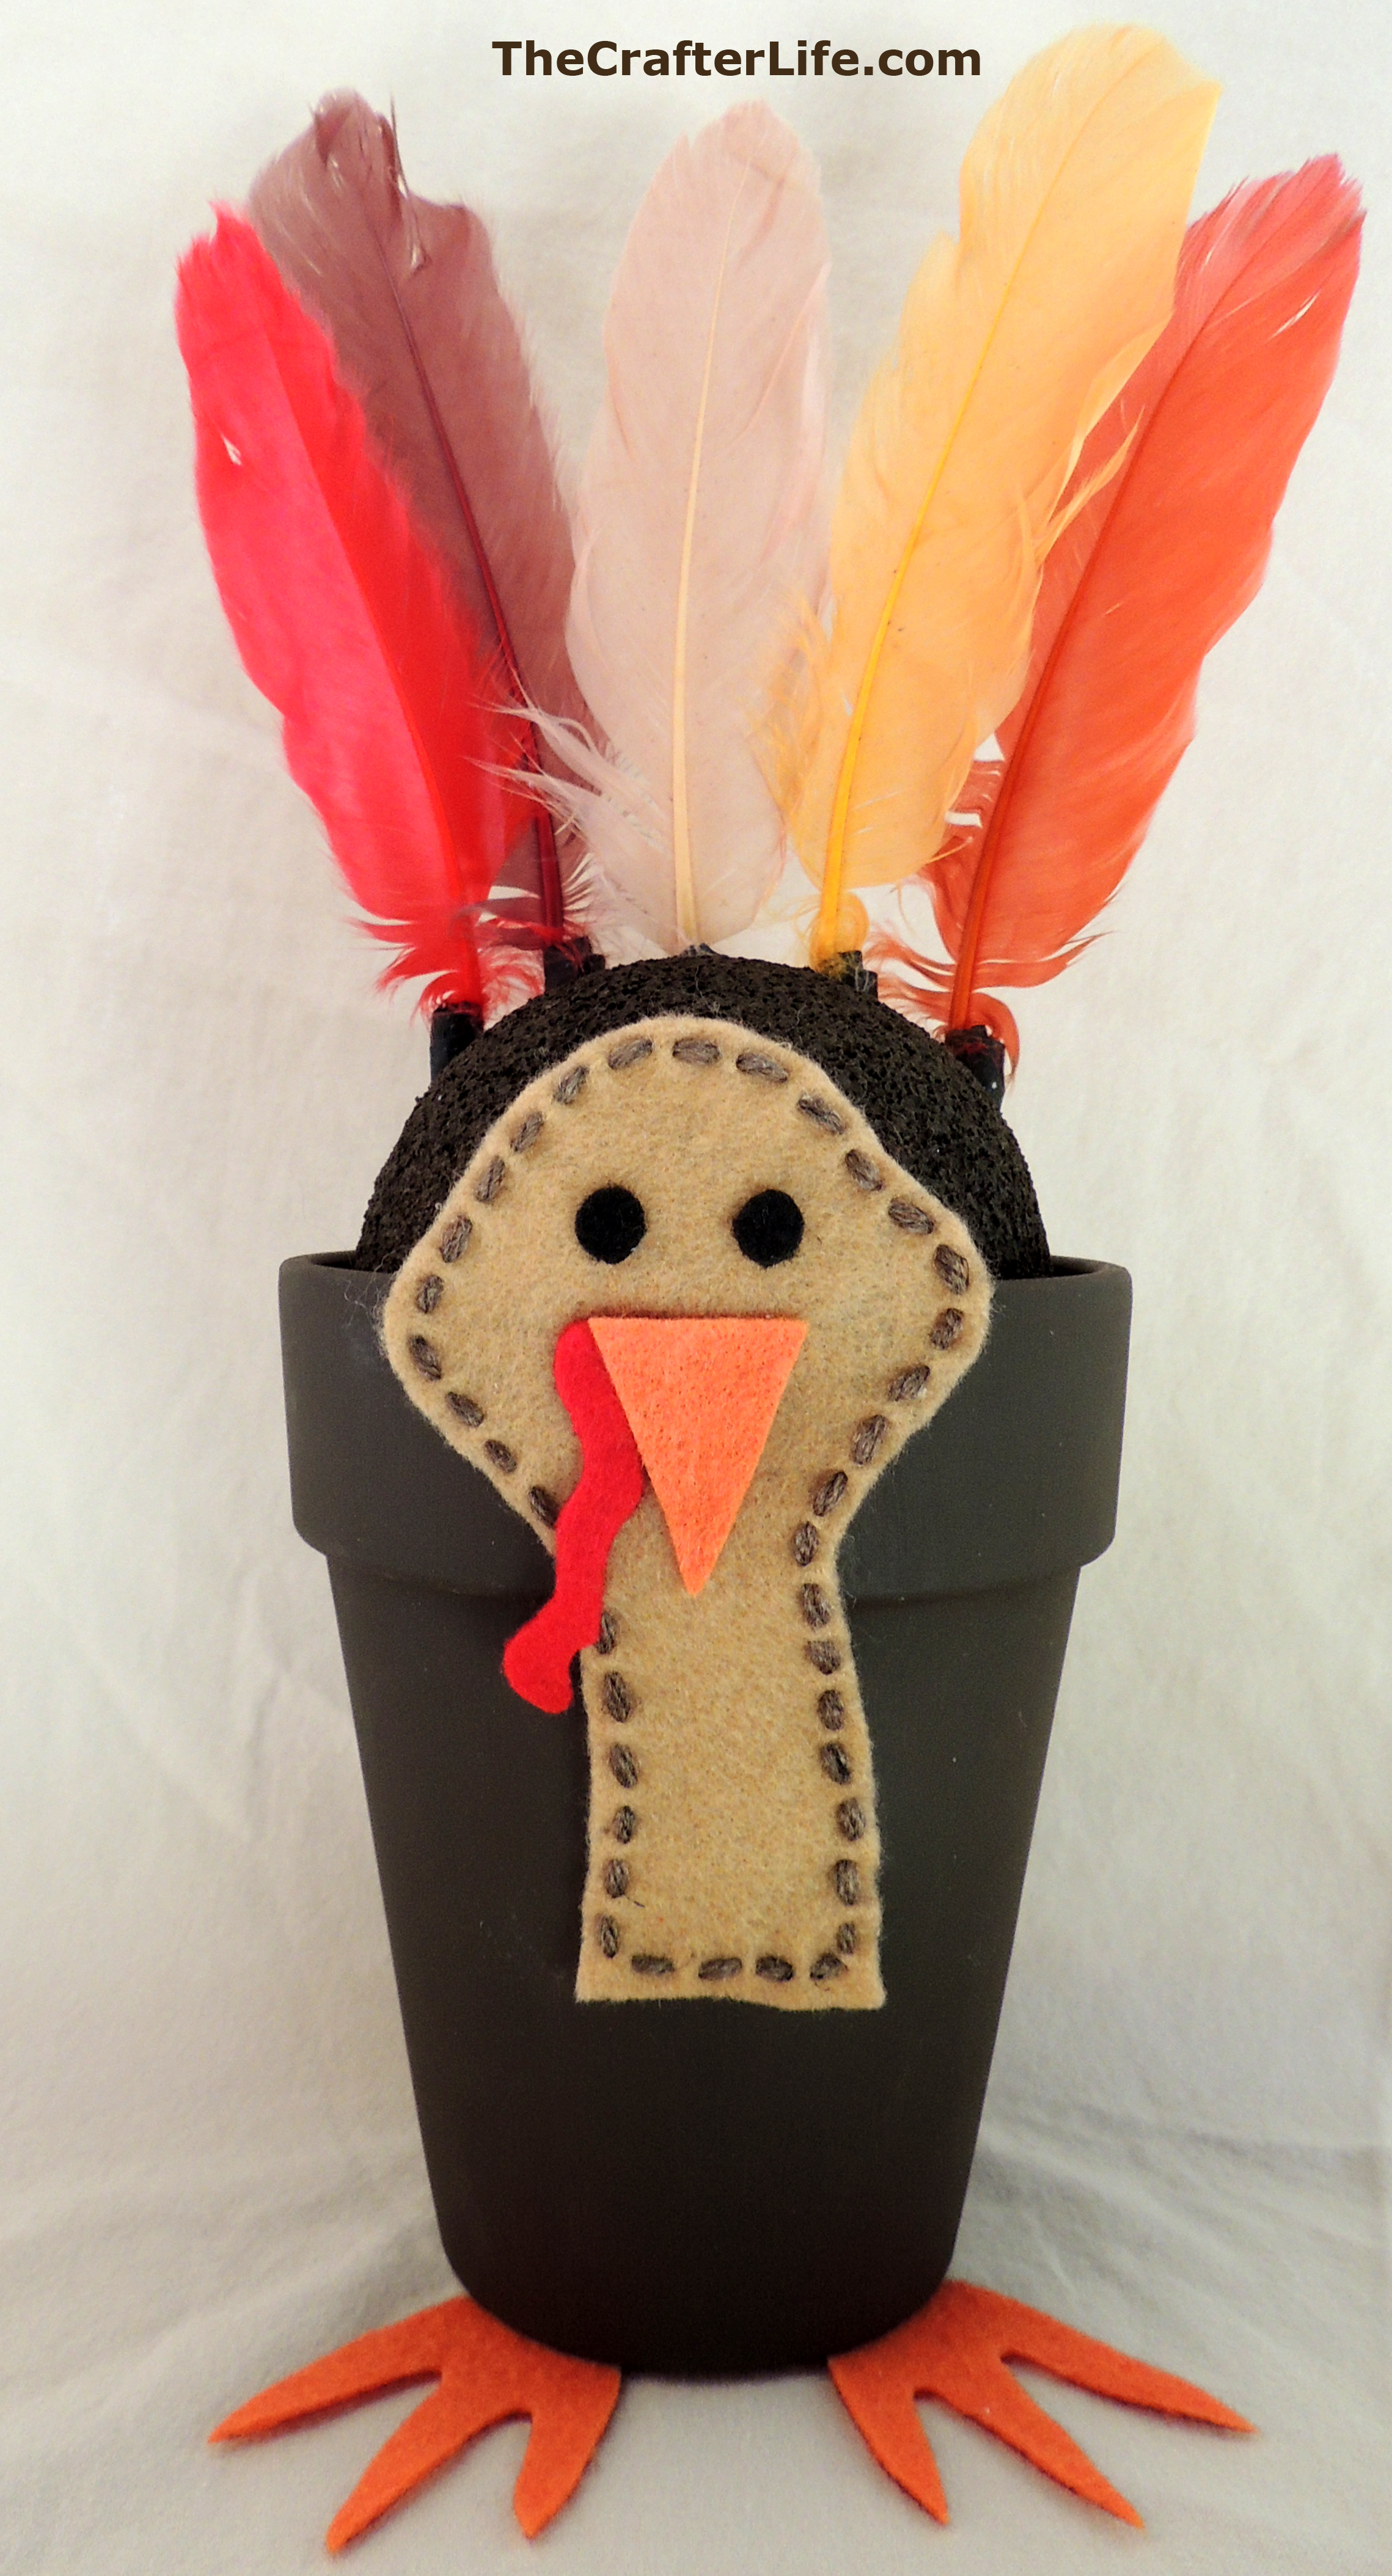
Turkey Pen Pail
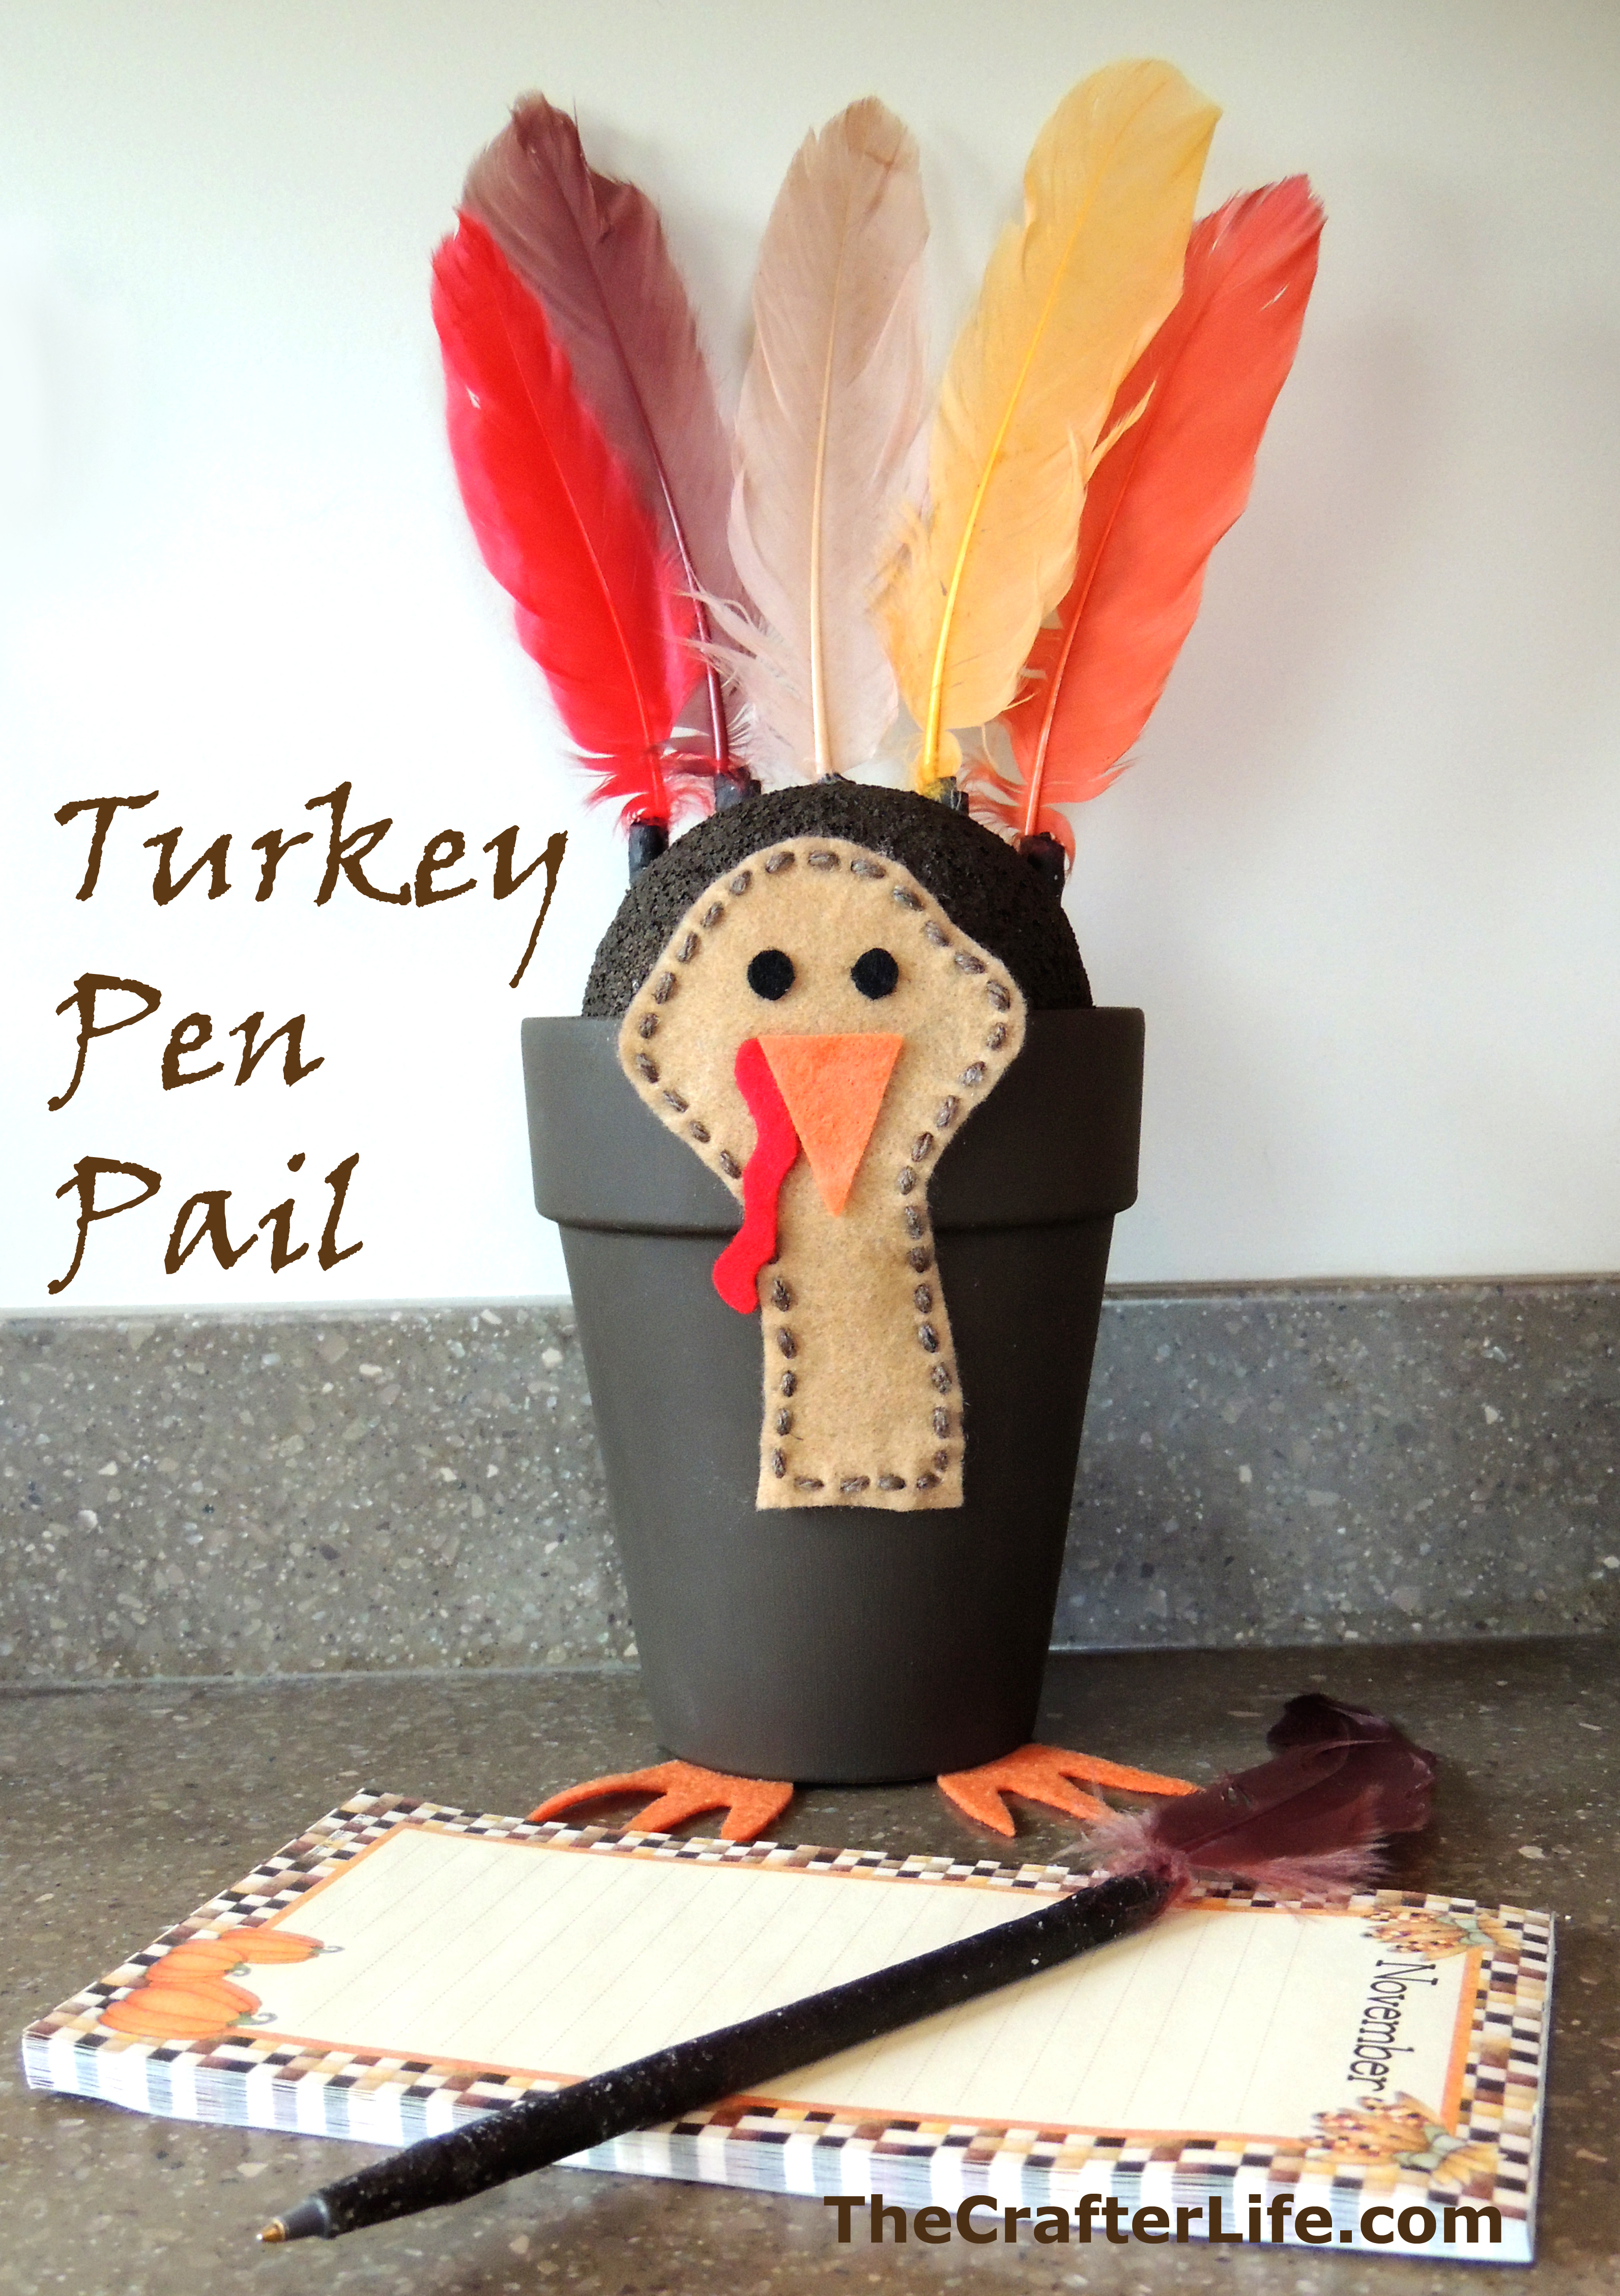
For a new spin on flower pens, I decided to make feather pens. They would be neat by themselves, but I thought for Thanksgiving, I would make them into turkey feathers. I didn’t know if they made brown floral tape or not since I’ve only ever used green for flower pens, so I was excited when I found some at Michaels! The turkey pen pail would make a great gift for a teacher or would be great as a Thanksgiving decoration around the house. Below are the directions for my turkey pen pail.
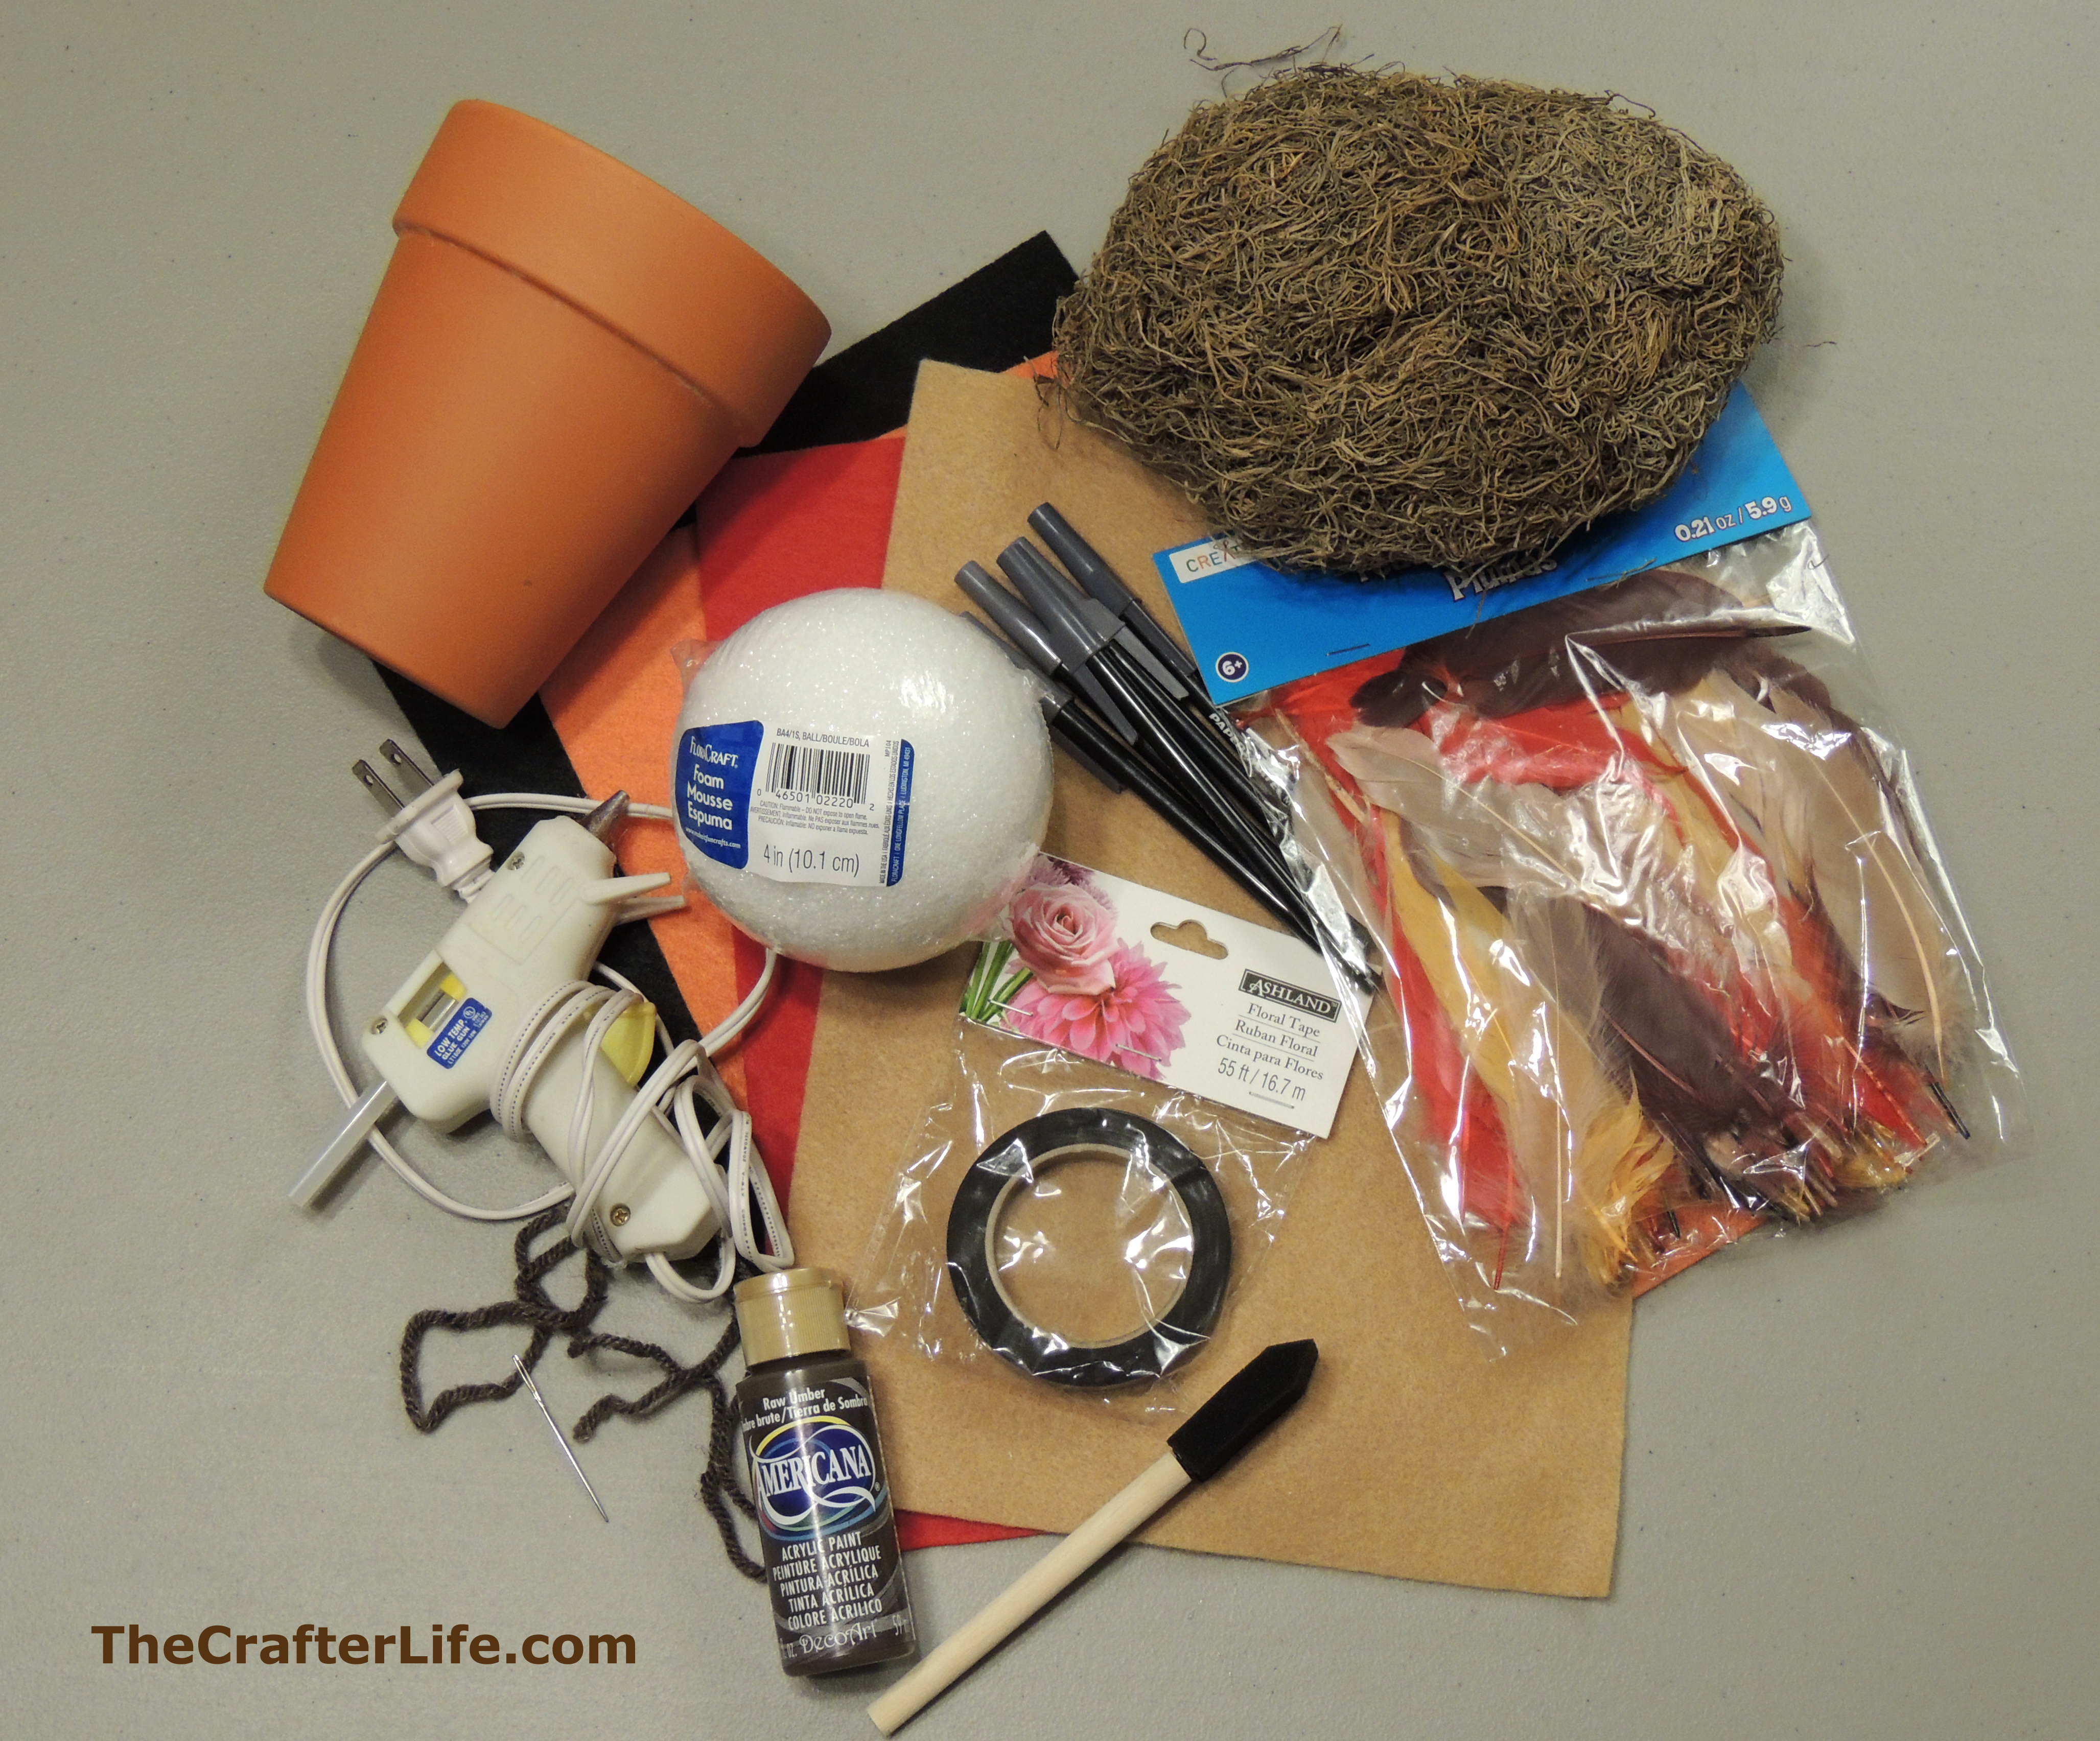
Materials:
– Clay pot (5.5 inches tall)
– 4 inch Styrofoam ball
– Spanish moss
– Black, orange, red, and light brown felt
– Brown floral tape
– Feathers
– Pens
– Dark brown acrylic paint
– Brown yarn
– Needle
– Paint sponge/brush
– Hot glue gun/glue
– Toothpicks
Directions:
1. Paint the clay pot dark brown. Allow it to dry.

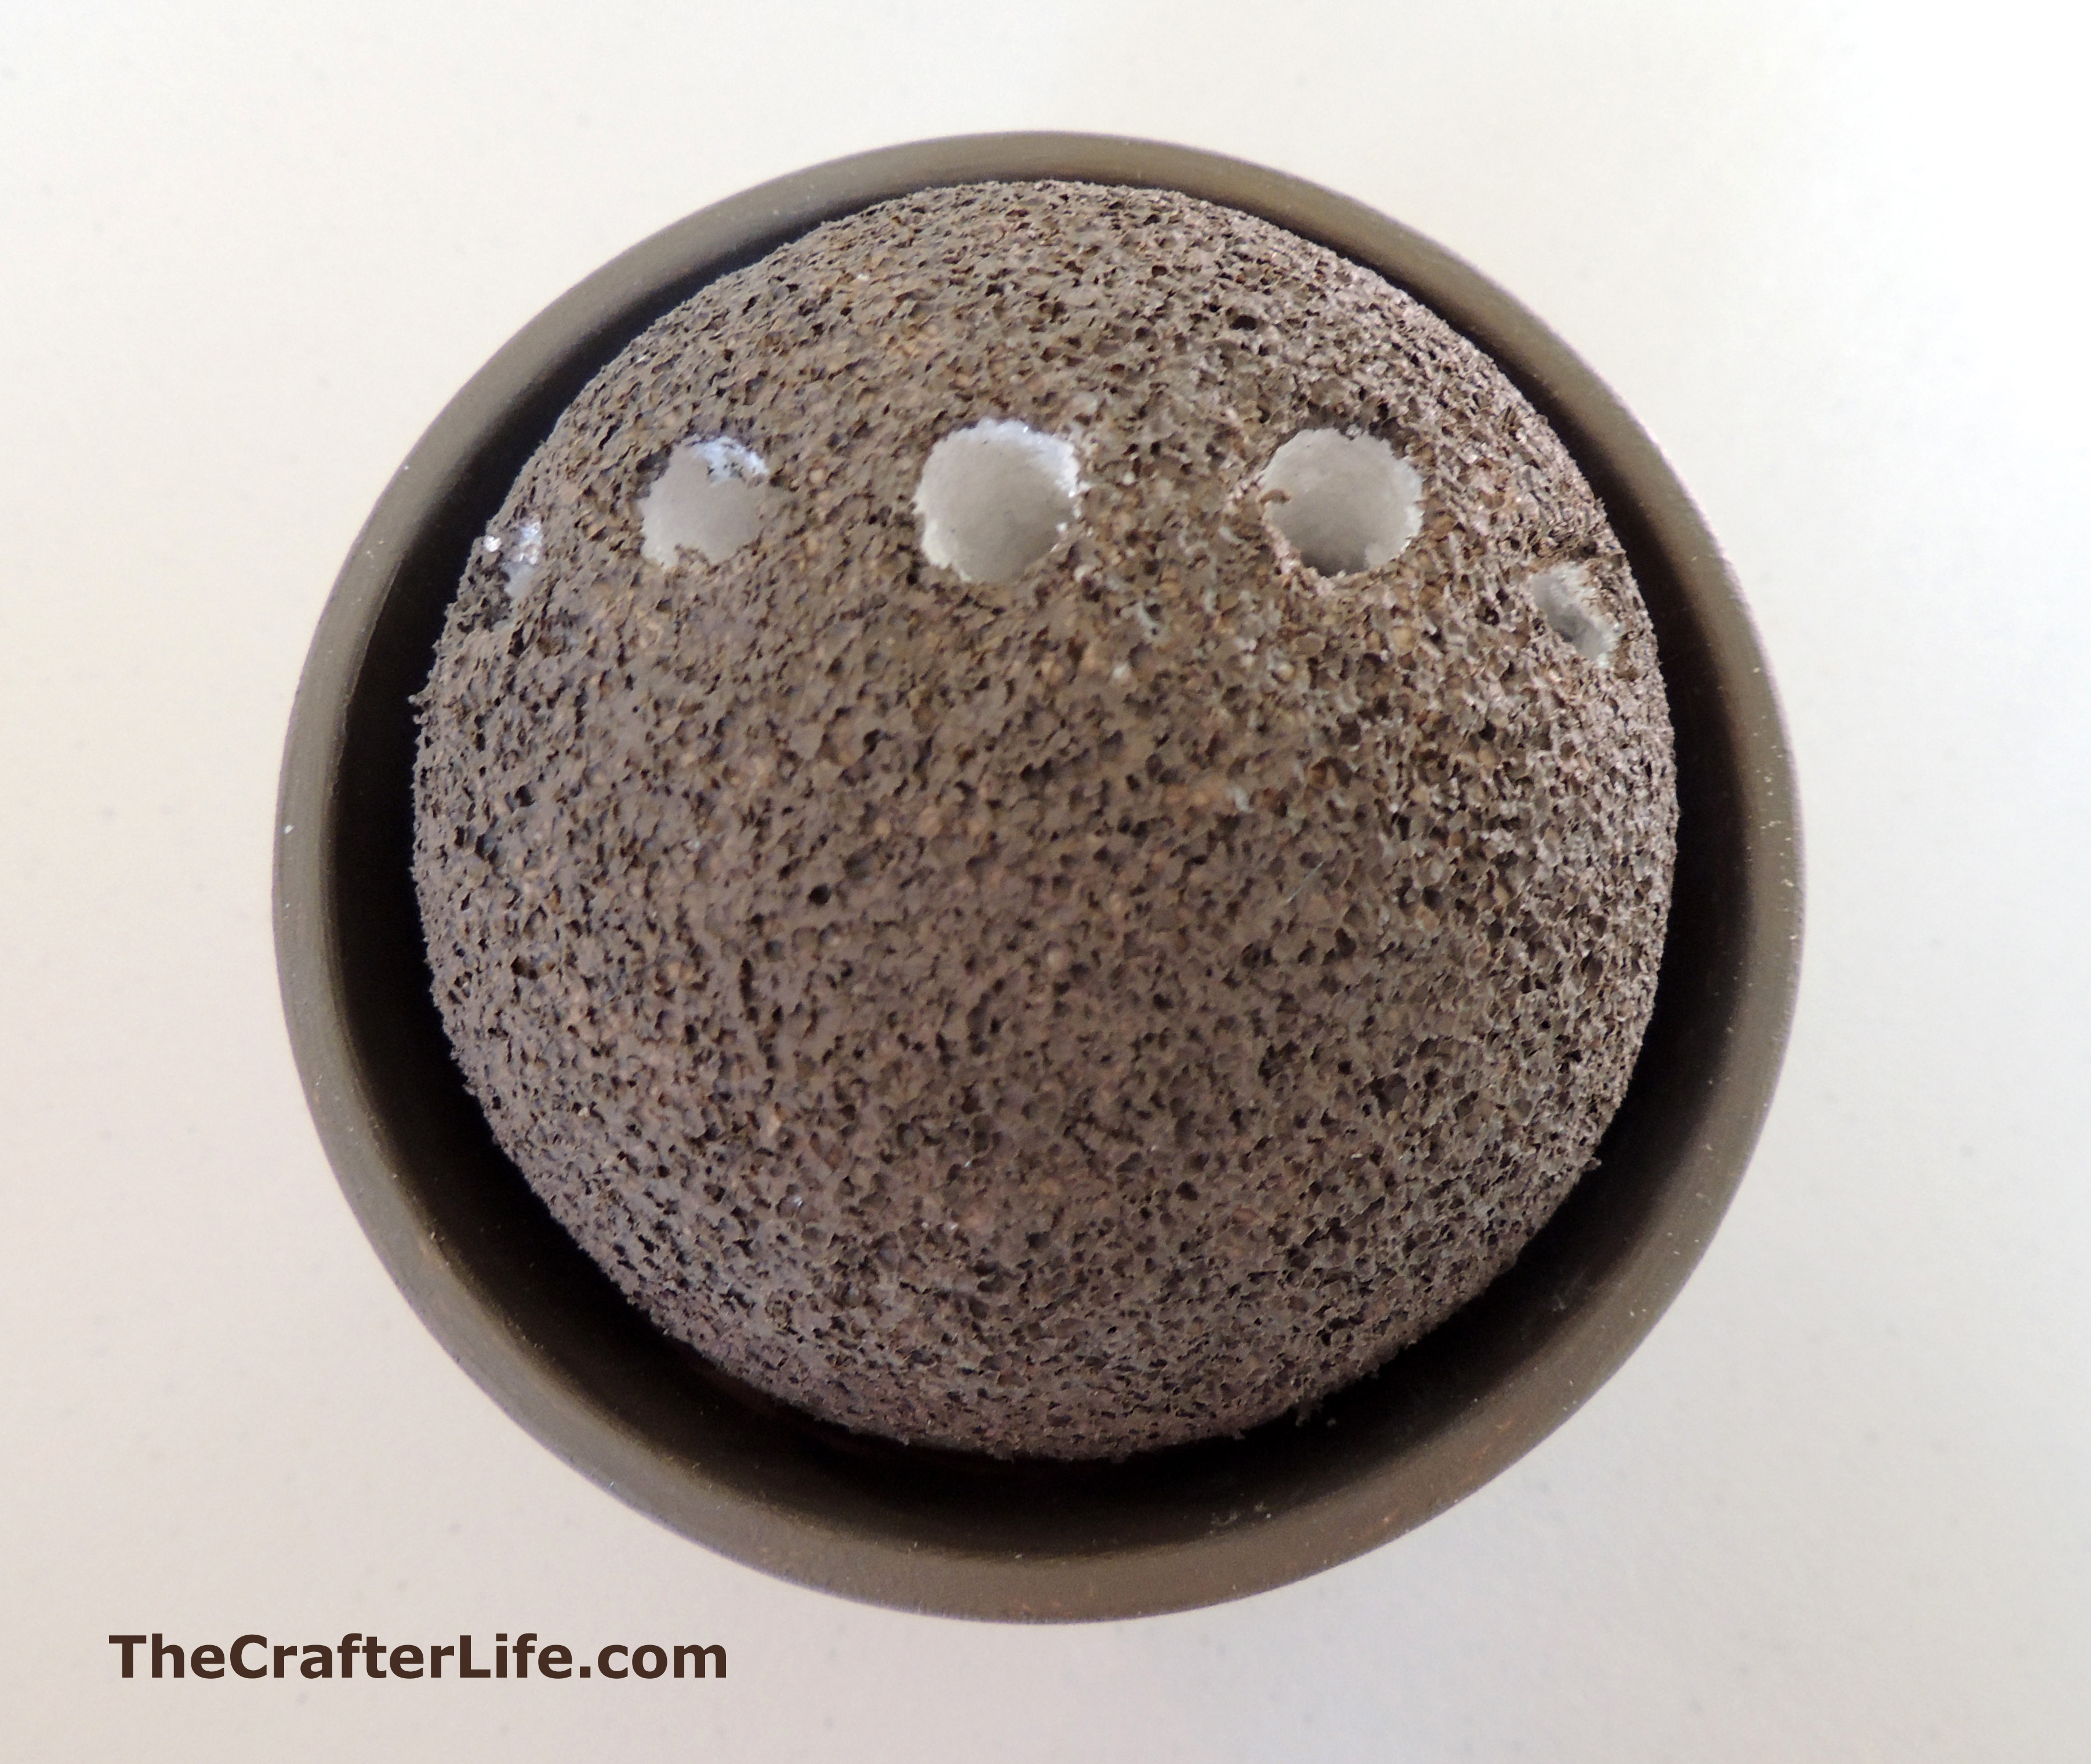
2. Place the Styrofoam ball in the clay pot and decide on the placement of the feather pens by using toothpicks as place markers. Then, for the trickiest part, use the handle of your paint sponge to hollow out the holes made by your toothpicks. You may also find that a large screwdriver, crochet hook, or other similar object works better to enlarge the holes so that the pens will fit through them. Try to make the holes go straight through the Styrofoam ball so that once the pens are inserted, they do not cross paths. The holes should go completely through the ball. If you find this is too tricky, or don’t want to risk messing up the Styrofoam ball, you could always just stick the pens in the back of the pot, behind the ball.

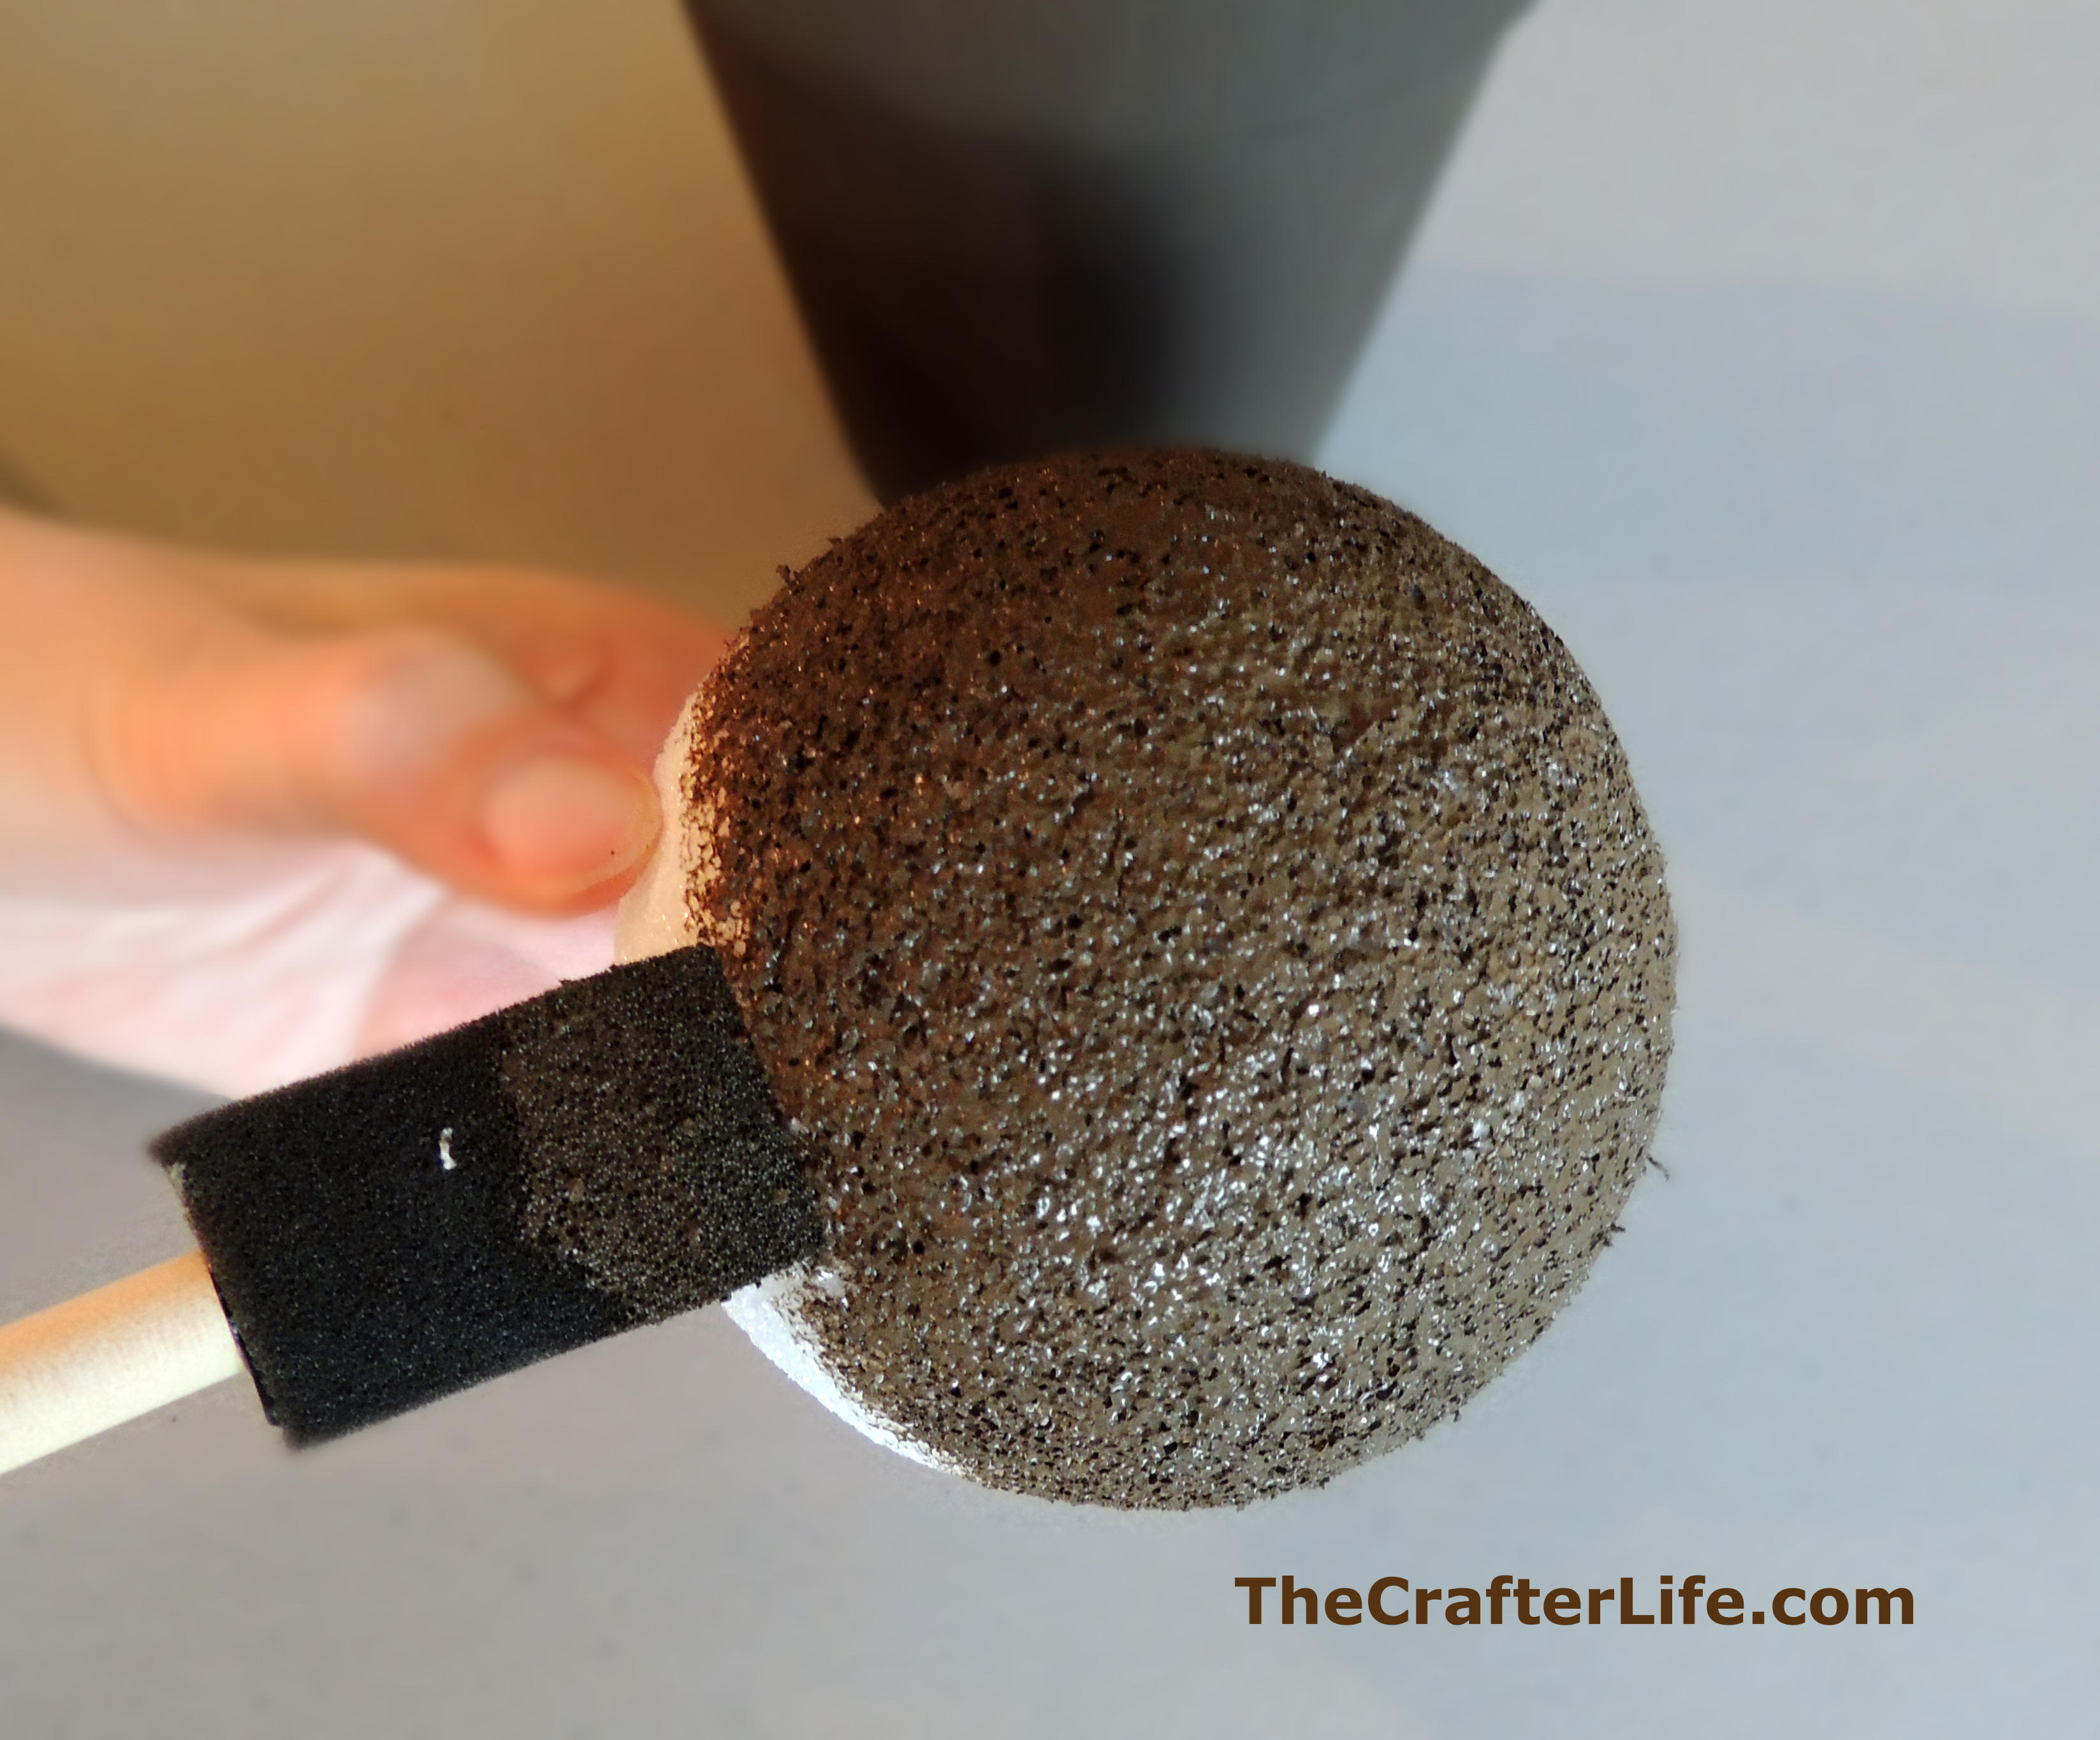
3. Paint the Styrofoam ball dark brown, making sure to paint around the holes you created for the pens. Allow it to dry. It helps to dab the paint on instead of brushing it on so it soaks into the Styrofoam better. In order to let it dry without rolling around, stick three toothpicks in the bottom so they form a tripod stand.
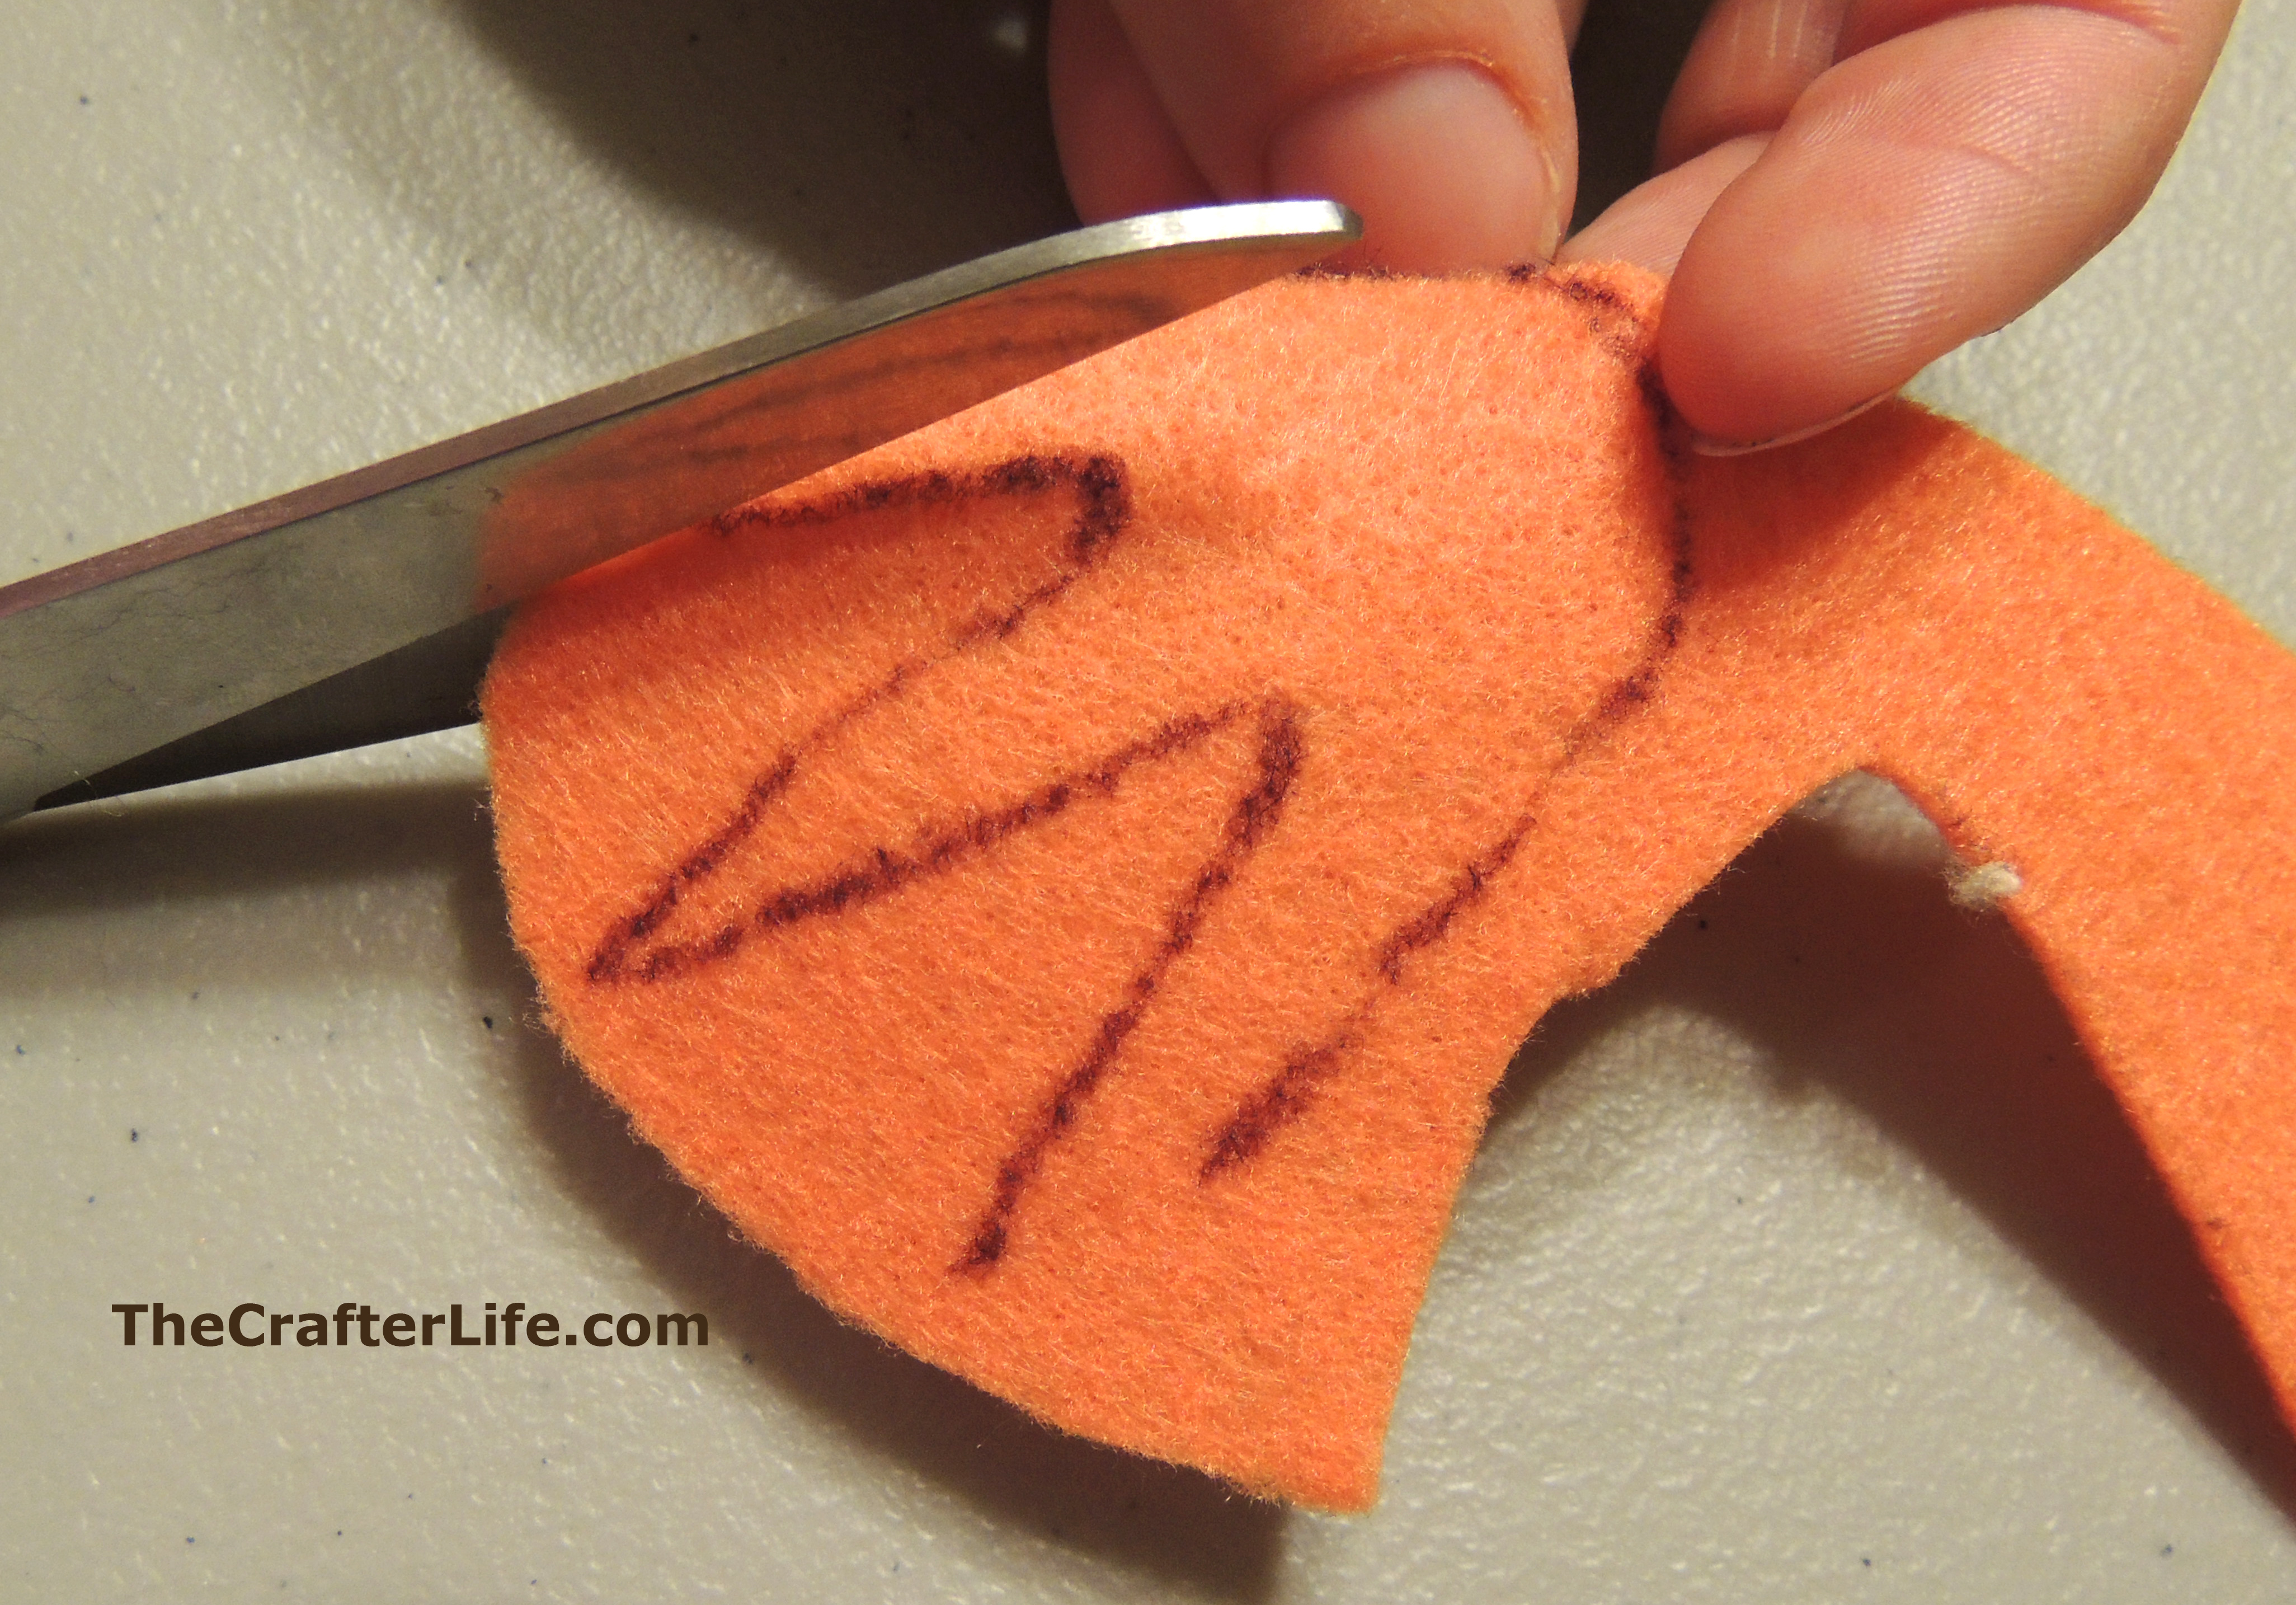
4. Cut the turkey shapes out of the felt. You will want to cut the turkey neck and head out of the light brown felt, the beak and feet from the orange felt, the snood (the red piece hanging from the beak – yes, I had to google search the name of it), and the eyes from the black felt.
5. Use your needle and brown yarn to stitch around the perimeter of the felt turkey neck and head.
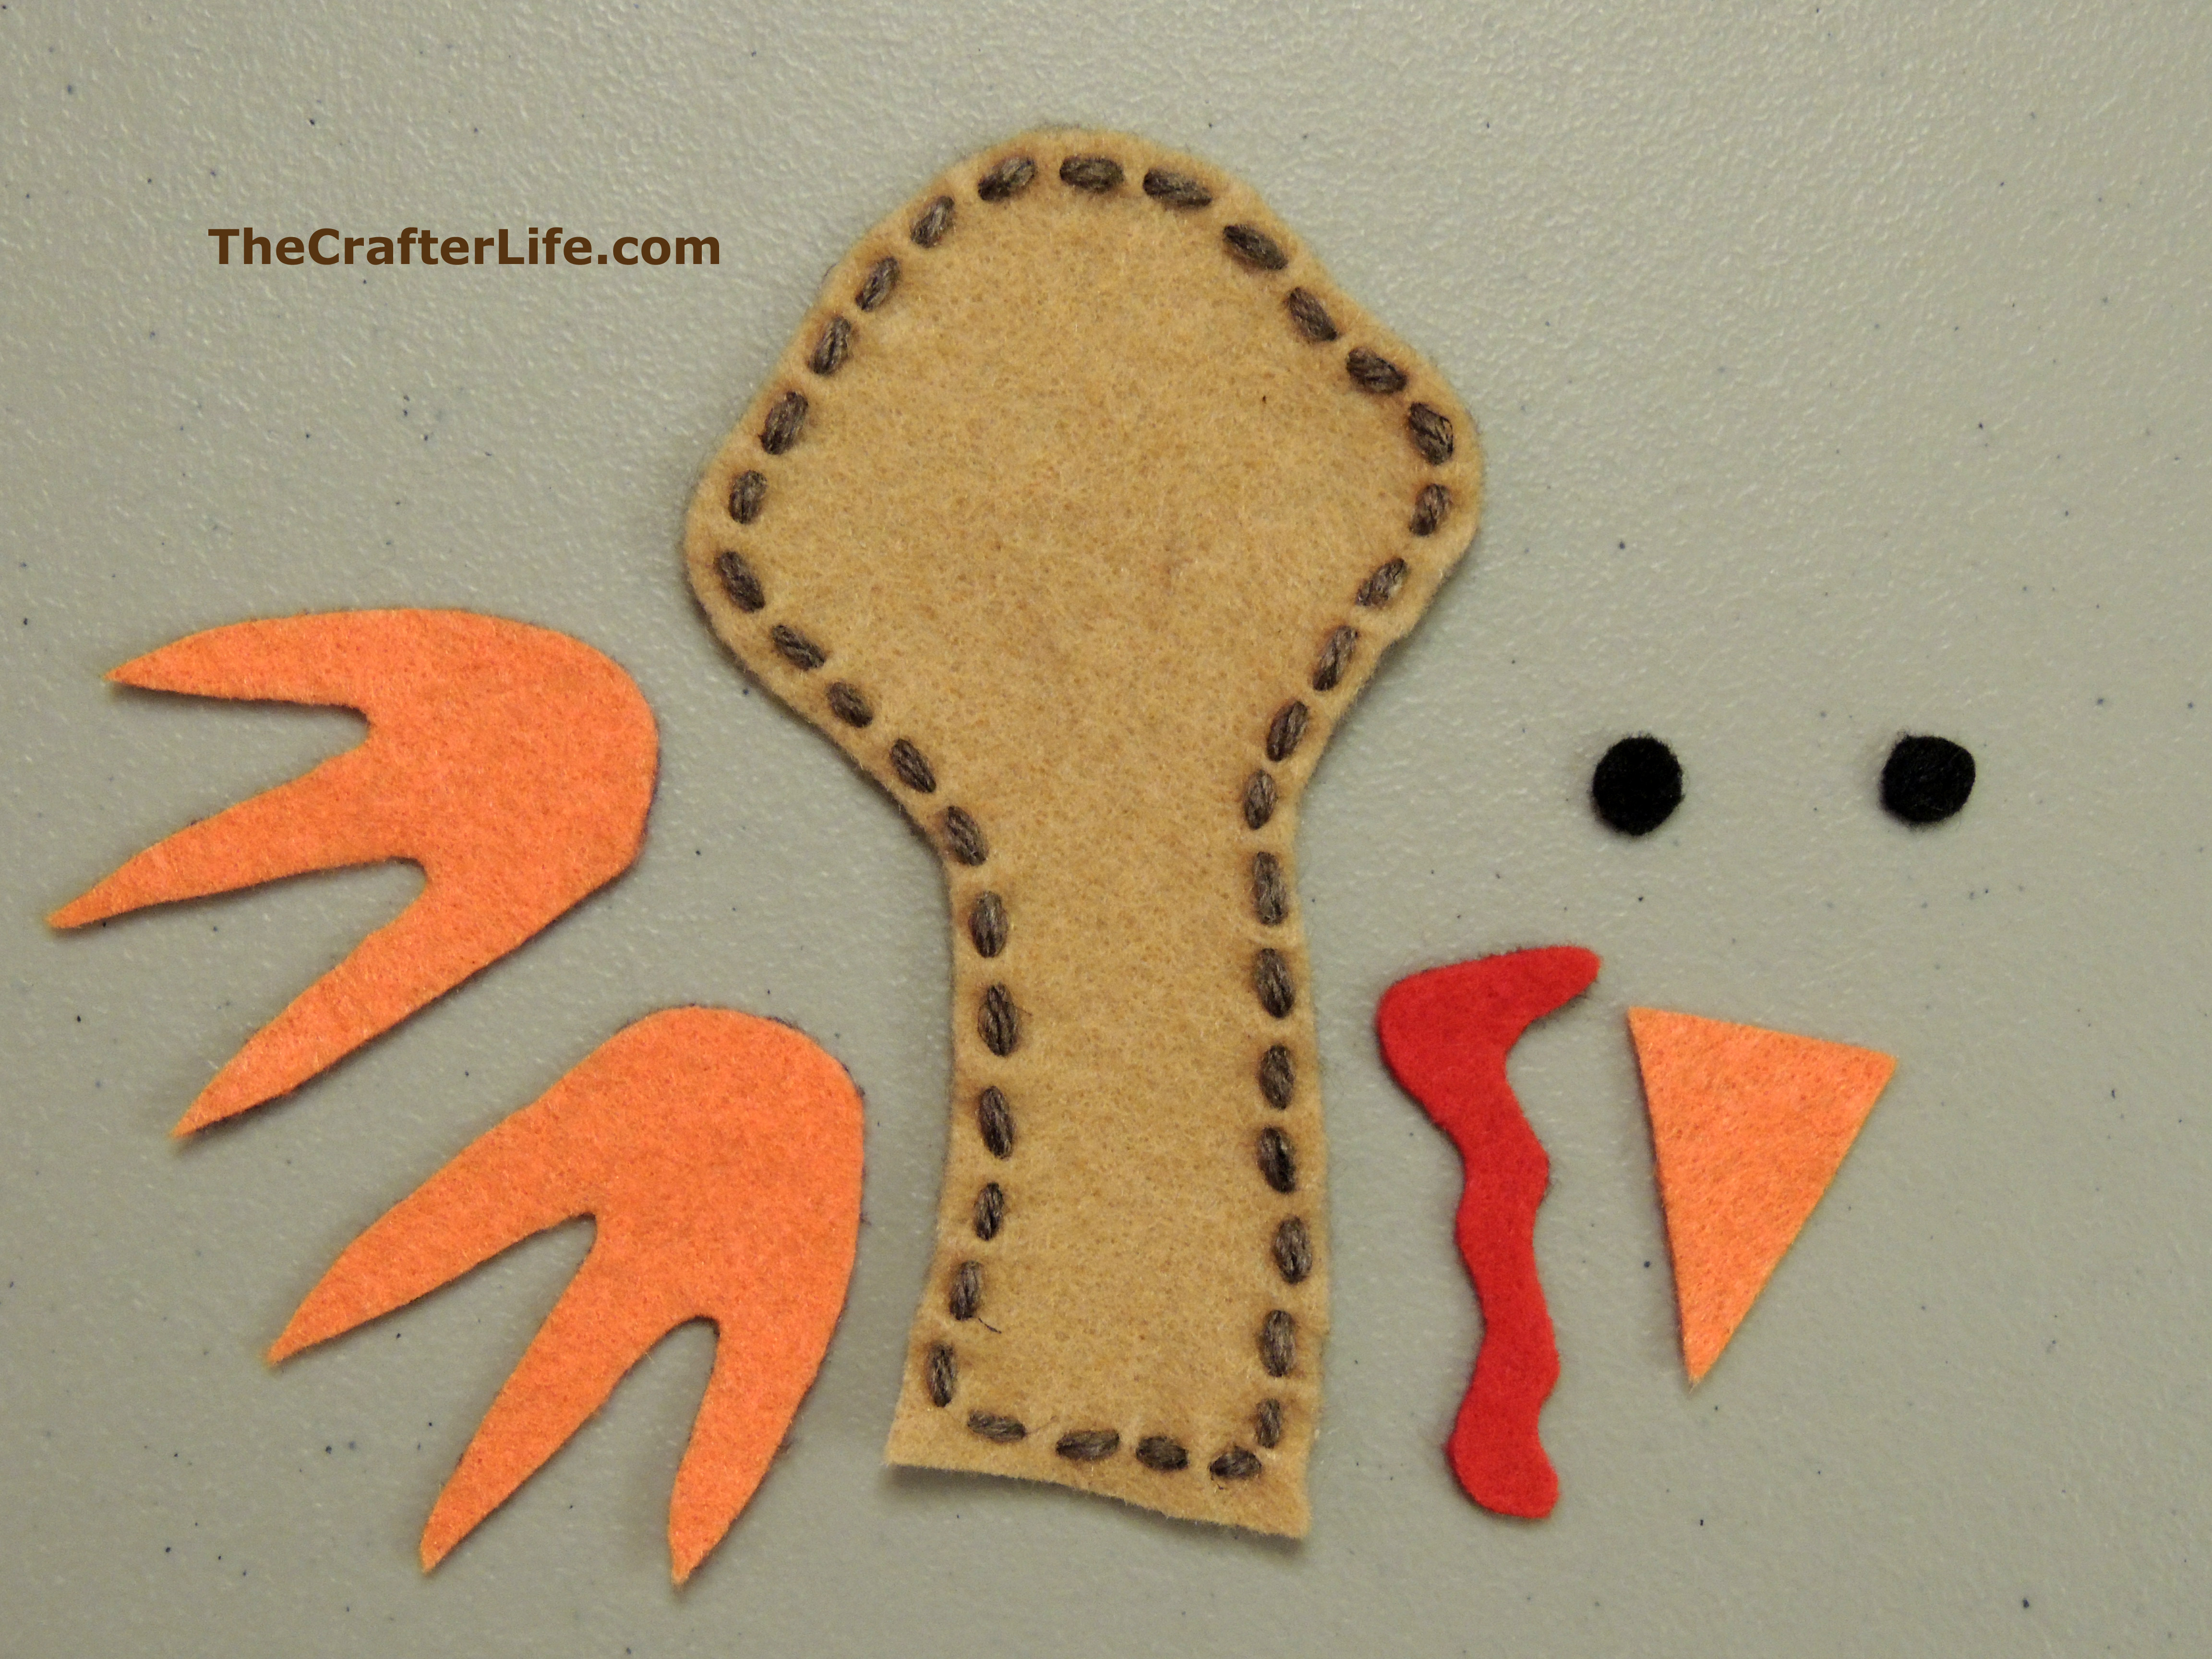
6. Hot glue the eyes, beak, and snood (such a funny word) in place on the turkey head.
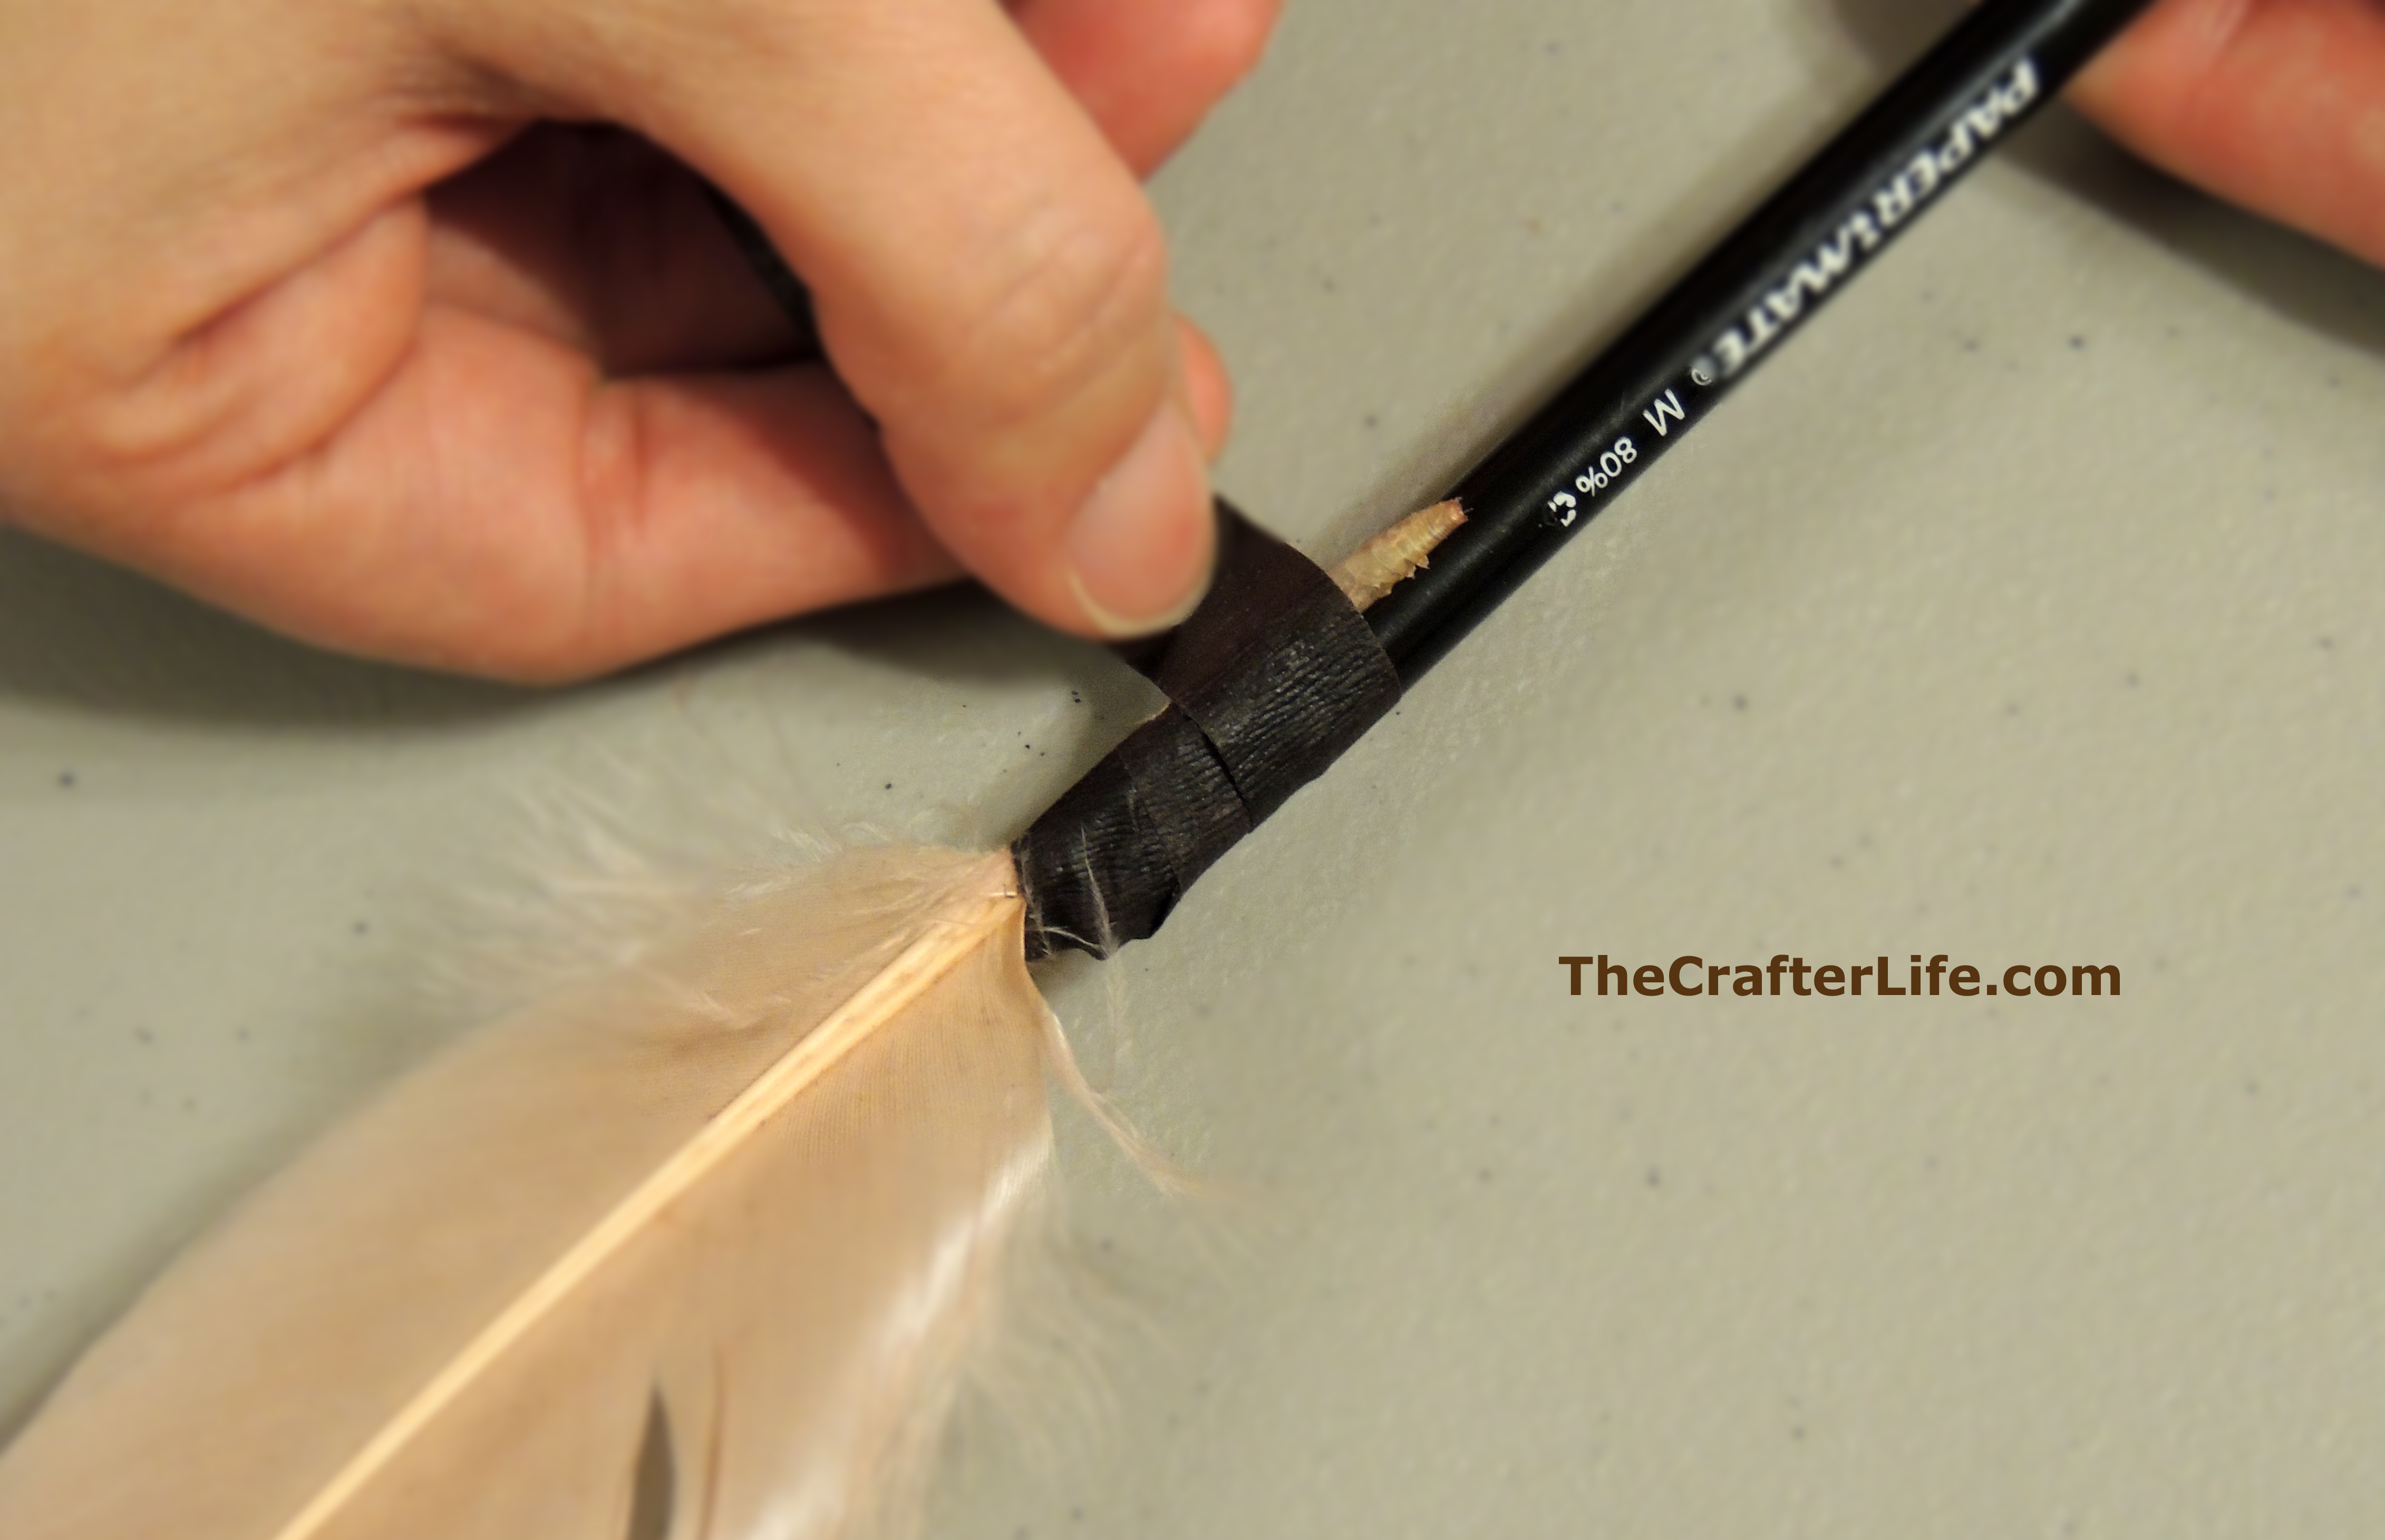
7. Attach the feathers to the pens by wrapping them with the brown floral tape. Place the bottom “stick” part of the feather so that it overlaps the top of the pen and then wrap the floral tape around it to keep it in place. Continue wrapping the rest of the pen with the floral tape down to the tip (make sure you take off the pen cap). Make 5 feather pens.

8. Pack some Spanish moss inside the bottom of the pot. Put enough moss in there to raise the Styrofoam ball out of the pot so that it creates the turkey’s body. You may also wish to place about three toothpicks in the bottom of the Styrofoam ball to hold the ball in place in the pot.
9. Hot glue the felt turkey head and felt feet onto the pot.
10. Now place the feather pens inside the holes of the Styrofoam ball. Most of my feathers curved, so I tried finding the straightest one to put in the middle spot. Before placing the pens in the ball, you may want to clean out the holes better to keep bits of Styrofoam from sticking to the pens. If pieces do stick, you should be able to wipe them off easily.
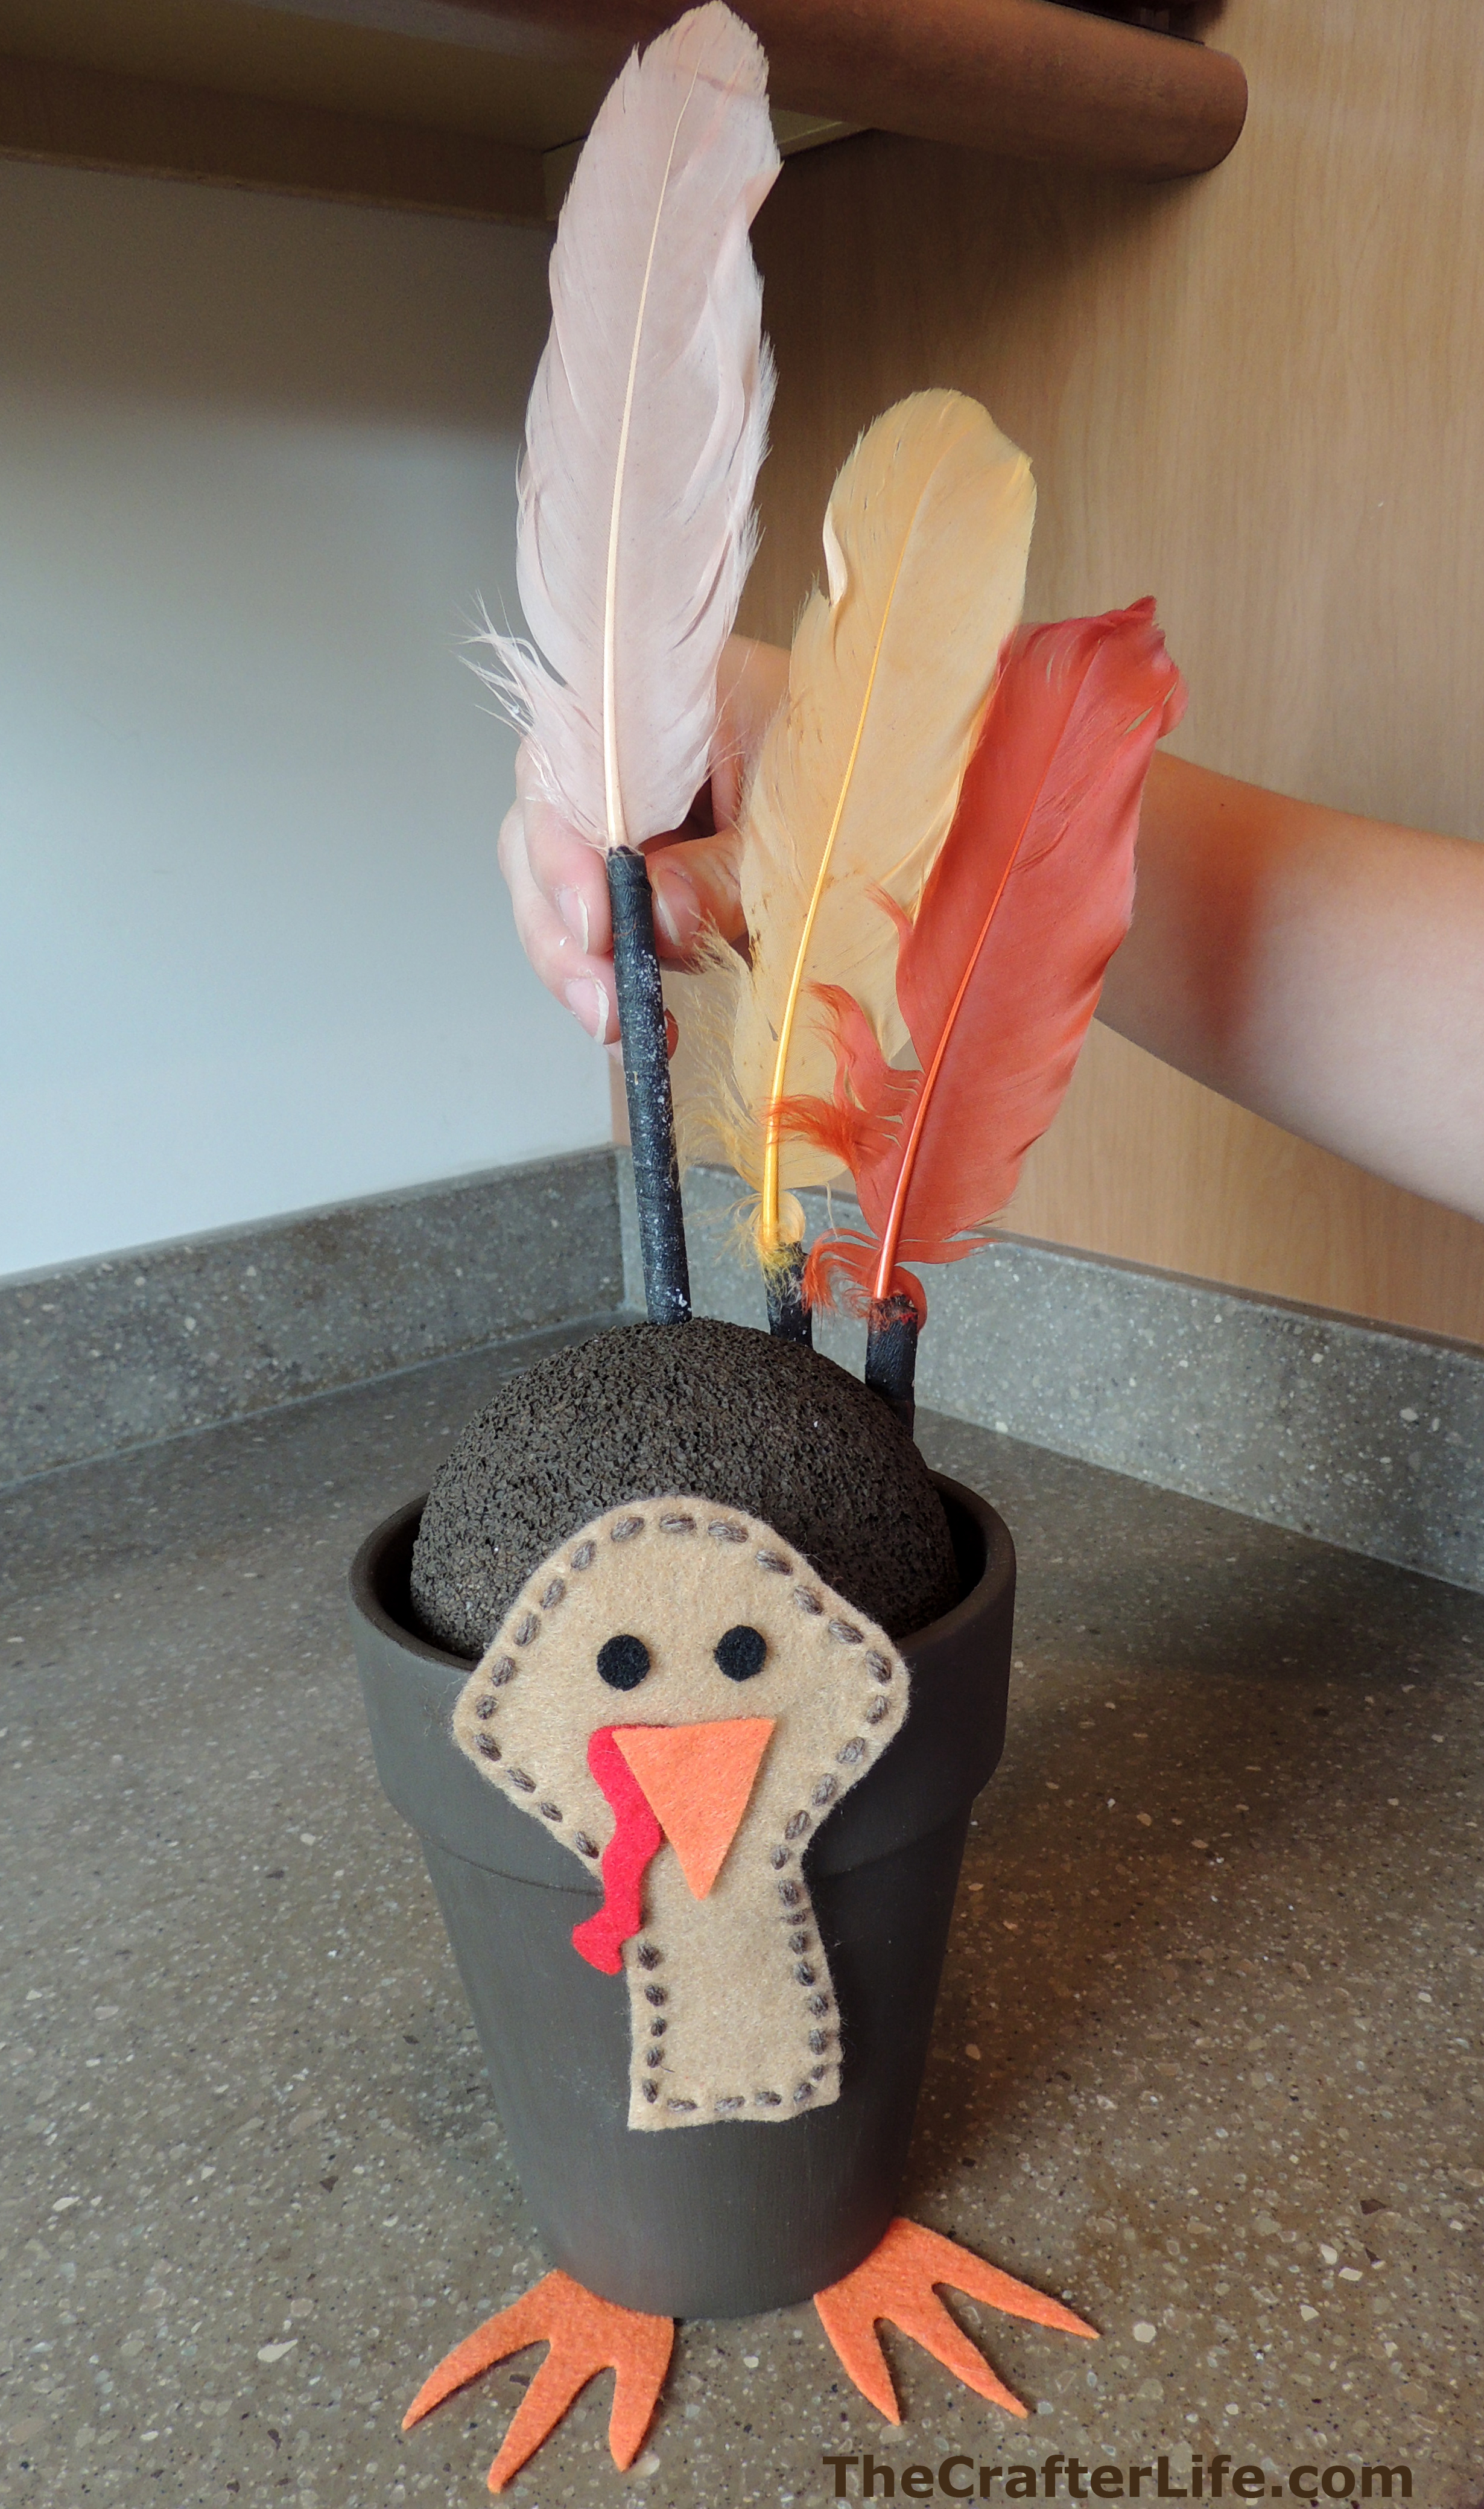
11. Use your pot as a decoration or give to someone as a gift!
Share your Turkey Pen Pail here or on my Facebook page!
**If you like what you see, feel free to pin, share, and link back to my site. Thank you for visiting!