Spring Into Summer Waterfall Cardigan
Hi, Everyone! I hope you all are having a wonderful spring! We are heading toward summer, so now is the perfect time to share this amazing Spring into Summer cardigan pattern with you. This crochet pattern is brought to you by the talented RaeLynn Endicott of Itchin’ for some Stitchin’, where she shares her fabulous crochet designs and techniques along with sewing and knitting tutorials and tips. Read RaeLynn’s full bio to hear more about her and what Itchin’ for some Stitchin’ is all about.
Here is RaeLynn to present her pattern!
Hi I’m RaeLynn Endicott from Itchin’ for some Stitchin’ where I share my passion for crochet, sewing, and knitting.
I am so happy to be sharing my latest crochet creation with you today on The Crafter Life.
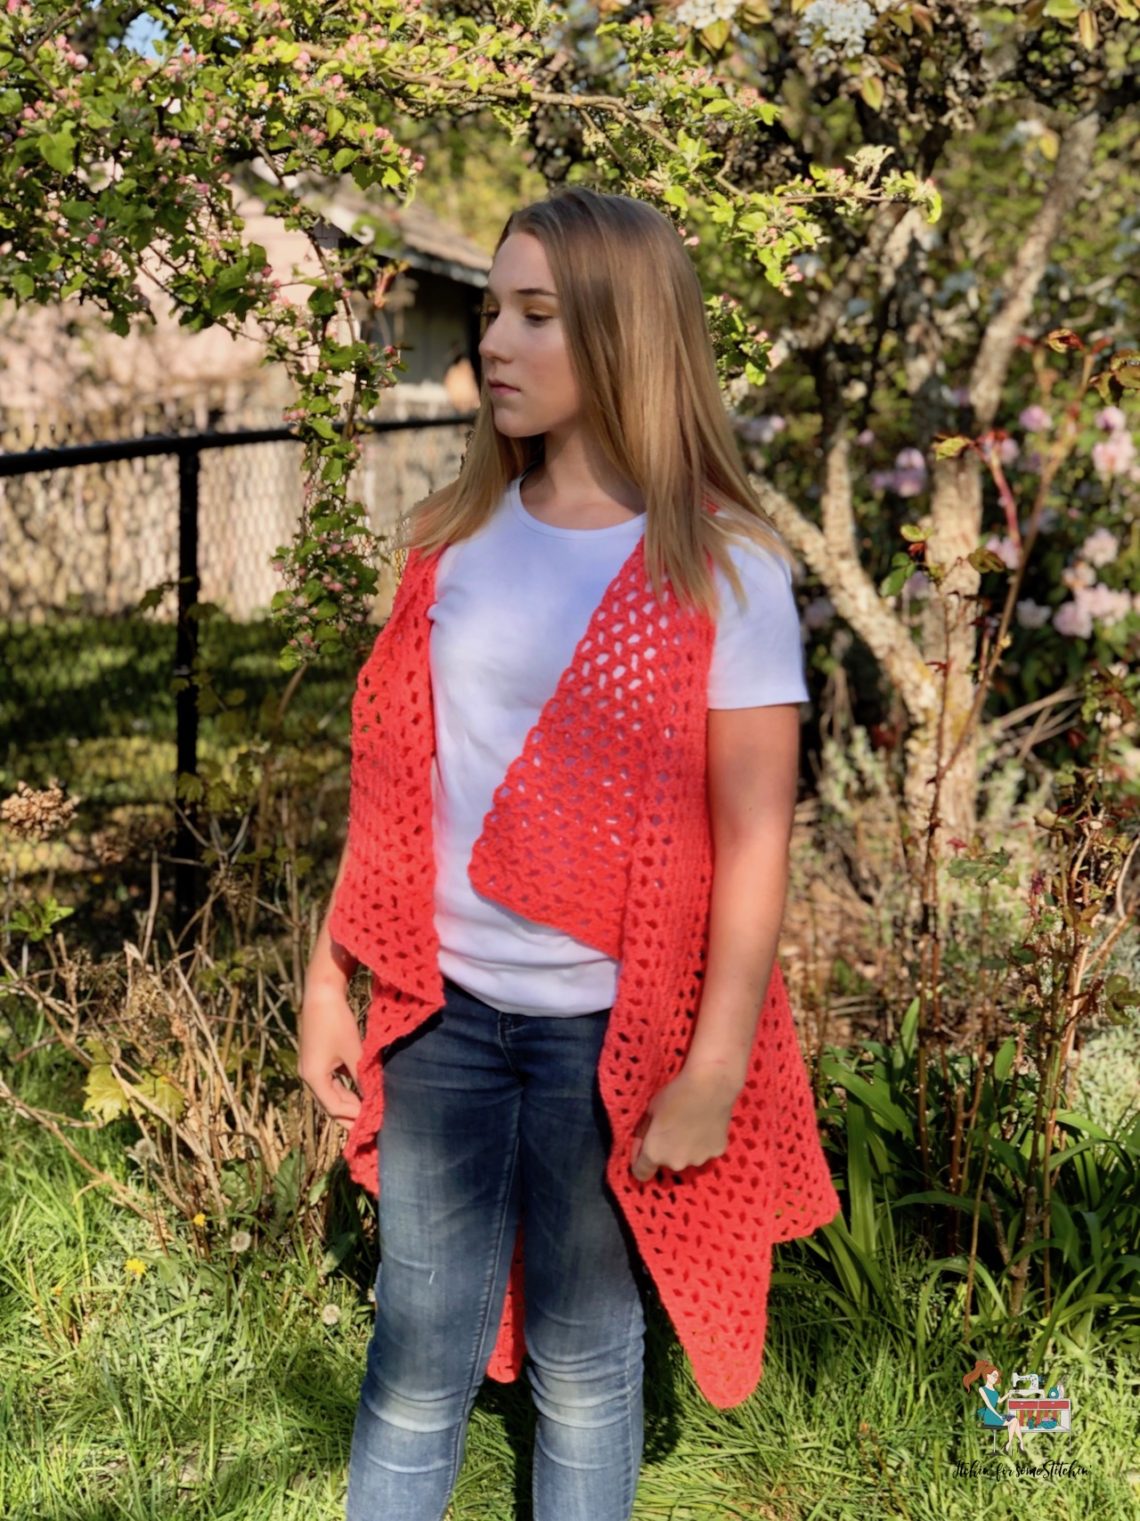
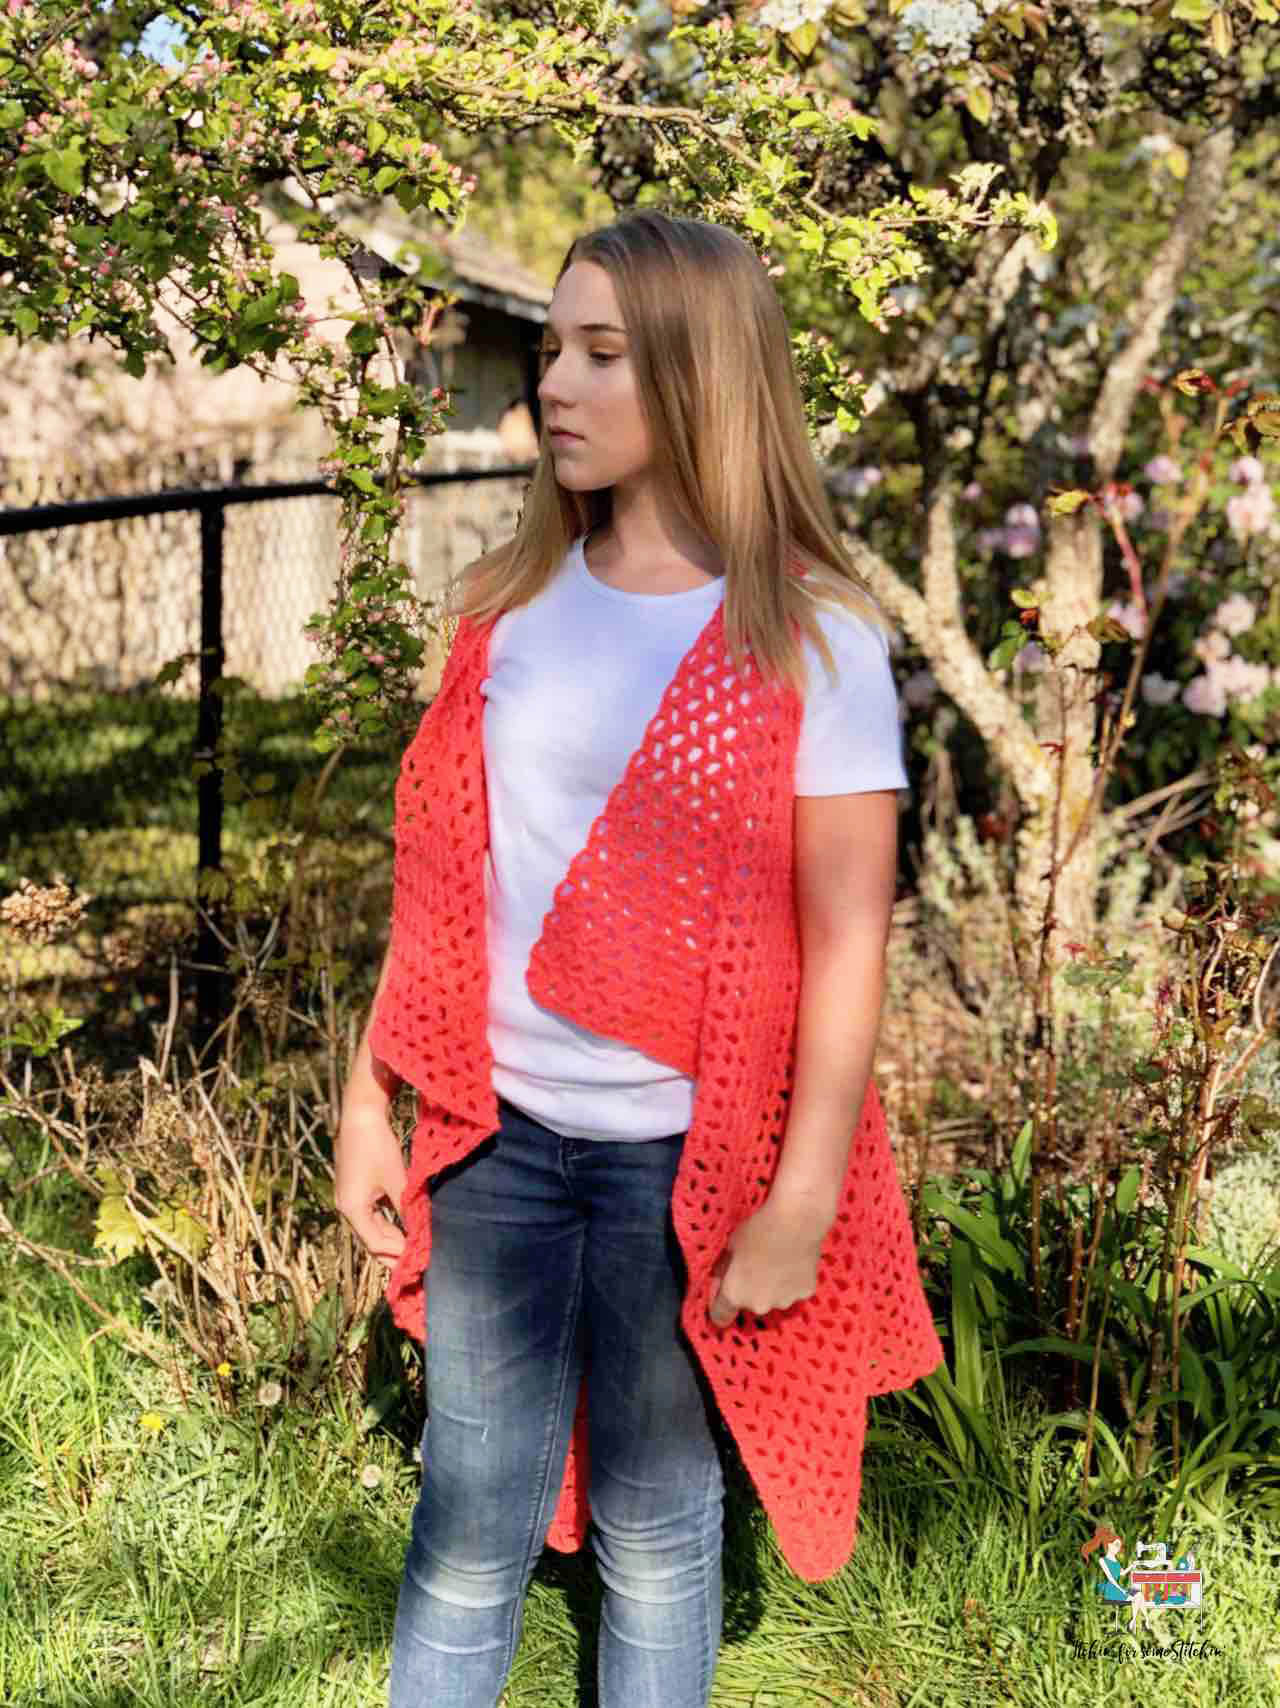
It’s a super easy waterfall cardigan that’s perfect for both Spring and Summer!
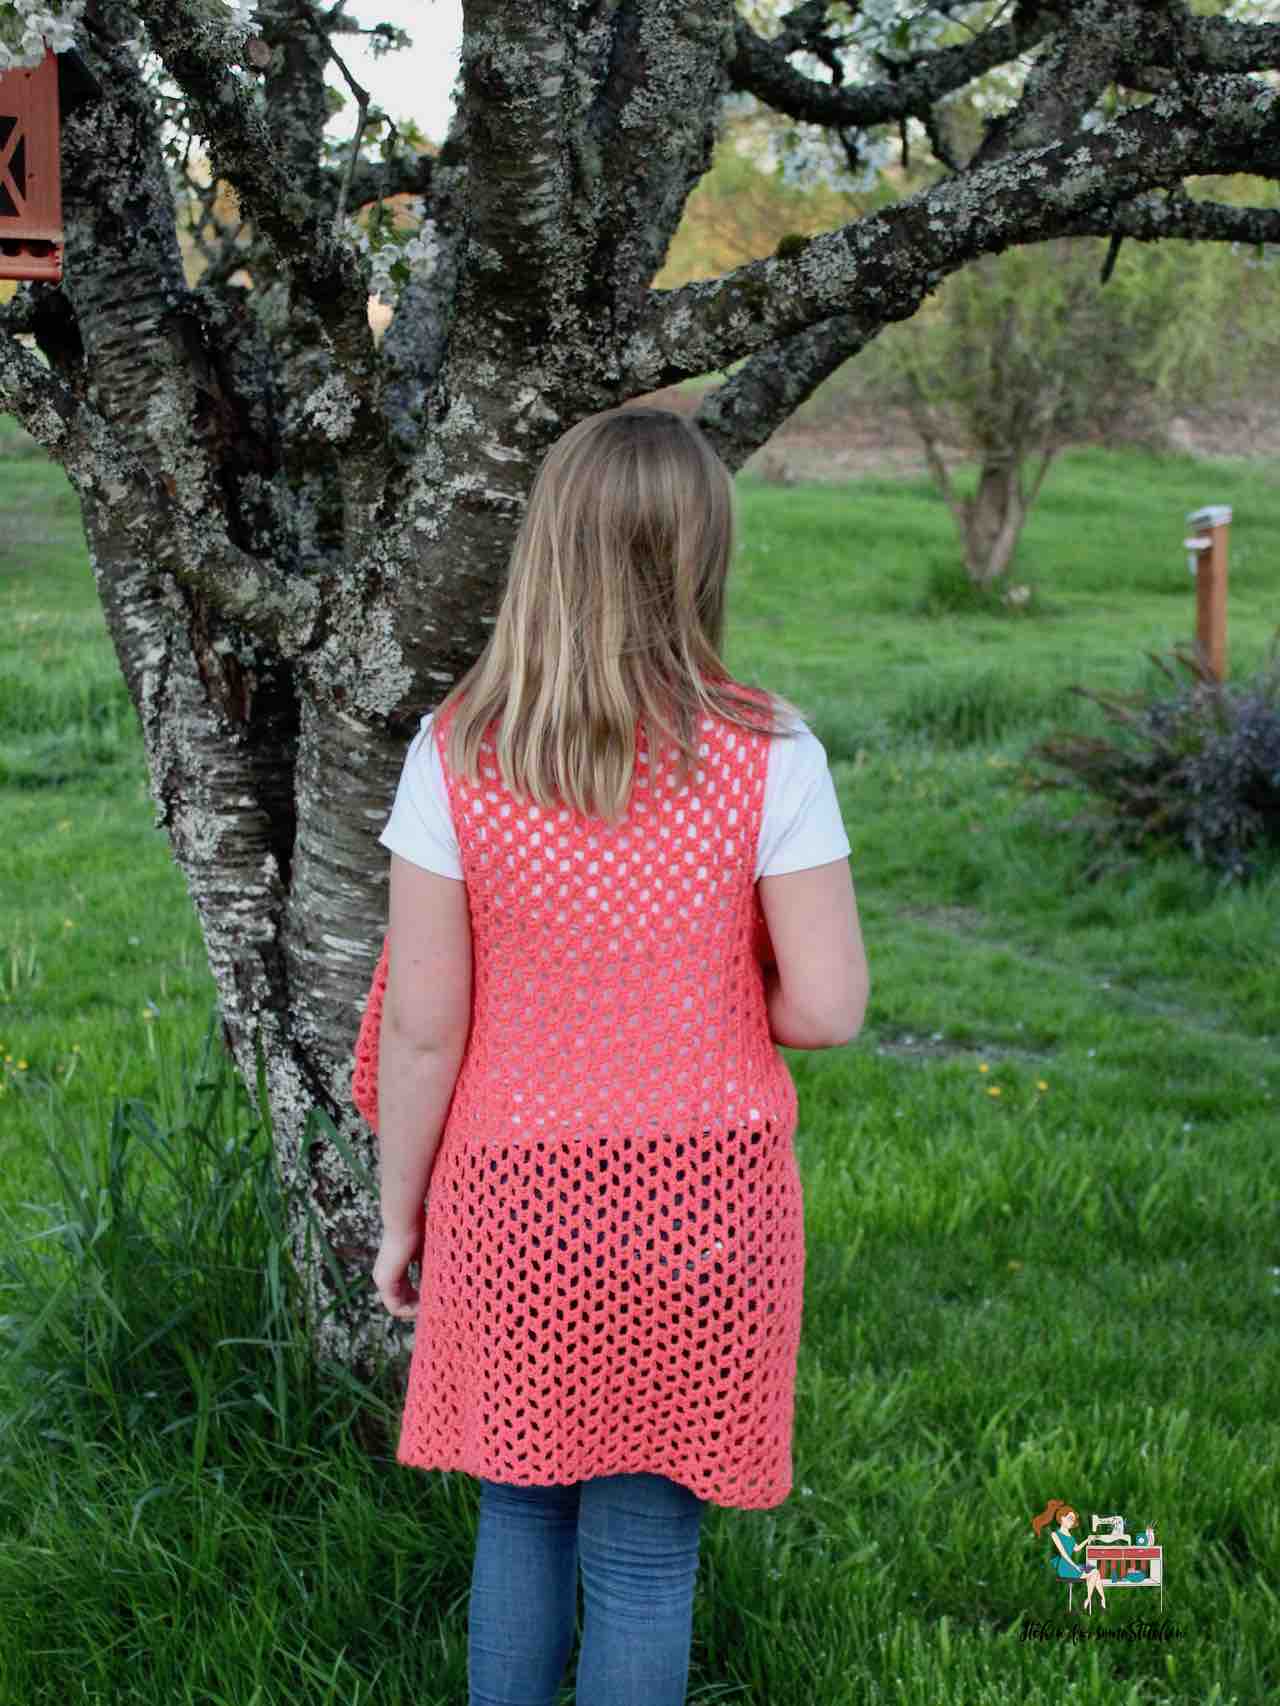
It’s light-weight, easy to put together and beginner-friendly. It’s worked flat from side to side as one seamless piece. Plus, you only need to know a few basic crochet stitches to make a lacy cardigan you’ll absolutely love!
If you can double crochet then you can do this pattern. I promise. 🙂
It really is that easy!
I created the pattern in multiple sizes so that nearly everyone can enjoy this fun and fashionable cardigan. Work it up in your favorite colors and you’ll have a great spring-summer jacket that’s as unique as you!
Spring Into Summer Waterfall Cardigan
Pattern by RaeLynn from ItchinForSomeStitchin.com
This pattern and photos of this item are property of ItchinForSomeStitchin. This pattern and design are subject to copyright, and are for personal, non-commercial use only. You may not distribute, sell this pattern, or claim it as your own under any circumstance.
Links:
This pattern is also available on Ravelry: Get it HERE
Prefer a PDF? This pattern is also available for purchase on Etsy. Get it HERE
Pattern:
It’s time to Spring into Summer with this lovely transitional cardigan that’s great for both seasons! Beginner-friendly and easy to work up, this waterfall cardigan is a must-have accessory for those cool spring mornings and warm summer days.
Difficulty level: Level 1 – Beginner
Finished Dimensions: 29-inches long and 43-inches wide.
Gauge: 9 rows and 14 stitches = 4-inches in double crochet
Materials:
Lightweight #3 weight 100% acrylic yarn
In this pattern I used Bernat Baby Sport, colorway: Coral Crocus
Total yardage: 1000-1200 yards
- Crochet Hook size G-4.25mm
- Scissors
- Tapestry needle
Abbreviations: Pattern is written in US terms.
- Chain stitch (ch/chs)
- Single crochet (sc)
- Double crochet (dc)
- Slip-stitch (slp-st)
- Stitch/es (st/sts)
- Back post only (bpo)
Additional Notes:
2 dc stitches = 1 dc cluster
Blocking the finished product is recommended, but not necessary. Use your method of choice.
Instructions: Ch 100.
NOTE: If you prefer your cardigan longer you can simply chain more at this point. Make sure that you chain in multiples of 3 plus 1 extra chain at the end. This is to ensure that your number of stitches after row 1 is divisible by 3. For instance, chaining 170 will give you 169 stitches after row 1. Then 169 divided by 3 will give you 56 clusters and should extend to or near the ankles on a person who is roughly around 5-foot.
Row 1: Turn work, sc in 2nd ch from hook in the bpo and in each ch across. (99 sts)
Row 2: Ch 5 (counts as a ch 3 turning chain & a ch 2 that will become a ch2-space), turn work, skip 2 sts, 2 dc in the next st,*ch 2, skip 2 sts, 2 dc in the next st*. Repeat from * to * across. (33 clusters)
NOTE: Your cluster count will be based on the number of chains in your foundation chain. If you chained more or less than the 100 chains instructed in the pattern you will need to keep track of your cluster count.
Row 3: Ch 5 (counts as a ch 3 turning chain & a ch 2 that will become a ch2-space), turn work, 2 dc in the 1st ch2-space, skip the 1st dc cluster, *ch 2, 2 dc in the next ch-2 space, skip the next dc cluster*. (33 clusters)
Repeat from * to * across.
Rows 4-26: Repeat row 3.
Row 27: Ch 5 (counts as a ch 3 turning chain & a ch 2 that will become a ch2-space), turn work, 2 dc in the 1st ch2-space, skip the 1st dc cluster, *ch 2, 2 dc in the next ch-2 space, skip the next dc cluster*. Repeat from * to *one more time.
NOTE: You should have a total of 3 dc clusters at this point.
At the end of your third dc cluster ch 34, skip 8 dc clusters (a total of 30 sts), 2 dc in the ch2-space following the 8th skipped dc cluster, skip the next dc cluster, *ch 2, 2 dc in the next ch-2 space, skip the next dc cluster*.
Repeat from * to * across. (26 clusters)
NOTE: If you chained more or less than 100 chains for your foundation chain your cluster count will be the number of clusters you had from row 2 minus the 8 clusters you skipped in row 27.

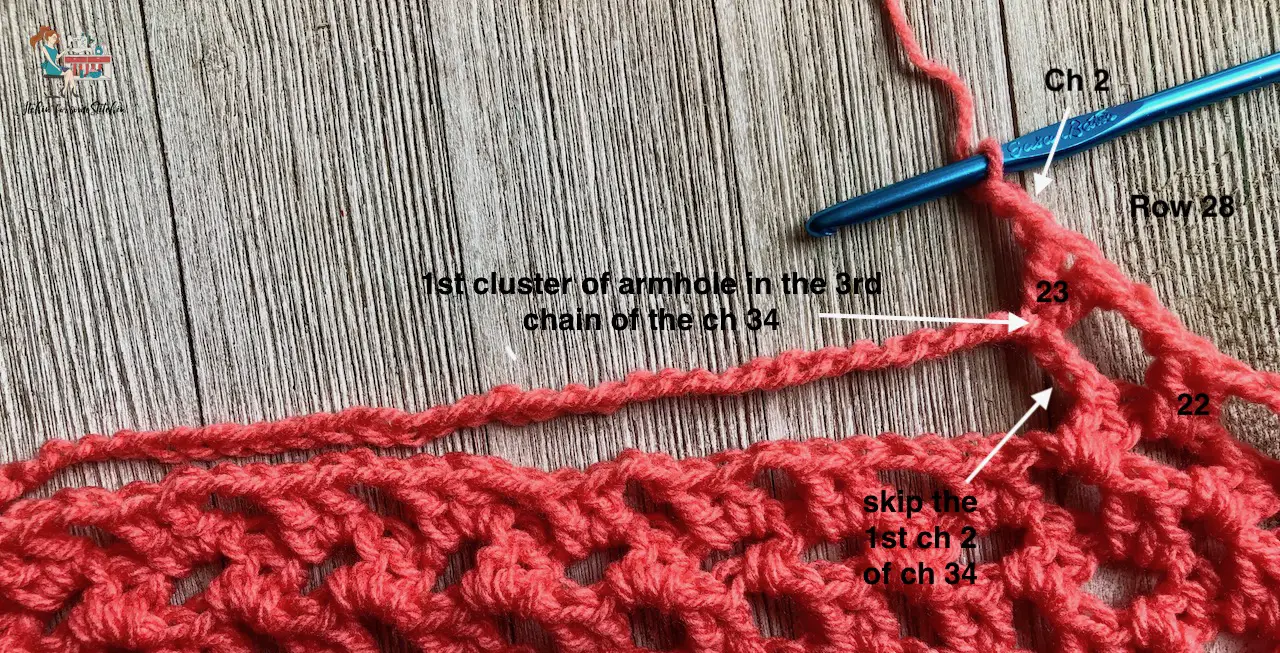
Row 28: Ch 5 (counts as a ch 3 turning chain & a ch 2 that will become a ch2-space), turn work, 2 dc in the 1st ch2-space, skip the next dc cluster, *ch 2, 2 dc in the next ch-2 space, skip the next dc cluster*. Repeat from * to * 20 more times.
NOTE: Should have a total of 22 dc clusters and be right before the dc cluster that is attached to the ch 34 from the previous row.

Skip the dc cluster that is attached to the ch 34 from the previous row (denoted as #23 on row 27 in the photo above), skip the first 2 chains of the ch 34, 2 dc in the bpo of the next chain, skip 2 chains, 2 dc in the bpo of the next chain – this makes your first cluster in the 3rd chain of the ch 34.
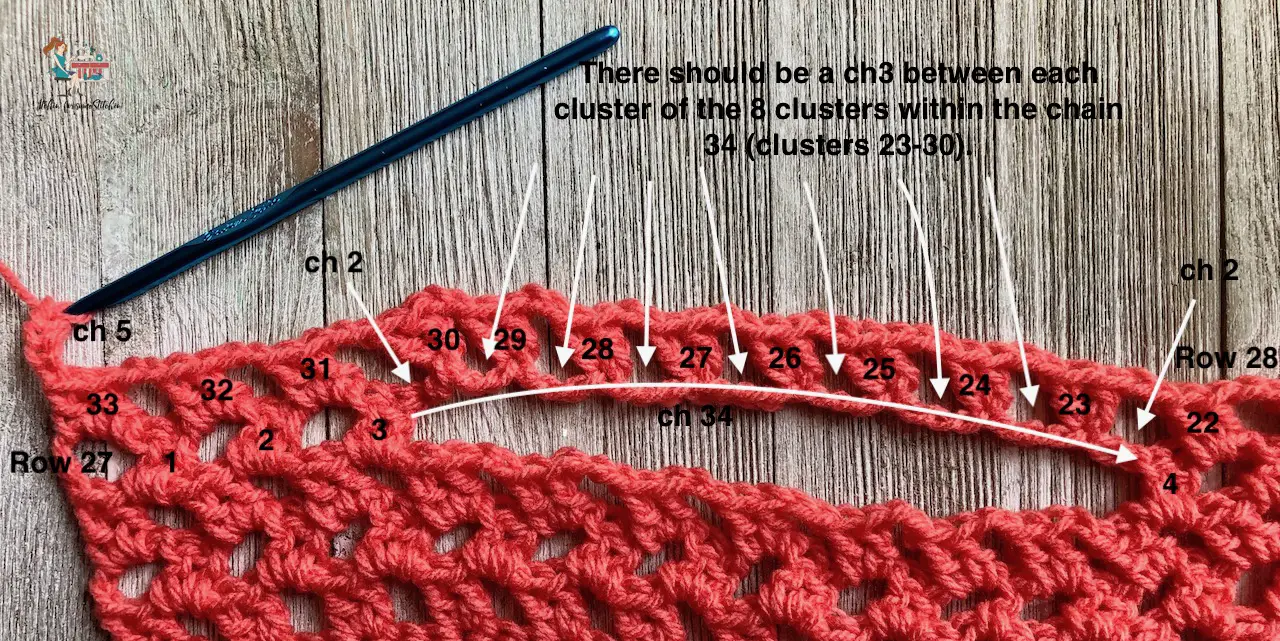
Then *ch2, skip 3 chains, 2 dc in the next (4th)*.
Repeat from * to * to the end of th ch 34.
NOTE: You should have made 8 dc clusters within the ch 34 and each dc cluster should be directly across from a dc cluster in row 26. You also should have ended with 2 chains of the ch 34 remaining after you made the 8th dc cluster.
Skip the last 2 chains of the ch 34, skip the first dc cluster attached to the ch 34, *ch 2, 2 dc in the next ch2-space, skip the next dc cluster*. Repeat from * to * across. (33 clusters)
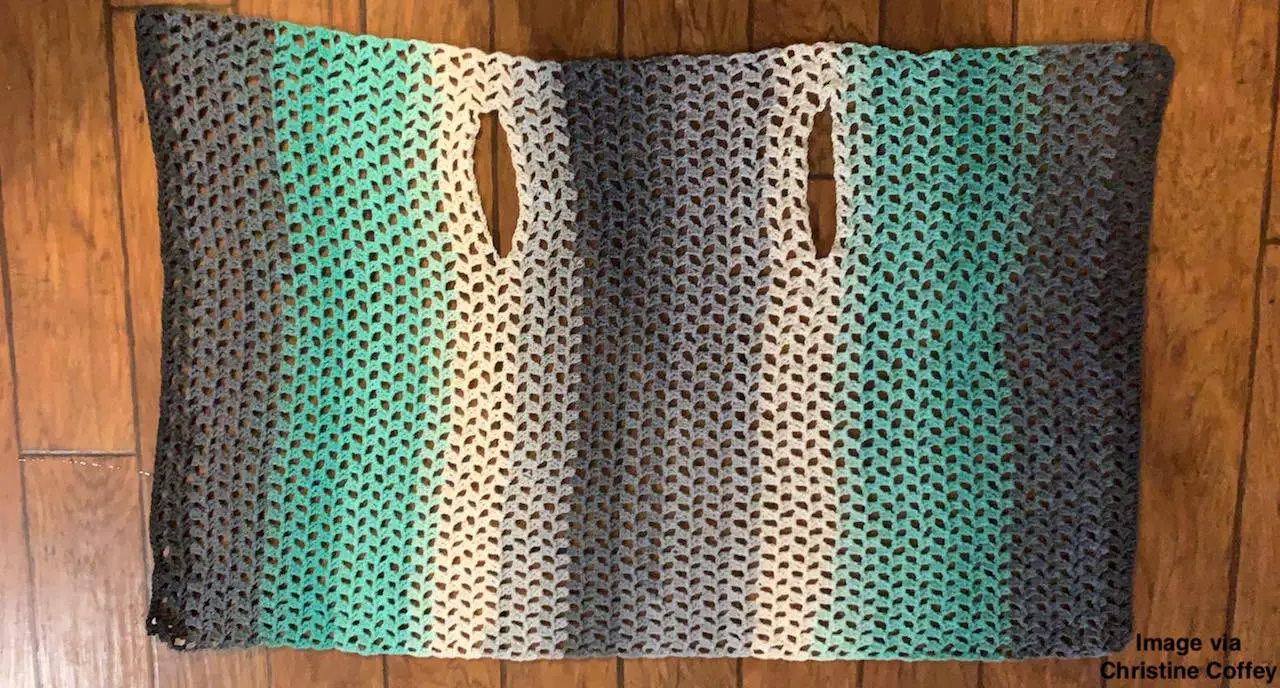
You have just completed your first armhole. It should be 7-inches across (horizontally). Vertically it will stretch over your arm.
Tips for adjusting the armholes
- The armholes should stretch once the cardigan is complete. Keep this in mind when making adjustments.
- If you prefer a larger armhole, then skip more than 8 clusters and add 4 chains for every additional cluster you skip to the chain 34.
- EXAMPLE: If you skip 9 clusters, add 4 chains to 34 = 38 chains.
- If you prefer a smaller armhole, then skip less than 8 clusters and subtract 4 chains for every subtracted cluster from the chain 34.
- EXAMPLE: If you skip 7 clusters, subtract 4 chains from 34 = chain 30.
At this point, you will be creating the section of the cardigan that will go across the back. The number of rows you need will depend on the size of of the cardigan you are making and is subject to your personal preference/body type.
You can certainly increase the number of rows to create more width or decrease the number of rows to create less width per your personal needs/desire.
Extra-Small to Medium (XS-M) Rows 29-50: Repeat row 3. –Approximately 12.5-inches in length.
Large to Extra-Large (L -XL) Rows 29-54: Repeat row 3. –Approximately 14.5-inches in length.
Row 51 (Xs-M) and Row 55 (L-XL): Repeat row 27.
Row 52 (Xs-M) and Row 56 (L-XL): Repeat row 28.
Rows 53-77 (Xs-M) and Row 57-79 (L-XL): Repeat row 3.
Row 78 (Xs-M) and Row 80 (L-XL): Ch 1, turn work, sc in the first st and in each st across. (99 sts)
I love how versatile this cardigan is for spring and summer! I can picture/envision it in so many beautiful colors. All of RaeLynn’s patterns are so fashionable and fun!
Be sure to check out RaeLynn’s other amazing creations over at Itchin’ for some Stichin’ like the Simple Spring Modern Granny Scarf !
If you enjoyed the Spring into Summer cardigan pattern, you will love this one too! Such a sweet scarf to make for spring!

Simple Spring Modern Granny Scarf