Crayon Melt Tic-Tac-Toe
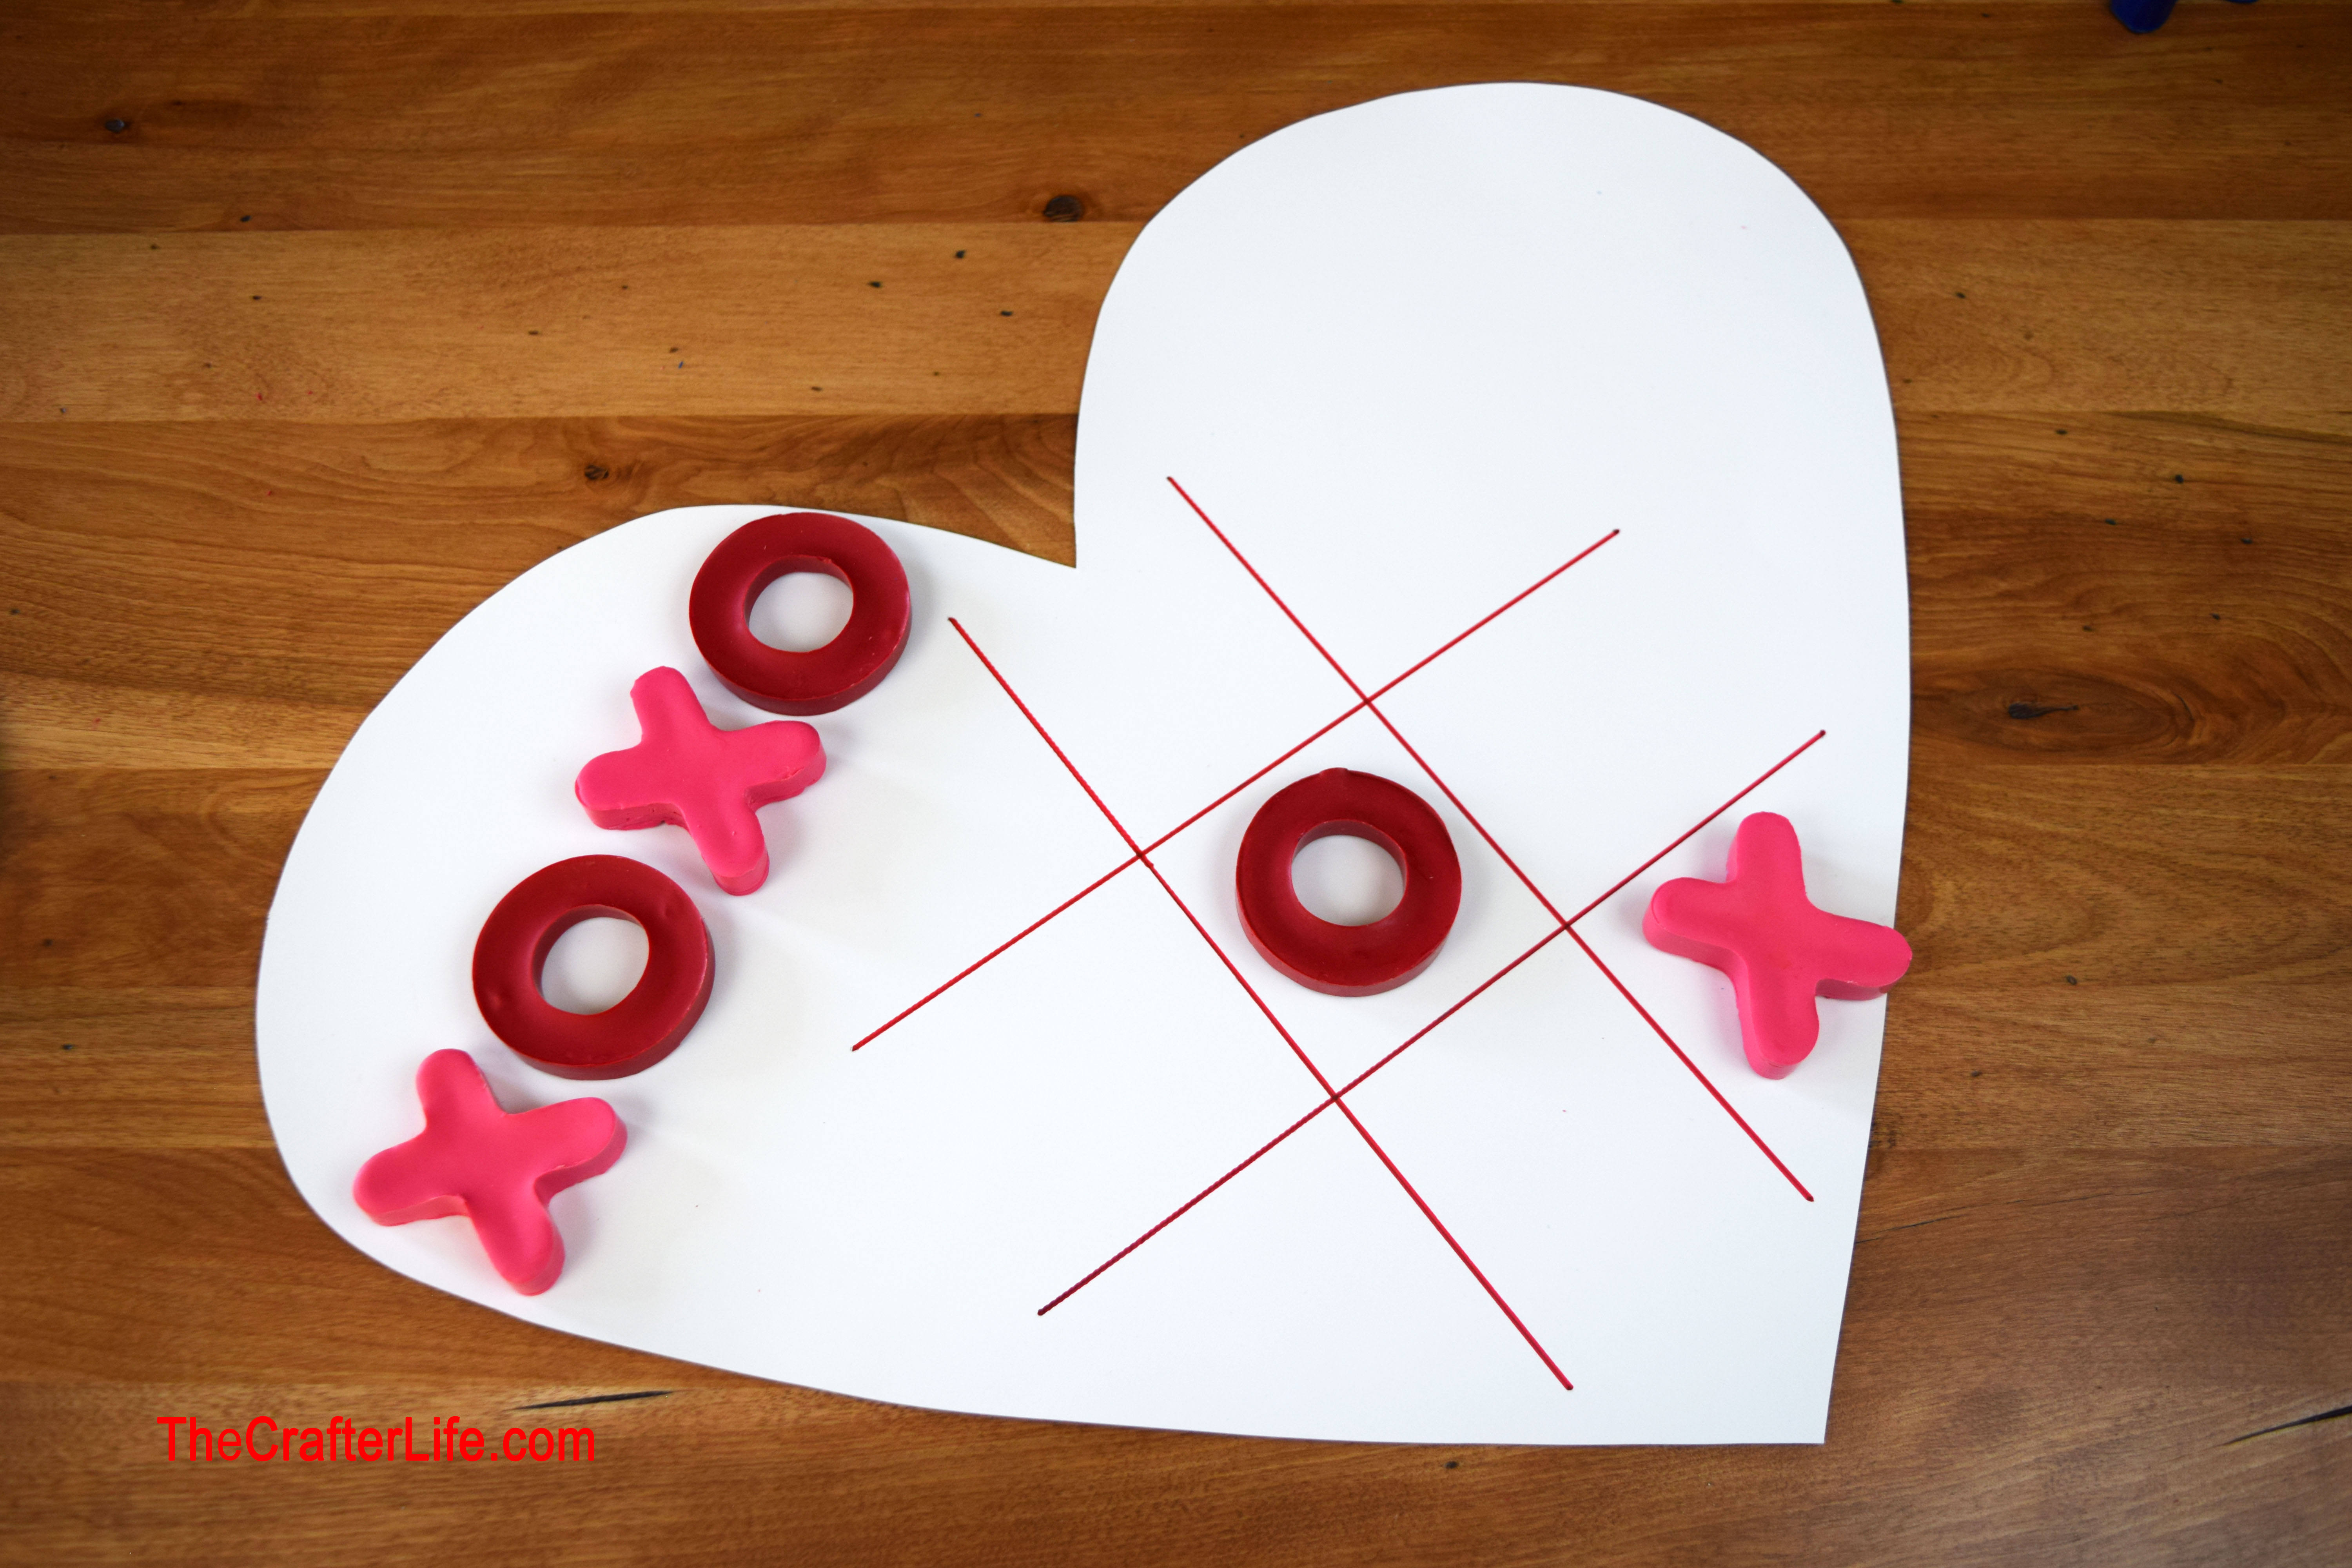
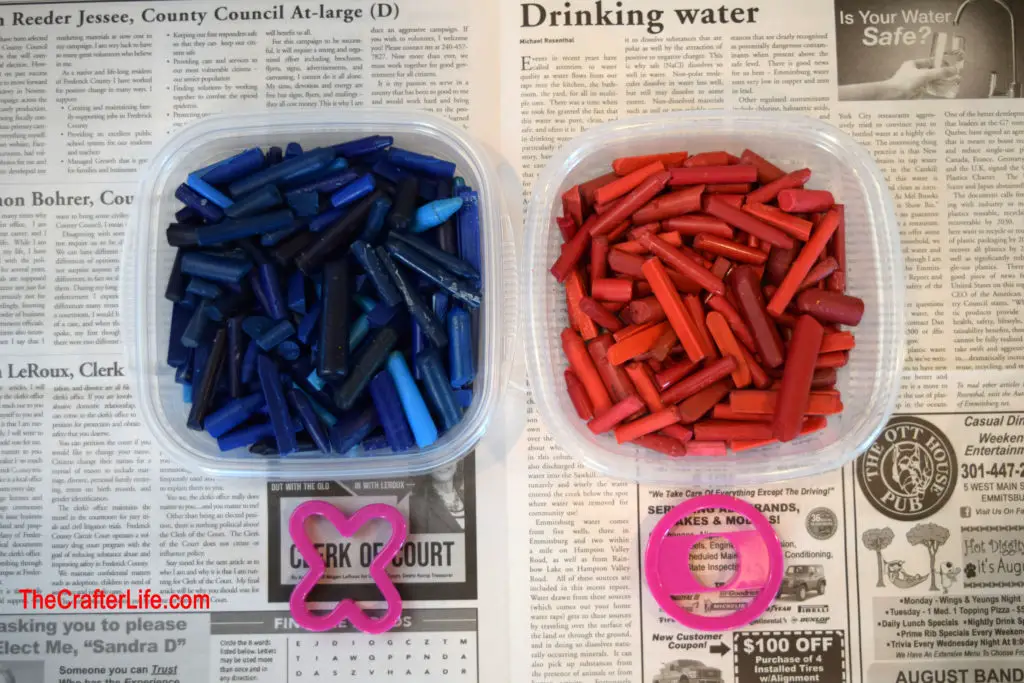
Recently, I noticed our crayon bin was beginning to overflow so much that the lid would no longer close. Many of the crayons were broken or worn down, so instead of throwing them away, I wanted to try melting them and making them into new crayons. My kids and I had fun using muffin tins and cookie cutters to shape the new crayons. I think one of my favorite things we did was turning the melted crayon wax into the shapes of X’s and O’s using contrasting *colors to use for Tic-Tac-Toe.
My original idea was to use the X and O crayons to write with during a game of Tic-Tac-Toe (one child/player uses a crayon in the shape of an X and the other child/player uses a crayon in the shape of an O). By physically holding an X or an O, I thought that would be a great way for younger children to remember whether they are an X or an O in the game. I’ve noticed my children sometimes forget whether they are an X or and O in a normal game of Tic-Tac-Toe where you write in one color. The crayons turned out to be a nice size for toddlers to grasp.
*These would also make a cute Valentine’s Day gift! I’ve provided a printable below*
After making the crayons with our letter-shaped cookies cutters, I saw that they were big enough to use as the actual game pieces themselves, so that could be another option. If you are interested in making your own set of X and O melted crayons to use for Tic-Tac-Toe, see below.
MATERIALS
– Crayons (at least two different colors)
– Glass Bowl/Microwavable-Safe Bowl –OR– Tin/Aluminum Can and Sauce Pan
– Oven Mitt and hot pad
– Cookie Cutter in the shape of an X
– Cookie Cutter in the shape of an O
– Wax Paper
**OPTIONAL: Clear gift bags, printables/gift tag, hole punch, ribbon, paper/cardstock/posterboard (if using as Valentine’s Day gift)
DIRECTIONS
*Steps 1 and 2 are kid-friendly tasks.*
- Remove all paper wrappers from the crayons.
- Sort the crayons by color.

*Steps 3–5 should be done by an ADULT while kids observe as the crayon wax and materials get very hot and can cause burns.*
- Melt the crayons into liquid. There are two methods I used. I prefer the microwave method since it is easier.
Method 1: I first melted the crayons by boiling water in a sauce pan, placing the crayons into a large tin can, and then placing the tin can into the  boiling water. I stirred the crayons around until they melted while holding the tin can using an oven mitt. The tin can gets hot, so if you use this method, make sure to wear oven mitts to protect from burns.
Method 2: I placed the crayons into a microwaveable glass bowl and put the bowl in the microwave for 30-second intervals, stirring between each round in the microwave. I repeated this until the crayons were liquefied. I used oven mitts/hot pads to handle the bowl as it became very hot. Use caution when handling your bowl.
- Pour the liquid crayon wax into an X-shaped or an O-shaped cookie cutter. My cookie cutter was on wax paper on top of a flat cookie sheet to protect my kitchen counters. *Be very careful pouring as the wax is hot.

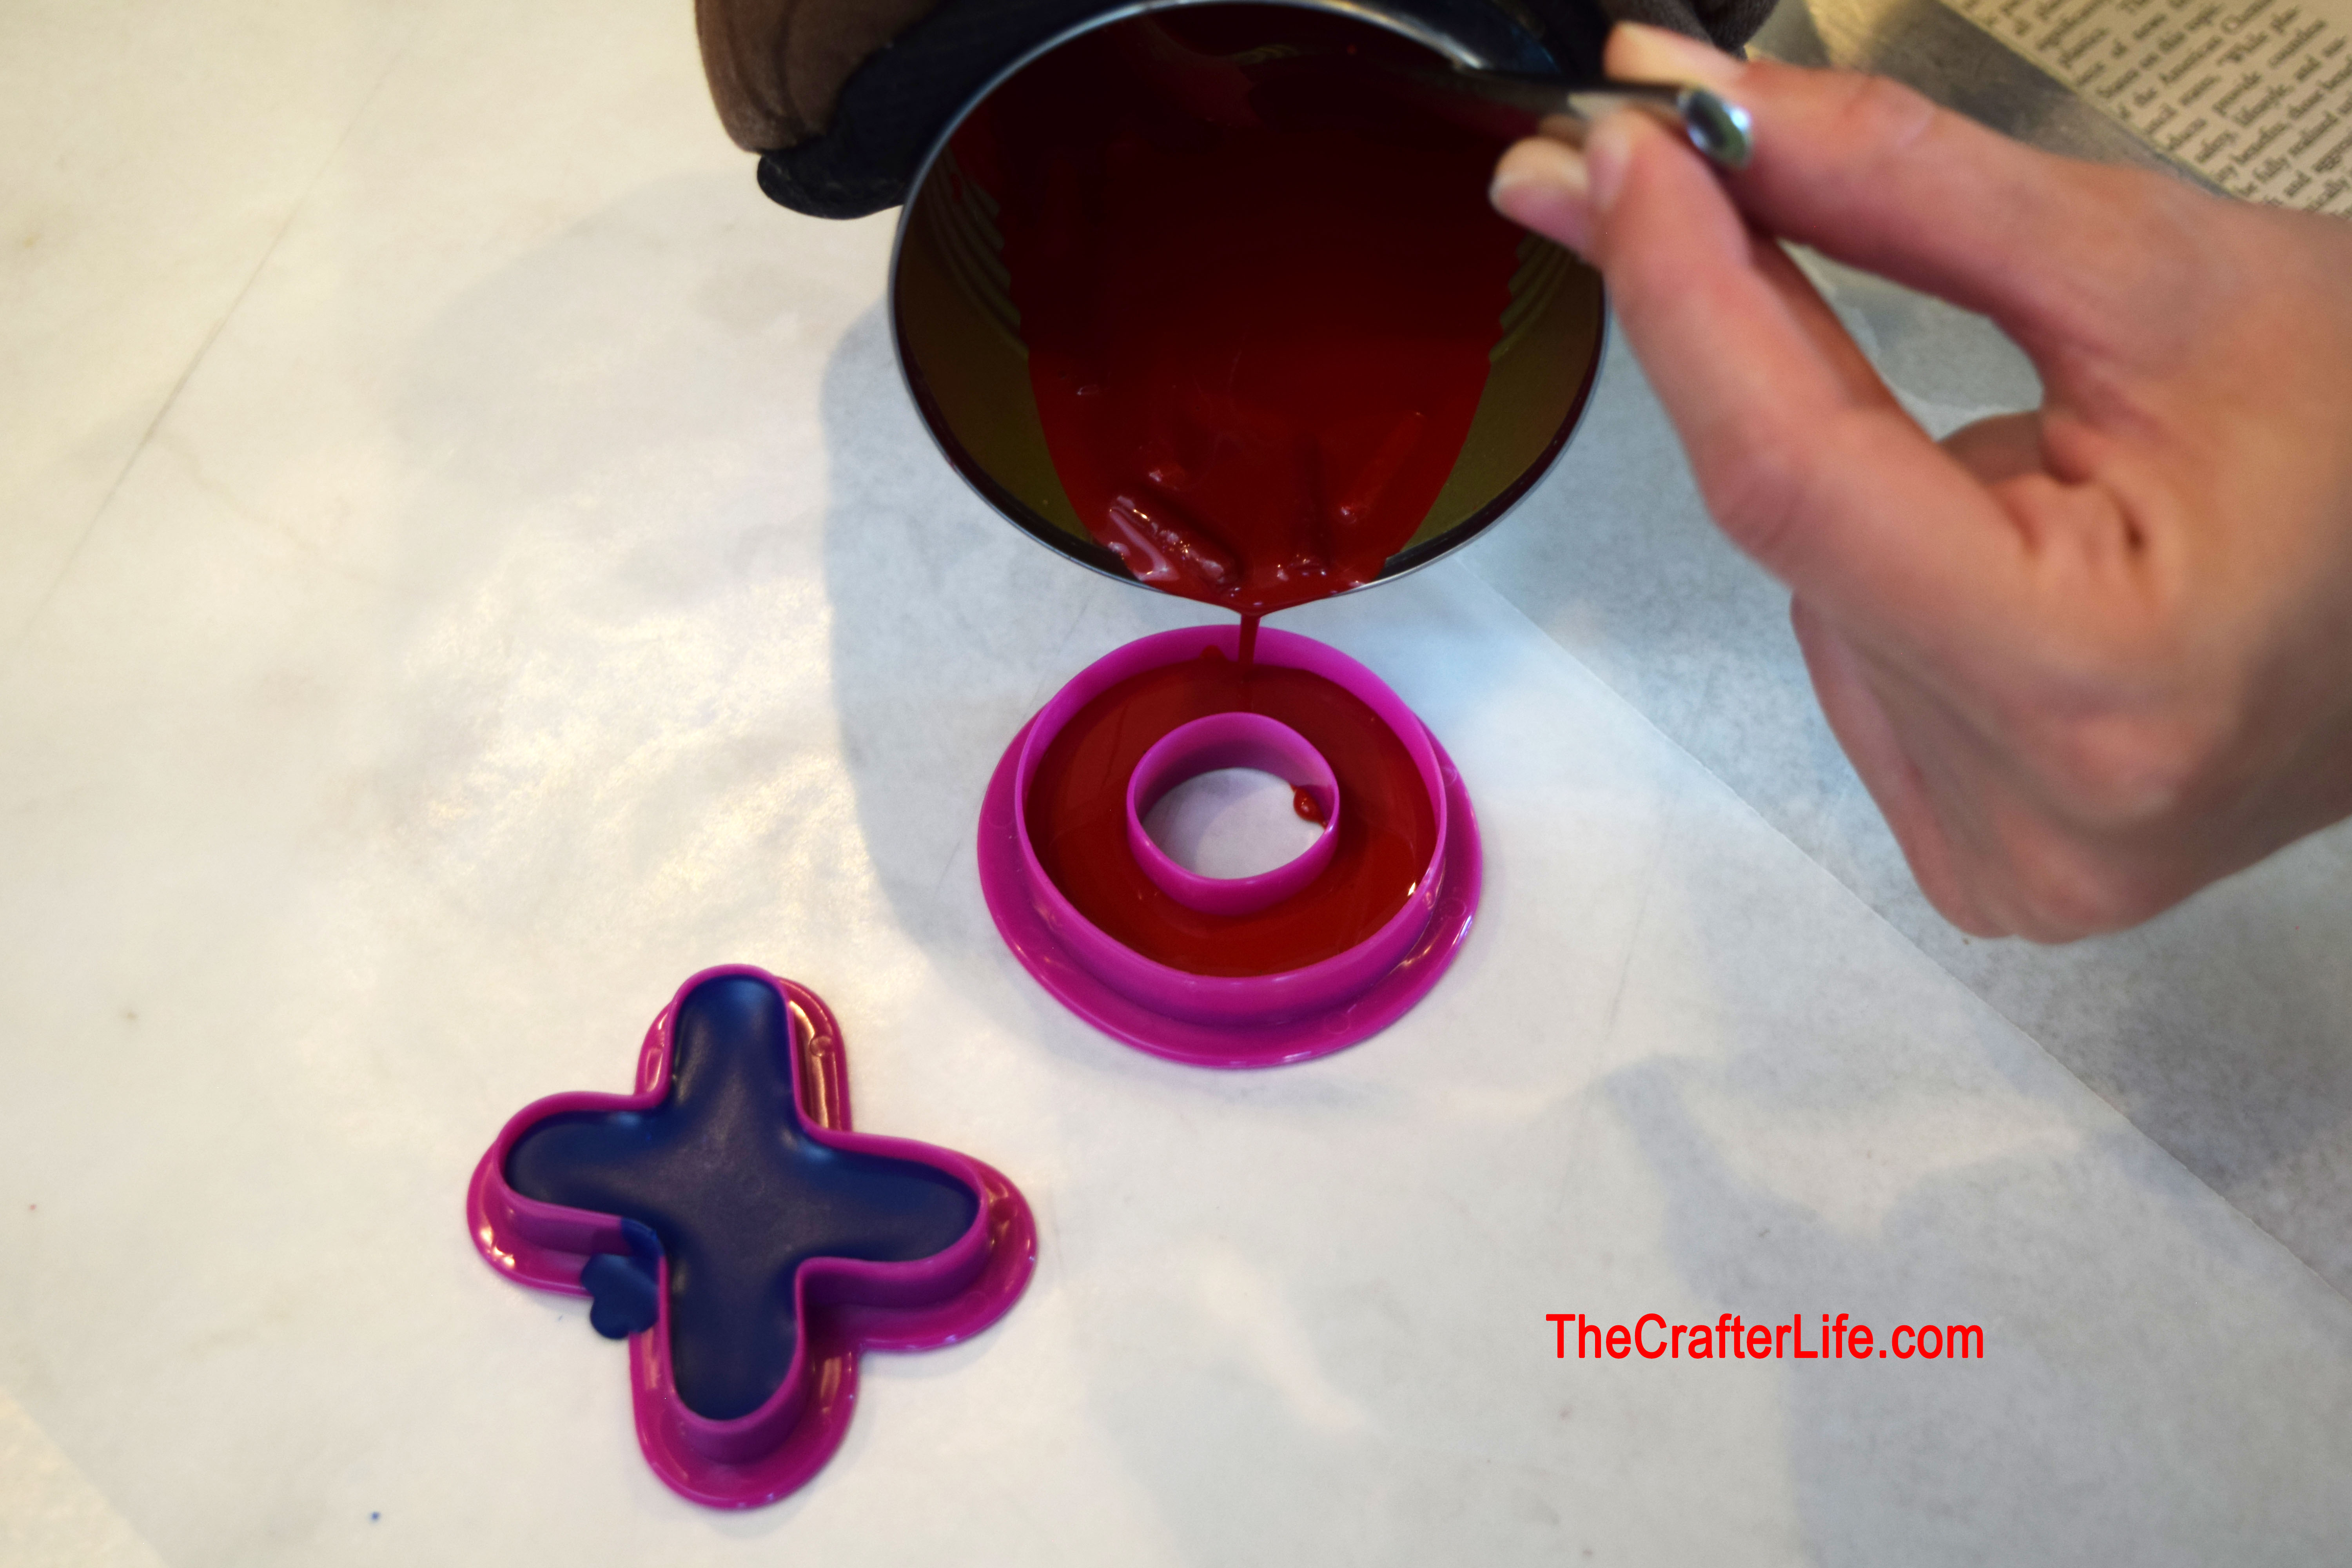
HINT: You may need to hold the cookie cutter down when you first pour the wax in so it does not start to leak out the bottom. Use extreme caution when pouring the wax as it is very HOT.
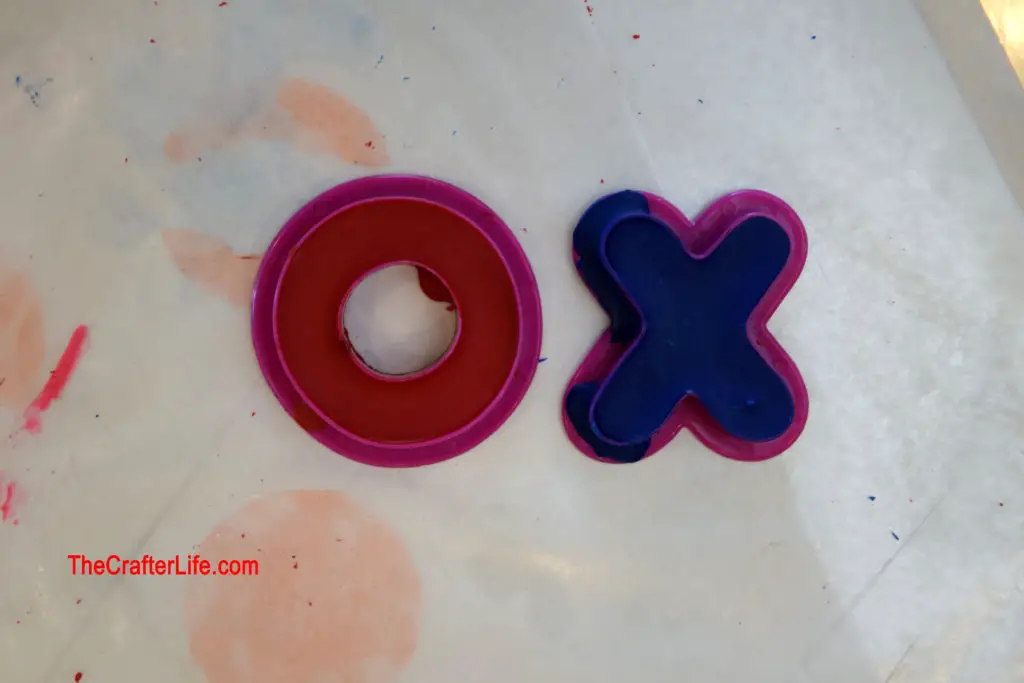
- Let the wax solidify and cool completely inside the cookie cutter. Putting it into the freezer for a short time may help speed up the process.
- Carefully press/pop the crayon out of the cookie cutter.
- You can now use your crayon to either write with or use as a game piece!
- Keep repeating the process of melting/pouring the wax into the cookie cutters until you have as many crayons/pieces as you want.

VALENTINE’S DAY GOODIE BAG DIRECTIONS
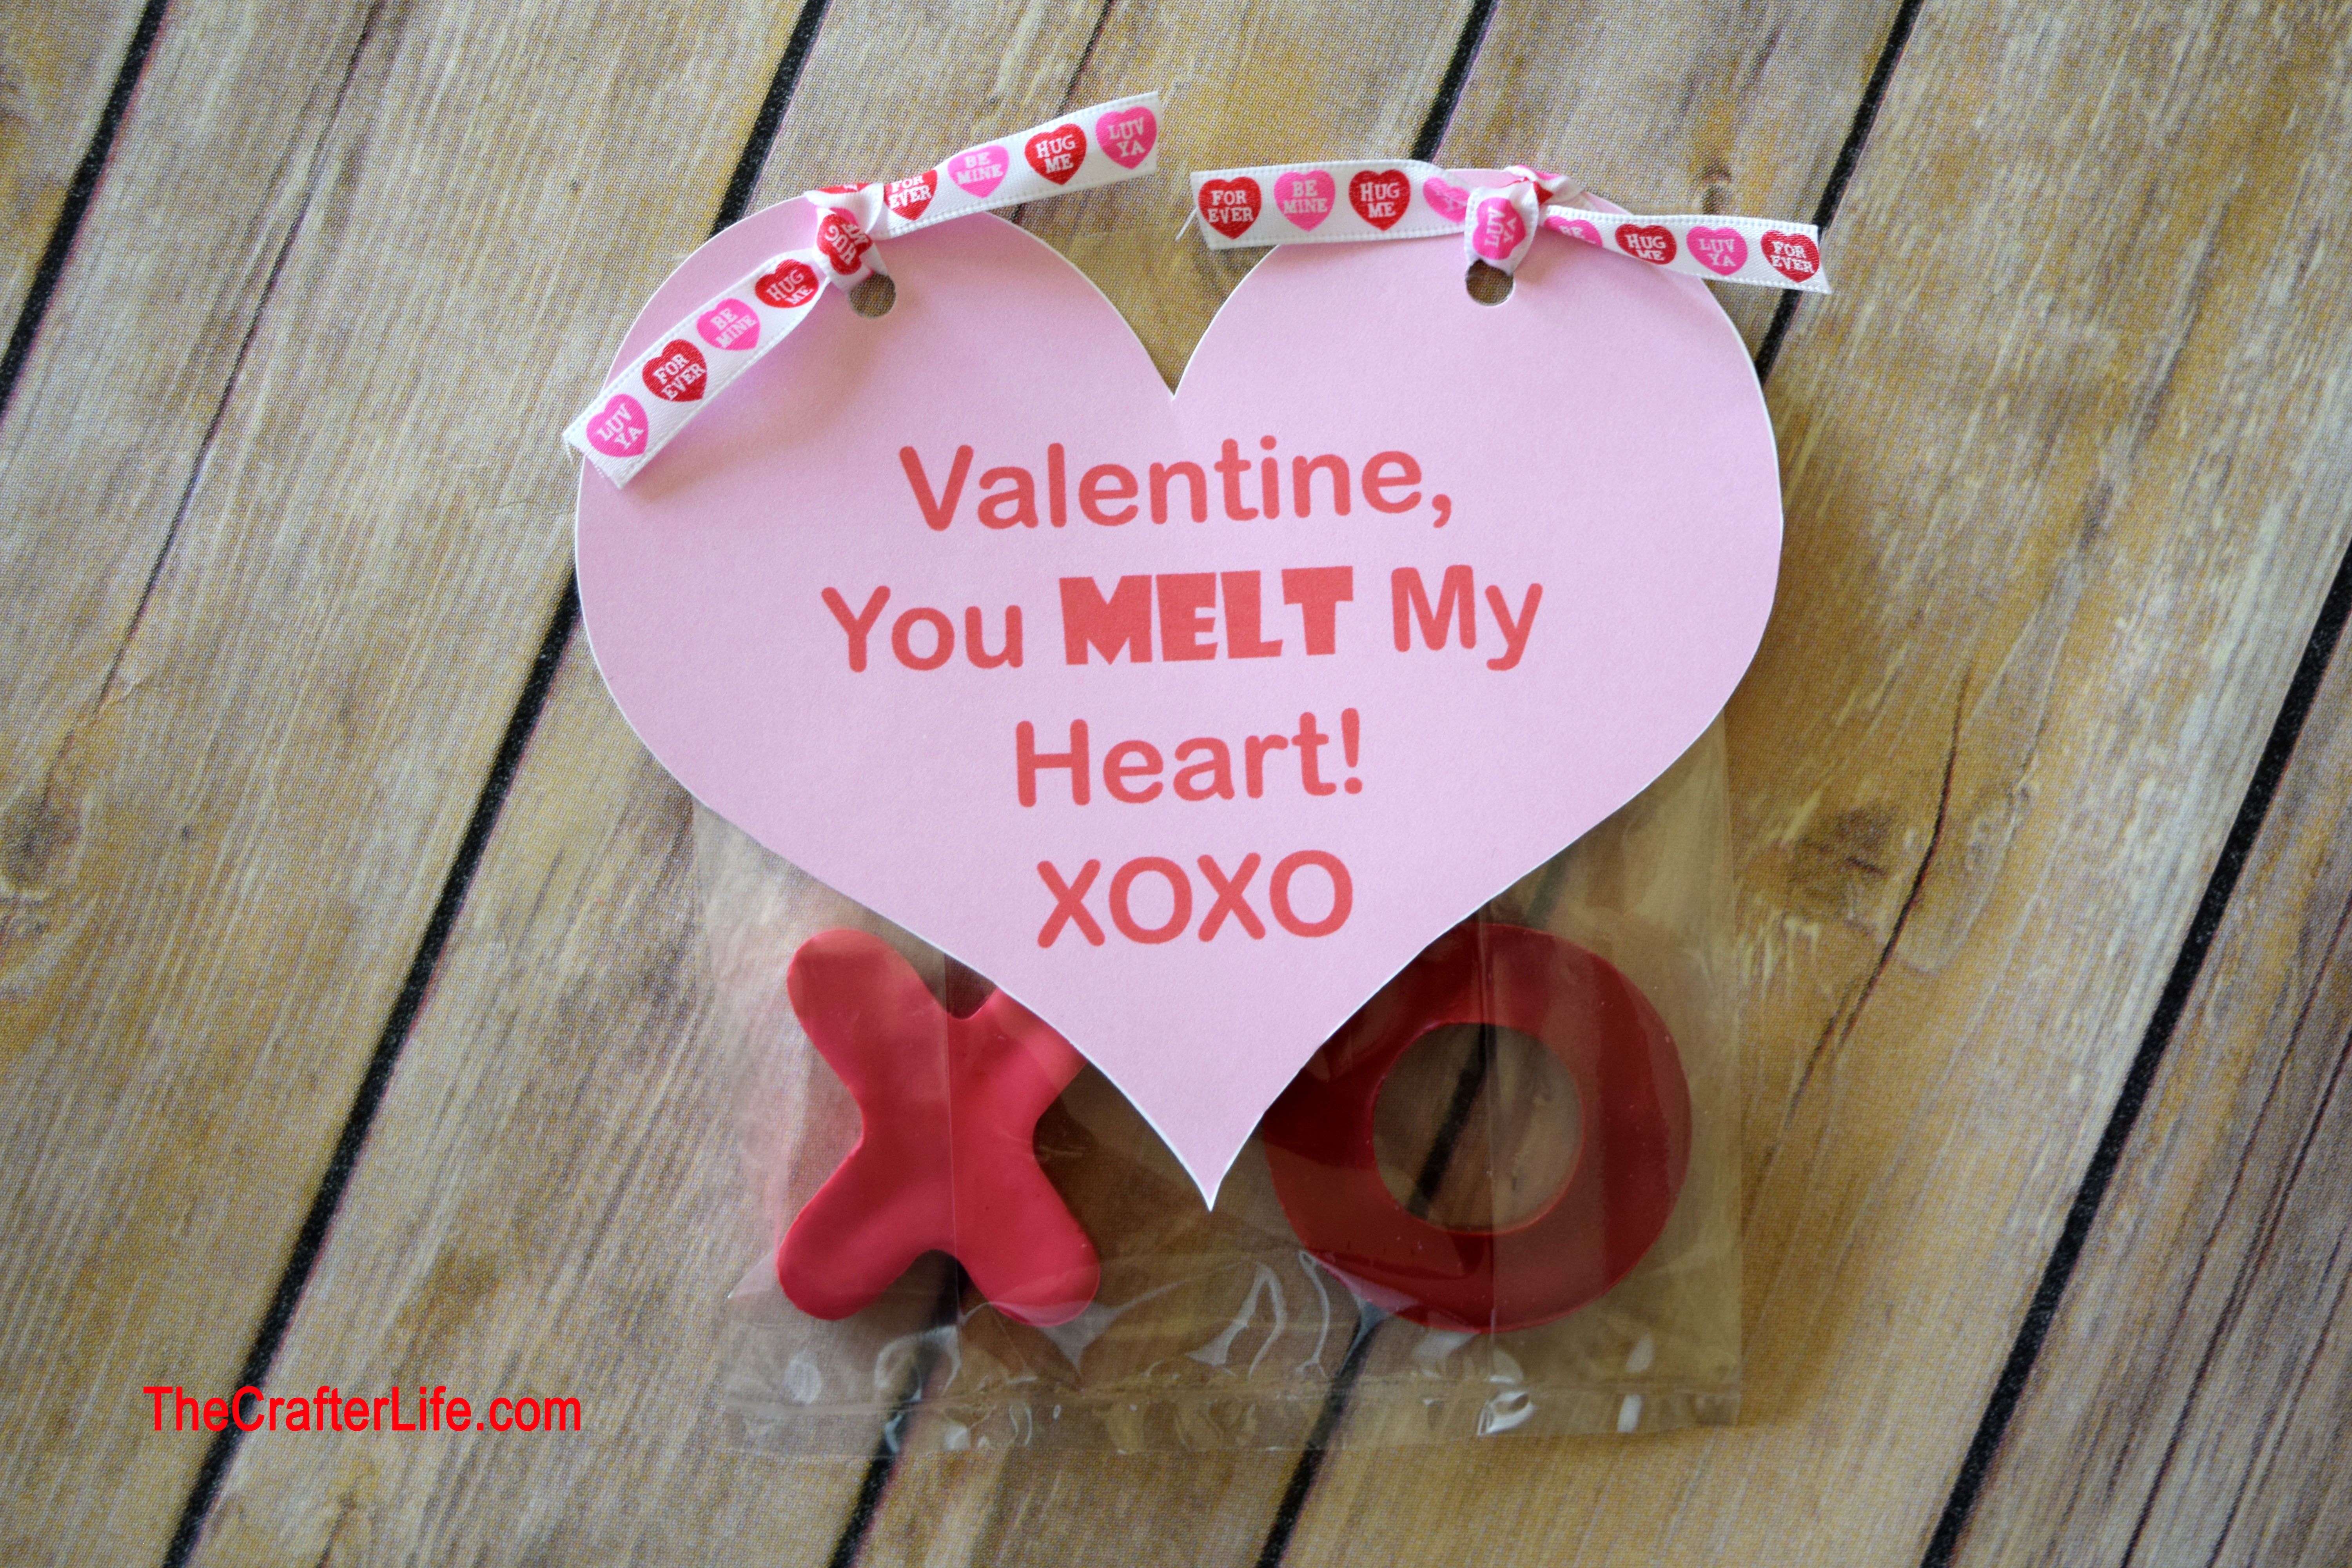
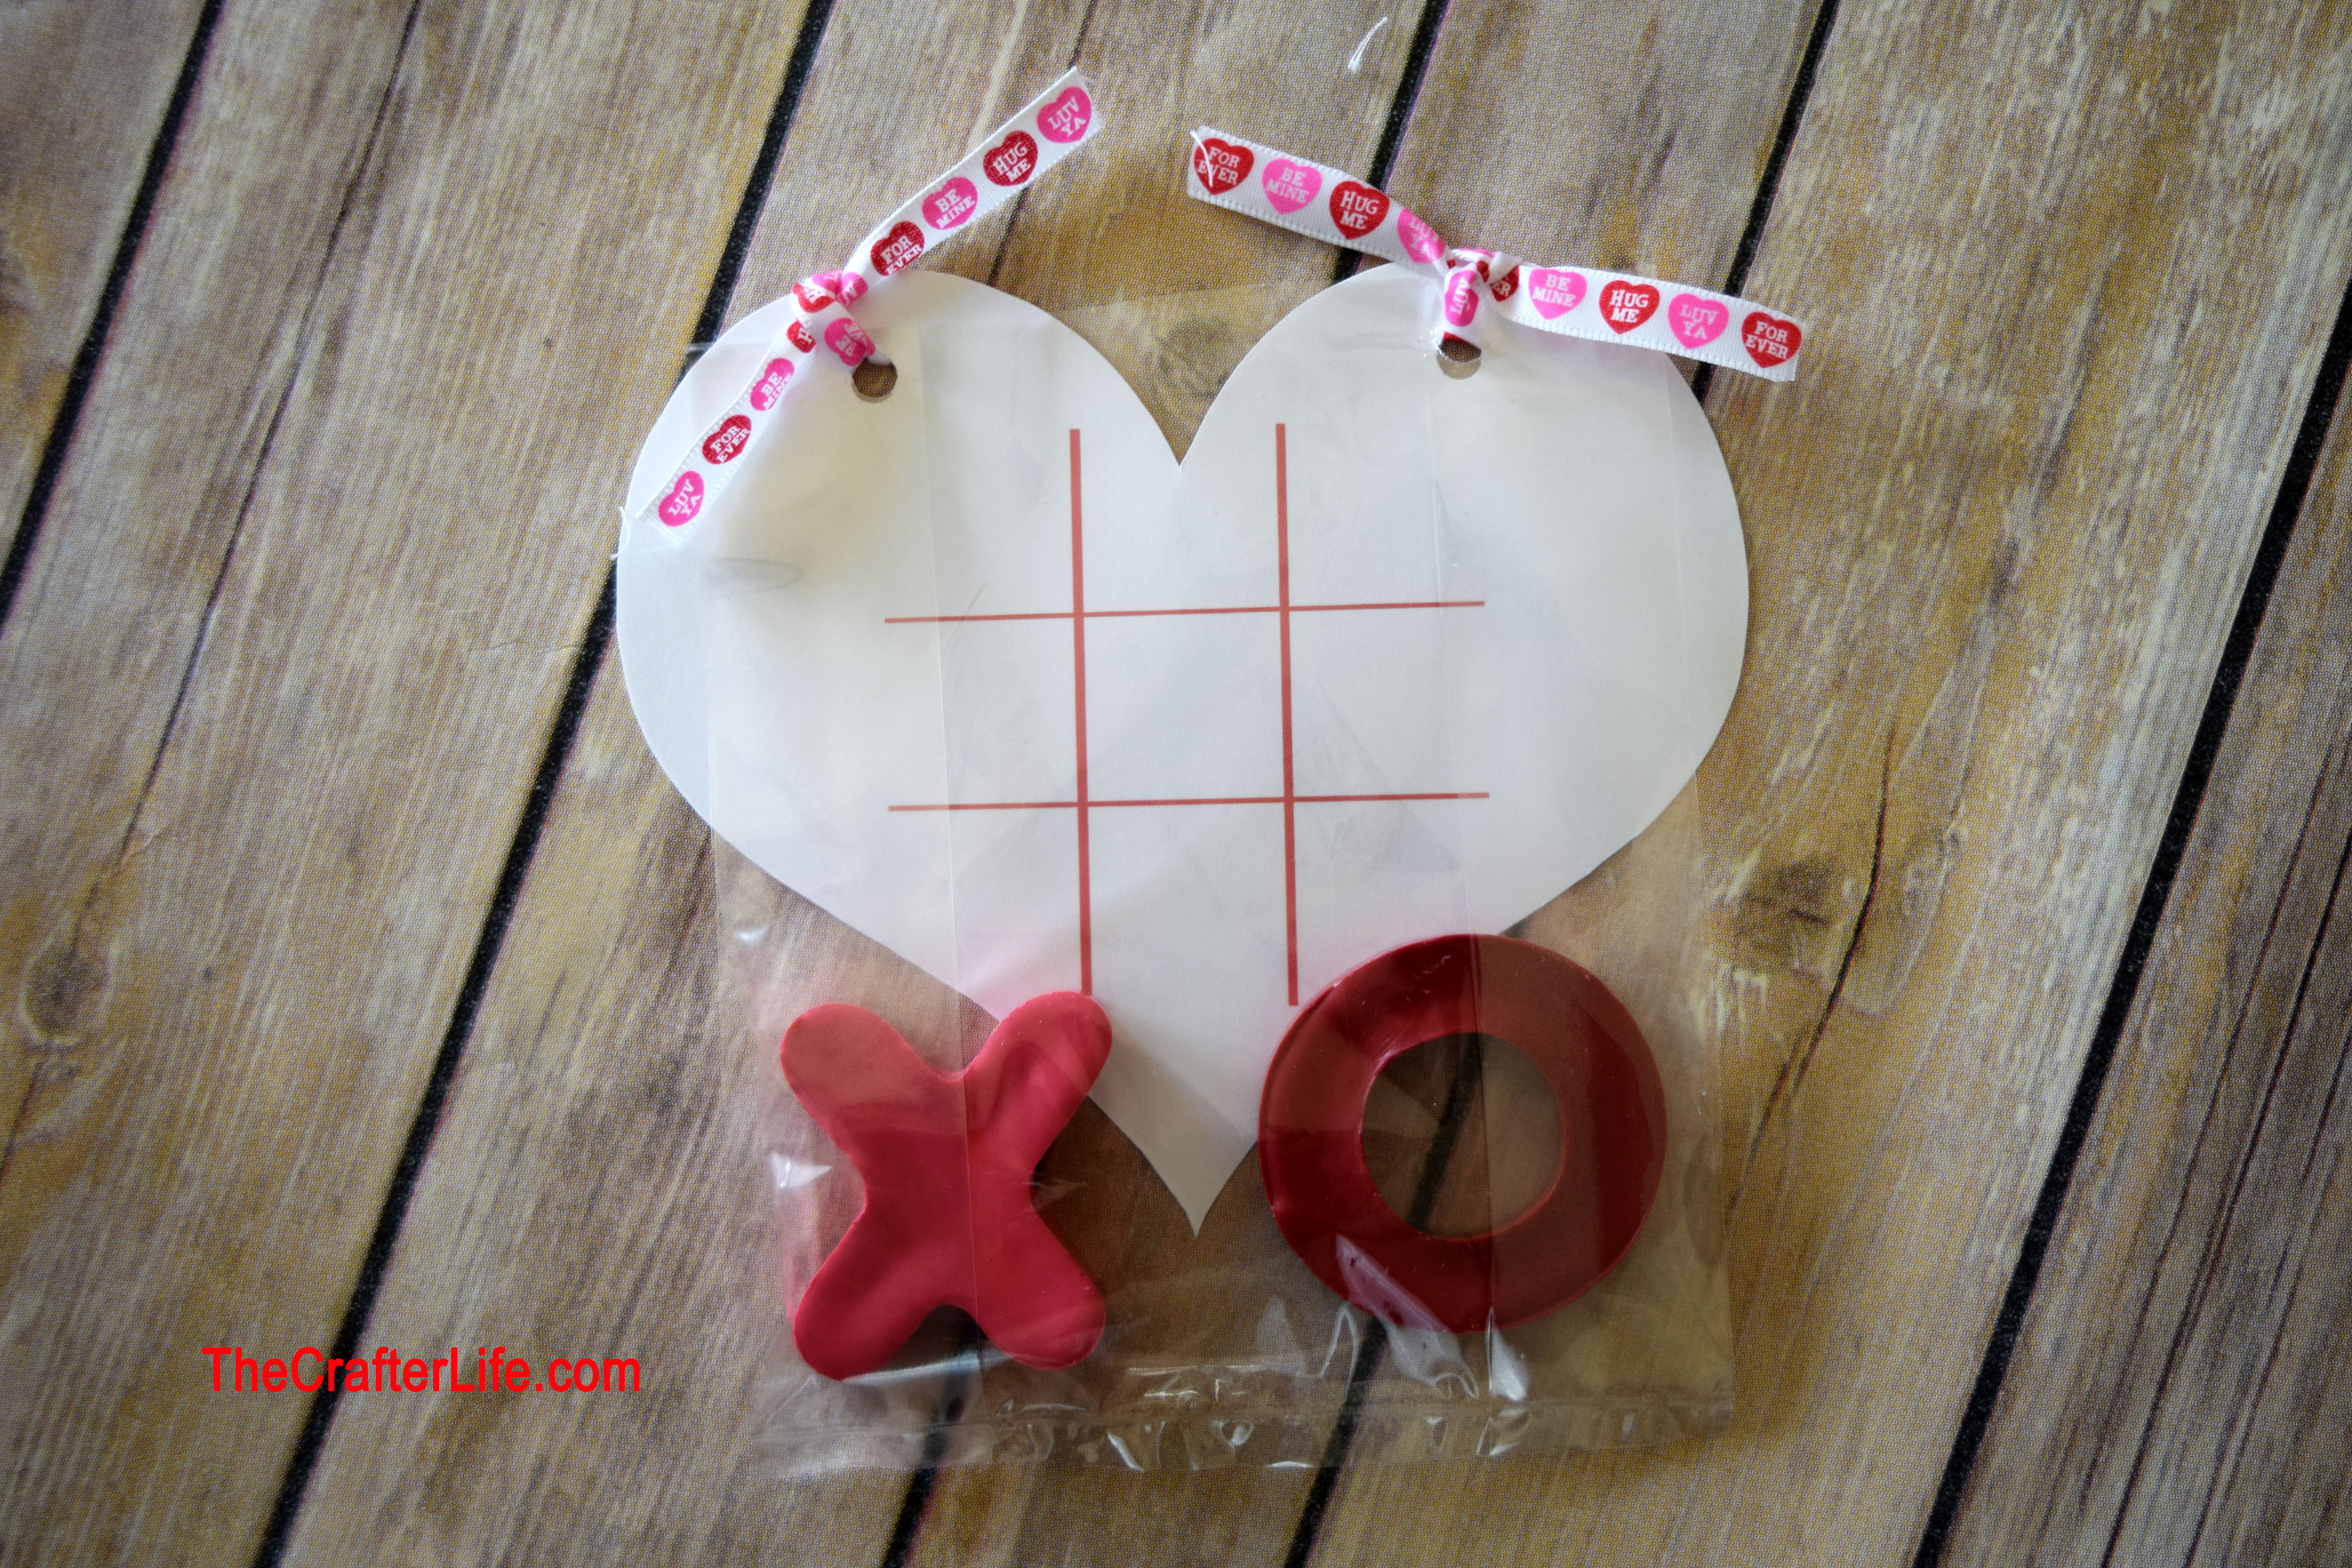
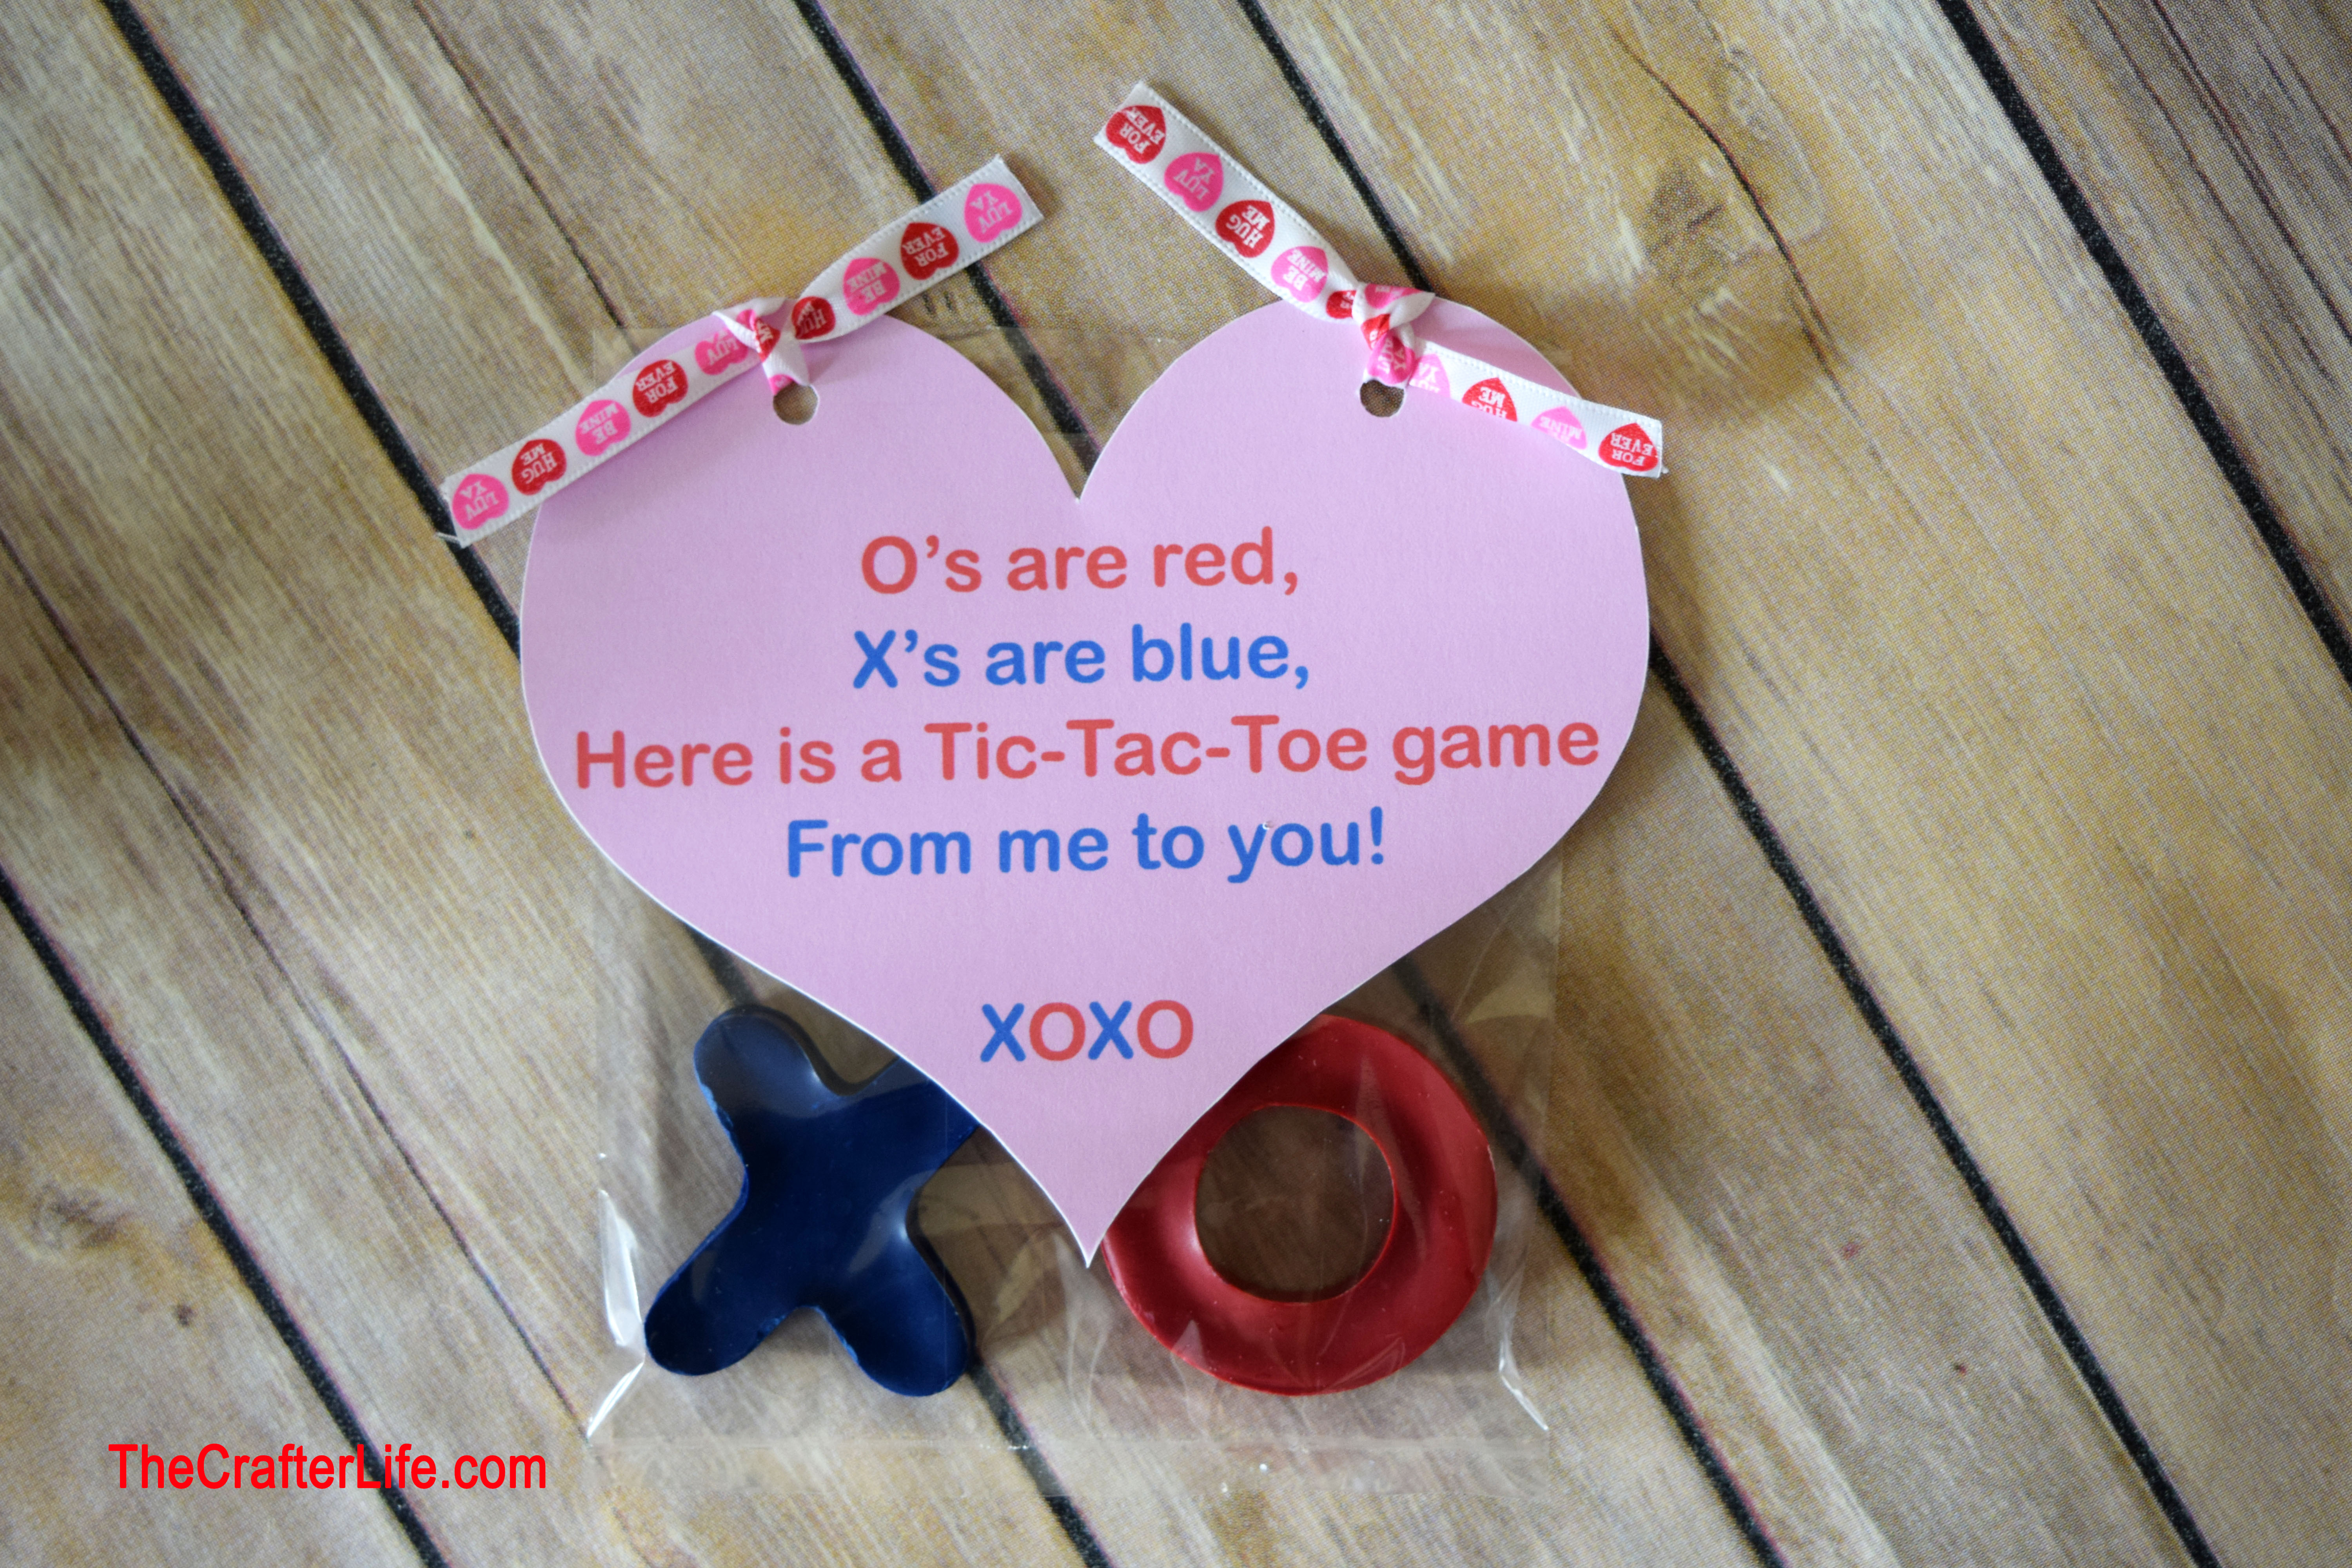
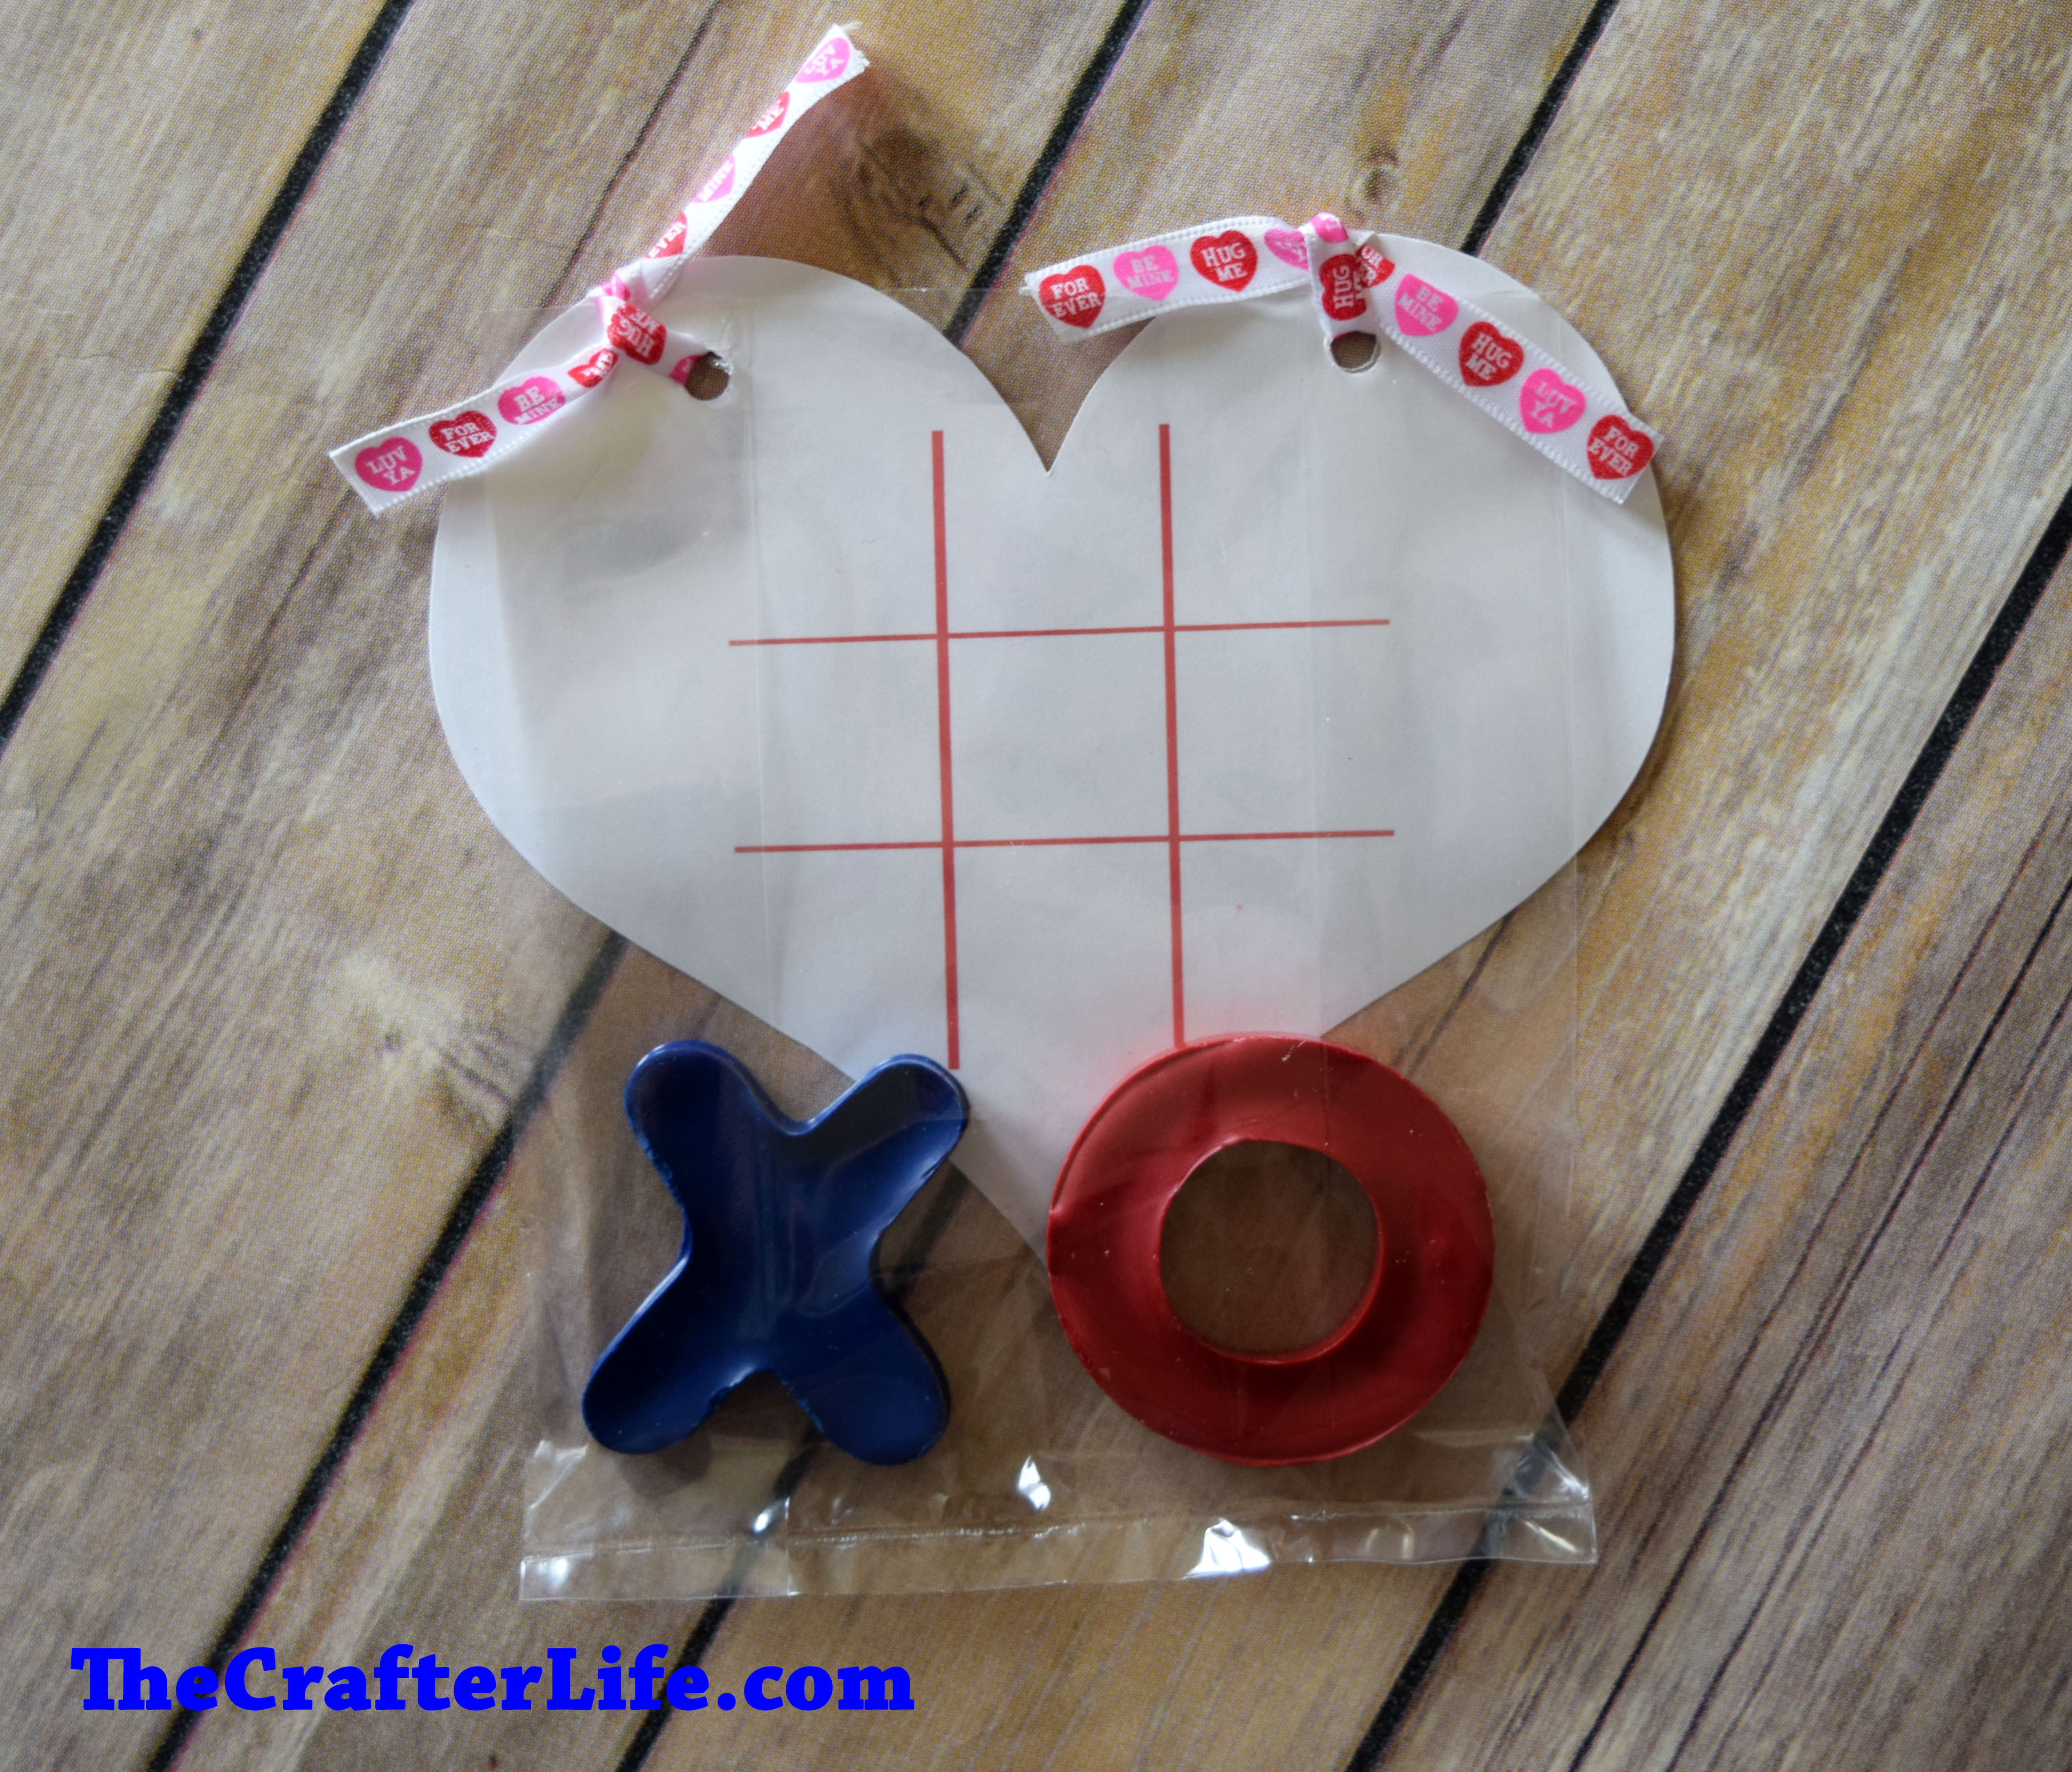
Place an X and an O crayon into a small clear treat bag. Print the heart printables** on cardstock and cut out. You can also make your own gift tag/label. Attach your printable/label to the bag by punching two holes (one on each side) on the top of the heart and through the bag. Then insert a piece of ribbon through each hole and tie them together.
Printable for FRONT: PrintableFRONT1 Printable for BACK: PrintableBACK
Printable for FRONT: PrintableFRONT2 Printable for BACK: PrintableBACK
**The printables are aligned to print front to back on the same sheet of paper. After your print the first image (the heart), feed your paper into the printer so that it will print on the opposite side (this depends on your personal printer). Then print the second image (the game board). These should align/print so that the game board is on the back center of the heart.