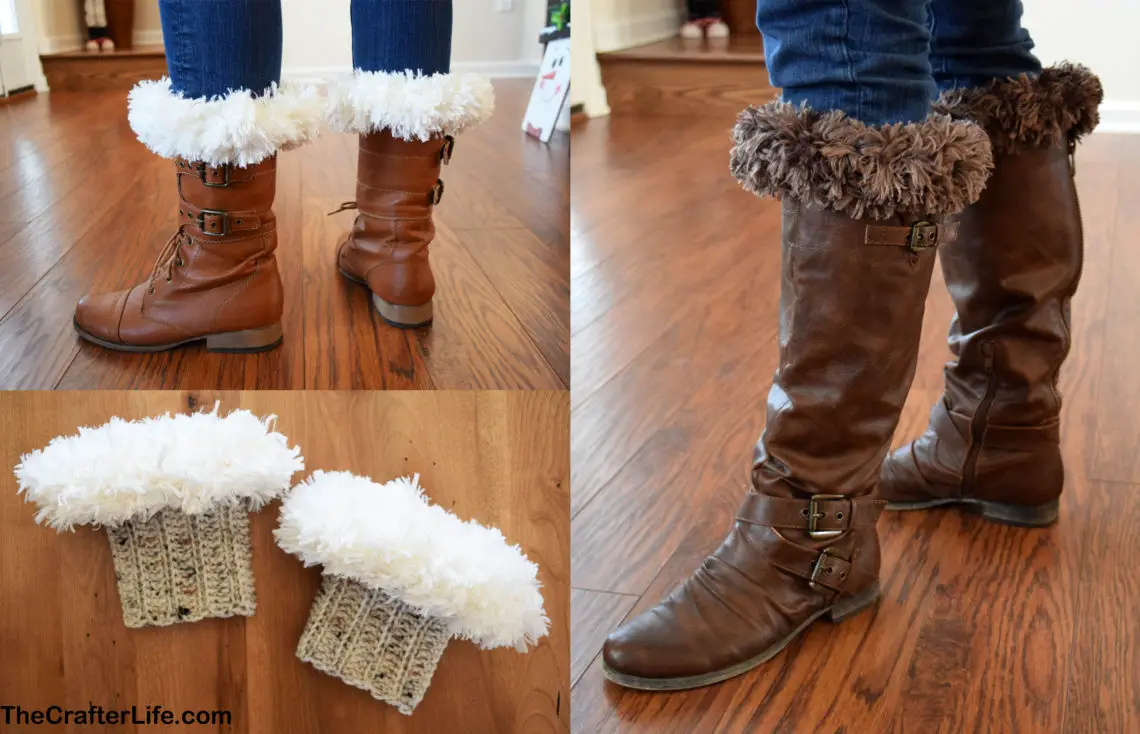
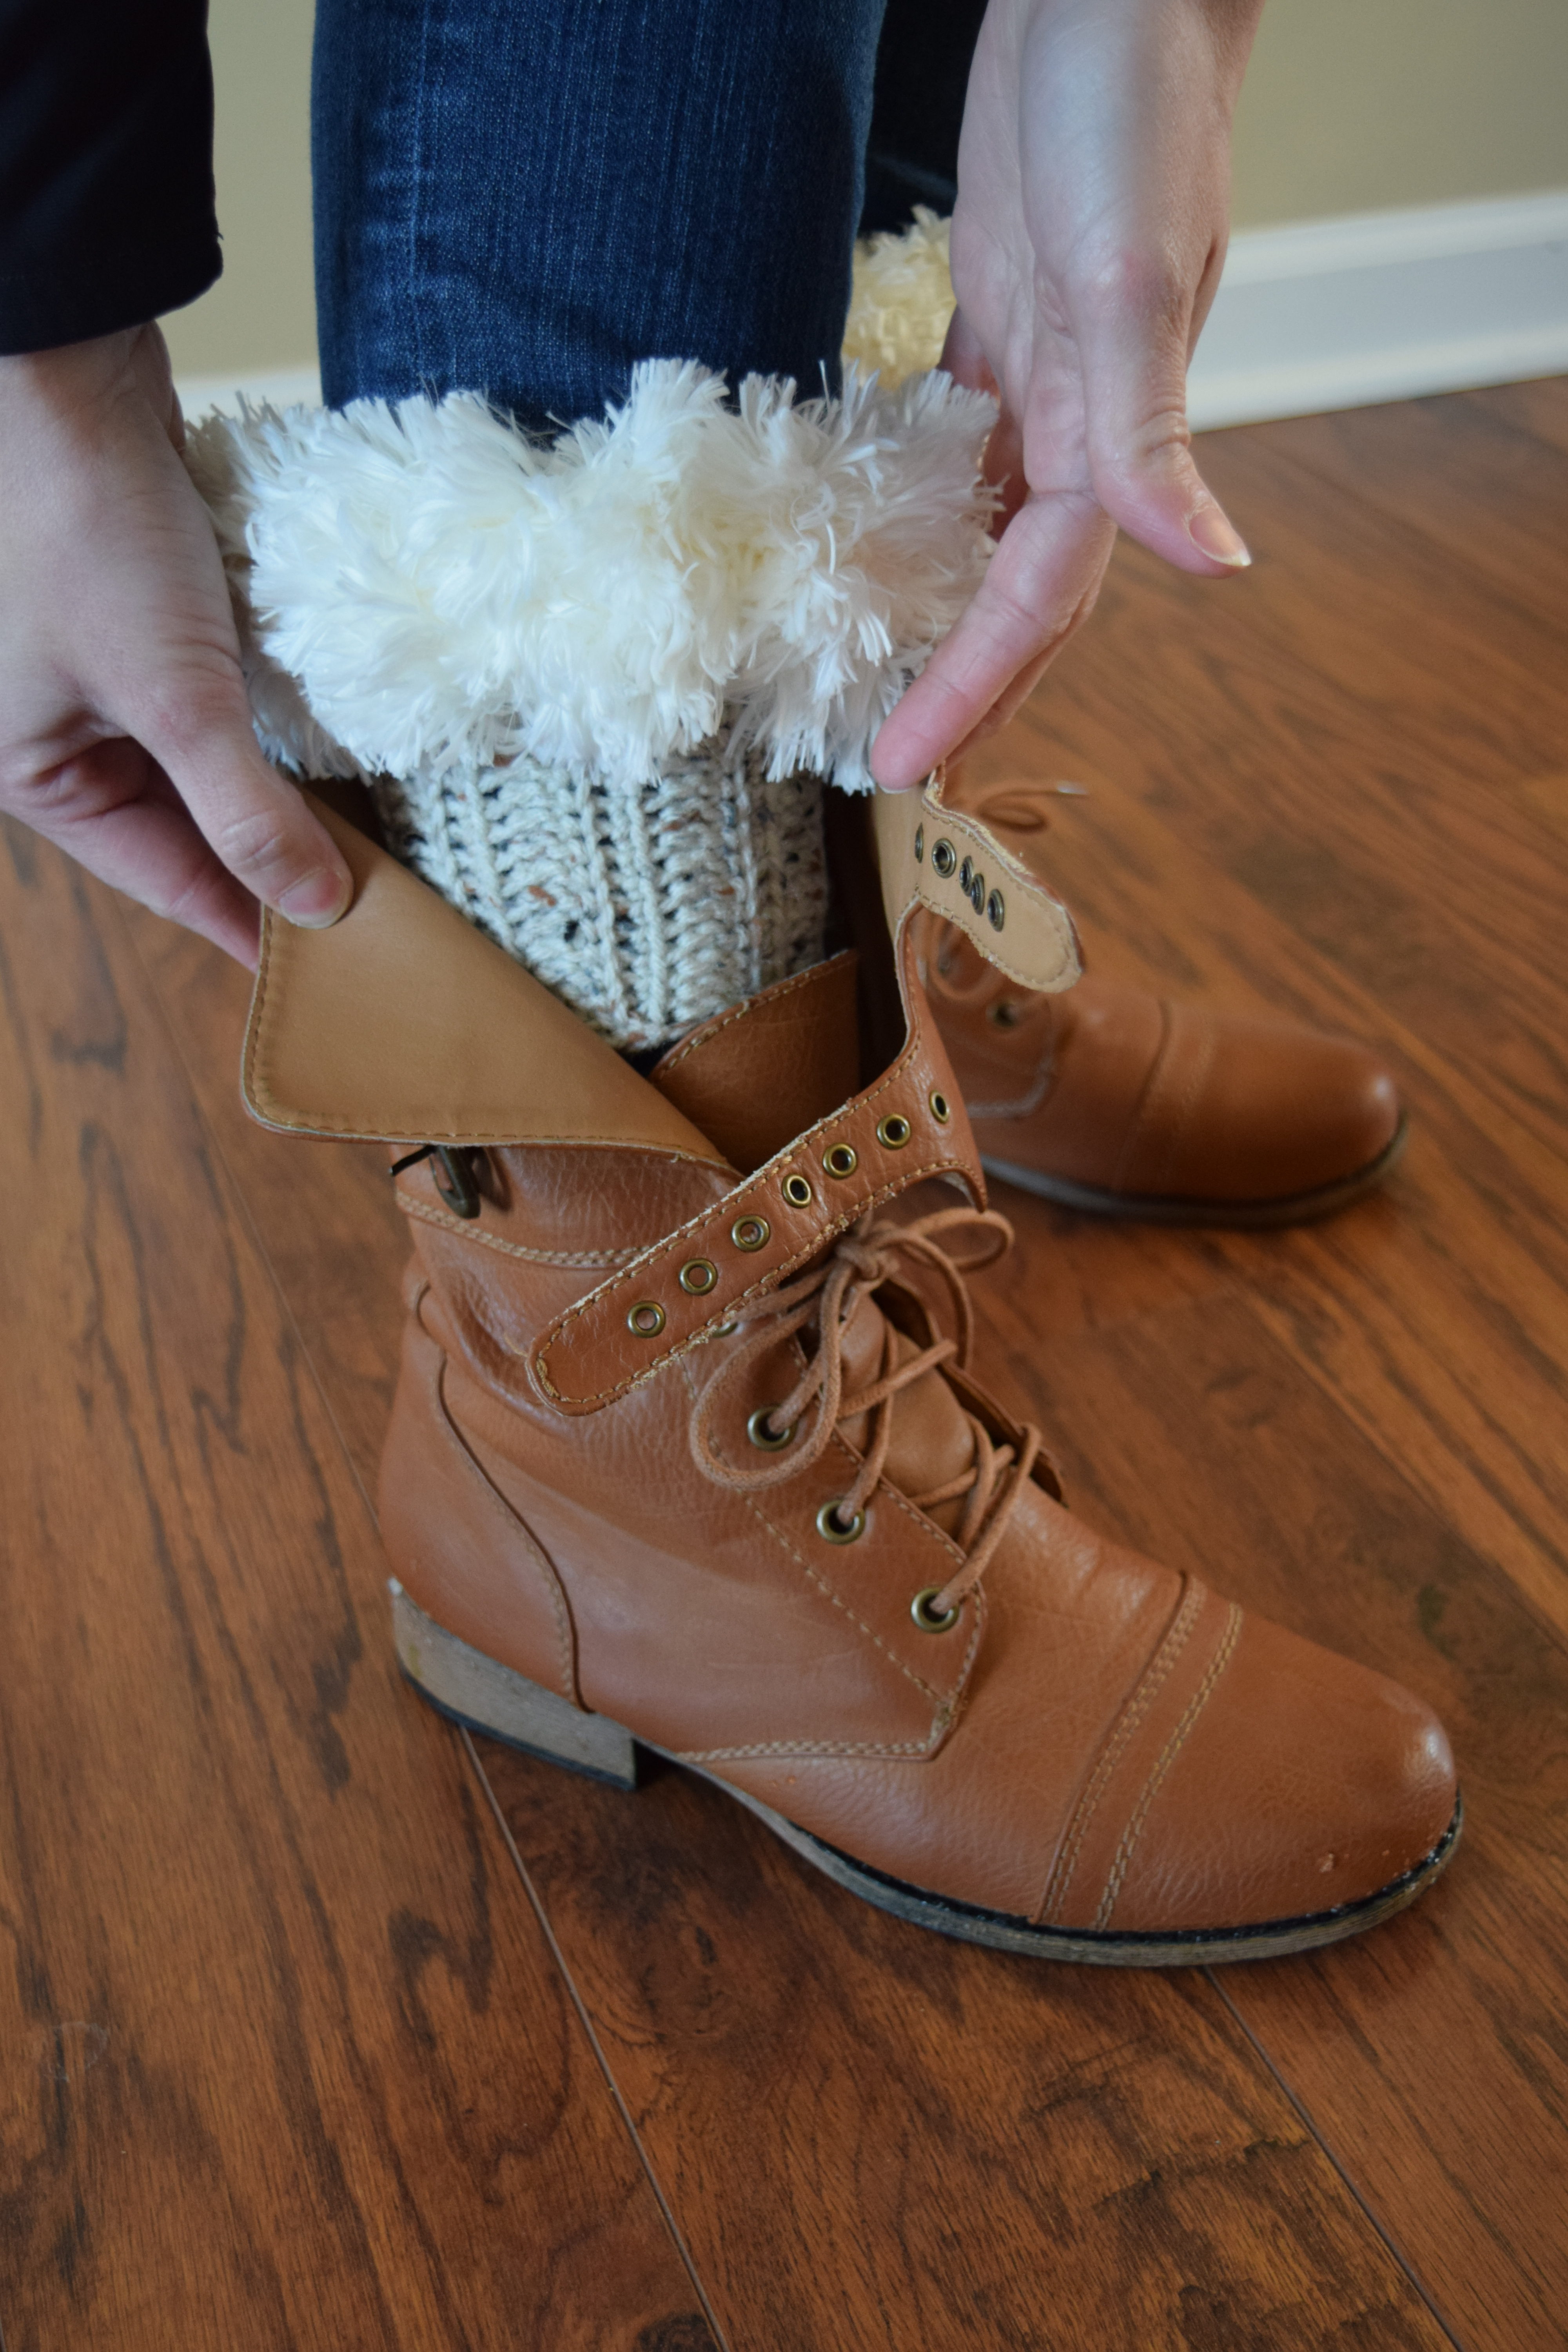
Fur-Top Boot Cuff
I think boots are so cute to wear in the cooler seasons and a pair of boot cuffs really adds an additional layer of cuteness! I decided to make some fur-topped boot cuffs for this extra cold winter and I think they turned out great! The Red Heart Fur yarn I used created the exact look I wanted. The Polar, Mink, and Slate colors in this line of yarn are the perfect neutral colors to pair with any standard boot. I chose to use Red Heart Super Saver yarn in Aran Fleck to make the bottom of the boot cuff because it compliments those colors nicely.
The fabulous thing about these fur-topped boot cuffs is that they can be worn with a more casual outfit or be used to add sophistication and elegance to your boots when wearing a dressier outfit. I hope you love these as much as I do and enjoy making them! The pattern is quick and easy so you should have yours made in no time! See below for the pattern.
After I made mine, my daughter asked me to make her a pair. You can find this child-size pattern included in my Etsy listing below.
Fur-Top Boot Cuff
This boot cuff pattern is written for an adult-size boot cuff meant to fit most adults (and older children/teens). The size can be easily adjusted by adding or subtracting rows from the bottom of the boot cuff. You will need to adjust it depending on where you want it to sit on your leg.
FINISHED MEASUREMENTS
Approximately 5 inches tall (bottom of cuff without fur top is approximately 4¼ inches tall)
Circumference is about 2½ inches less than the widest part of leg where the cuff sits
MATERIALS
– Size I/9/5.50mm crochet hook or size needed to obtain gauge
– Size N/15/10.00mm crochet hook or size needed to obtain gauge
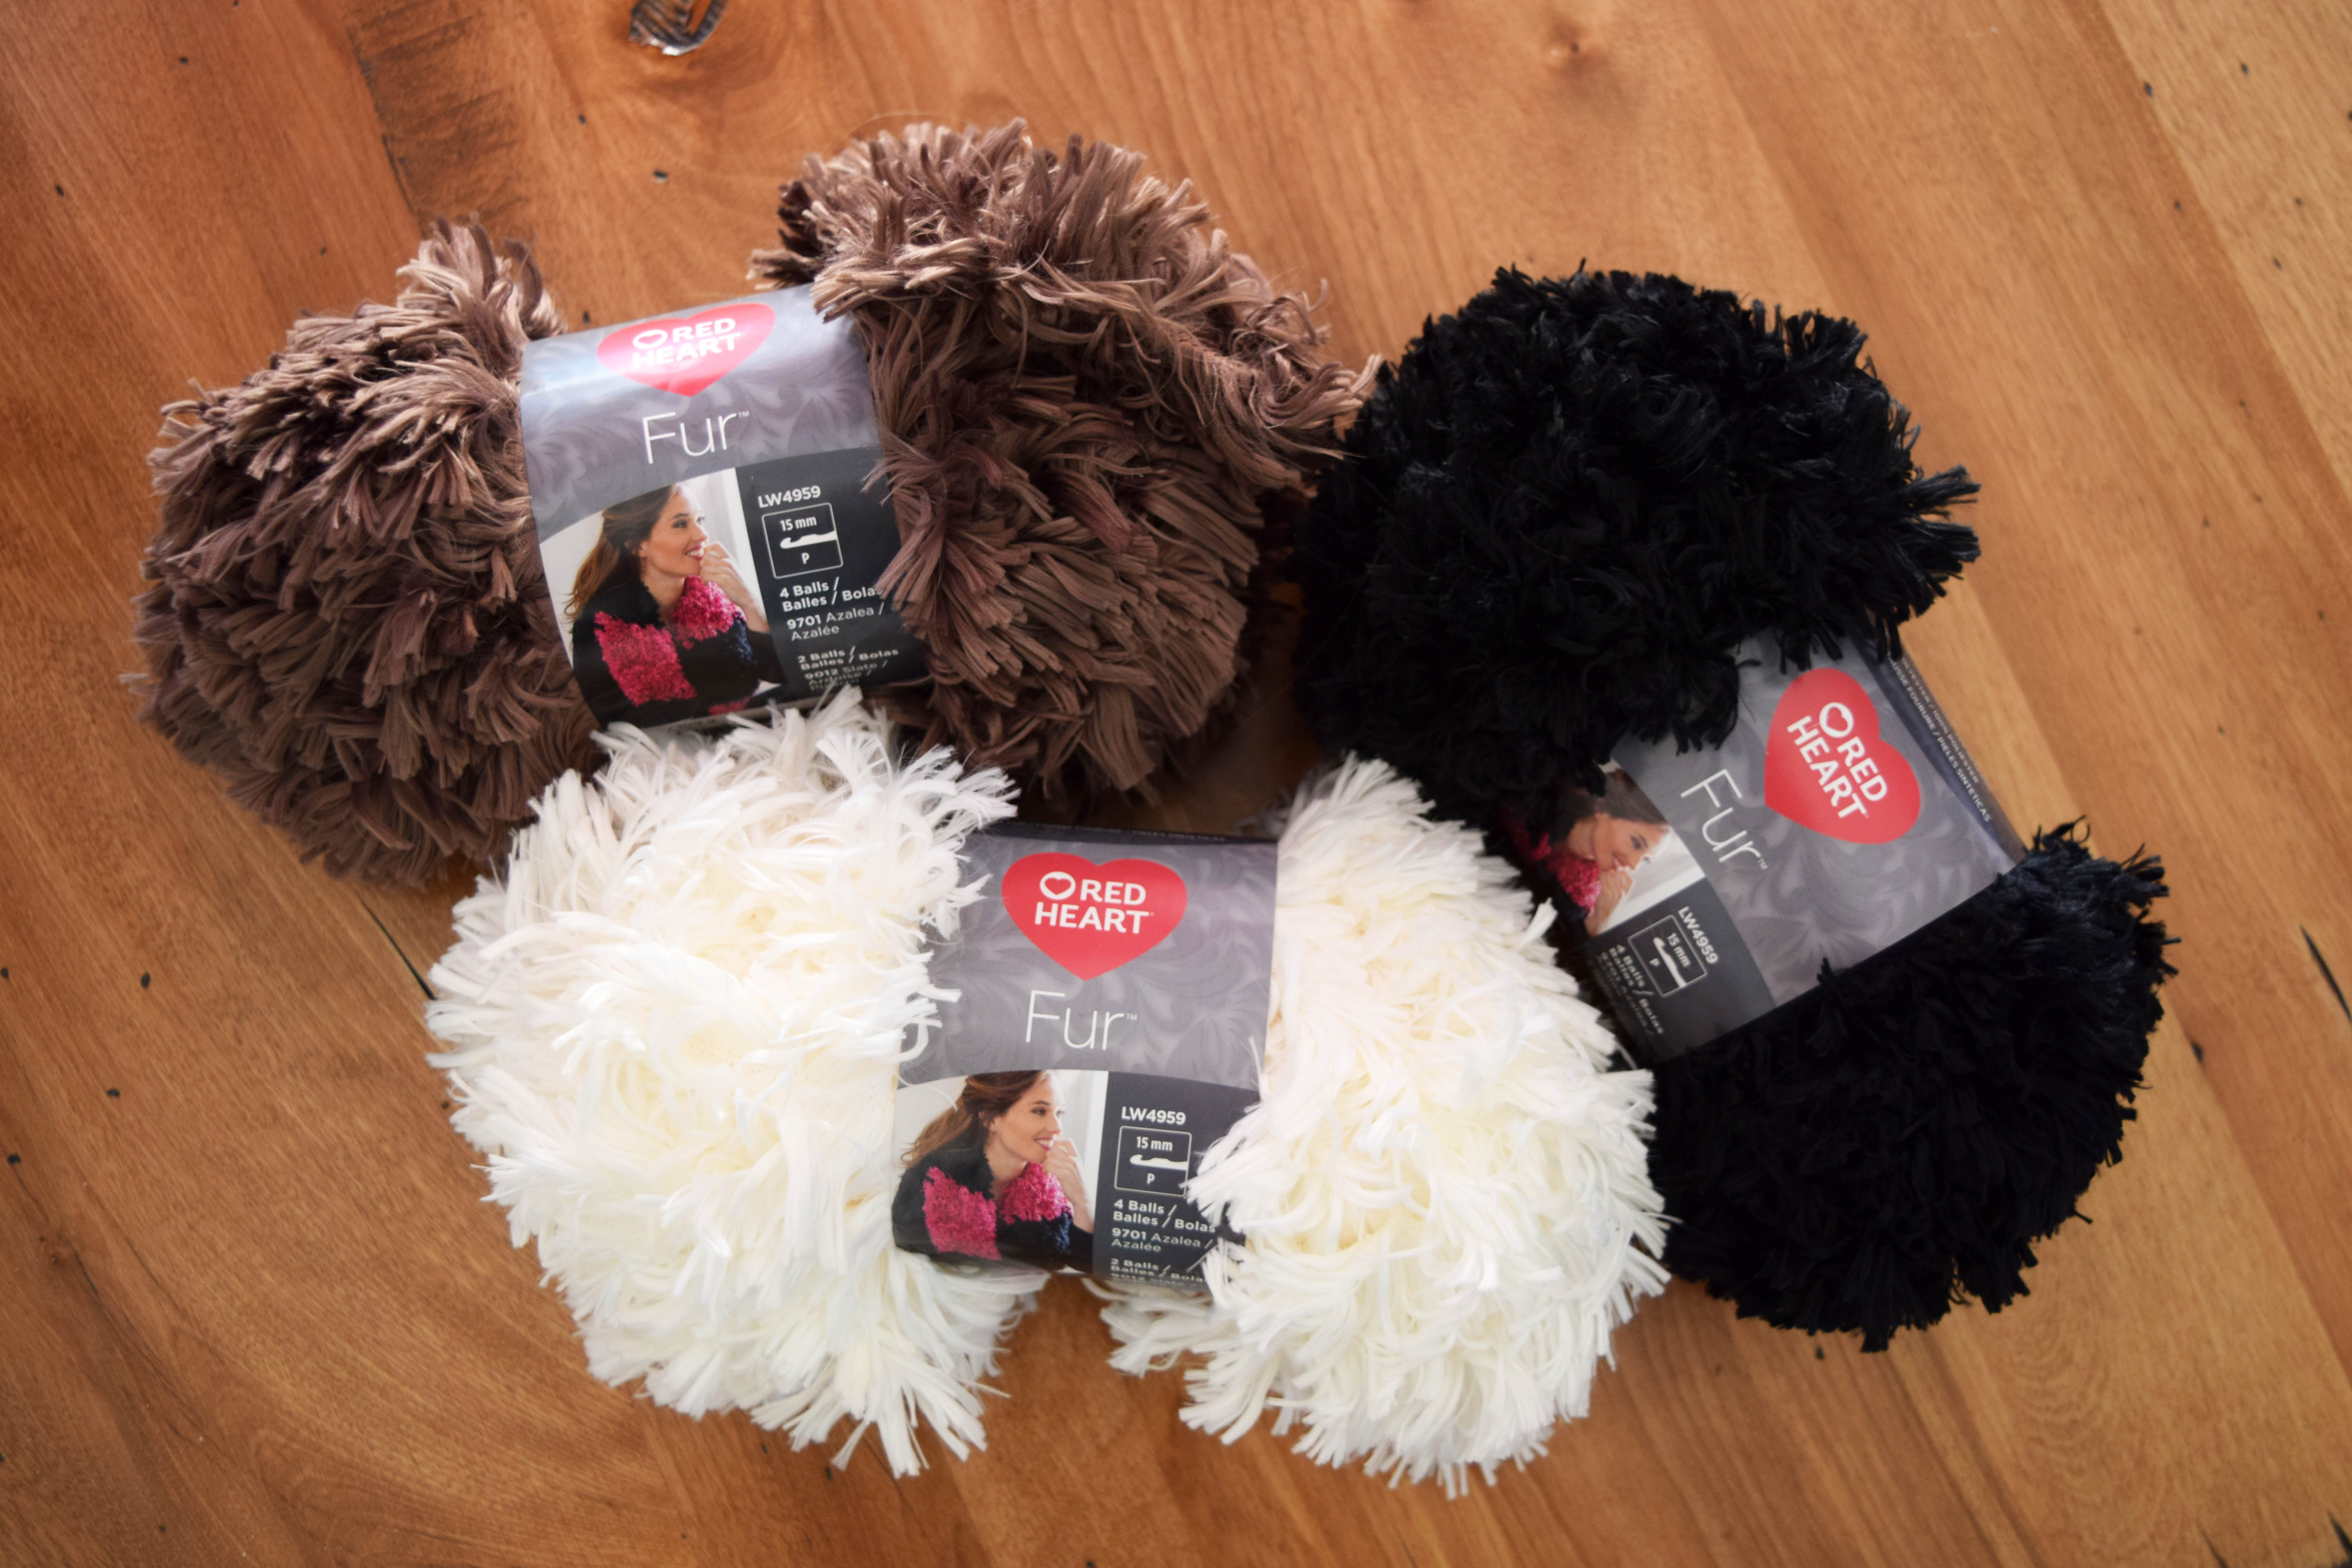
– Red Heart Fur yarn (or other fur yarn of Jumbo weight (7)) in your choice of color (I used Red Heart Fur yarn in “Polar” for my white ankle boot topper and in “Mink” for my brown calf-height boot topper.)
***If the bottom of your boot cuff requires more than 24 rows, you will need 2 skeins of the Red Heart Fur yarn. You should only need 1 skein if the bottom of your boot cuff is 24 rows or less.****
– Scissors
– Tapestry needle for weaving in ends
– Stitch markers (Optional – if needed for counting/marking stitches/rows)
– Measuring tape
ABBREVIATIONS
– ch = chain
– chs = chains
– dc = double crochet
– sc = single crochet
– slst = slip stitch
– st = stitch
– sts = stitches
GAUGE
8 dc = 2 inches
8 sc = 2 inches
4 rows = 2 inches
PATTERN NOTES
- The bottom of the boot cuff is made first. As you work, check your length every so often by wrapping it around your leg to determine how long/how many rows it should be.
- When making the bottom of the boot cuff, make sure to end on an even-numbered row (your last row should be a row of dc in the front loops only).
- The pattern for the bottom of the cuff requires dc stitches to be done in the front loops only and sc stitches to be done in the back loops only. This creates a ribbing effect. The side with the ribbing is the right side of the cuff so it should end up on the outside after you create the seam.
- After making the seam of the bottom of the cuff, put it on your leg first to check the fit before you fasten off. You can easily pull out the seam if you need to add or delete any rows to make a better fit.
- The first stitch of each row is always done in the same stitch as the chain-1/chain-2 unless otherwise stated (the chain-1/chain-2 does not count as a stitch, so don’t skip the first stitch of the row).
*** In making this pattern, I found a good formula that worked for me for sizing was measuring around the widest part of my leg where I wanted the cuff to sit, and then making the bottom of the cuff about 2½ inches shorter (since it stretches). Of course, everyone’s preference of fit differs, so you will always want to check your sizing as you work. ***
DIRECTIONS (**MAKE 2**)
*Below is the general pattern for the fur-top boot cuff that can be used for any size/leg placement.
Bottom of Boot Cuff
***Use a 5.50mm crochet hook for the bottom of the boot cuff***
REMINDER: Make sure to check for proper fit as you work the bottom of the cuff so you know when to stop.
HINT: When measuring your leg/checking the fit, make sure to do it while wearing the pants you plan to wear with your boot cuffs to accommodate for the extra fabric.
Row 1: With your worsted weight yarn, ch 18, sc in 2nd ch from hook and in each ch across. (17 sc)
Row 2: Ch 2, turn, dc in front loop only of each st across. (17 dc)
Row 4: Ch 2, turn, dc in front loop only of each st across. (17 dc)
Rows 5 – Last EVEN-Numbered Row: [Repeat Rows 3–4] as many times as needed until you reach your desired length; do not fasten off at the end of your last (even-numbered) row. Follow the directions below to create the seam of the cuff.
Seam of Bottom of Boot Cuff
You will be slip-stitching the stitches from your last row to the chain stitches from the starting chain to create the seam. See below for further instructions.
With the wrong side of the cuff out (and the right side in), fold the boot cuff in half so that the dc stitches from your last row line up with the chain stitches from the starting chain of Row 1. Make sure to line them up so each chain stitch has a matching dc stitch from your last row. In order to create the seam, you will attach the ends together using slip stitches. Slst each chain stitch together with its matching dc stitch. In order to begin the seam, use the loop left from your last row and pull it through its corresponding chain stitch. Join each pair of stitches together with a slst across the entire row so that you end up with 17 slsts which create the seam. Fasten off and weave in the loose ends once you have determined the cuff fits properly.
***Turn your work right-side out before starting the fur top.***
Fur Top of Boot Cuff
***Use a 10.00mm crochet hook for the fur top of the boot cuff.***
Choose one of the open ends of the cuff you just made to be the top of the cuff where you will attach the fur yarn. You will be working around that edge to create the fur top.
NOTE: You will not be working in the usual (top) part of stitches (the top two loops) while making the fur top of the cuff because the top edge of the cuff is actually the side of the stitches and not the top of the stitches. You will simply need to work your stitches evenly around in the spaces along the edge. You should be placing about one stitch per row of the bottom of the cuff.
Round 1: Using a 10.00mm hook, attach the fur yarn to the top edge of the cuff near the seam, ch 2, dc evenly around the top edge (placing a stitch about every row), join to first dc with slst, fasten off, weave in loose ends. You should have about the same number of fur dc stitches as the number of rows you had for the bottom of the cuff.
Once you have made both of your fur-topped boot cuffs, wear them with your boots for a luxurious look!!!

This post contains sponsored and/or affiliate links
The pattern and photos of this item are the property of TheCrafterLife. This pattern and design are subject to copyright, and are for personal, non-commercial use only. You may not distribute, sell this pattern, or claim it as your own under any circumstances.
You may not sell my patterns or claim them as your own. You may make items to sell (i.e. on Etsy) from my patterns but I ask that you link back to my site and provide credit for the pattern. You are welcome to share my patterns on social media as long as you link back directly to my site by providing the link. No copying and pasting of any patterns will be allowed under any circumstances.

DIY Painted Sign