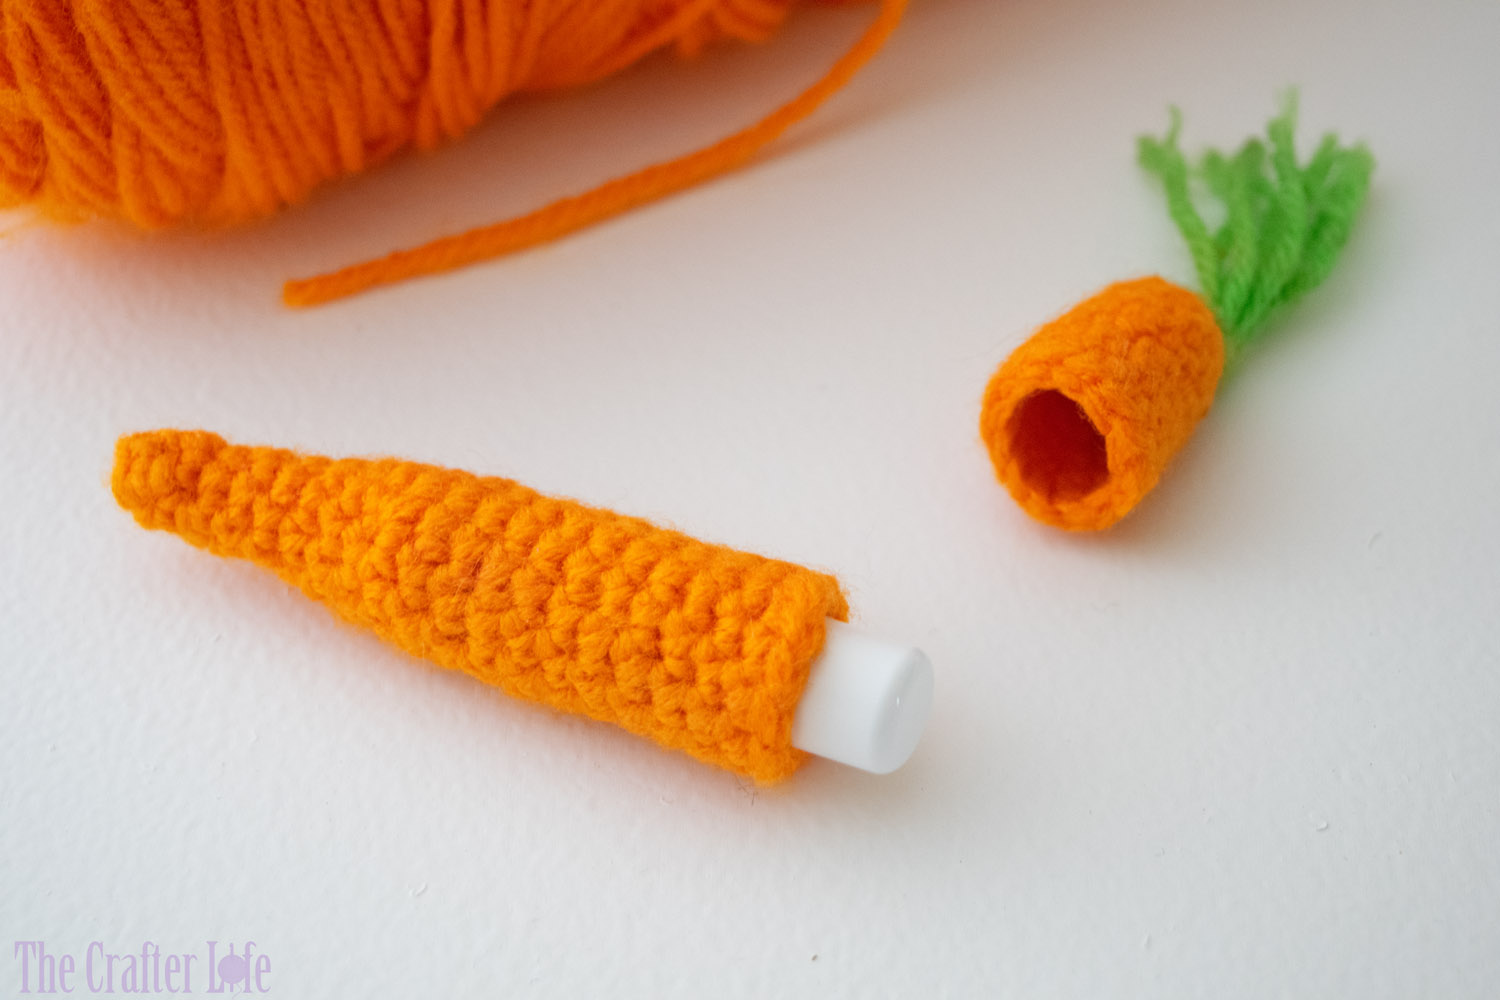
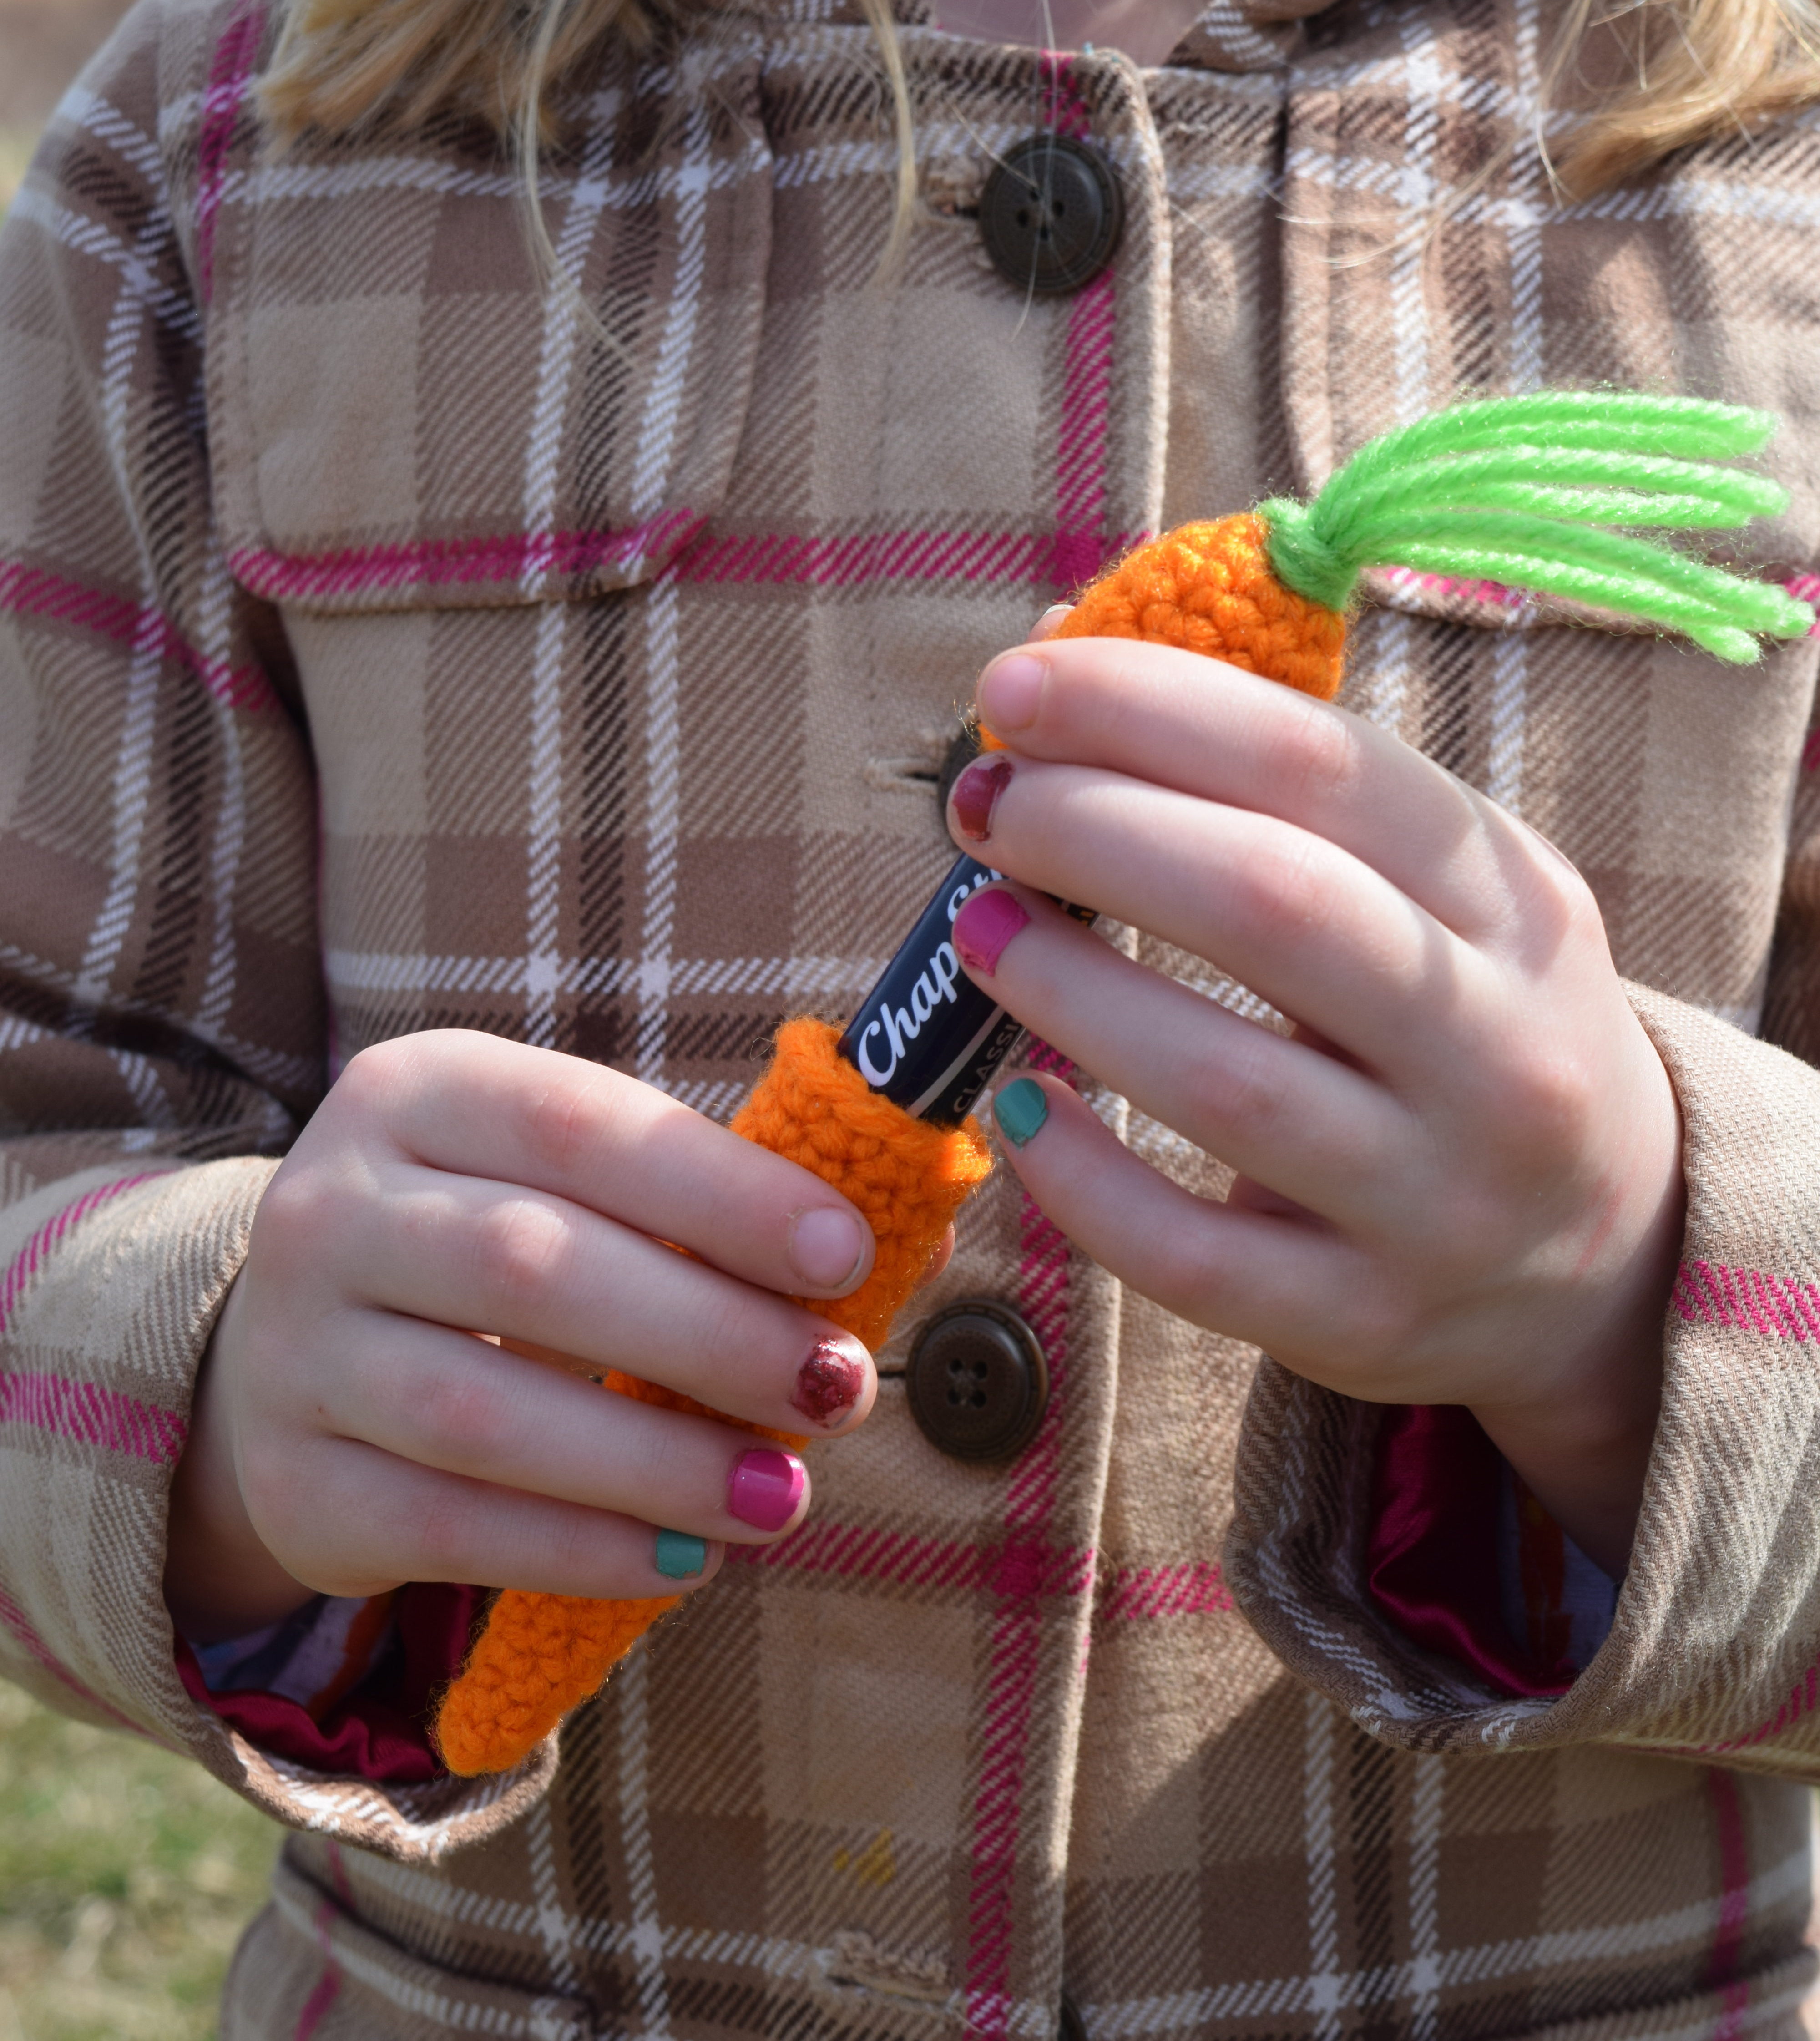
Carrot Lip Balm Holder
My carrot lip balm/gift holder fits perfectly in any Easter basket! It is a quick and fun project to make! Like a plastic Easter egg, it can also be used to hold other small gifts like candy and money. An ideal basket stuffer! The pattern can be found below. If you enjoy this pattern, check out my candy cane lip balm/gift holder.
Ad-Free, large-print PDF with detailed pattern instructions that includes pictures and additional tips available on Etsy
Carrot Lip Balm Holder
This carrot lip balm holder is written to fit standard size sticks of lip balm. It can also be used as a money gift holder as well (just roll the bills).
Ad-Free, large-print PDF with detailed pattern instructions that includes pictures and additional tips available on Etsy
FINISHED MEASUREMENTS
The carrot is approximately 5 inches long (not including the green strands at the top) and approximately 3 inches around where the lip balm sits.
Alone, the top piece of the carrot 1¼” long (not including the strands) and the bottom piece is 3¾” long.
MATERIALS
– Size F/5/3.75mm crochet hook or size needed to obtain gauge
– Worsted weight (4) yarn in Orange (I used Red Heart Super Saver yarn in Pumpkin.)
– Worsted weight (4) yarn in Green (I used Red Heart Super Saver yarn in Spring Green.)
– Scissors
– Tapestry needle
– Measuring tape
Optional Items:
– Stitch markers (if needed for marking stitches/rows)
ABBREVIATIONS
– ch = chain
– chs = chains
– sc = single crochet
– slst = slip stitch
– st = stitch
– sts = stitches
GAUGE
5 sc = 1 inches; 6 rounds = 1 inch

PATTERN NOTES
- The carrot is made in continuous rounds. Do not join round with a slip stitch unless otherwise indicated.
- Close the magic ring and weave in the loose end at the beginning since it gets very narrow as you work and it will be difficult to weave in at the end.
Ad-Free, large-print PDF with detailed pattern instructions that includes pictures and additional tips available on Etsy
DIRECTIONS
Bottom of Carrot (Large Pointed Section)
*The bottom is made in continuous rounds.
*Use your orange worsted weight yarn.
Round 1: Make a magic ring, ch 1, work 4 sc in magic ring, pull ring closed.
Round 2: Sc in each st around.
Round 3: Sc in each st around.
Round 4: 2 sc in first st, sc in next st, 2 sc in next st, sc in next st.
Round 5: Sc in each st around.
Round 6: Sc in each st around.
Round 7: 2 sc in first st, sc in next 2 sts, 2 sc in next st, sc in next 2 sts.
Round 8: Sc in each st around.
Round 9: Sc in each st around.
Round 10: 2 sc in first st, sc in next 3 sts, 2 sc in next st, sc in next 3 sts.
Round 11: Sc in each st around.
Round 12: Sc in each st around.
Round 13: 2 sc in first st, sc in next 4 sts, 2 sc in next st, sc in next 4 sts.
Round 14: Sc in each st around.
Round 15: Sc in each st around.
Round 16: Sc in each st around.
Round 17: Sc in each st around.
Round 18: Sc in each st around.
Round 19: Sc in each st around.
Round 20: Sc in each st around, slst to first st of round, fasten off, weave in end.
***You should now have the main portion of your carrot complete. Follow the directions below to make the top/lid of the carrot.
Top/Lid of Carrot
*The carrot top is also made in continuous rounds.
*Use your orange worsted weight yarn.
Round 1: Make a magic ring, ch 1, work 6 sc in magic ring, pull ring closed.
Round 2: 2 sc in each st around.
Round 3: Sc in each st around.
Round 4: Sc in each st around.
Round 5: Sc in each st around.
Round 6: Sc in each st around.
Round 7: Sc in each st around.
Round 8: Sc in each st around, slst to first st of round, fasten off, weave in end.
Ad-Free, large-print PDF with detailed pattern instructions that includes pictures and additional tips available on Etsy
**You should now have a completed orange top to your carrot. Follow the directions below to attach the green strands on the top.
Attaching Green Strands to Carrot Top
- Cut 4 strands of green yarn that are each 6 inches long.
- Holding the green strands together, fold them in half.
- Insert your hook under the closed magic ring (first round) of the carrot top and pull through a loop (the fold of the green strands). Bring the ends of the green strands through the loop and pull tightly against the top of the carrot. The green strands should now be attached to the carrot top.
- Trim the green strands so they are even.
**You should now have both pieces (carrot bottom and top) of your lip balm/gift holder complete. Try it out!

The pattern and photos of this item are the property of TheCrafterLife. This pattern and design are subject to copyright, and are for personal, non-commercial use only. You may not distribute, sell this pattern, or claim it as your own under any circumstances.
You may not sell my patterns or claim them as your own. You may make items to sell (i.e. on Etsy) from my patterns but I ask that you link back to my site and provide credit for the pattern. You are welcome to share my patterns on social media as long as you link back directly to my site by providing the link. No copying and pasting of any patterns will be allowed under any circumstances.
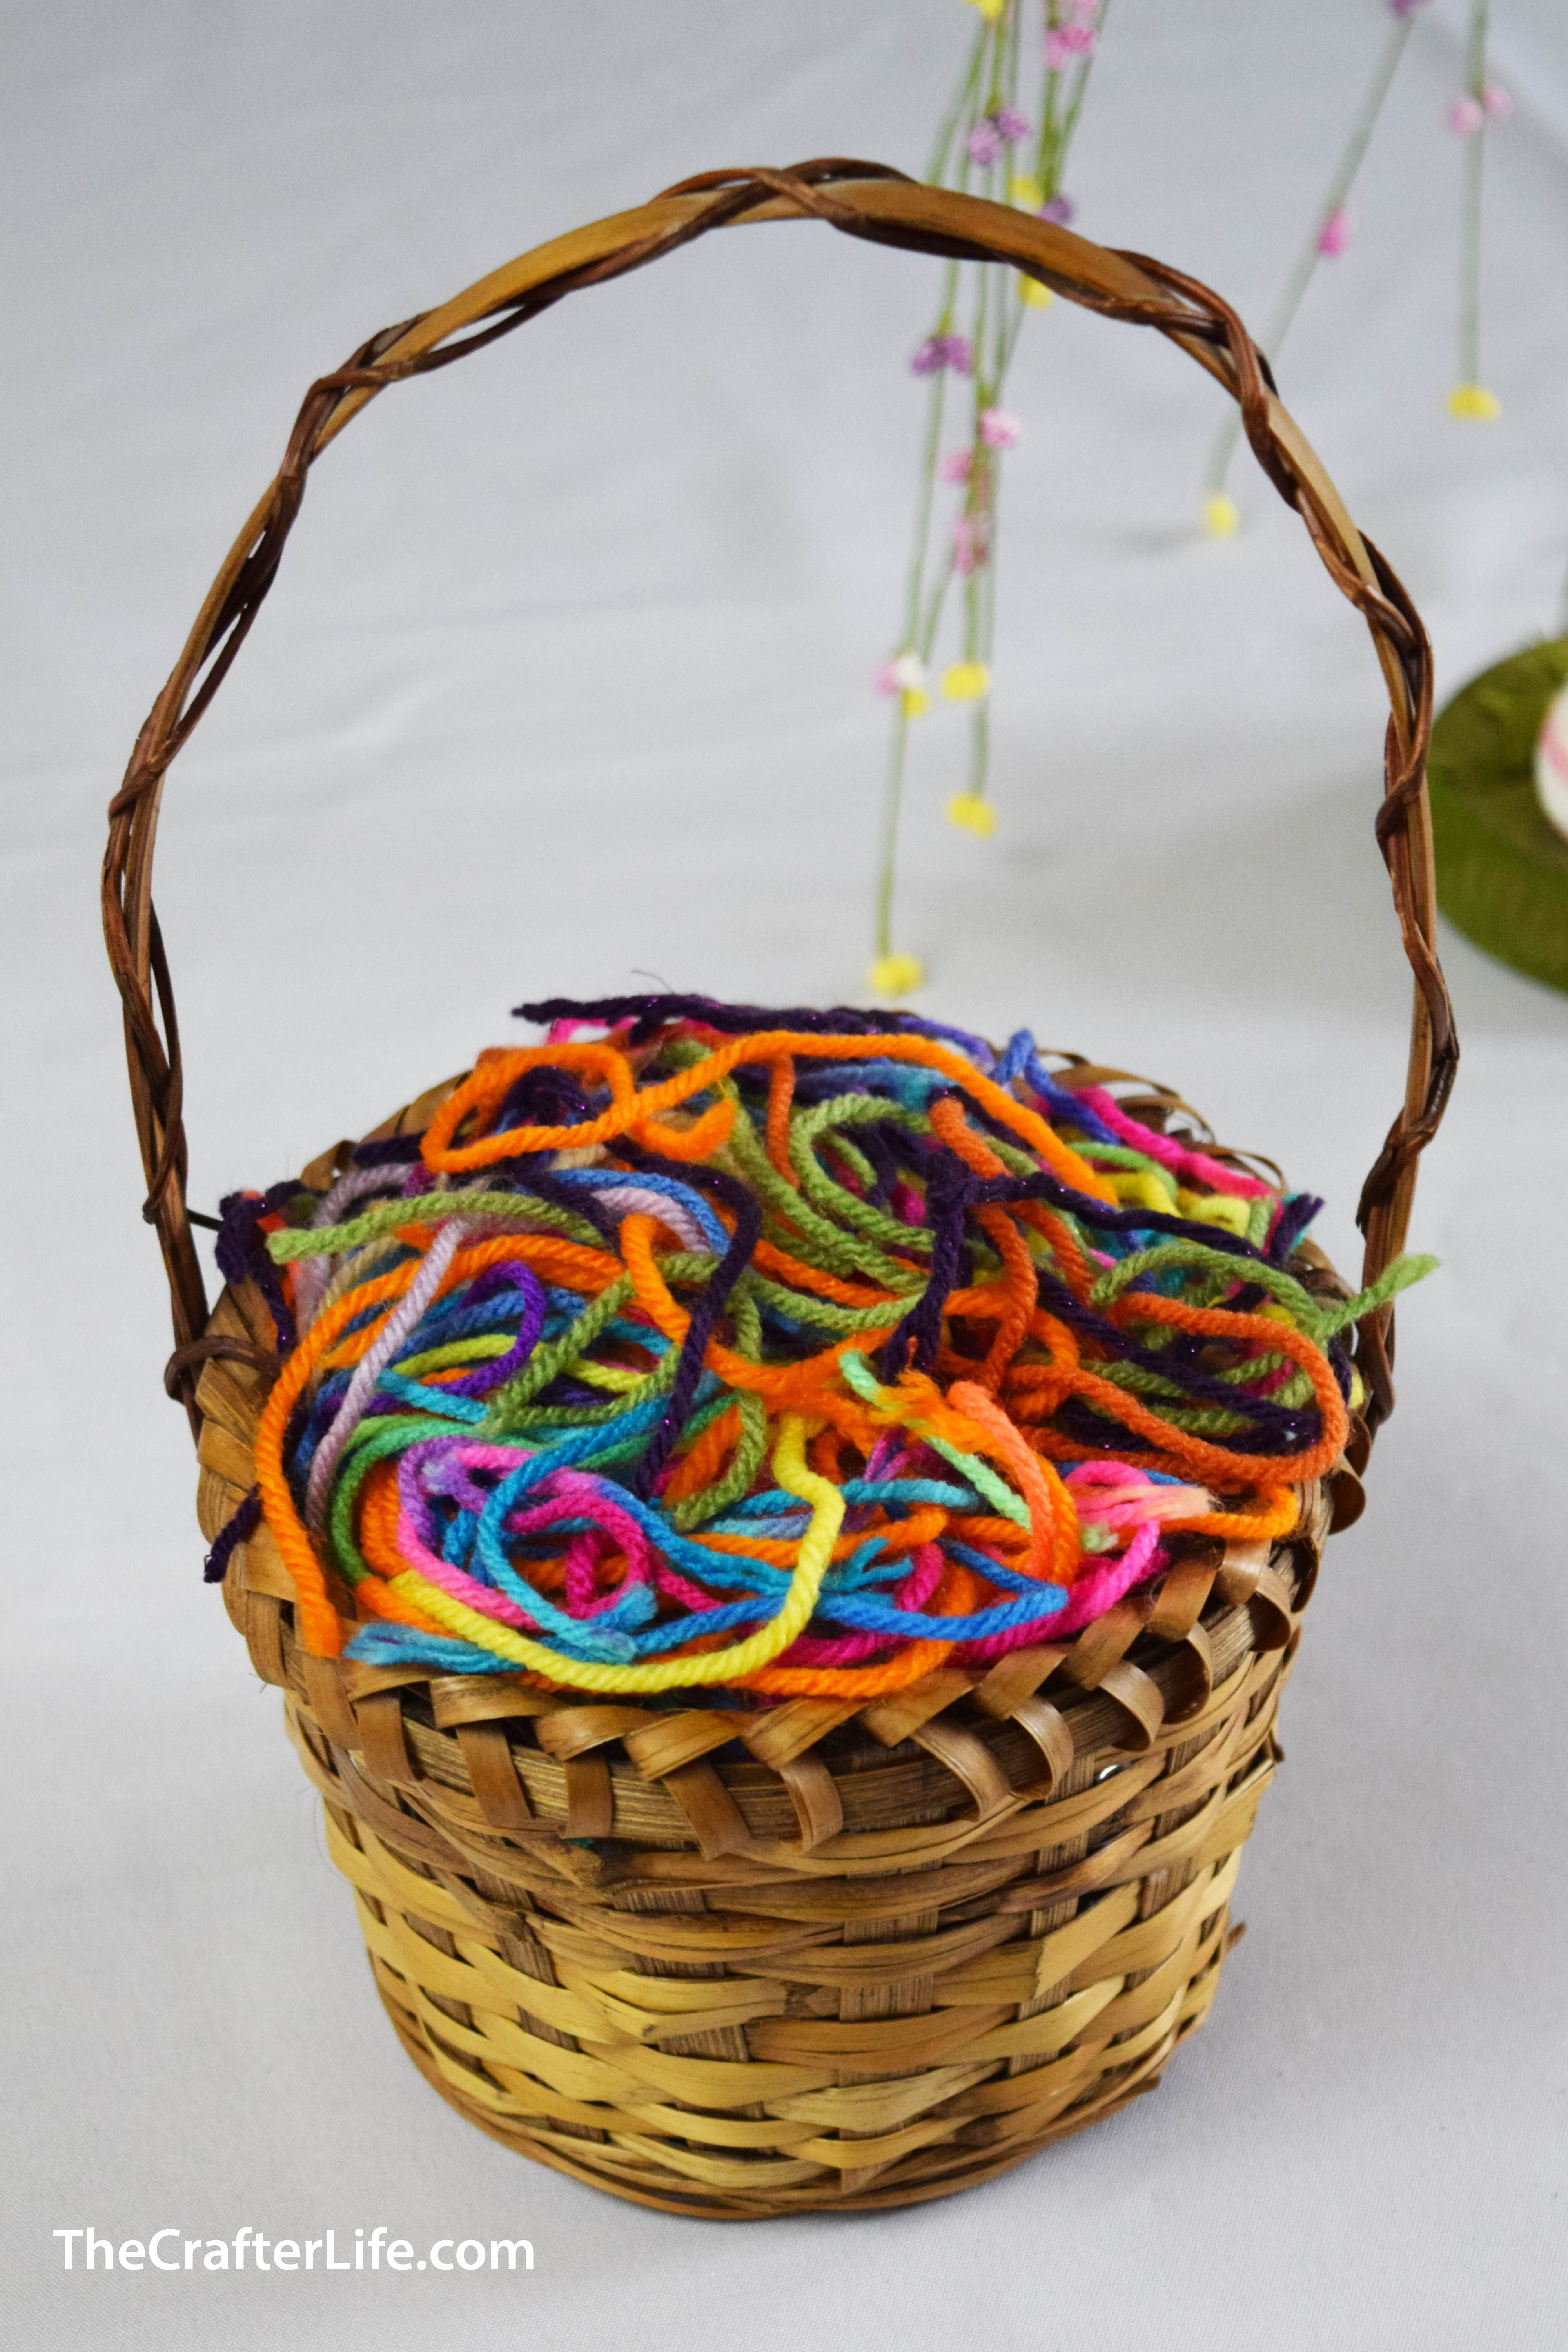
**A totally fun and creative way to use your scrap yarn! Gather up all your scrap yarn and cut them into smaller pieces to use as Easter Basket grass.**