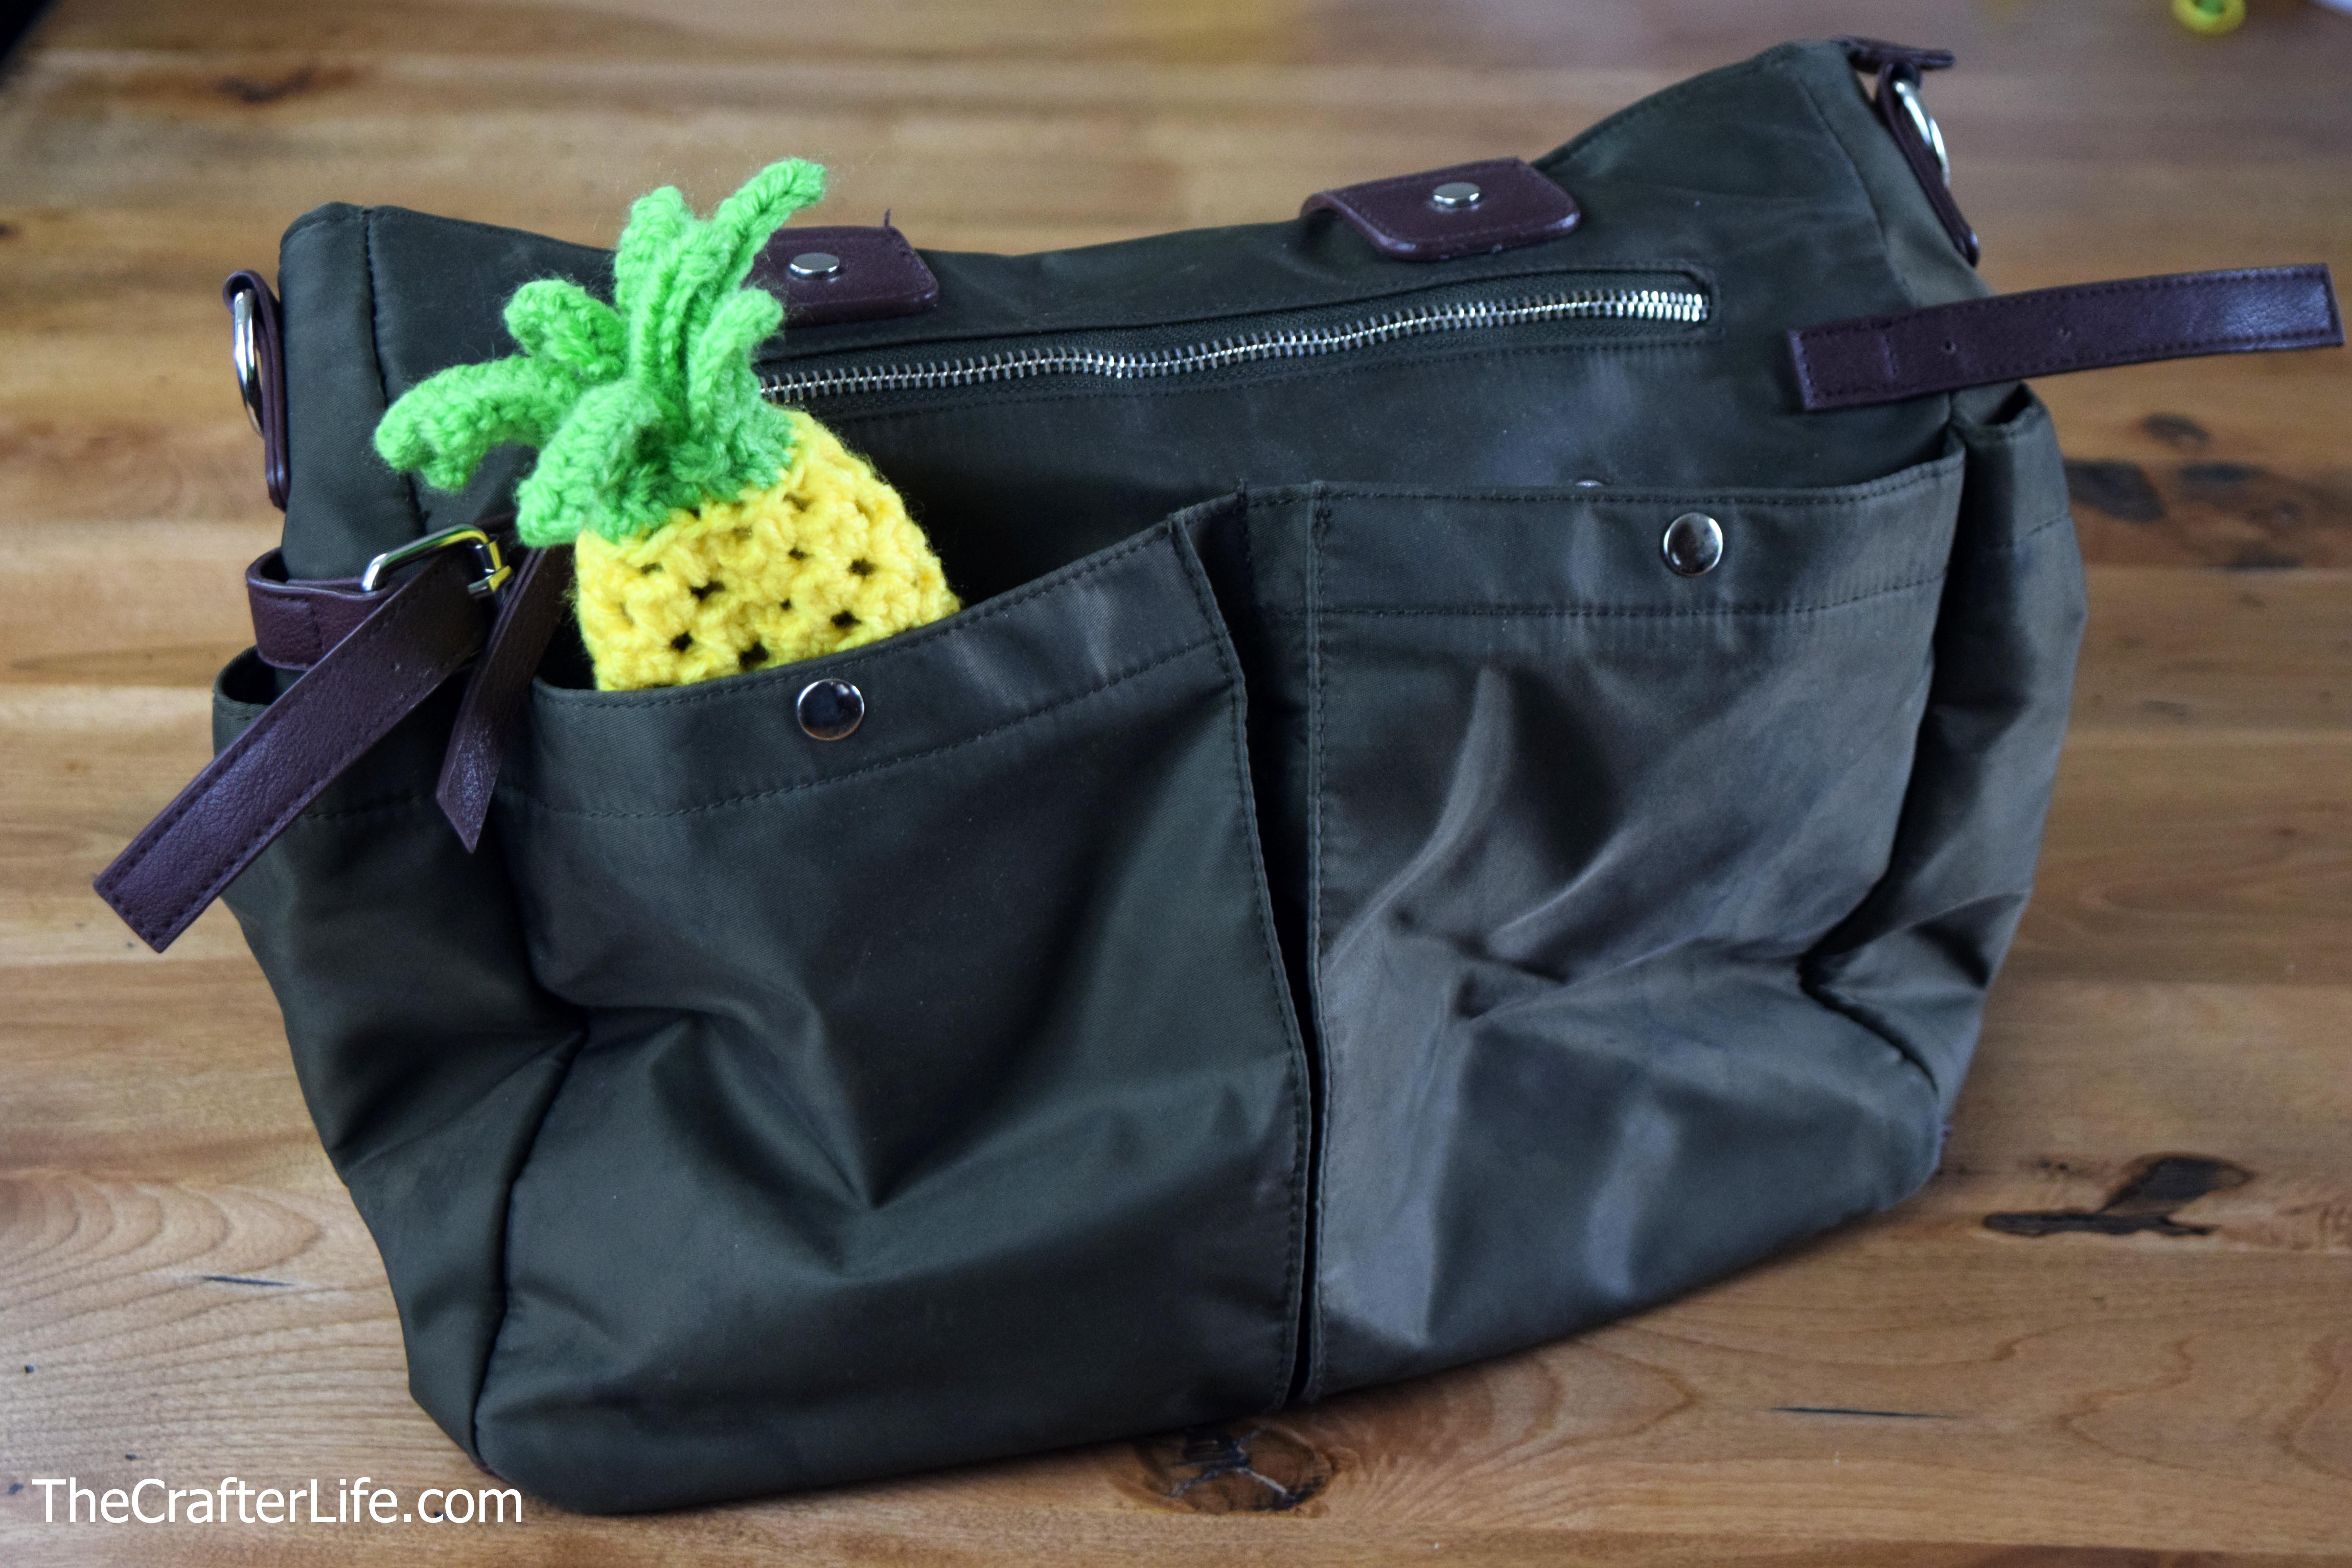
Pineapple Drawstring Sunglass Bag
Get ready for some fun in the sun this summer! If you are like me, I often lose my sunglasses in my purse. I thought I would make a bright bag to hold them so they are easier to find. I thought a pineapple bag would be sweet for summer and the bright yellow color would be hard to miss! I added a drawstring so it can close and easily be attached to a purse or hook. If you are interested in making one for yourself or as a fun gift, see below for my pattern.
Pineapple Drawstring Sunglass Bag
This sunglass bag pattern is written to hold most adult-size sunglasses. Smaller sunglasses will also fit inside the bag.
FINISHED MEASUREMENTS
The pineapple bag is approximately 7½ inches long and 8 inches around (circumference). It has a diameter of about 2½ inches.
MATERIALS
– Size H/8/5.00mm crochet hook or size needed to obtain gauge
– Worsted weight (4) yarn in Yellow (I used Red Heart Super Saver in Bright Yellow.)
– Worsted weight (4) yarn in Green (I used Red Heart Super Saver in Spring Green.)
– Tapestry needle for weaving in ends and drawstring
– Scissors
– Measuring Tape
Optional Items:
– Stitch markers (if needed for marking/counting stitches or rounds)
Ad-Free, large-print PDF with detailed pattern instructions that includes pictures and additional tips available on Etsy
ABBREVIATIONS
– ch = chain
– ch sp = chain space
– chs = chains
– hdc = half double crochet
– hdc2tog = half double crochet 2 together (half double crochet decrease)
– sk = skip
– slst = slip stitch
– sp = space
– st = stitch
– sts = stitches
SPECIAL STITCHES
– hdc2tog (hdc decrease): Yarn over, insert your hook under the first stitch, yarn over and pull up a loop (you should now have 3 loops on your hook). Then, yarn over and insert your hook under the next stitch, yarn over, and pull up a loop (you should now have 5 loops on your hook). With five loops now on your hook, yarn over and pull through all five loops.
***In Row 17 of this pattern, the hdc2tog stitch will be done with a chain space and a half double crochet stitch. You follow the same steps for the hdc2tog stitch, but you are decreasing using two different types of stitches (the chain space and the hdc). See below for the specific steps for when you see “hdc2tog(next ch sp and next hdc)” in the pattern.
***hdc2tog(next ch sp and next hdc): Yarn over, insert your hook under the next chain space, yarn over and pull up a loop (you should now have 3 loops on your hook). Then, yarn over and insert your hook under the top two loops of the next half double crochet stitch, yarn over and pull up a loop (you should now have 5 loops on your hook). With 5 loops on your hook, yarn over and pull through all 5 loops.
GAUGE
4 hdc = 1 inch; 3 rounds = 1 inch
Ad-Free, large-print PDF with detailed pattern instructions that includes pictures and additional tips available on Etsy
PATTERN NOTES
- The yellow body of the pineapple bag is made first with joined rounds. Each round is completed with a slip stitch to the first stitch of the round (do not count the slip stitch used to join each round as a stitch).
- The pineapple’s appearance is created by alternating a set of 2 half double crochet stitches with a chain stitch. The half double crochet stitches are actually placed in the chain spaces (space created by the chain between the sets of half double crochet stitches) rather than the loops of the stitches like normally done.
- The first stitch of each round is made in the very first stitch of the previous round (the same stitch in which the join/slip stitch and ch-1 was made).
- Brackets [ ] indicate a series of stitches to be repeated.

DIRECTIONS
Yellow Pineapple Body
*The pineapple sunglass bag is made starting with the yellow closed end (the bottom of the pineapple).
*Use your yellow worsted weight yarn to begin the first round.
*Make sure to pull the magic ring closed and weave in/secure end at closure at the beginning.
Round 1: Make a magic ring, ch 1, work 10 hdc in magic ring, pull ring closed, join to first hdc with a slst. (10 hdc)
Round 2: Ch 1, 2 hdc in each st around, join to first hdc with a slst. (20 hdc)
Round 3: Ch 1, 2 hdc in first st, ch 1, sk next st, repeat [2 hdc in next st, ch 1, sk next st] around, join to first hdc with a slst. (20 hdc, 10 chs; 30 total sts)
Round 4: Ch 2 (the second ch is actually considered the first st of the round), sk first 2 sts, 2 hdc in first ch sp, repeat [ch 1, sk next 2 sts, 2 hdc in next ch sp], around, join to first st (which is the 2nd ch from ch-2 at beginning of round) with a slst. (10 chs, 20 hdc; 30 total sts)
Round 5: Ch 1, 2 hdc in first ch sp, ch 1, sk next 2 sts, repeat [2 hdc in next ch sp, ch 1, sk next 2 sts] around, join to first hdc with a slst. (20 hdc, 10 chs; 30 total sts)
Rounds 6–15: [Repeat Rounds 4–5] 5 times.
Round 16: Repeat Round 4.
Round 17: Ch 1, hdc2tog(first ch sp and first hdc), ch 1, sk next st, repeat [hdc2tog(next ch sp and next hdc), ch 1, sk next st] around, join to first st with a slst, fasten off, weave in loose ends. (10 hdc2tog, 10 chs; 20 total sts)
Join green yarn to the back loop only of the first stitch of Round 17. Then, continue following the pattern starting from Round 18, below.
Round 18: Ch 1, hdc in back loop only of first st, hdc in back loops only of remaining 19 stitches, join to the back loop only of the first hdc with a slst. (20 hdc)
Round 19: Repeat [Ch 10, hdc in 2nd ch from hook and in next 8 chs, slst to back loop only of next stitch of Round 18, slst to front loop only of next st of Round 18, ch 7, hdc in 2nd ch from hook and in next 5 chs, slst to front loop only of next st of Round 18, slst to back loop only of next st from Round 18] around, join to the back loop only of the first stitch, fasten off and weave in loose ends. (5 long leaves, 5 short leaves; 10 total leaves)
Attaching the Drawstring
- Cut a strand of green yarn that is about 20 inches long.
- Thread the strand of green yarn through your tapestry needle and insert the needle from the inside of the bag to the outside under the back loop of the first stitch of Round 18 (where the first tall leaf begins). Pull the yarn through until you have a tail of about 3 inches left on the inside of the bag.
- Skip the back loop of the next stitch and bring your needle/pull your yarn through the front loop of the third stitch of Round 18 where the first short leaf begins (from the outside to the inside of the bag).
- Skip the front loop of the next stitch and bring your needle under the back loop of the fifth stitch of Round 18 where the next tall leaf begins (from the inside of the bag to the outside). Continue following this pattern by weaving the strand of yarn in and out of every other stitch from Round 18 until you bring your yarn through the 19th stitch of Round 18. Then, simply bring your needle back out through the 20th stitch and back down into the 1st stitch where your other tail is. You should have both tails hanging from the first stitch of Round 18 inside the bag.
- Make sure the pineapple bag is open and not pulled closed. Hold both loose ends of the drawstring together, loop them around your finger and pull the tails through the loop to create a knot. Make the knot as close to the open edge of the bag on the inside as possible. You want to make at least a double knot, so repeat the process of looping the two strands around your finger and pulling through the ends to make the knot larger. Once you have a decent/secure knot, cut the two tails pretty close to the knot.
- Test the drawstring by pulling it to close the bag. The drawstring should now be a loop that you can use for holding or attaching to something.

***Once you are finished with the drawstring, you are now ready to use your sunglass bag. Place your favorite pair of sunglasses inside the bag for a totally unique way of carrying them.
Ad-Free, large-print PDF with detailed pattern instructions that includes pictures and additional tips available on Etsy
If you like my Pineapple Drawstring Sunglass Bag, check out my Bee Drawstring Sunglass Bag on Itchinforsomestitchin where I posted as a guest designer!


The pattern and photos of this item are the property of TheCrafterLife. This pattern and design are subject to copyright, and are for personal, non-commercial use only. You may not distribute, sell this pattern, or claim it as your own under any circumstances.
You may not sell my patterns or claim them as your own. You may make items to sell (i.e. on Etsy) from my patterns but I ask that you link back to my site and provide credit for the pattern. You are welcome to share my patterns on social media as long as you link back directly to my site by providing the link. No copying and pasting of any patterns will be allowed under any circumstances.