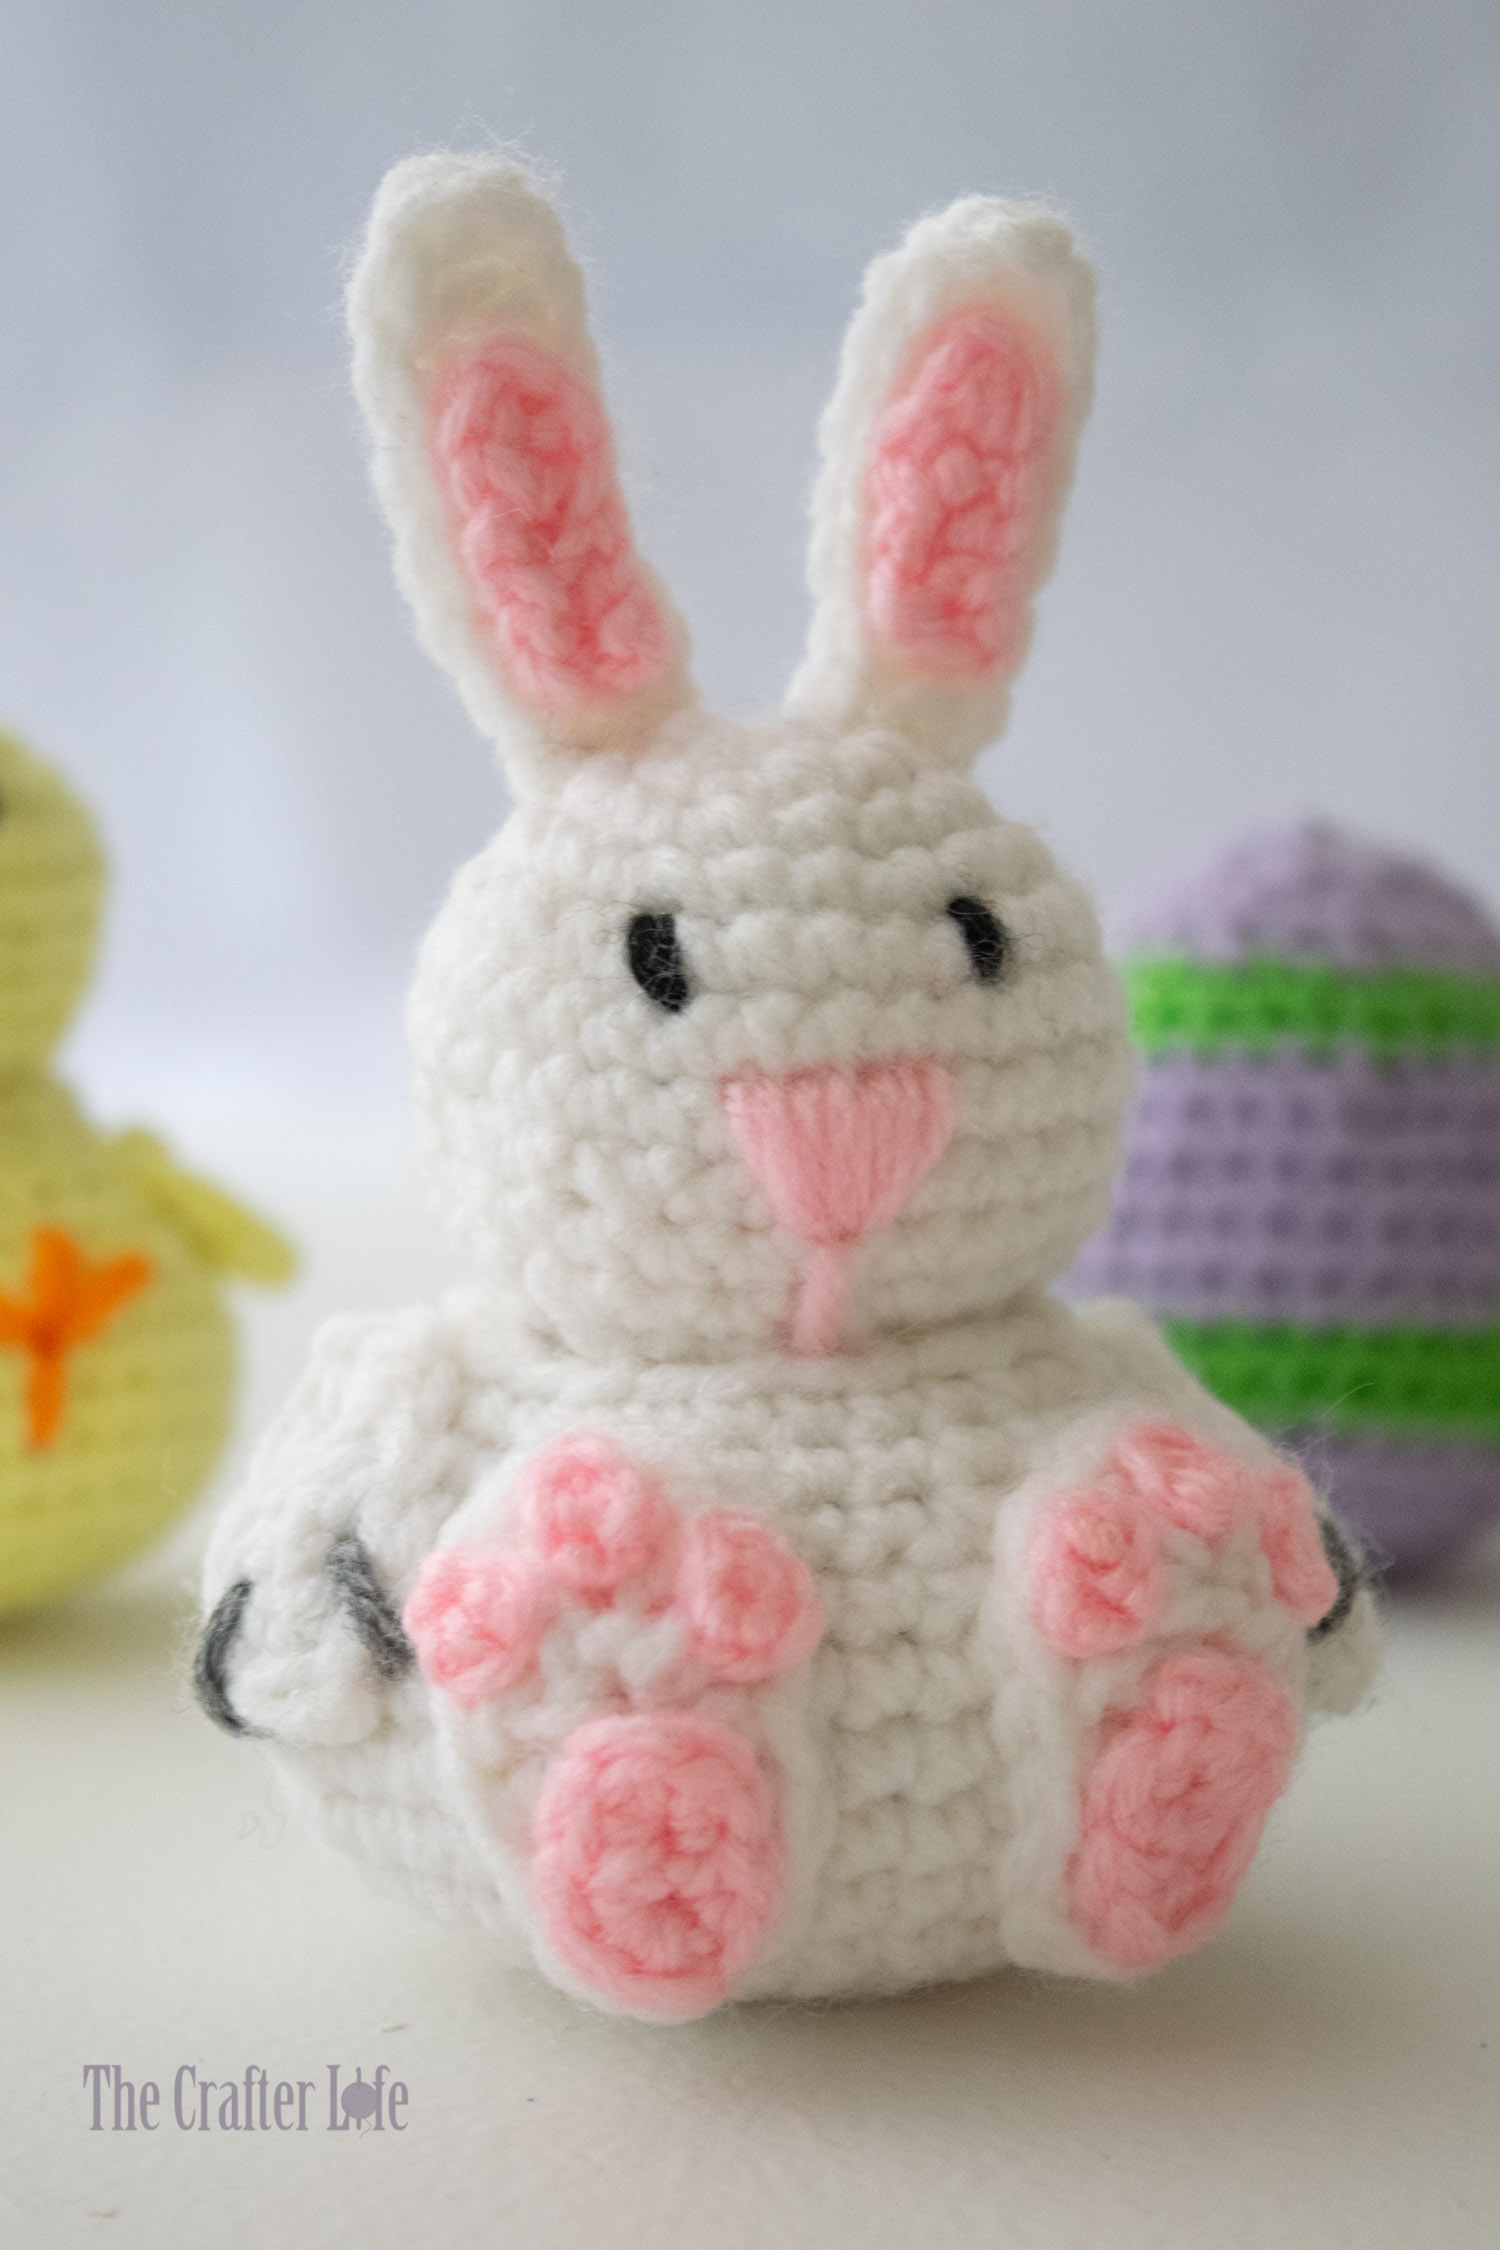
Butterball Baby: Hops the Bunny
Butterball Baby: “Hops” the Bunny
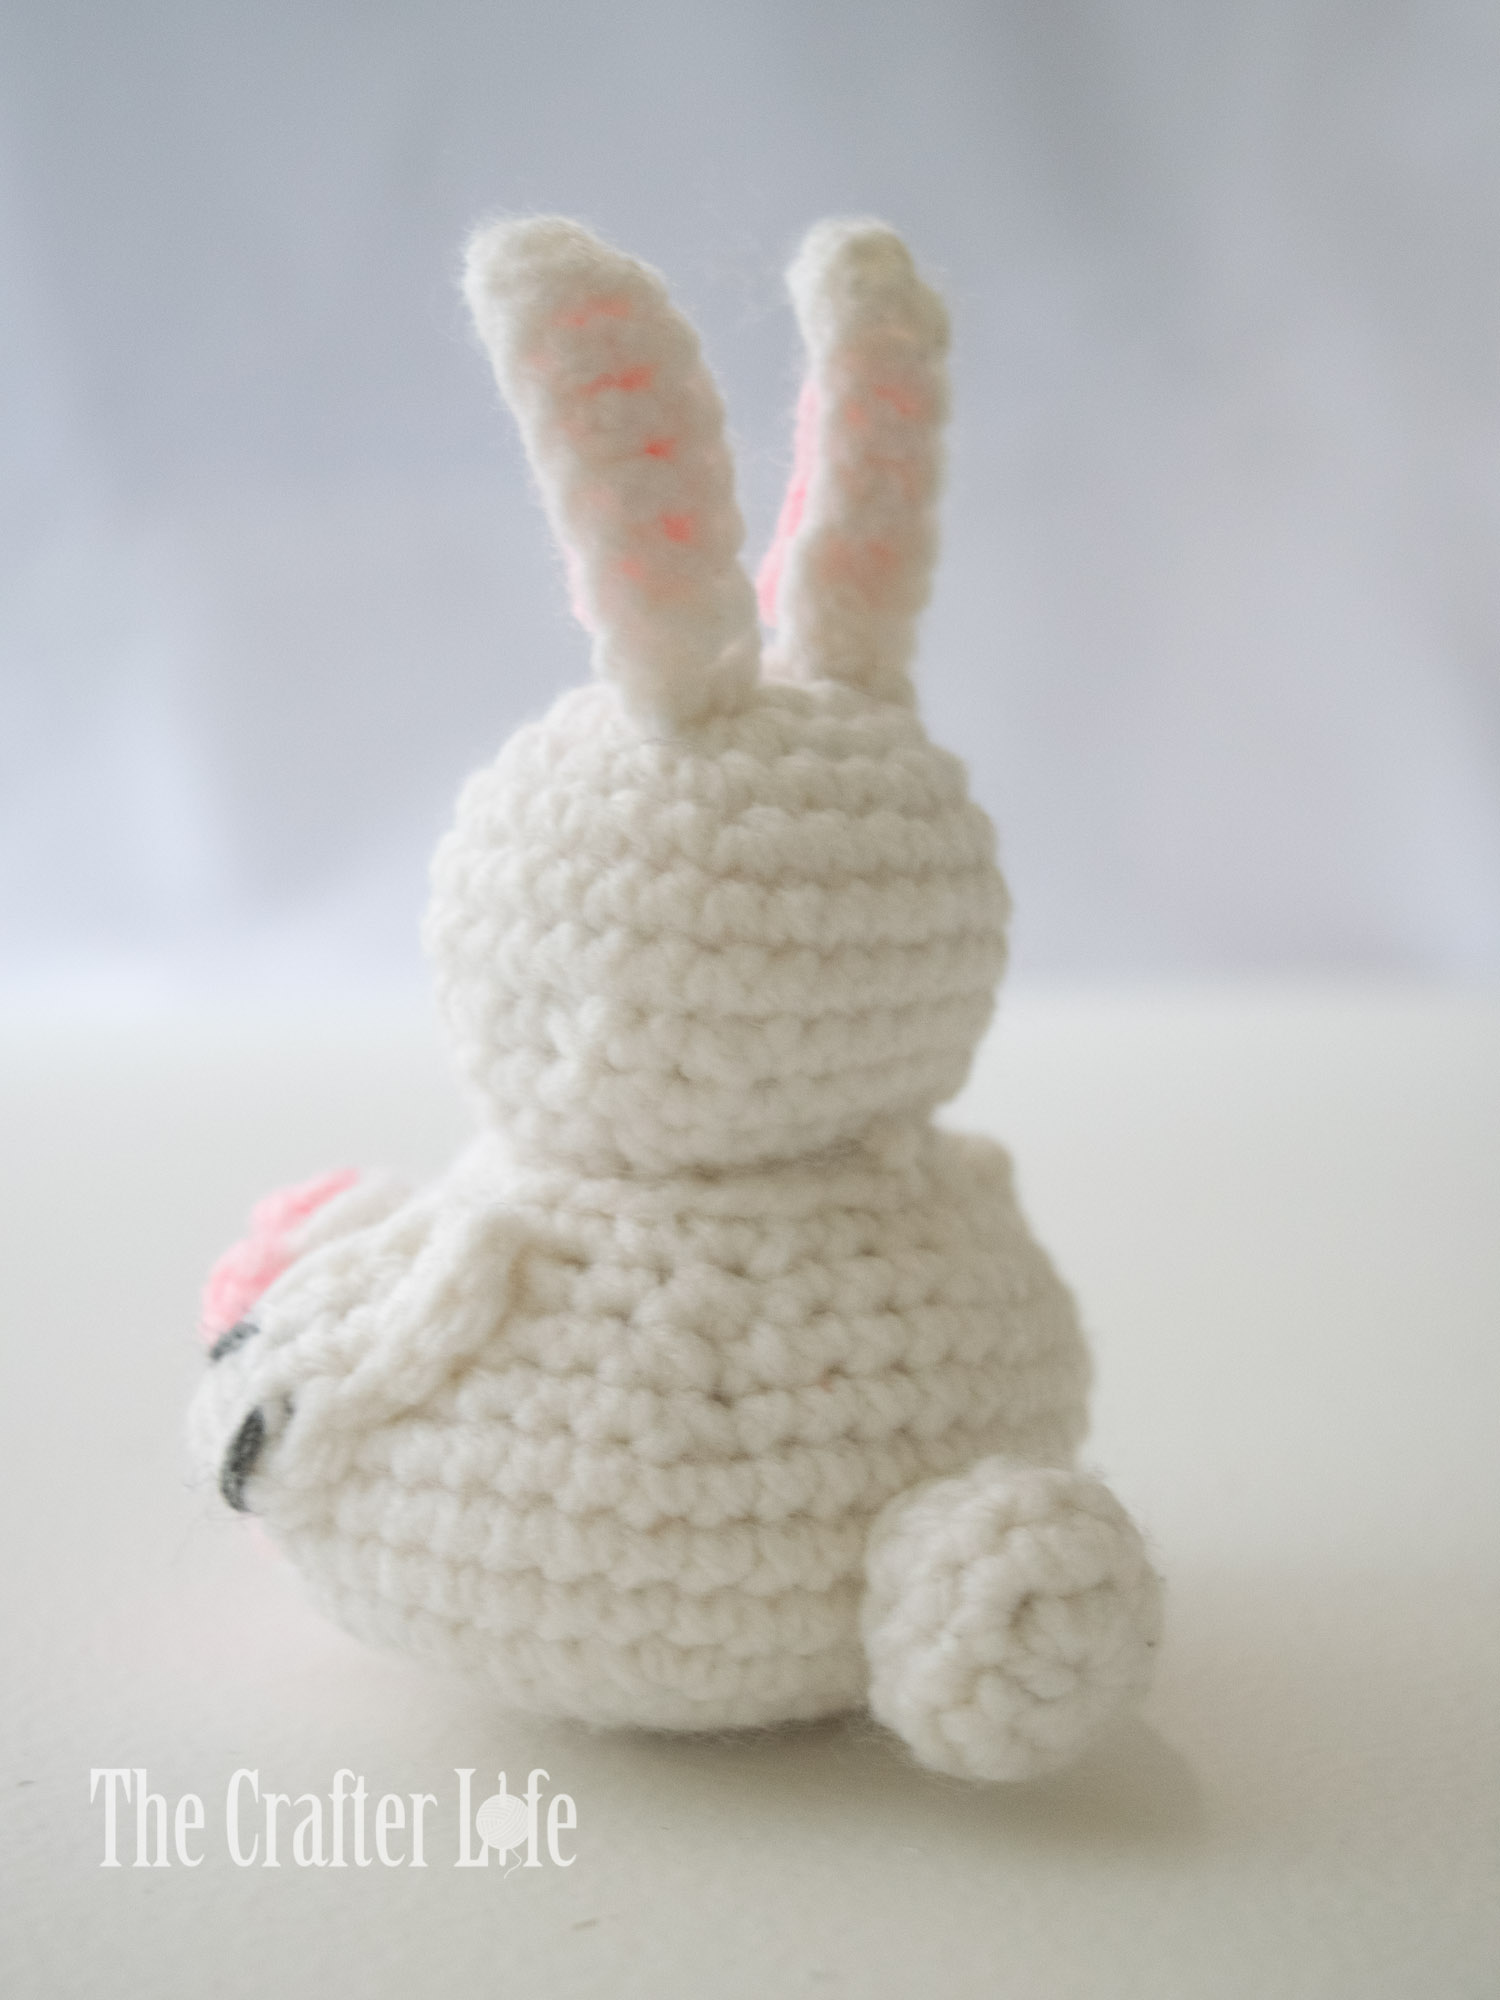
Hops the Bunny, complete with his cottontail, is my newest crochet Butterball Baby! Debuting just in time for Easter and the perfect friend to hang out with Coops, Hops can’t wait to be your next crochet project! Hops fits perfectly inside any Easter Basket – I made this Butterball Bunny to give along with Coops to my baby girl for Easter. Hops would also make a cute spring decoration! See below if you are interested in my crochet pattern so you can make Hops for yourself or for someone else. Hops would also be fun to make in different colors!!!
FINISHED MEASUREMENTS
The baby bunny is about 5 inches tall (measuring from the very bottom all the way to the top top of the ears) and 3 inches wide across the front (about 9 inches around the widest part of the body).
MATERIALS
– Size 4.00 mm crochet hook or size needed to obtain gauge
– Worsted weight (4) acrylic yarn in Main Color Choice (I used Red Heart Super Saver yarn in White.)
– Worsted weight (4) acrylic yarn in Nose/Paw Pad/Inner Ear Color Choice (I used Red Heart Super Saver Yarn in Baby Pink.)
– Worsted weight (4) acrylic yarn in Eye Color Choice (I used Red Heart Super Saver Yarn in Black.)
– Worsted weight (4) acrylic yarn in “Front Paw Line” Color Choice (I used Red Heart Super Saver Yarn in Gray Heather.)
– Fiberfill
– Scissors
– Tapestry needle for weaving in ends
– Stitch markers
– Measuring tape
ABBREVIATIONS
– ch = chain
– chs = chains
– dc = double crochet
– hdc = half double crochet
– sc = single crochet
– sc2tog = single crochet 2 together (single crochet decrease)
– slst = slip stitch
– st = stitch
– sts = stitches
GAUGE
3 sc = ½ inch
3 rounds of sc = ½ inch
PATTERN NOTES
- The body and head of the baby bunny are made separately, each in continuous rounds. Do not join continuous rounds unless otherwise stated. Simply work the first stitch of each round in the first stitch of the previous round. Attach a stitch marker to mark rounds and move marker as you complete each round.
- Brackets [ ] indicate portions of the pattern to be repeated.
DIRECTIONS
Body of Bunny
*Use your 4.00 mm hook and main color worsted weight yarn (I used white) to complete the body of the bunny.
*The bunny body is worked in continuous rounds. Work first stitch of round in first stitch of previous round. Use a stitch marker if needed.
*Make sure to pull the magic ring closed and weave in/secure end at closure at the beginning. This is because it will be harder to do later once the body gets larger.
Round 1: Make a magic ring, ch 1, work 6 sc in the ring, pull ring closed. (6 sc)
Round 2: Work 2 sc in each st around. (12 sc)
Round 3: 2 sc in next 3 sts, sc in next 3 sts, 2 sc in next 3 sts, sc in next 3 sts. (18 sc)
Round 4: Sc in first st, 2 sc in next st, sc in next 2 sts, 2 sc in next st, sc in next 2 sts, 2 sc in next st, sc in next 2 sts, 2 sc in next st, sc in next 2 sts, 2 sc in next sts, sc in next 2 sts, 2 sc in next st, sc in next st. (24 sc)
Round 5: Sc in next 2 sts, 2 sc in next st, sc in next st, 2 sc in next st, sc in next st, 2 sc in next st, sc in next 7 sts, 2 sc in next st, sc in next st, 2 sc in next st, sc in next st, 2 sc in next st, sc in next 5 sts. (30 sc)
Round 6: Sc in next 3 sts, 2 sc in next st, repeat [sc in next 4 sts, 2 sc in next st] 5 times, sc in last st. (36 sc)
Round 7: Repeat [sc in next 3 sts, 2 sc in next st] 3 times, sc in next 9 sts, 2 sc in next st, sc in next 3 sts, 2 sc in next st, sc in next 3 sts, 2 sc in next st, sc in next 6 sts. (42 sc)
Rounds 8-10: Sc in each st around. (42 sc)
Round 11: Repeat [sc in next 3 sts, sc2tog] 3 times, sc in next 9 sts, sc2tog, sc in next 3 sts, sc2tog, sc in next 3 sts, sc2tog, sc in next 6 sts. (30 sc, 6 sc2tog; 36 total sts)
Round 12: Sc in next 3 sts, sc2tog, repeat [sc in next 4 sts, sc2tog] 5 times, sc in last st. (24 sc, 6 sc2tog; 30 total sts)
Round 13: Sc in next 2 sts, sc2tog, sc in next st, sc2tog, sc in next st, sc2tog, sc in next 7 sts, sc2tog, sc in next st, sc2tog, sc in next st, sc2tog, sc in next 5 sts. (18 sc, 6 sc2tog; 24 total sts)
Round 14: Sc in each st around, fasten off, leaving a really long tail for sewing the body to the heads. (24 sc)
**Make sure to weave in all loose ends except for the long tail you left at the end of Round 14.
Head of Bunny
*Use your 4.00 mm hook and main color worsted weight yarn (I used white) to complete the head of the bunny.
*The bunny head is worked in continuous rounds. Work first stitch of round in first stitch of previous round. Use a stitch marker if needed.
*Make sure to pull the magic ring closed and weave in/secure end at closure at the beginning. This is because it will be harder to do later once the head gets larger.
Round 1: Make a magic ring, ch 1, work 6 sc in the ring, pull ring closed. (6 sc)
Round 2: Work 2 sc in each st around. (12 sc)
Round 3: 2 sc in next 3 sts, sc in next 3 sts, 2 sc in next 3 sts, sc in next 3 sts. (18 sc)
Round 4: Sc in next st, 2 sc in next st, sc in next 2 sts, 2 sc in next st, sc in next 2 sts, 2 sc in next st, sc in next 2 sts, 2 sc in next st, sc in next 2 sts, 2 sc in next st, sc in next 2 sts, 2 sc in next st, sc in next st. (24 sc)
Round 5: Sc in next 2 sts, 2 sc in next st, sc in next st, 2 sc in next st, sc in next st, 2 sc in next st, sc in next 7 sts, 2 sc in next st, sc in next st, 2 sc in next st, sc in next st, 2 sc in next st, sc in next 5 sts. (30 sc)
Rounds 6-7: Sc in each st around. (30 sc)
Round 8: Sc in next 2 sts, sc2tog, sc in next st, sc2tog, sc in next st, sc2tog, sc in next 7 sts, sc2tog, sc in next st, sc2tog, sc in next st, sc2tog, sc in next 5 sts. (18 sc, 6 sc2tog; 24 total sts)
Round 9: Sc in each st around. (24 sc)
Round 10: Sc in next st, sc2tog, repeat [sc in next 2 sts, sc2tog] 5 times, sc in next st. (12 sc, 6 sc2tog; 18 total sts)
Round 11: Repeat [sc2tog] 3 times, sc in next 3 sts, repeat [sc2tog] 3 times, sc in next 3 sts, fasten off and weave in loose ends. (6 sc2tog, 6 sc; 12 total sts)
Ear of Bunny (Make 2)
*Use your 4.00 mm hook and main color worsted weight yarn (I used white) to complete the ears of the bunny.
Row 1: Ch 9, hdc in 2nd ch from hook, dc in next 4 chs, hdc in next 2 chs, sc in last ch, fasten off, leaving long tail for sewing ear onto head. (3 hdc, 4 dc, 1 sc; 8 total sts)
Inner Ear of Bunny (Make 2)
*Use your 4.00 mm hook and inner ear color worsted weight yarn (I used pink) to complete the inner ears of the bunny.
Row 1: Ch 6, sc in 2nd ch from hook, sc in next ch, slst in next 3 chs, fasten off, leaving long tail for sewing inner ear to ear. (2 sc, 3 slst; 5 total sts)
Ear Assembly
*Use your tapestry needle and long tail you left on the inner ear to assemble each ear.
- Each inner ear piece will be placed on the front of each ear piece. Position one of the inner ear pieces where you would like it on the front of one of the ear pieces (I tried to center the inner ear piece on the ear as best as I could). You may want to use pins to hold it in place.
- Using a tapestry needle and the tail you left on the inner ear piece, sew the inner ear piece to the front of the ear piece where you positioned it in Step 1. Make sure to keep your yarn between the inside of the inner ear piece and the main ear piece when sewing it so the inner ear color doesn’t show through on the back of the ear (do not run your yarn all the way through to the back of the ear piece). Once you have completely sewn the inner ear piece down to the front of the ear and you are satisfied with its position, secure your yarn in between the two pieces.
- Repeat Steps 1 and 2 to assemble the second ear.
*You should now have both ears assembled. Follow the directions below to make the feet of the bunny.
Foot of Bunny (Make 2)
*Use your 4.00 mm hook and main color worsted weight yarn (I used white) to complete the feet of the bunny.
*The foot is made in a joined round by working along both sides of the starting chain. Slst in first sc of round once you complete the round.
Round 1: Ch 6, 2 sc in 2nd ch from hook, hdc in next 2 chs, dc in next ch, 4 dc in last ch, working across other side of starting chain, dc in next ch, hdc in next 2 chs, 2 sc in next ch, slst in first sc of round, fasten off, leaving long tail for sewing foot onto body. (4 sc, 4 hdc, 6 dc; 14 total sts)
Large Paw Pad of Bunny (Make 2)
*Use your 4.00 mm hook and paw pad color worsted weight yarn (I used pink) to complete the large paw pads of the bunny.
*The paw pad is made in a joined round by working along both sides of the starting chain. Slst in first sc of round once you complete the round.
Round 1: Ch 3, 2 sc in 2nd ch from hook, 4 sc in last ch, working across other side of starting chain, 2 sc in next ch, slst in first sc of round, fasten off, leaving long tail for sewing paw pad to foot. (8 sc)
Small Paw Pad of Bunny (Make 6)
*Use your 4.00 mm hook and paw pad color worsted weight yarn (I used pink) to complete the small paw pads of the bunny.
Row 1: Ch 2, slst in 2nd ch from hook, fasten off, leaving long tail for sewing paw pad to foot. (1 slst)
Foot Assembly
*Use your tapestry needle and long tail you left on the paw pads to assemble each foot.
- Each large paw pad piece will be placed on the front of each foot piece, centered at the bottom. Position one of the large paw pad pieces where you would like it on the front of one of the foot pieces (I tried to center the large paw pad piece at the bottom of the foot as best as I could). You may want to use pins to hold it in place.
- Using a tapestry needle and the tail you left on the large paw pad piece, sew the large paw pad piece to the front of the foot piece where you positioned it in Step 1. You can run your yarn all the way through to the back of the foot piece if you choose since you won’t be able to see it once you sew the foot to the body. Once you have completely sewn the large paw pad piece down to the front of the foot and you are satisfied with its position, secure your yarn on the back side of the foot.
- Three small paw pad pieces will be placed at the top of each foot. Position each of the three small paw pad pieces where you would like them on the front of the foot piece that already has its large paw pad piece attached (I tried to center one at the very top of the foot and then placed the other two equally spaced apart on each side of it). You may want to use pins to hold them in place.
- Using a tapestry needle and the tail you left on the small paw pad pieces, sew the small paw pad pieces in place on the front of the foot piece where you positioned them in Step 3. You can run your yarn all the way through to the back of the foot piece if you choose since you won’t be able to see it once you sew the foot to the body. Once you have completely sewn the small paw pad pieces down to the front of the foot and you are satisfied with their positions, secure your yarn on the back side of the foot.
- Repeat Steps 1 through 4 to assemble the second foot.
*You should now have both feet assembled. Follow the directions below to make the front legs of the bunny.
Front Legs of Bunny (Make 2)
*Use your 4.00 mm hook and main color worsted weight yarn (I used white) to complete the front legs of the bunny.
*The front leg is made in a joined round by working along both sides of the starting chain. Slst in first sc of round once you complete the round.
Round 1: Ch 5, 2 sc in 2nd ch from hook, sc in next ch, hdc in next ch, 3 dc in last ch, working across other side of starting chain, hdc in next ch, sc in next ch, 2 sc in next ch, slst in first sc of round, fasten off, leaving long tail for sewing front leg onto body. (6 sc, 2 hdc, 3 dc; 11 total sts)
Front Leg/Paw Lines Assembly
*Use your tapestry needle and a strand of yarn in your paw line color choice (I used gray) to make the paw lines on the front legs.
- Use your tapestry needle and strand of yarn in the color you want your front paw lines to be to stitch two paw lines onto one of the front leg pieces. Each stitch (paw line) should run over the end of the front leg to the other side. I placed my two paw lines on either side of the 6th stitch from Round 1 of the front leg. Once you are satisfied with the paw lines, secure your yarn on the back side of the front leg. See picture below.
- Repeat Step 1 to assemble the other front leg.
*You should now have both front legs assembled. Follow the directions below to make the tail of the bunny.
Tail of Bunny
*Use your 4.00 mm hook and main color worsted weight yarn (I used white) to complete the tail of the bunny.
*The tail is made in continuous rounds just like the head and body of the bunny were made. Make sure to pull ring closed and secure yarn at the beginning.
Round 1: Make a magic ring, ch 1, work 6 sc in the ring, pull ring closed. (6 sc)
Round 2: Work 2 sc in each st around. (12 sc)
Round 3: Sc in each around. (12 sc)
Round 4: Repeat [sc2tog] around, slst in first st of round, fasten off, leaving long tail for sewing onto the body. (6 sc2tog)
*Once you have completed Round 4 of the tail, use fiberfill to stuff the tail to your desired level.
*You should now have the tail assembled. Follow the directions below to assemble the head of the bunny.
ASSEMBLY
Head Assembly
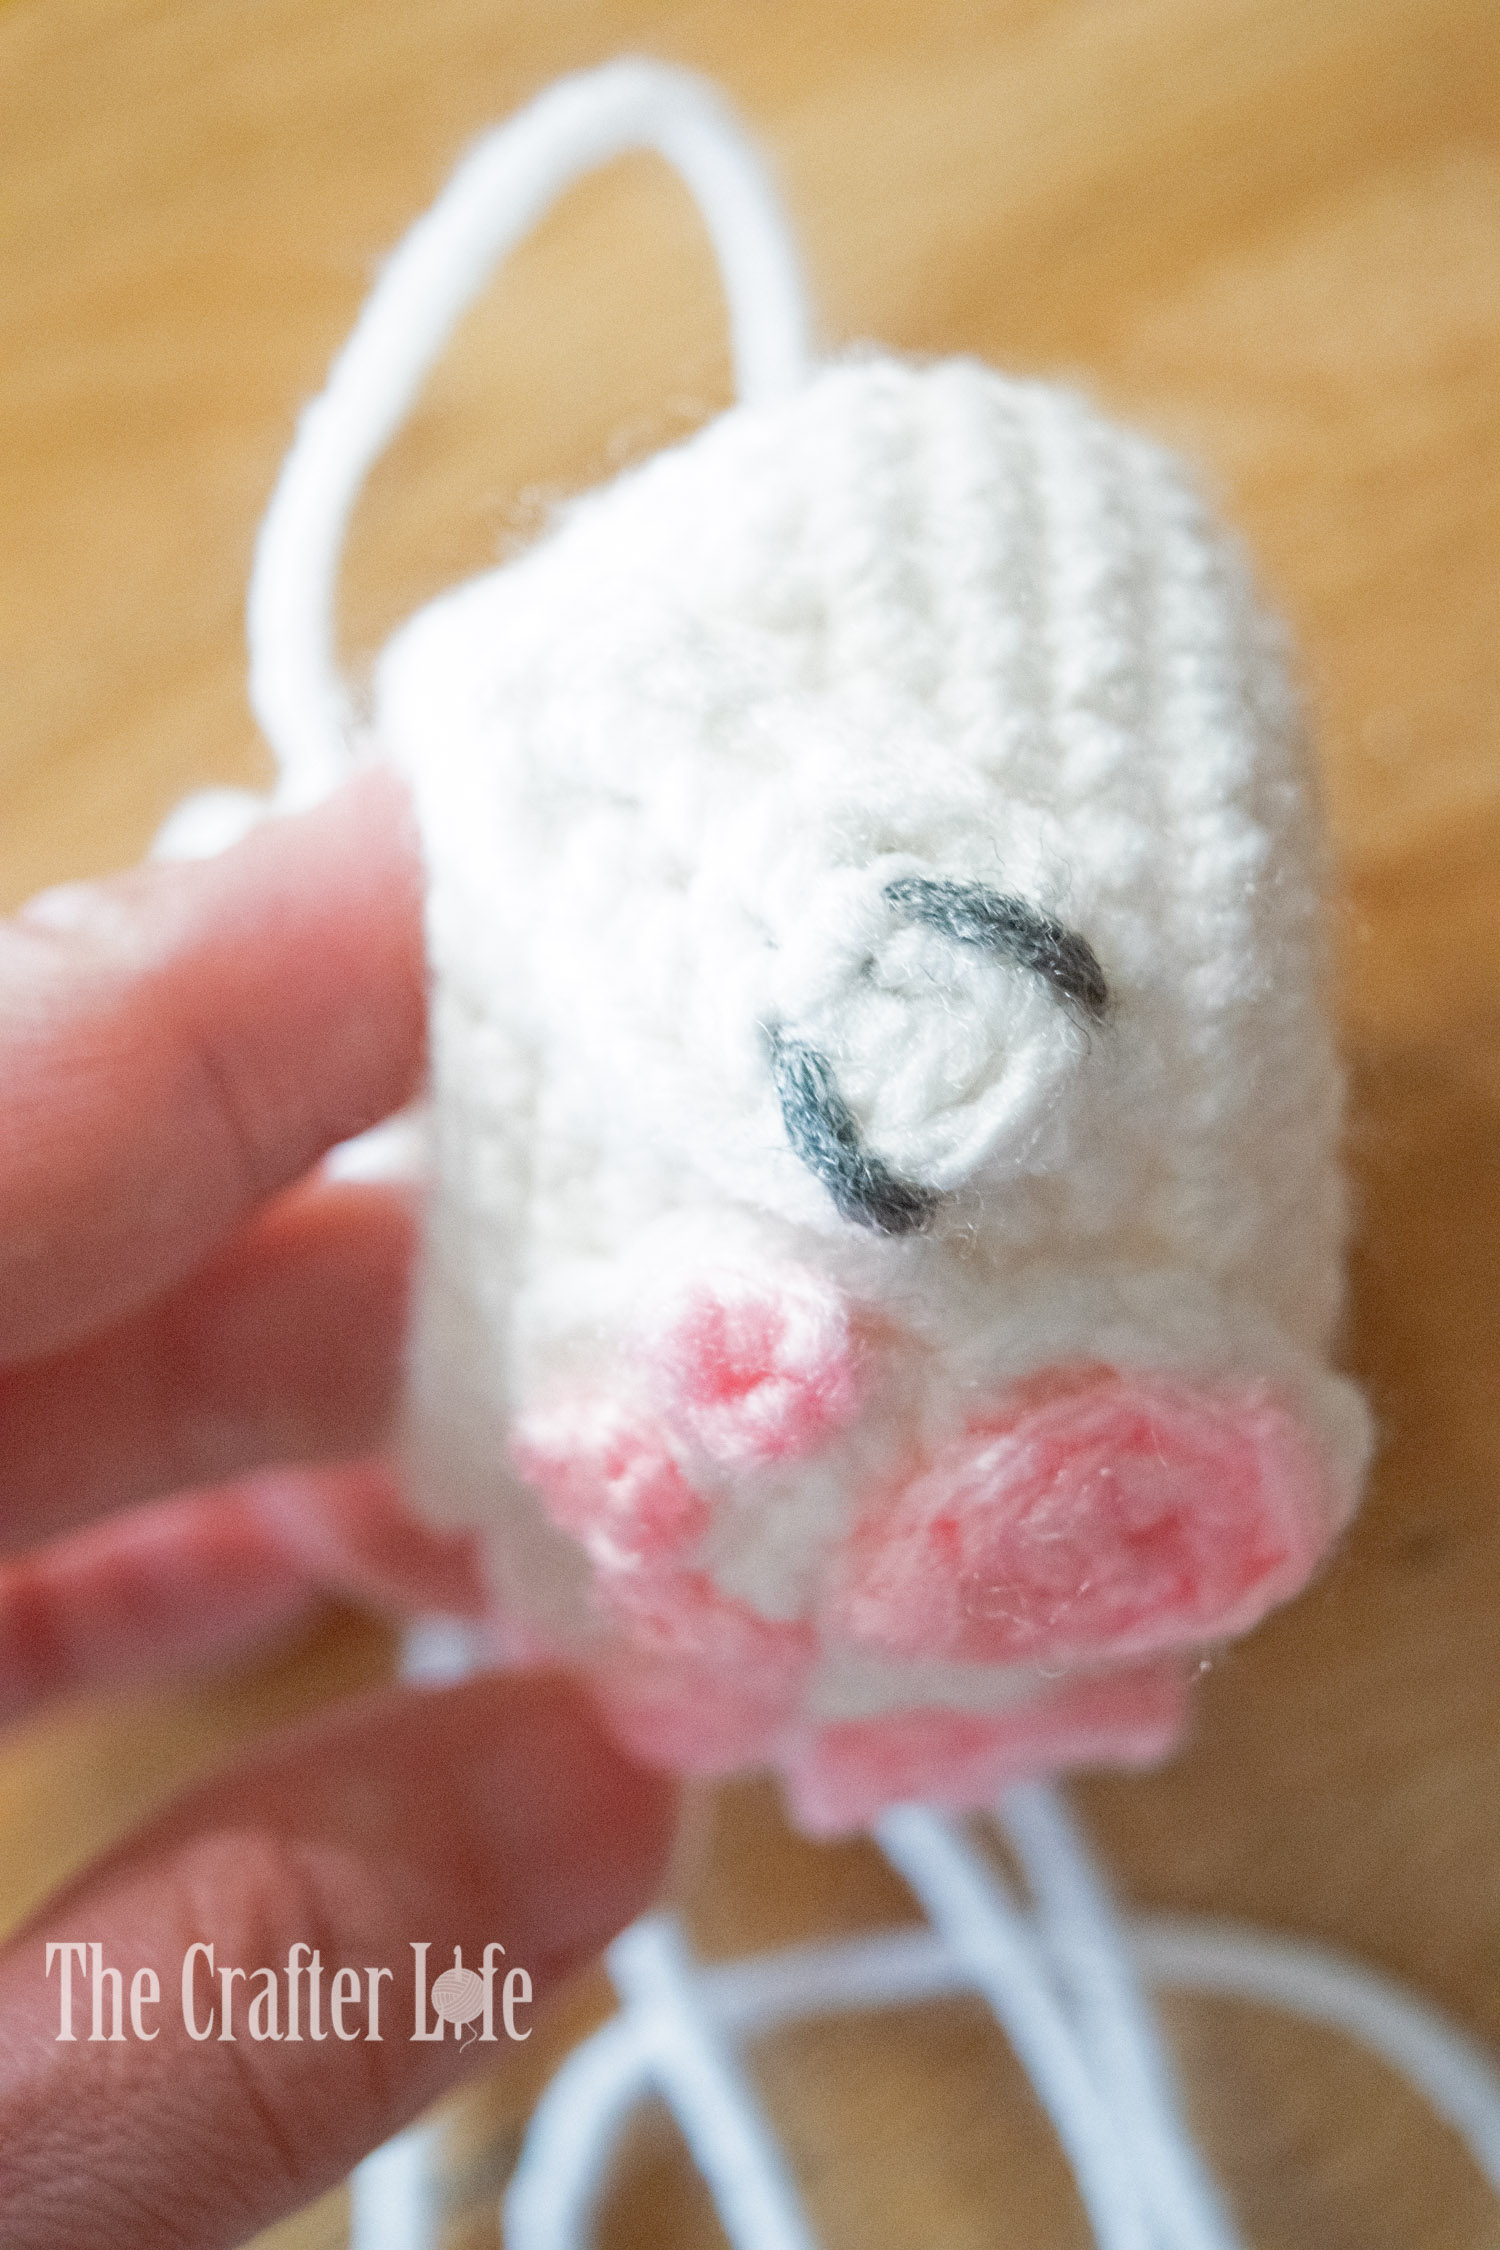
- Use a small tapestry/sewing needle and yarn in your nose color choice (I used pink) to stitch a nose and center line on the front of the head. The nose is made in a triangle shape using straight vertical stitches. It is 2 rounds tall and the top of the nose is about 3 stitches wide. Make a V shape with the first two stitches and place the other vertical stitches between them to cover up the space in the middle and make it appear like a solid nose. Once you have the nose completed, run a longer stitch from the bottom point of the nose, straight down and over the top of Round 11 to the inside of the head. Make sure to secure your yarn on the inside of the head. I stitched my nose between Rounds 6 and 9 of the head (it overlaps Rounds 7 and 8). The line under the nose runs over Round 9, 10, and 11.
- Use a small tapestry needle and yarn in your choice of eye color (I used black) to stitch two eyes onto the front of the head. Place them above the nose, centered on either side. Each eye is made with 2 short vertical stitches (each stitch is only one round high). Make sure to secure your yarn on the inside of the head. I placed my eyes on top of Round 5 (from the very top of Round 4 to the bottom of Round 6) about 2 stitches over from the top of the nose.
- Use a tapestry needle and the long tails you left on the ear pieces to attach the ears to the top of the head. I placed my bunny ears on each side of Round 1 of the head.
- Once you have secured all loose yarn ends on the inside of the head, use fiberfill to stuff the head to your desired level.
- You should now have the head assembled. Follow the directions below to assemble the body of the bunny.
Body Assembly
- Use a tapestry needle and the long tails you left on the feet to sew the feet onto the front of the body. You may want to place the head on top the body when you position the feet how you want them. You can use pins to hold them in place if needed. Make sure to secure your yarn on the inside of the body when finished attaching the feet. I placed my feet over Rounds 6 – 13 of the body of the bunny. I separated each foot on the body by about two stitches.
- Use a tapestry needle and the long tails you left on the front legs to sew the front legs onto the side of the body. You may want to use straight pins to help you position them where you want them before you start to attach them to the body. Make sure you secure yarn on the inside of the body. I sewed my front legs so they angle down towards the feet. I placed them over Rounds 9 through 14 so the front paws almost touch the feet.
- Use a tapestry needle and the long tail you left on the tail of the bunny to sew the tail to the back of the body, centered at the bottom. Make sure to secure your yarn on the inside of the body. I placed my tail over Rounds 7 – 9 of the body.
- Once you have secured all loose yarn ends on the inside of the body, use fiberfill to stuff the body to your desired level.
- You should now have the body assembled. Follow the directions below to sew the body of the bunny to the head.
Sewing Body to Head
Use a tapestry needle and the long tail you left on the body of the bunny to sew the top of the body to the bottom of the head. Make sure to sew them together so the face of the head is centered with the feet and front legs of the body. Run your needle under/through each stitch from Round 14 of the body and then up through a hole in between Rounds 10 and 11 of the head that is directly above each stitch. Once you have sewn them together all the way around and you are satisfied with the appearance/position of the head on the body, secure and fasten off your yarn by running it through the inside of the body a few times before cutting it and hiding it inside the body.
***Your baby bunny is finished and ready to spread some spring cheer!

The pattern and photos of this item are the property of TheCrafterLife. This pattern and design are subject to copyright, and are for personal, non-commercial use only. You may not distribute, sell this pattern, or claim it as your own under any circumstances.
You may not sell my patterns or claim them as your own. You may make items to sell (i.e. on Etsy) from my patterns but I ask that you link back to my site and provide credit for the pattern. You are welcome to share my patterns on social media as long as you link back directly to my site by providing the link. No copying and pasting of any patterns will be allowed under any circumstances.

Butterball Baby "Coops" the Chick