
Black Cat Pretzels
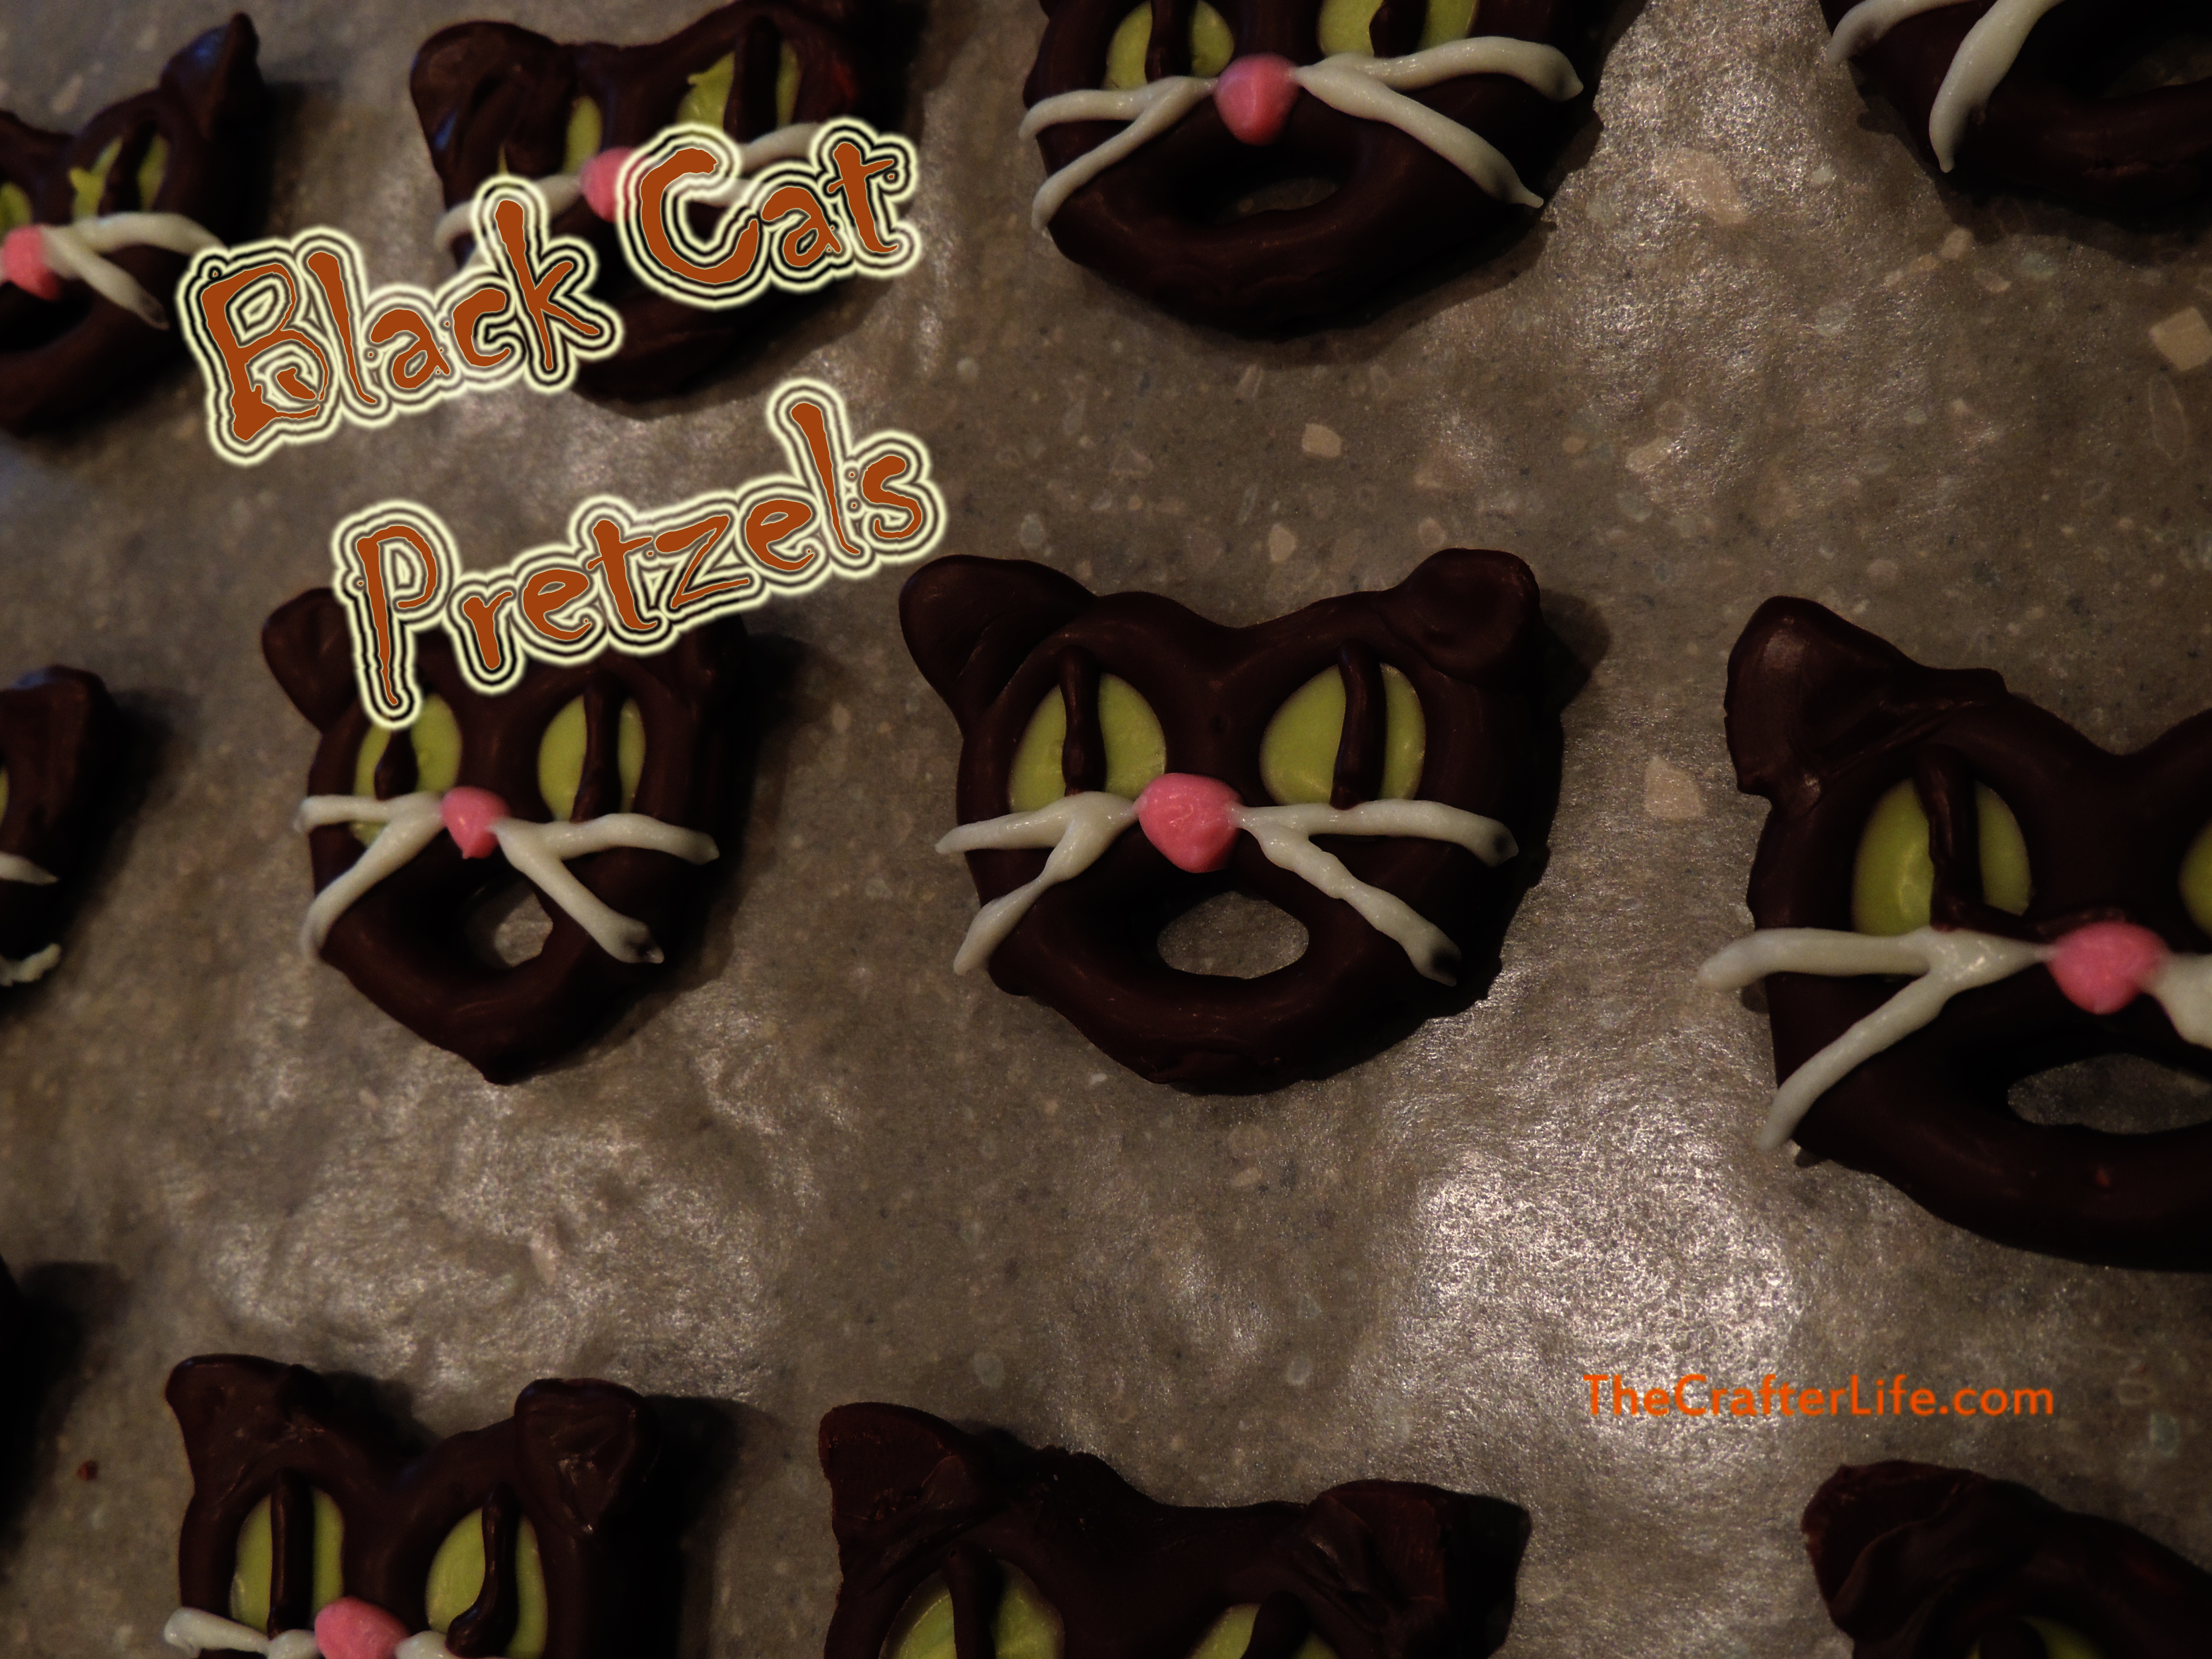
While shopping recently, I saw these awesome lime green candy melts that reminded me of cat eyes. Since chocolate covered pretzels are one of my favorite types of candy, I decided to make black cat chocolate pretzels for Halloween. I know the ladybug pretzels I made for my daughter’s first birthday party went really fast, so I think these black cat pretzels would be a big hit at a Halloween party!
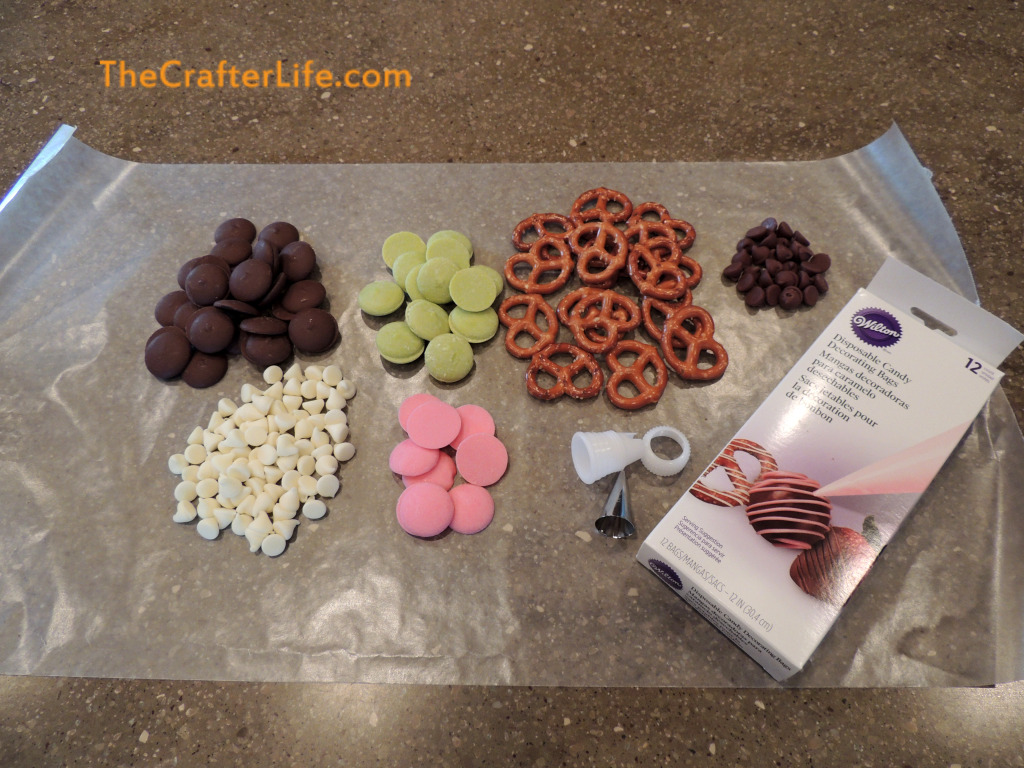
Materials
– Pretzels
– Candy Melts in lime green, pink, white, and dark chocolate (Wilton produces all of these colors that are sold at Michaels)
– Chocolate chips (for ears)
– Candy decorating bags w/ decorating tip
Directions
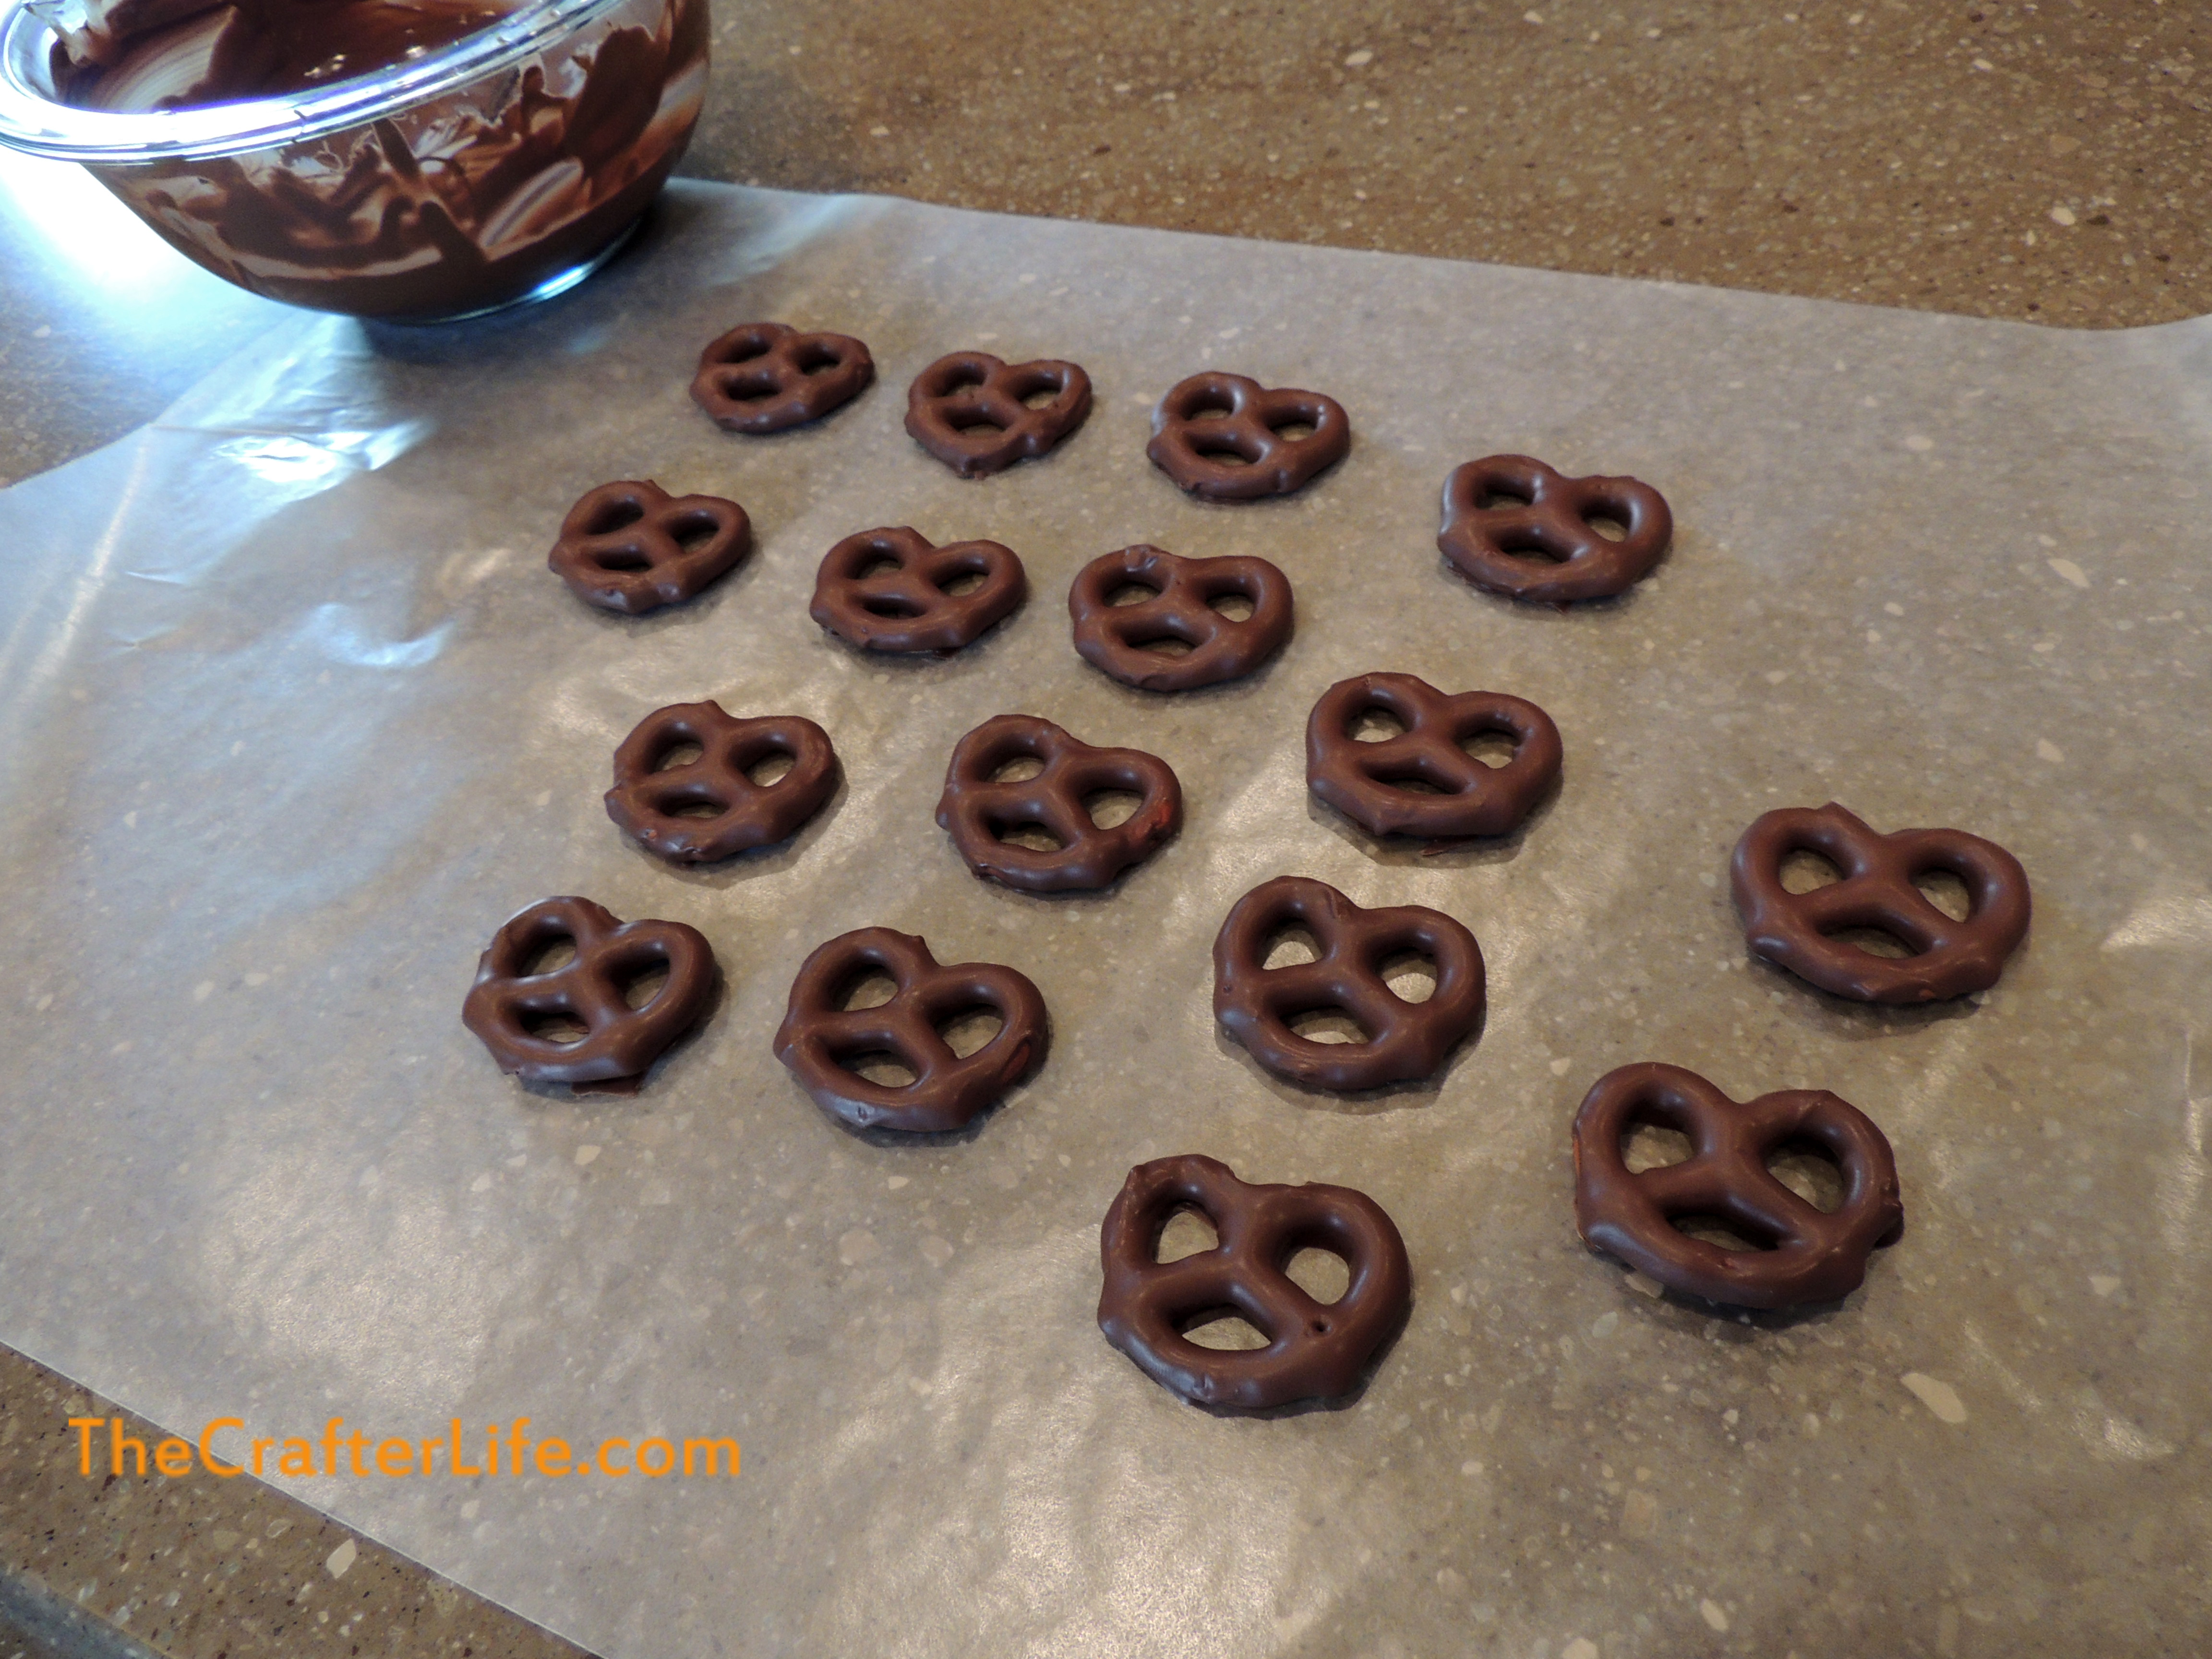
- Melt the dark chocolate candy melts.
- Dip the pretzels in the dark chocolate until entirely covered. Make sure to let excess chocolate drip off (you can use a spoon to help scrape off the extra chocolate). Let the pretzels dry.
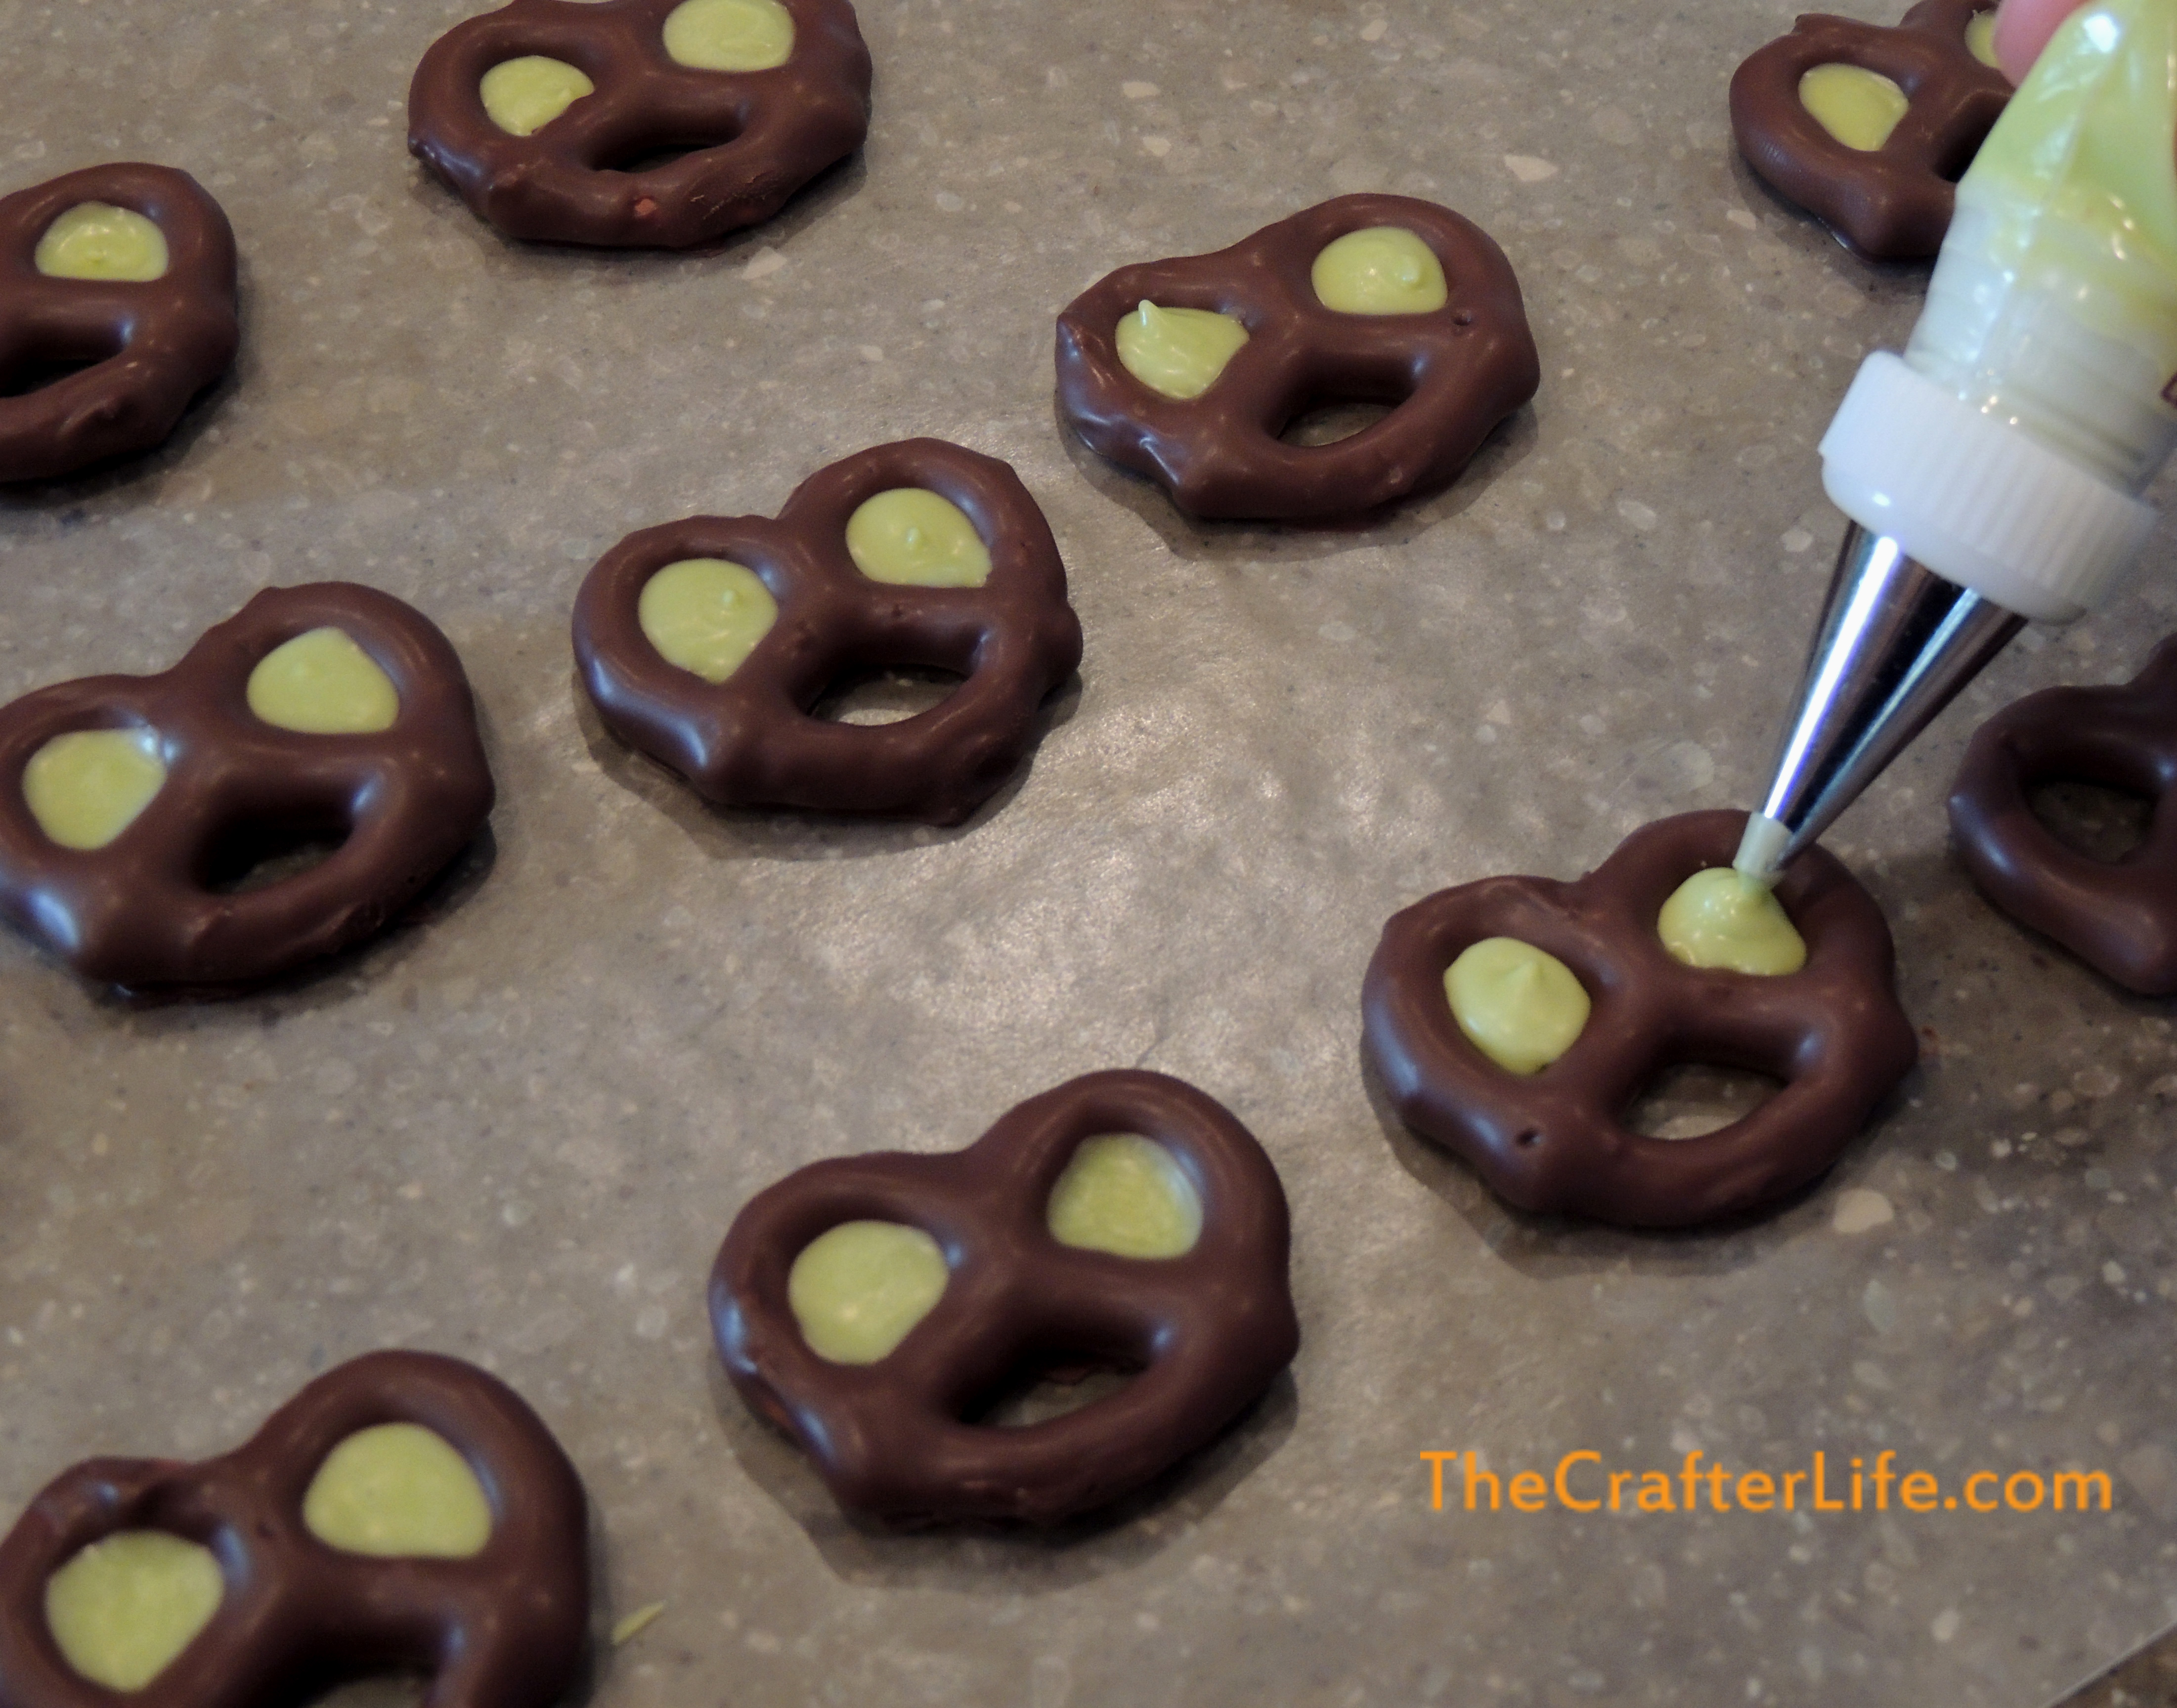
3. Melt the lime green candy melts. Pour the melted candy melts into a candy decorating bag.
4. Fill in the top two holes of the pretzels with the lime green melted candies using the decorating bag. You may need to gently tap the pretzels to release any air bubbles
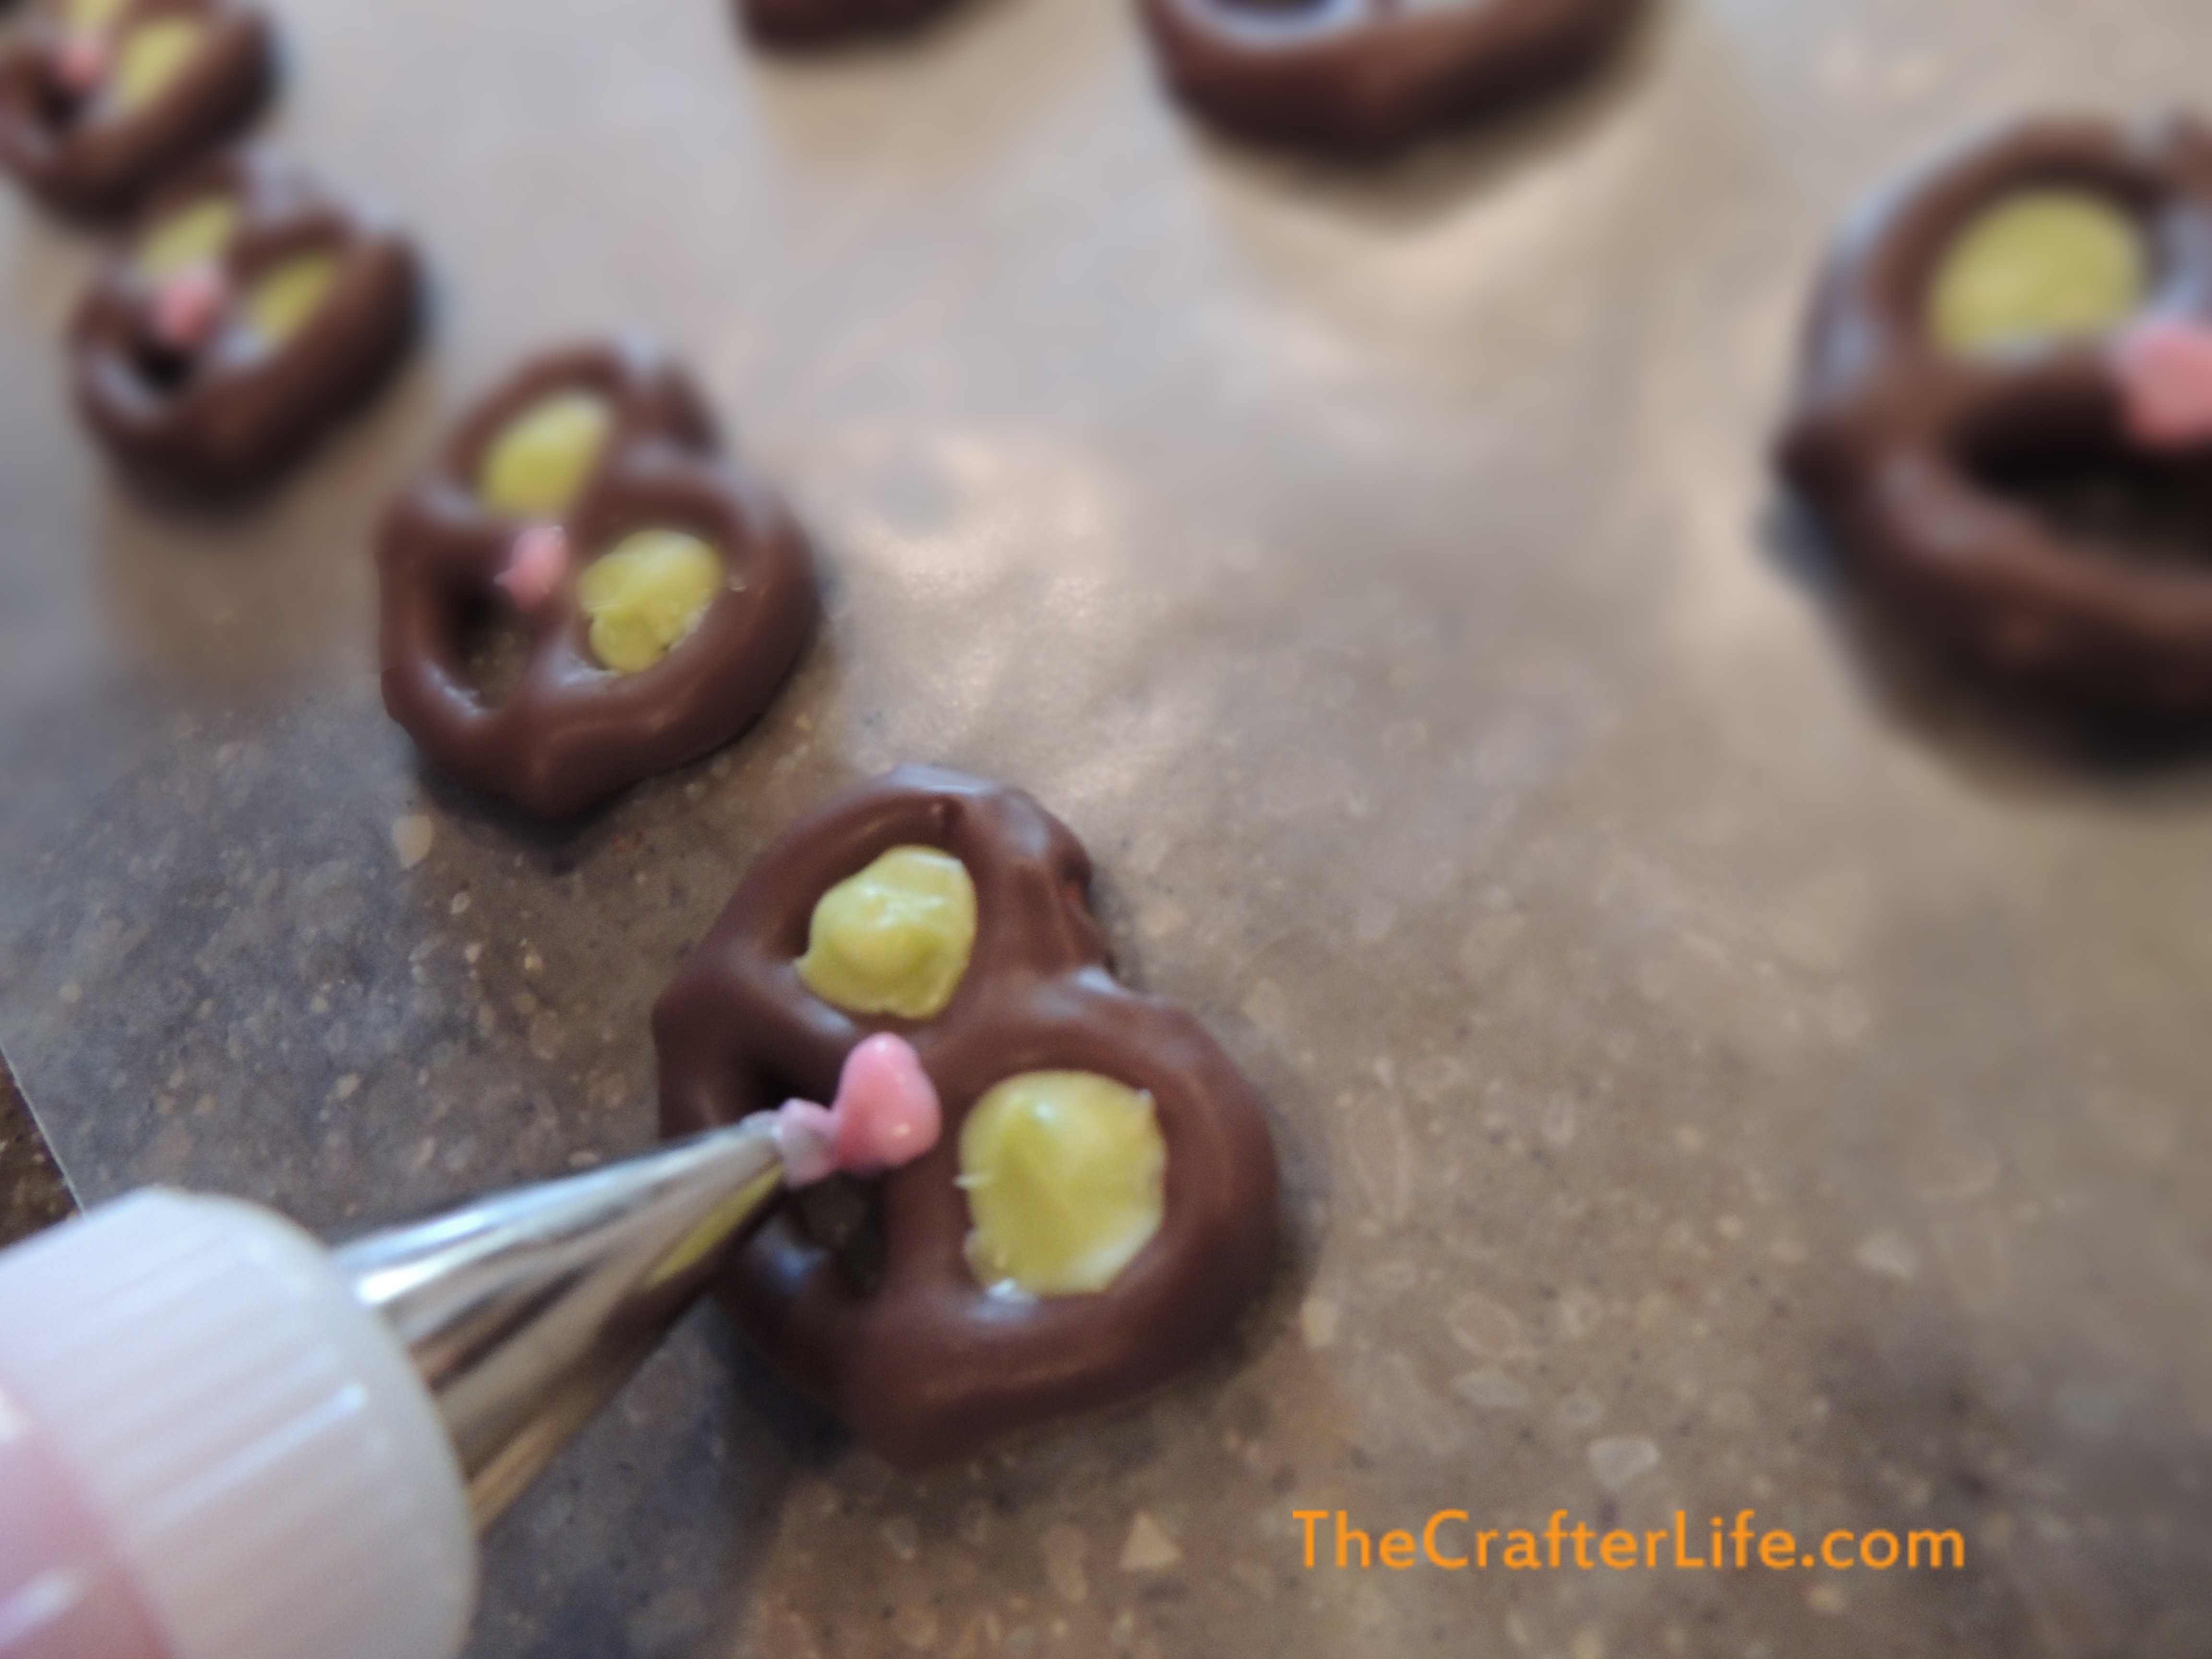
- Melt the pink candy melts. Fill a decorating bag with the melted pink candies.
- Use the decorating bag with the melted pink candies to place pink noses on each of the pretzels.
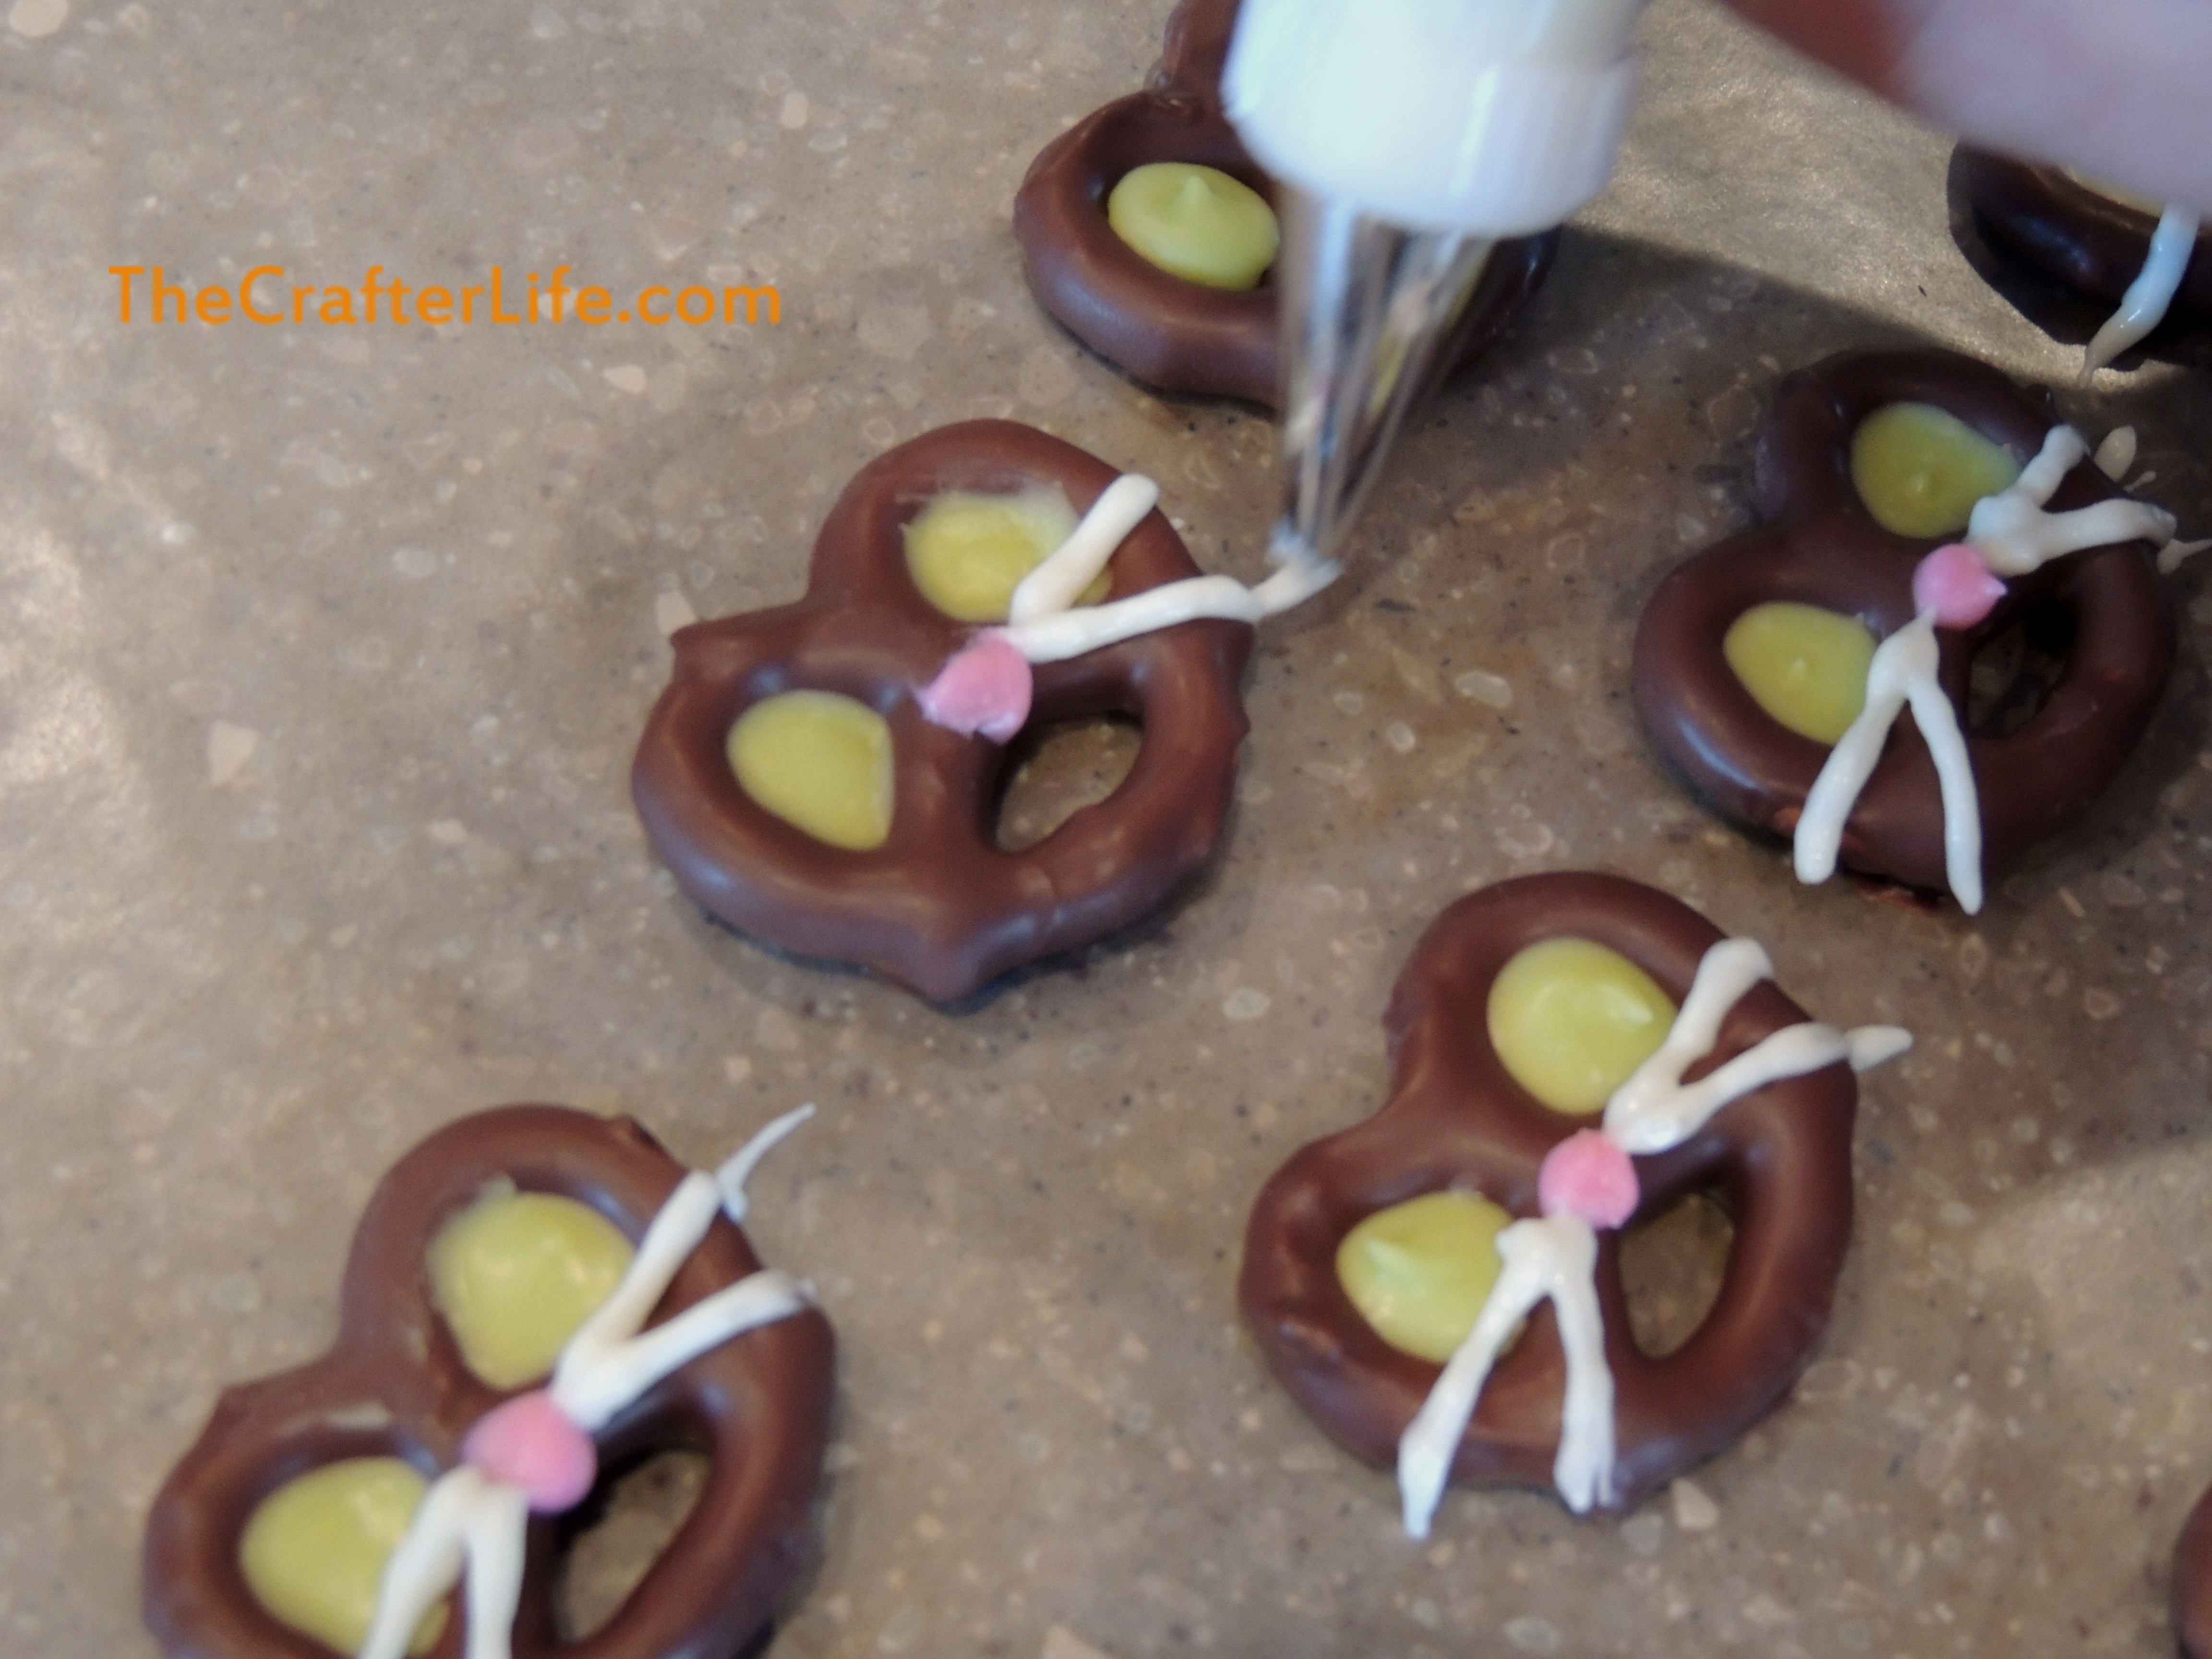
- Melt the white candy melts/chocolate. Fill a decorating bag with the melted white candies.
- Use the decorating bag with the melted white candies to draw whiskers on the pretzels. I found that two whiskers on each side worked the best for me. Three ended up looking like too many.
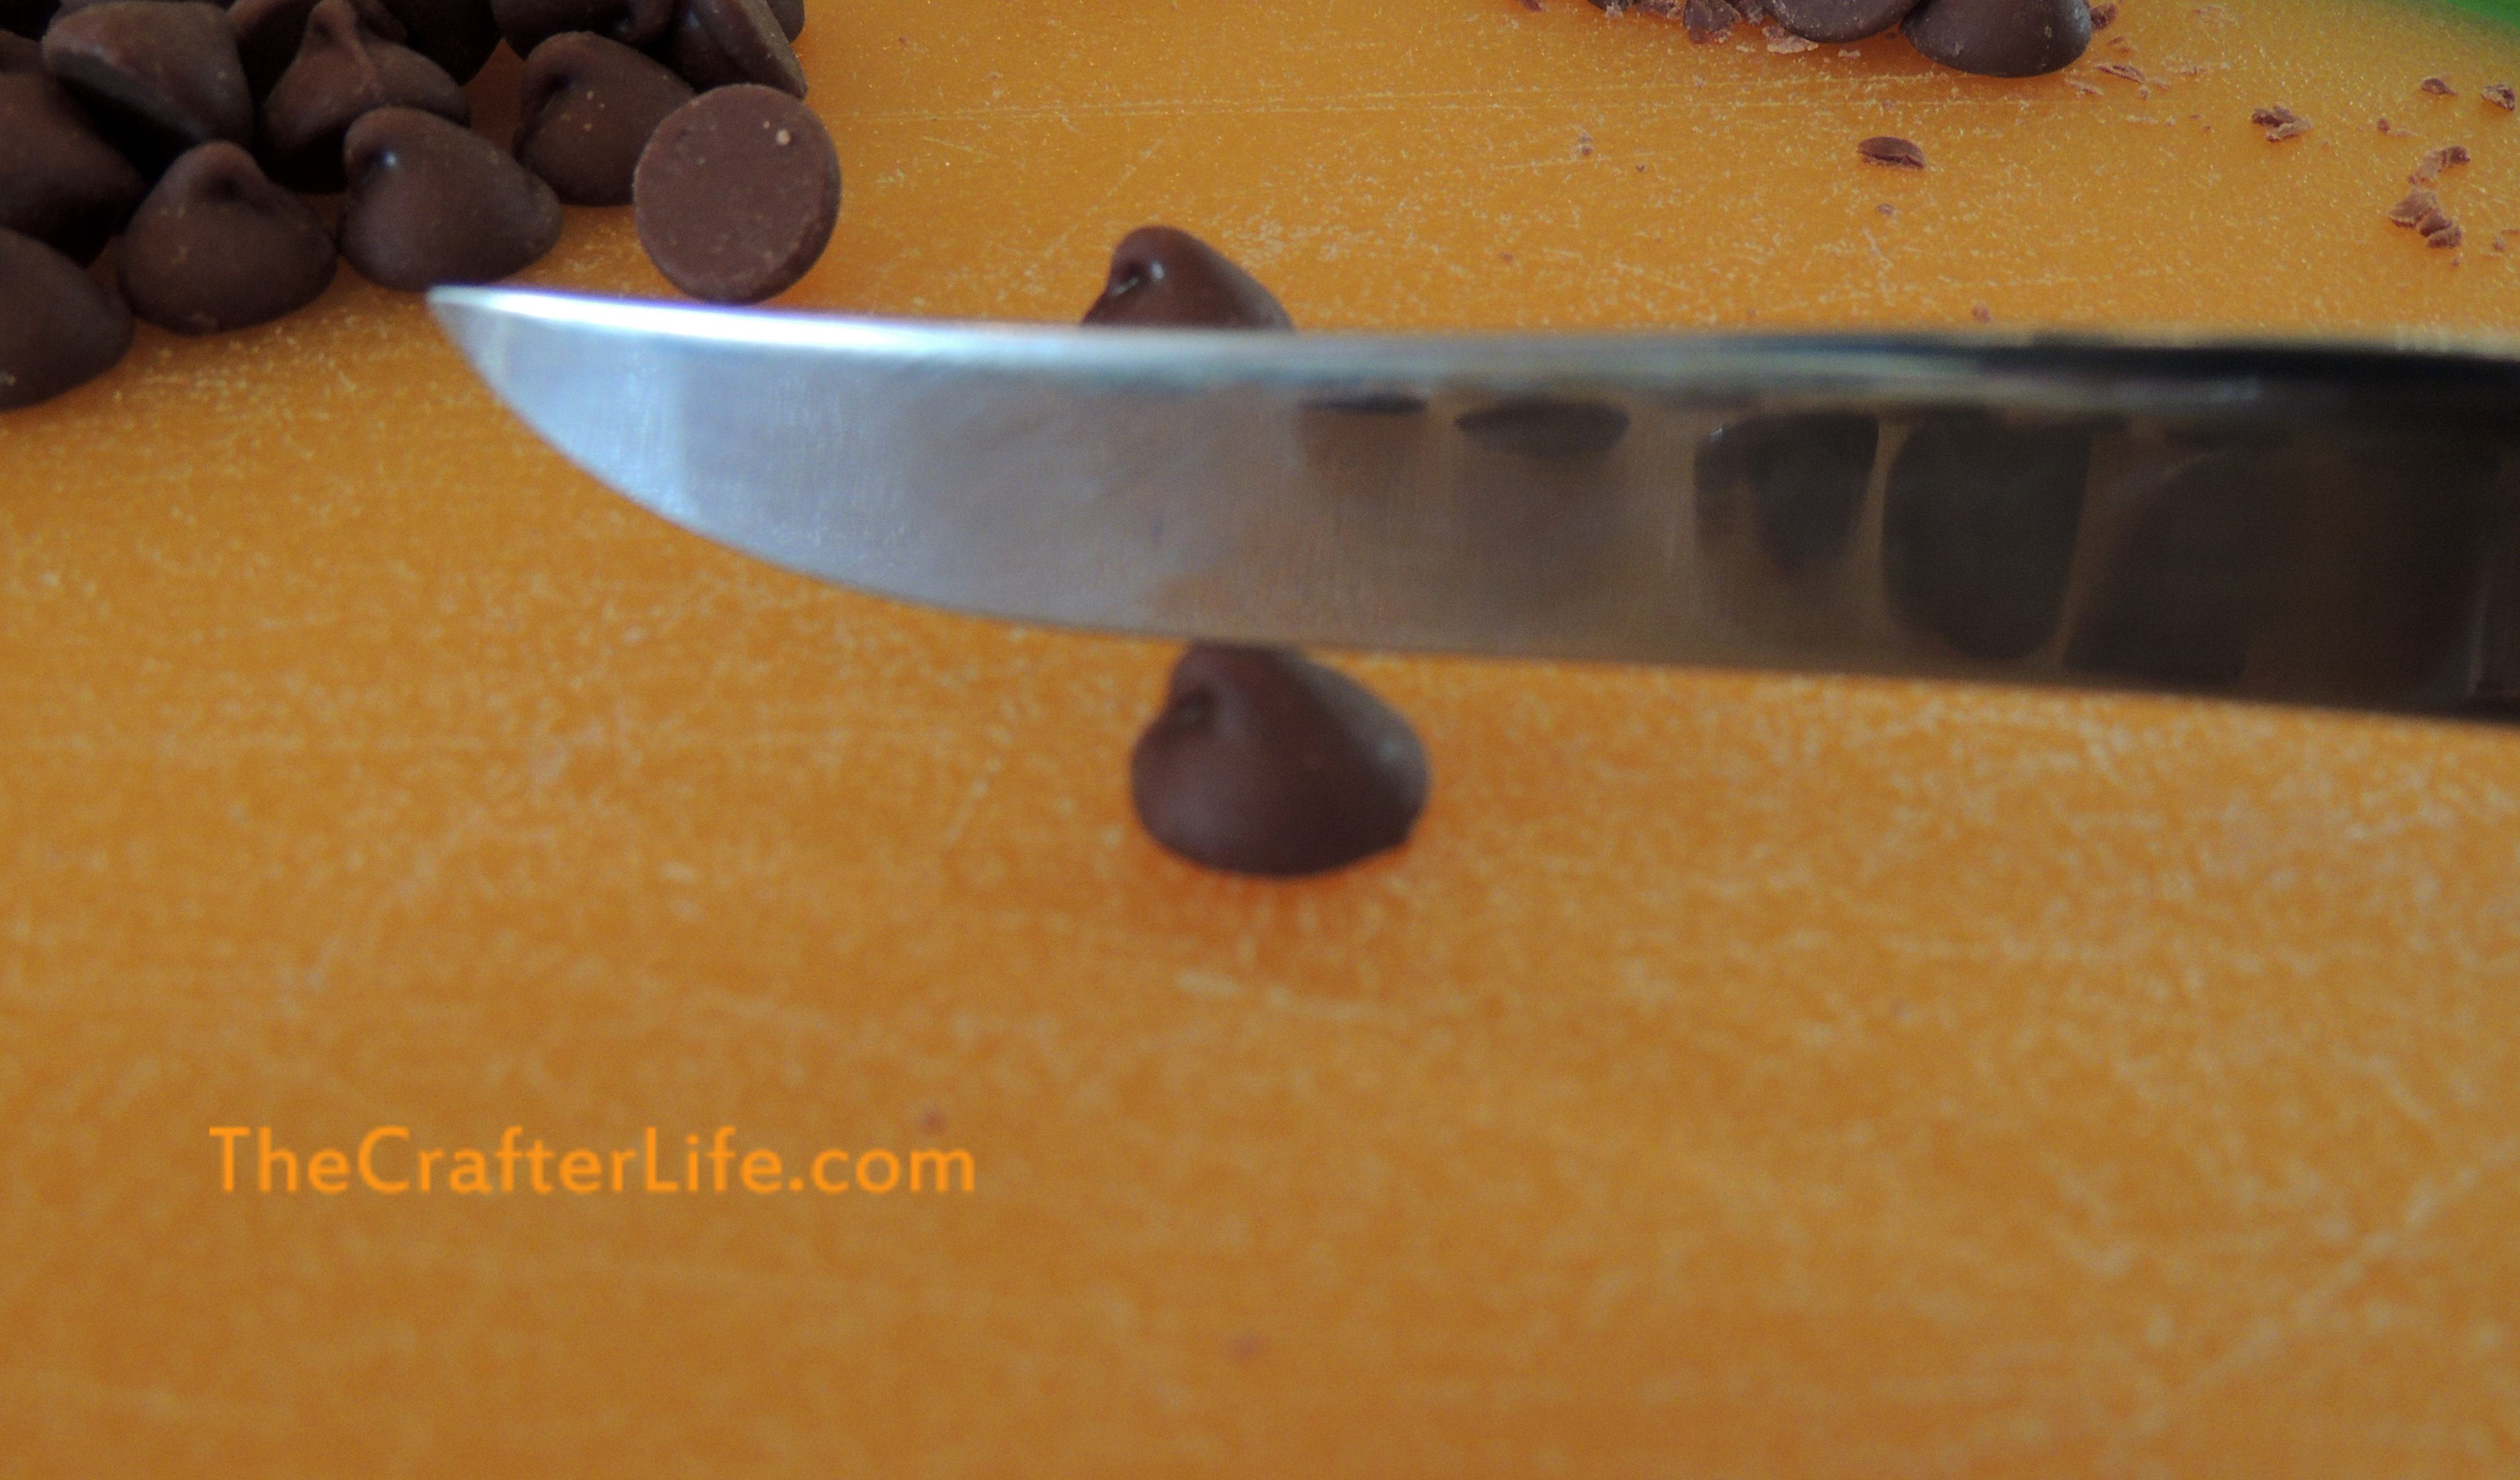
- Cut the chocolate chips in half as shown in the picture below. The two halves will serve as the ears of the black cat pretzels, so you should have at least one chocolate chip per pretzel. It is tricky to cut these correctly. Once cut, the bottom of the chocolate chip will be the part that will be attached to the pretzel. Make sure to have the chocolate chip “ears” curving outward.
10. Melt the dark chocolate candy melts again if they solidified. Fill a decorating bag with the melted dark chocolate candies.
11. Use the decorating bag with the melted dark chocolate to draw lines down the center of the green “eyes” of the pretzels.
12. Use the decorating bag with the melted dark chocolate to place a small amount of chocolate on the bottom of a chocolate chip half and stick it on the top of the pretzel to form an ear. Then put a small amount of melted chocolate on the bottom of the other chocolate chip half and stick it to the other side of the top of the pretzel to form the other ear. Continue doing this for each pretzel.
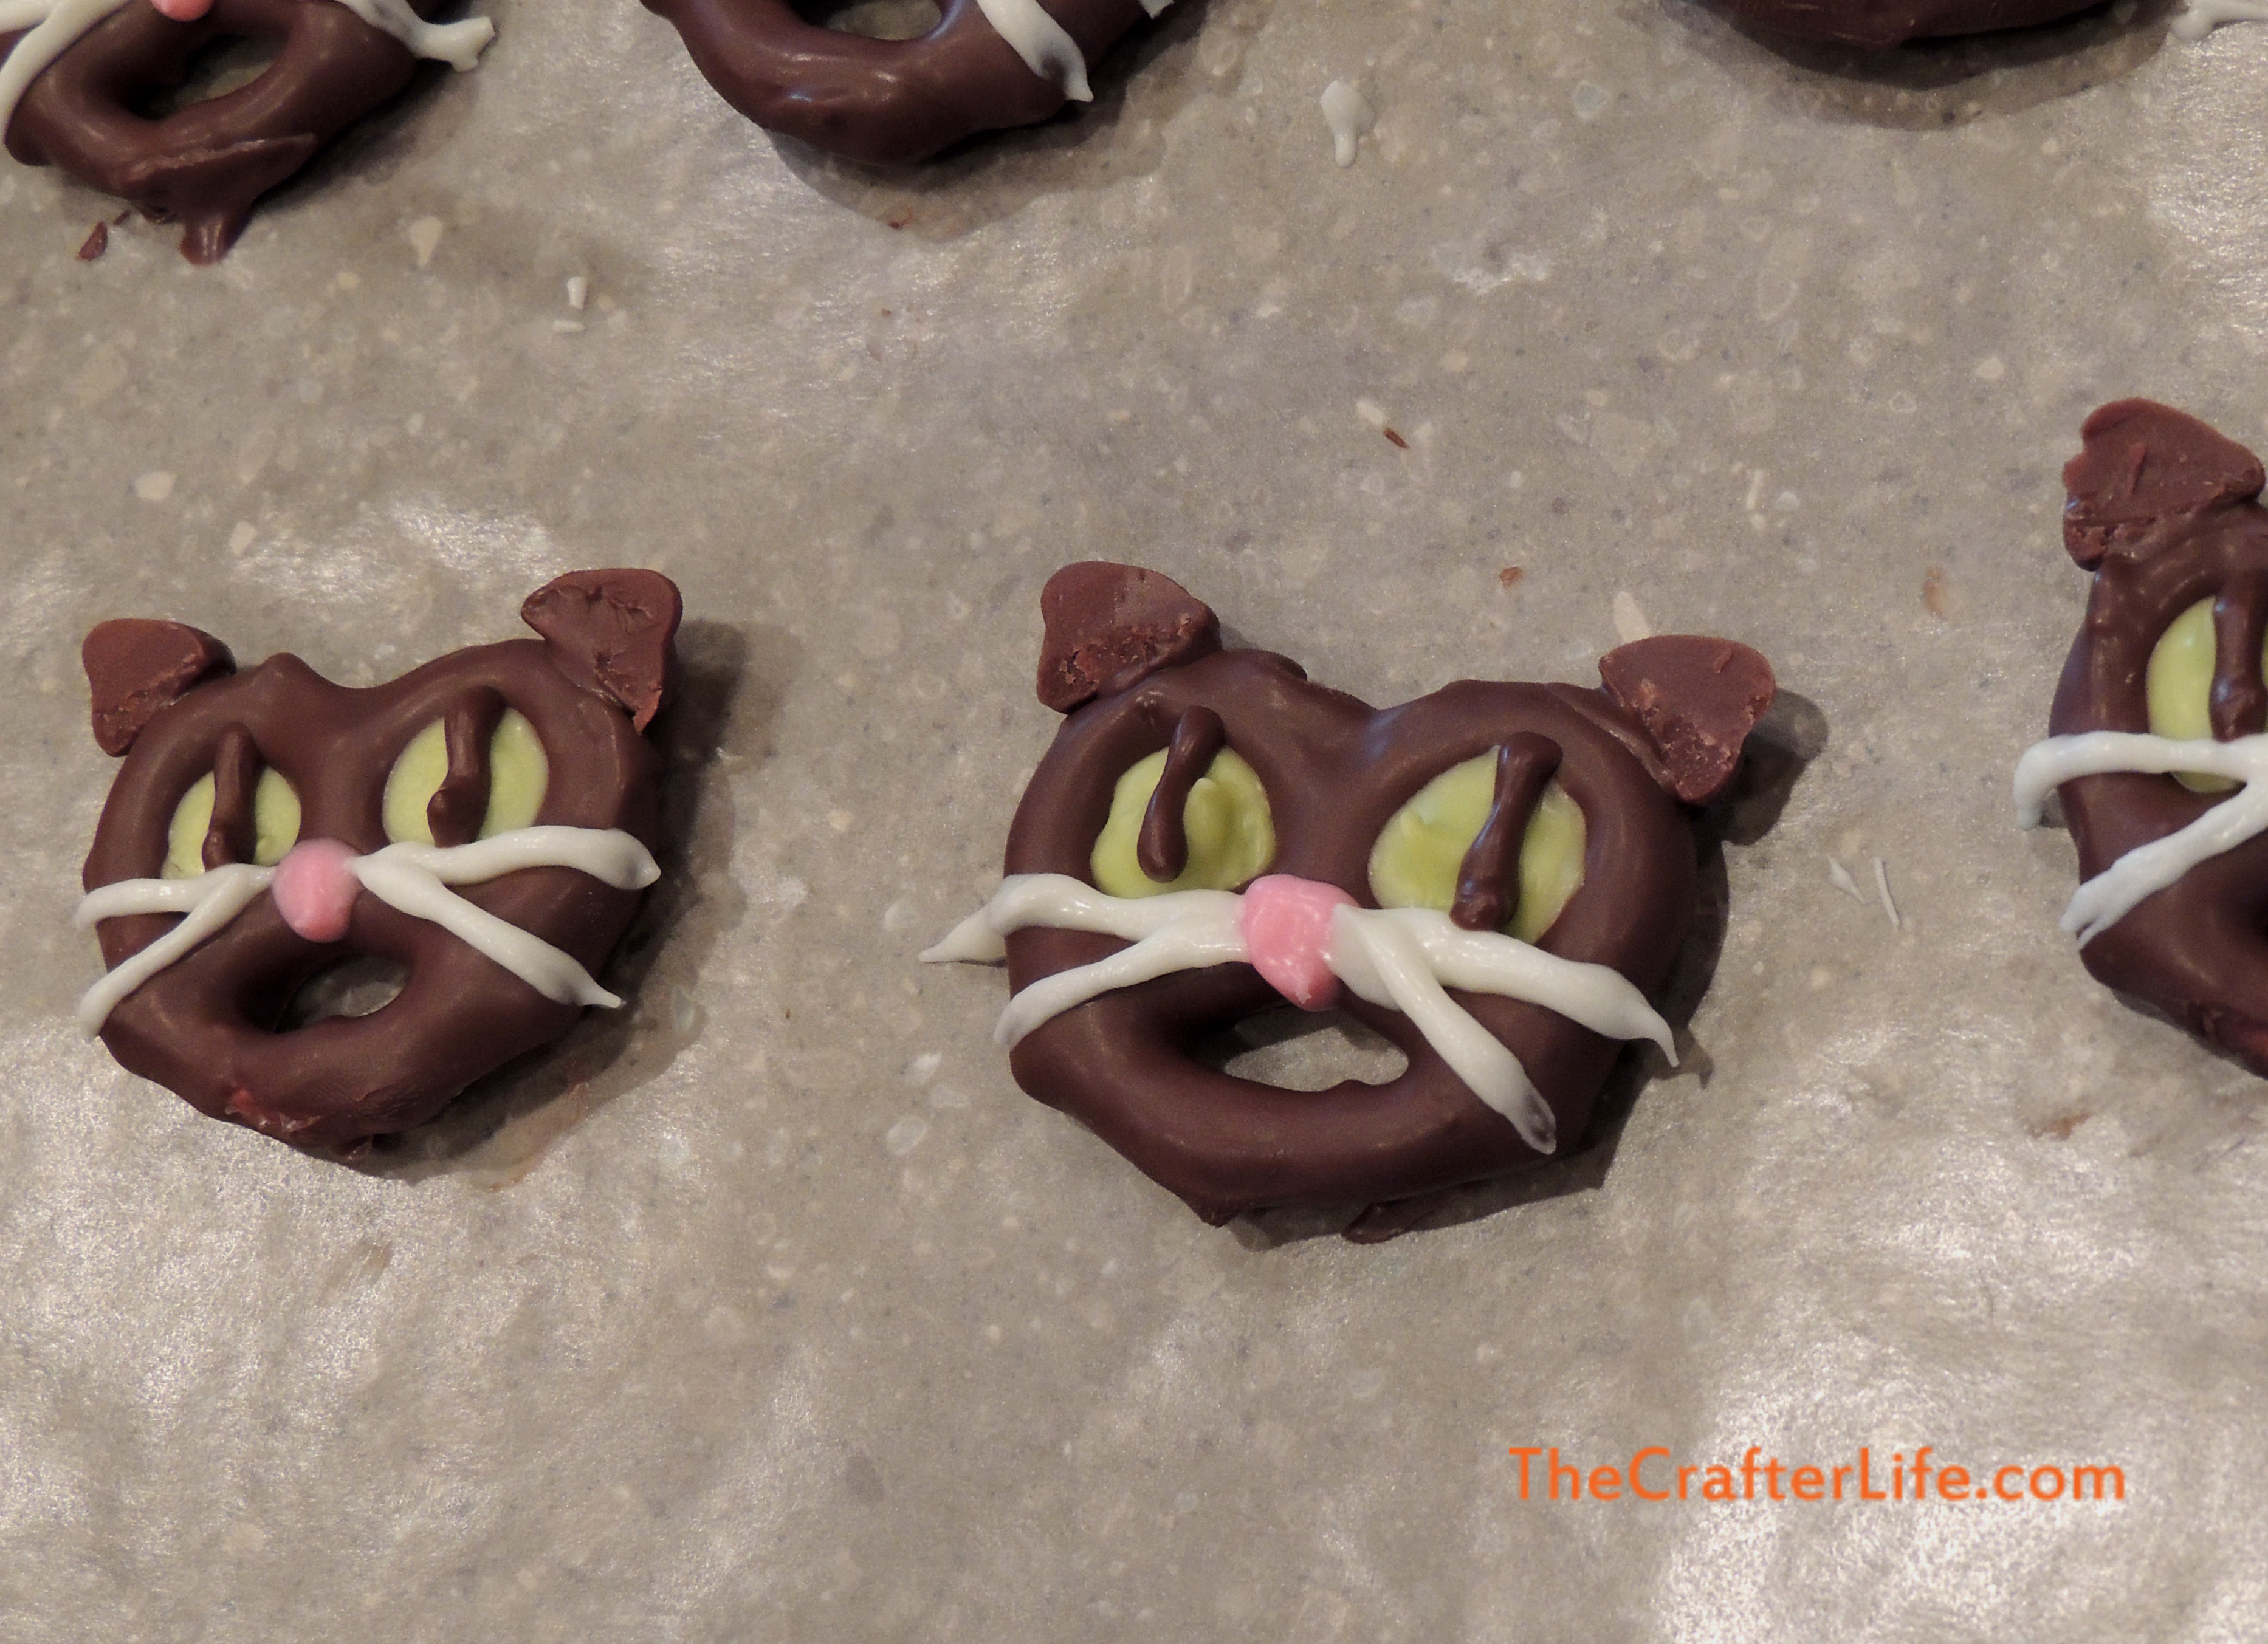
13. Use the decorating bag with the melted dark chocolate to cover the front of the chocolate chip “ears” so they blend in with the rest of the chocolate on the pretzel.
14. Allow the pretzels to dry and then serve or store in an air-tight container. You may wish to store them in the fridge!
Notes:
***If the chocolate on the pretzels start to get warm while you are making them, you may want to put them in the fridge for a few minutes before continuing so they don’t melt and become disfigured.
***It is probably easier to make the lines in the eyes with the dark chocolate before making the whiskers with the white chocolate. I chose to wait to make the lines in the eyes with the dark chocolate until I made the ears with the dark chocolate so I wouldn’t have to keep re-melting the dark chocolate.
I am sure you could make all kinds of cats using other colors of melting candies. I would love to see your cat pretzels. Please share here or on my Facebook page!
**If you like what you see, feel free to pin, share, and link back to my site. Thank you for visiting!


One Comment
Pingback: