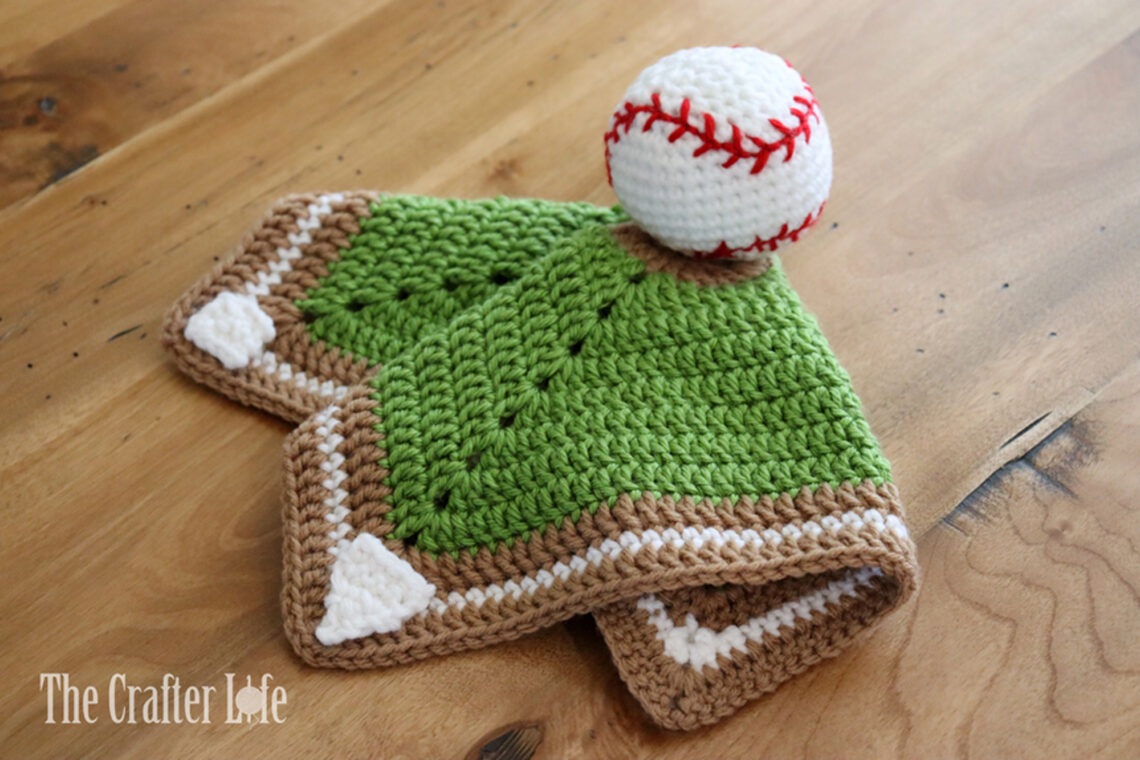
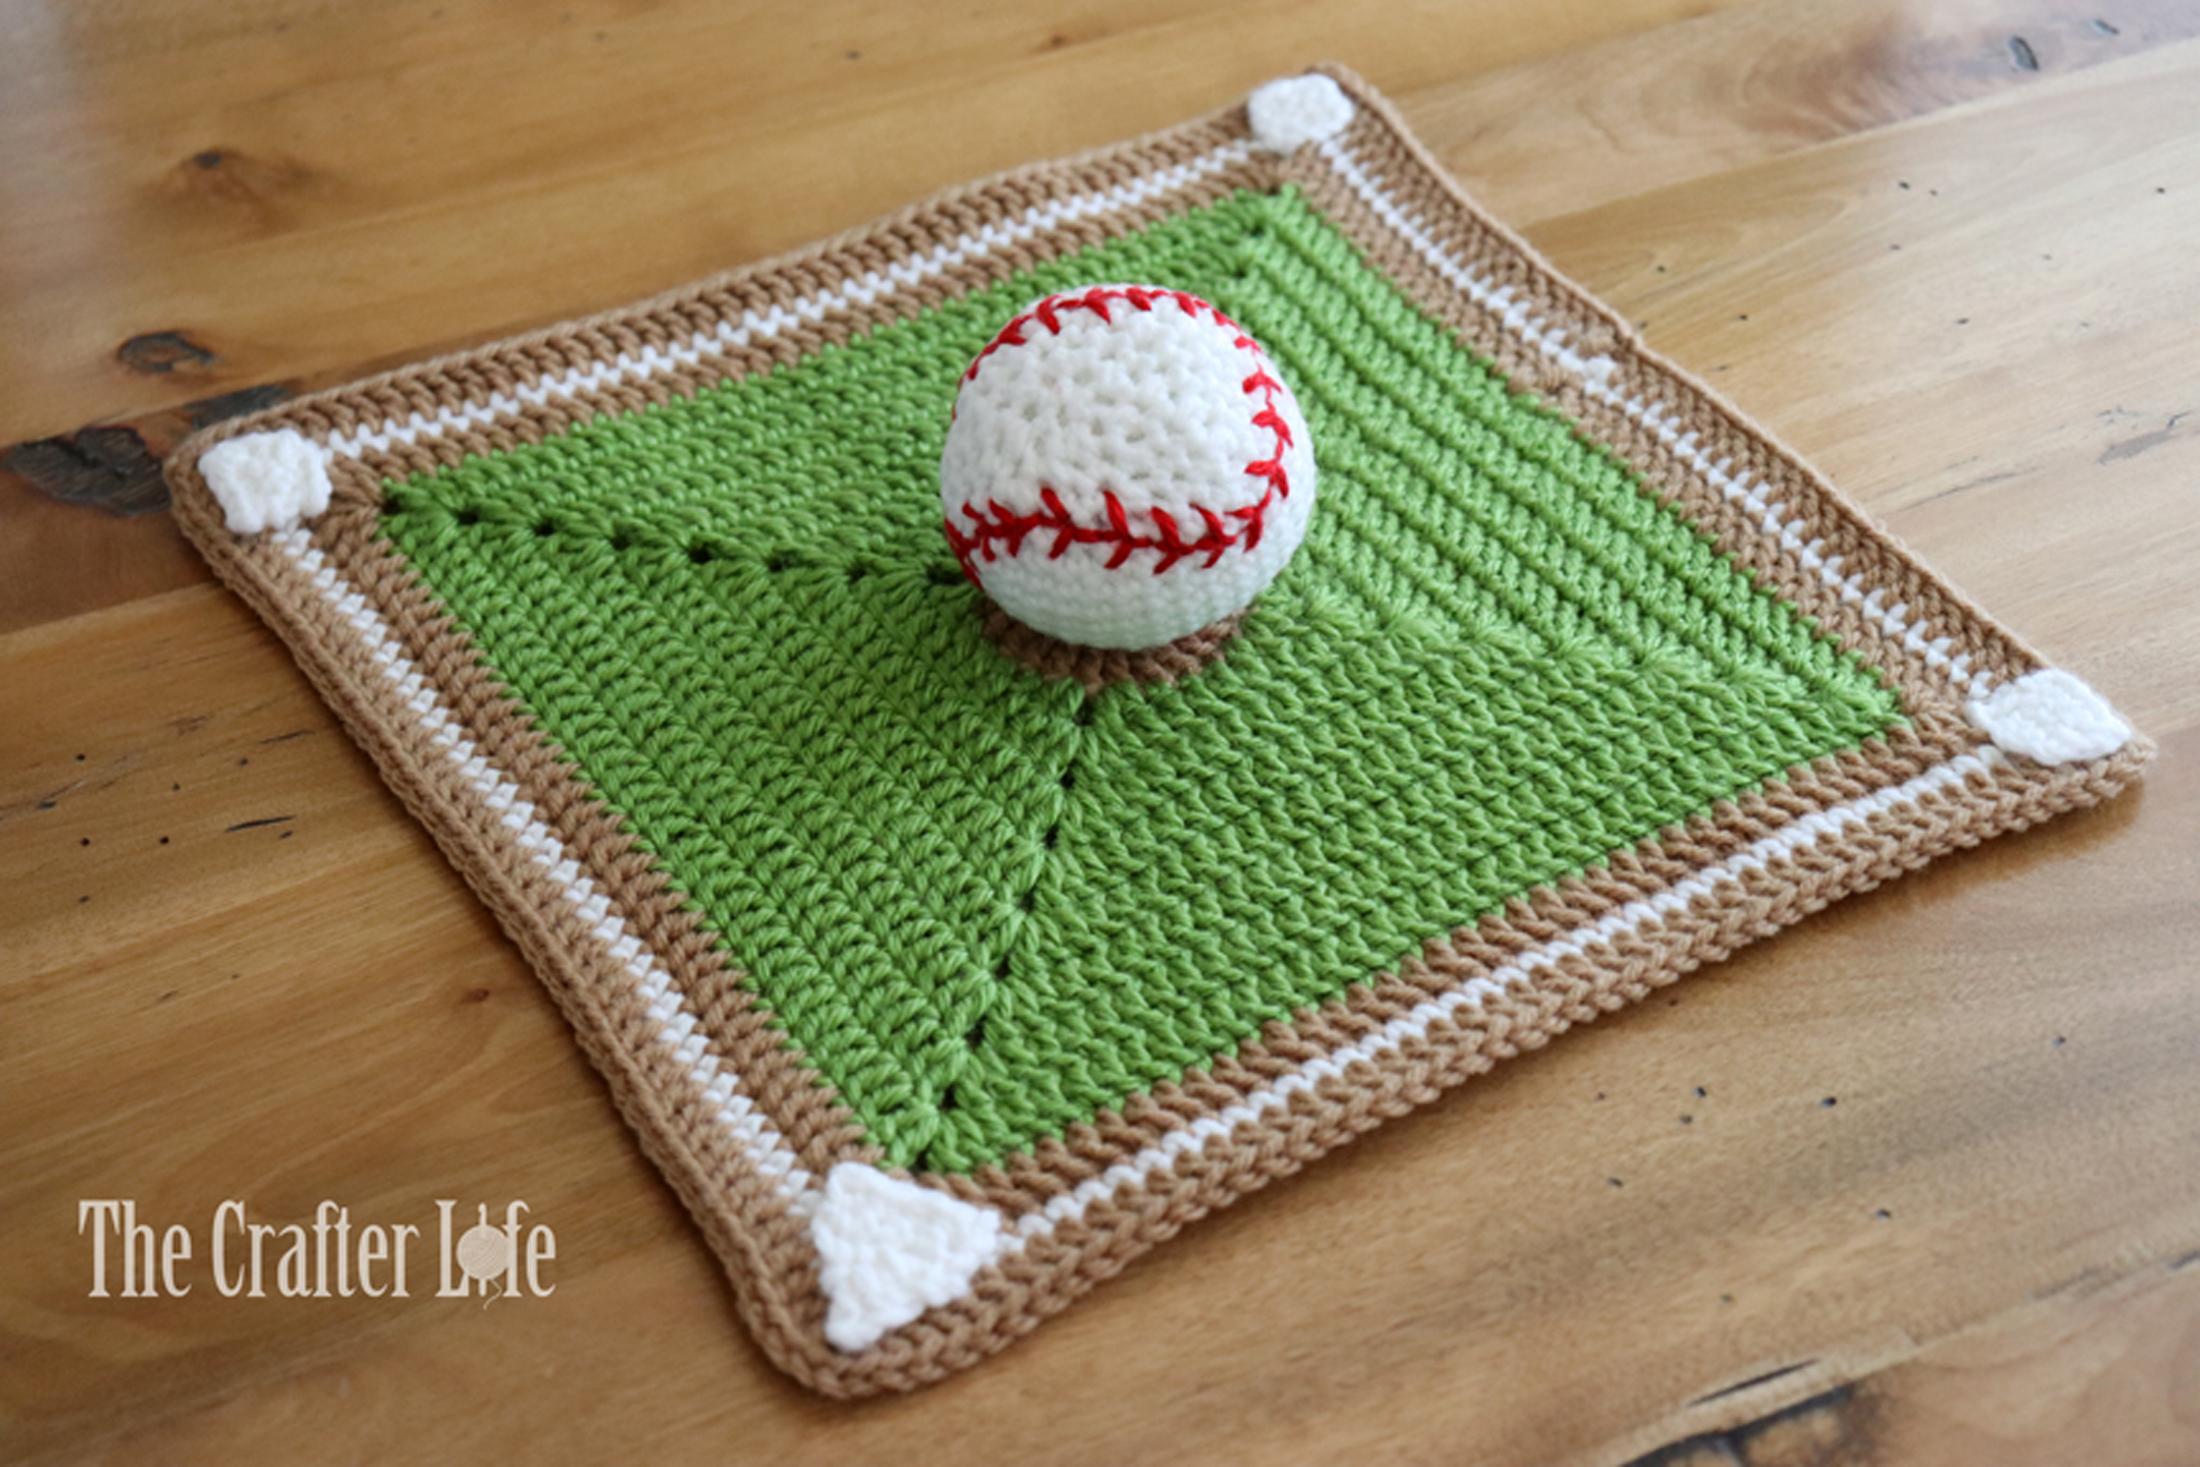
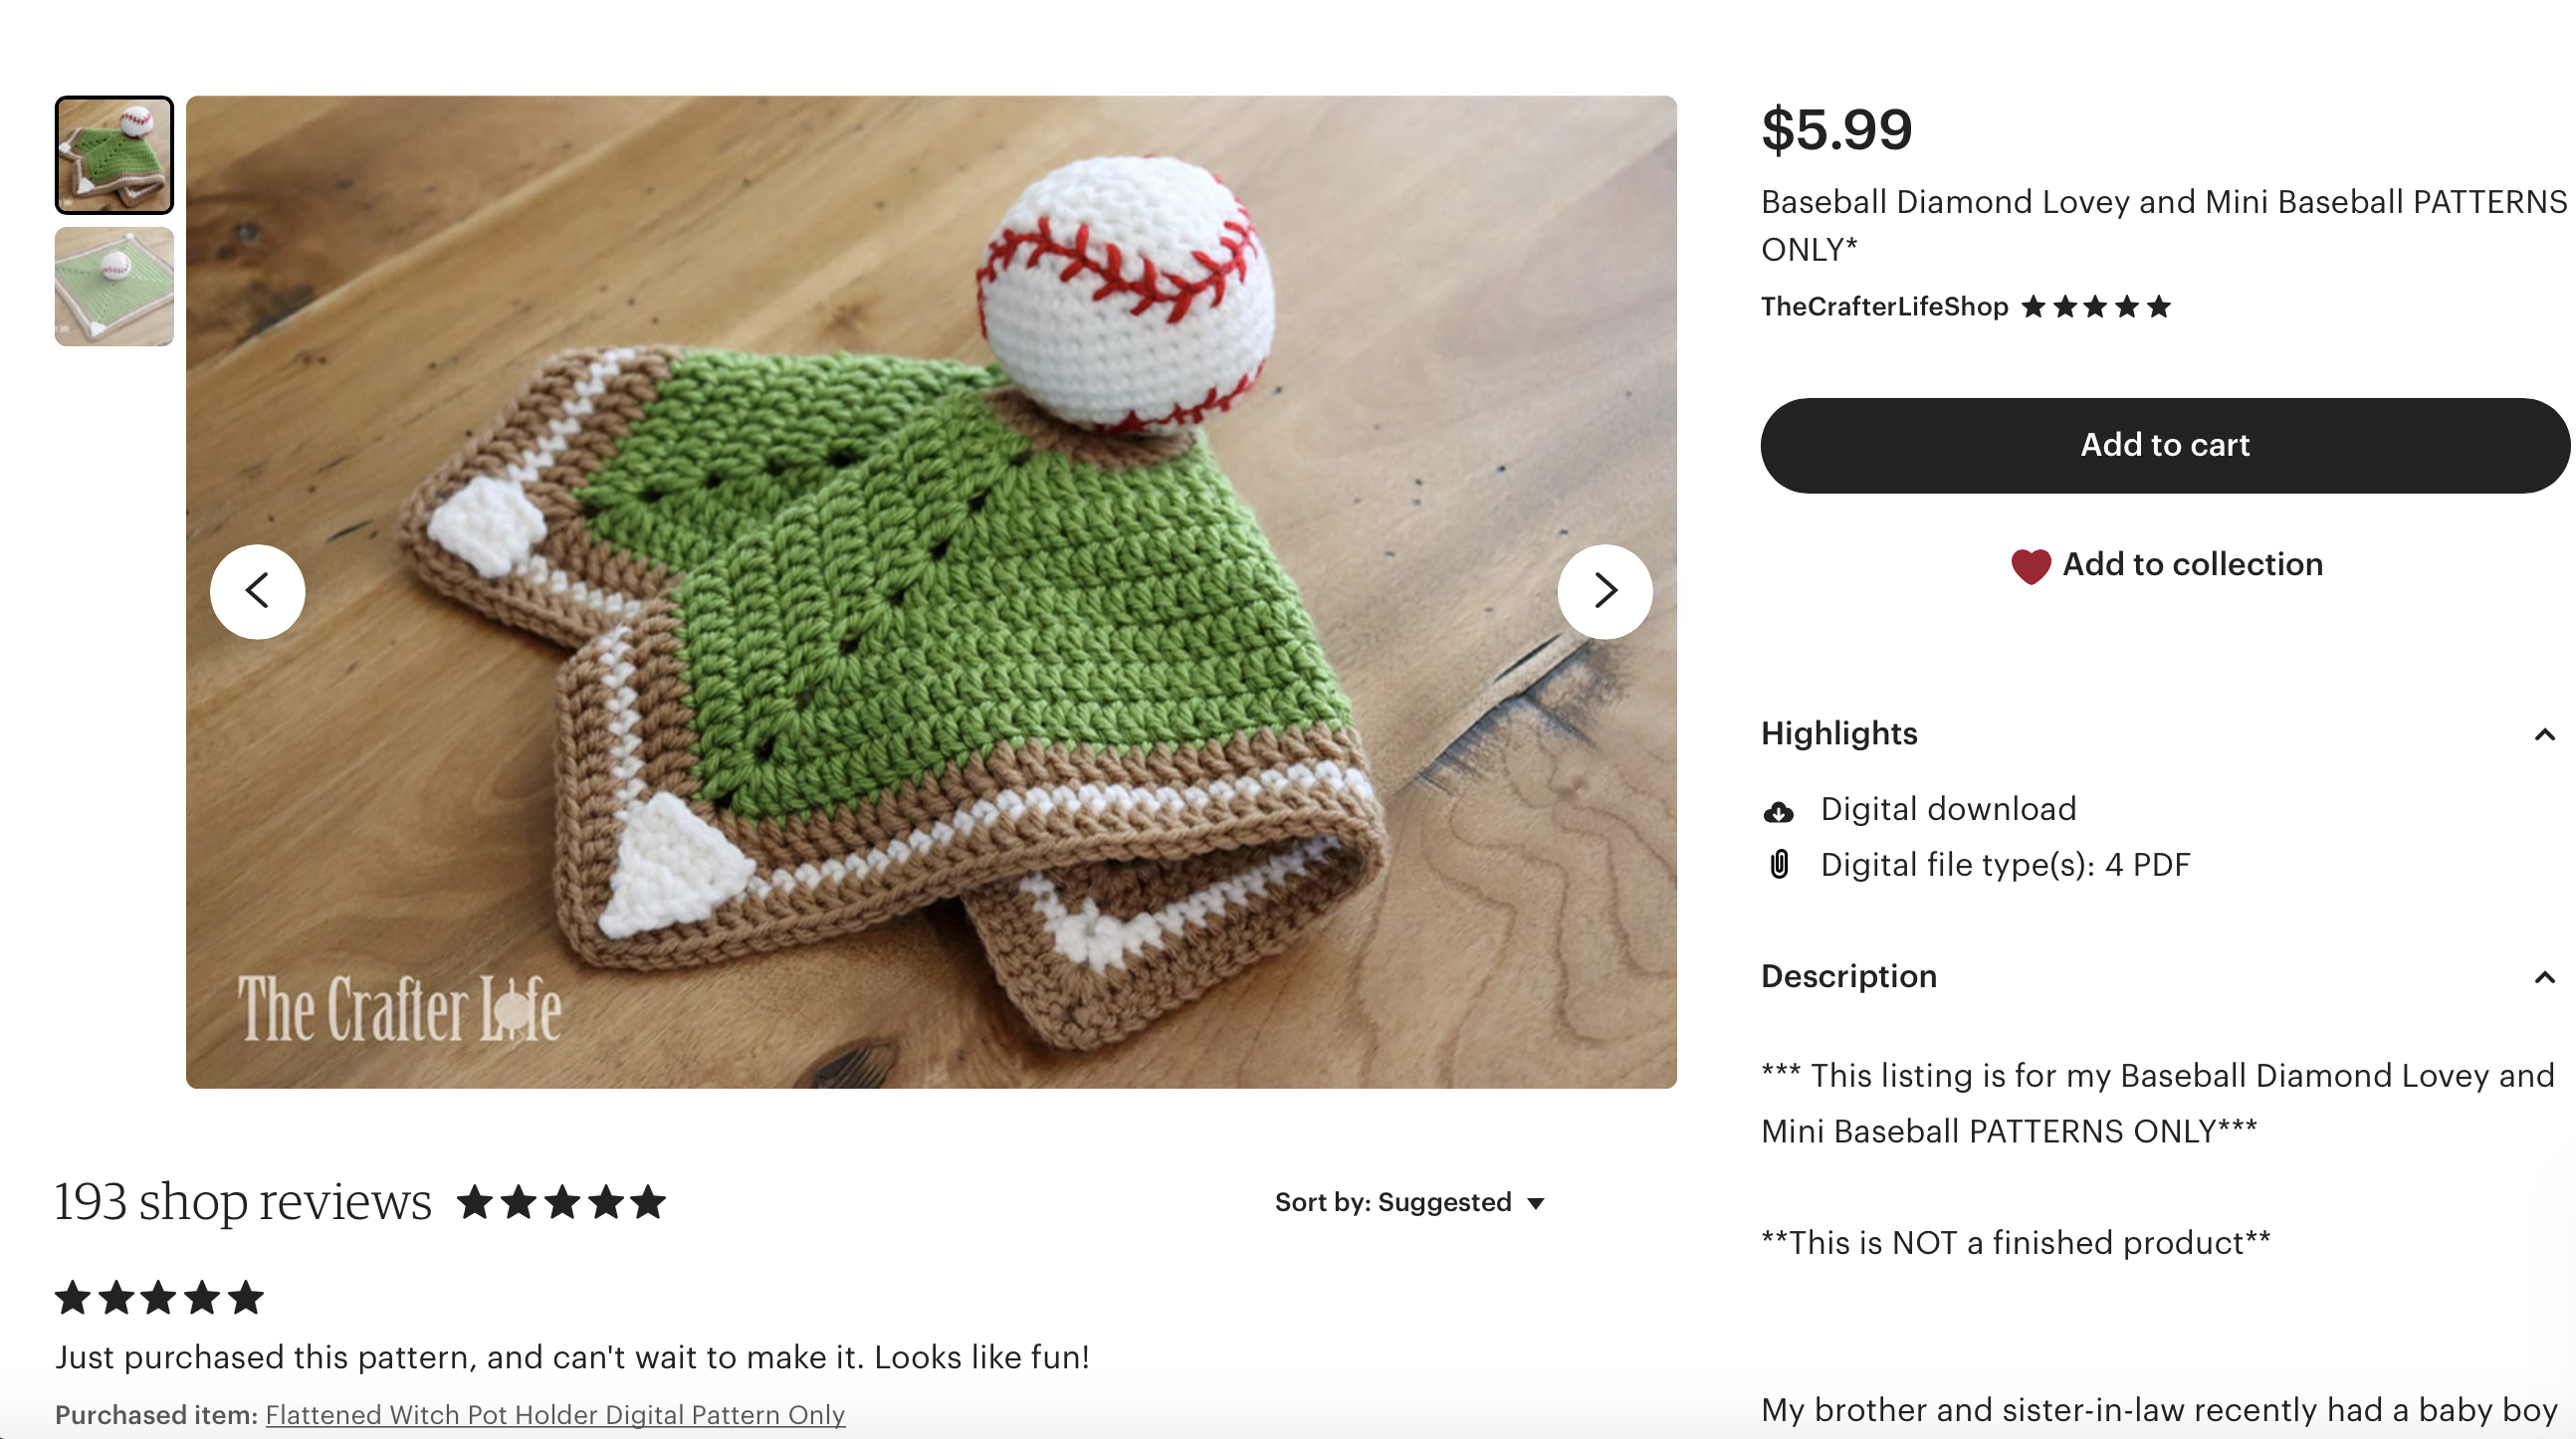
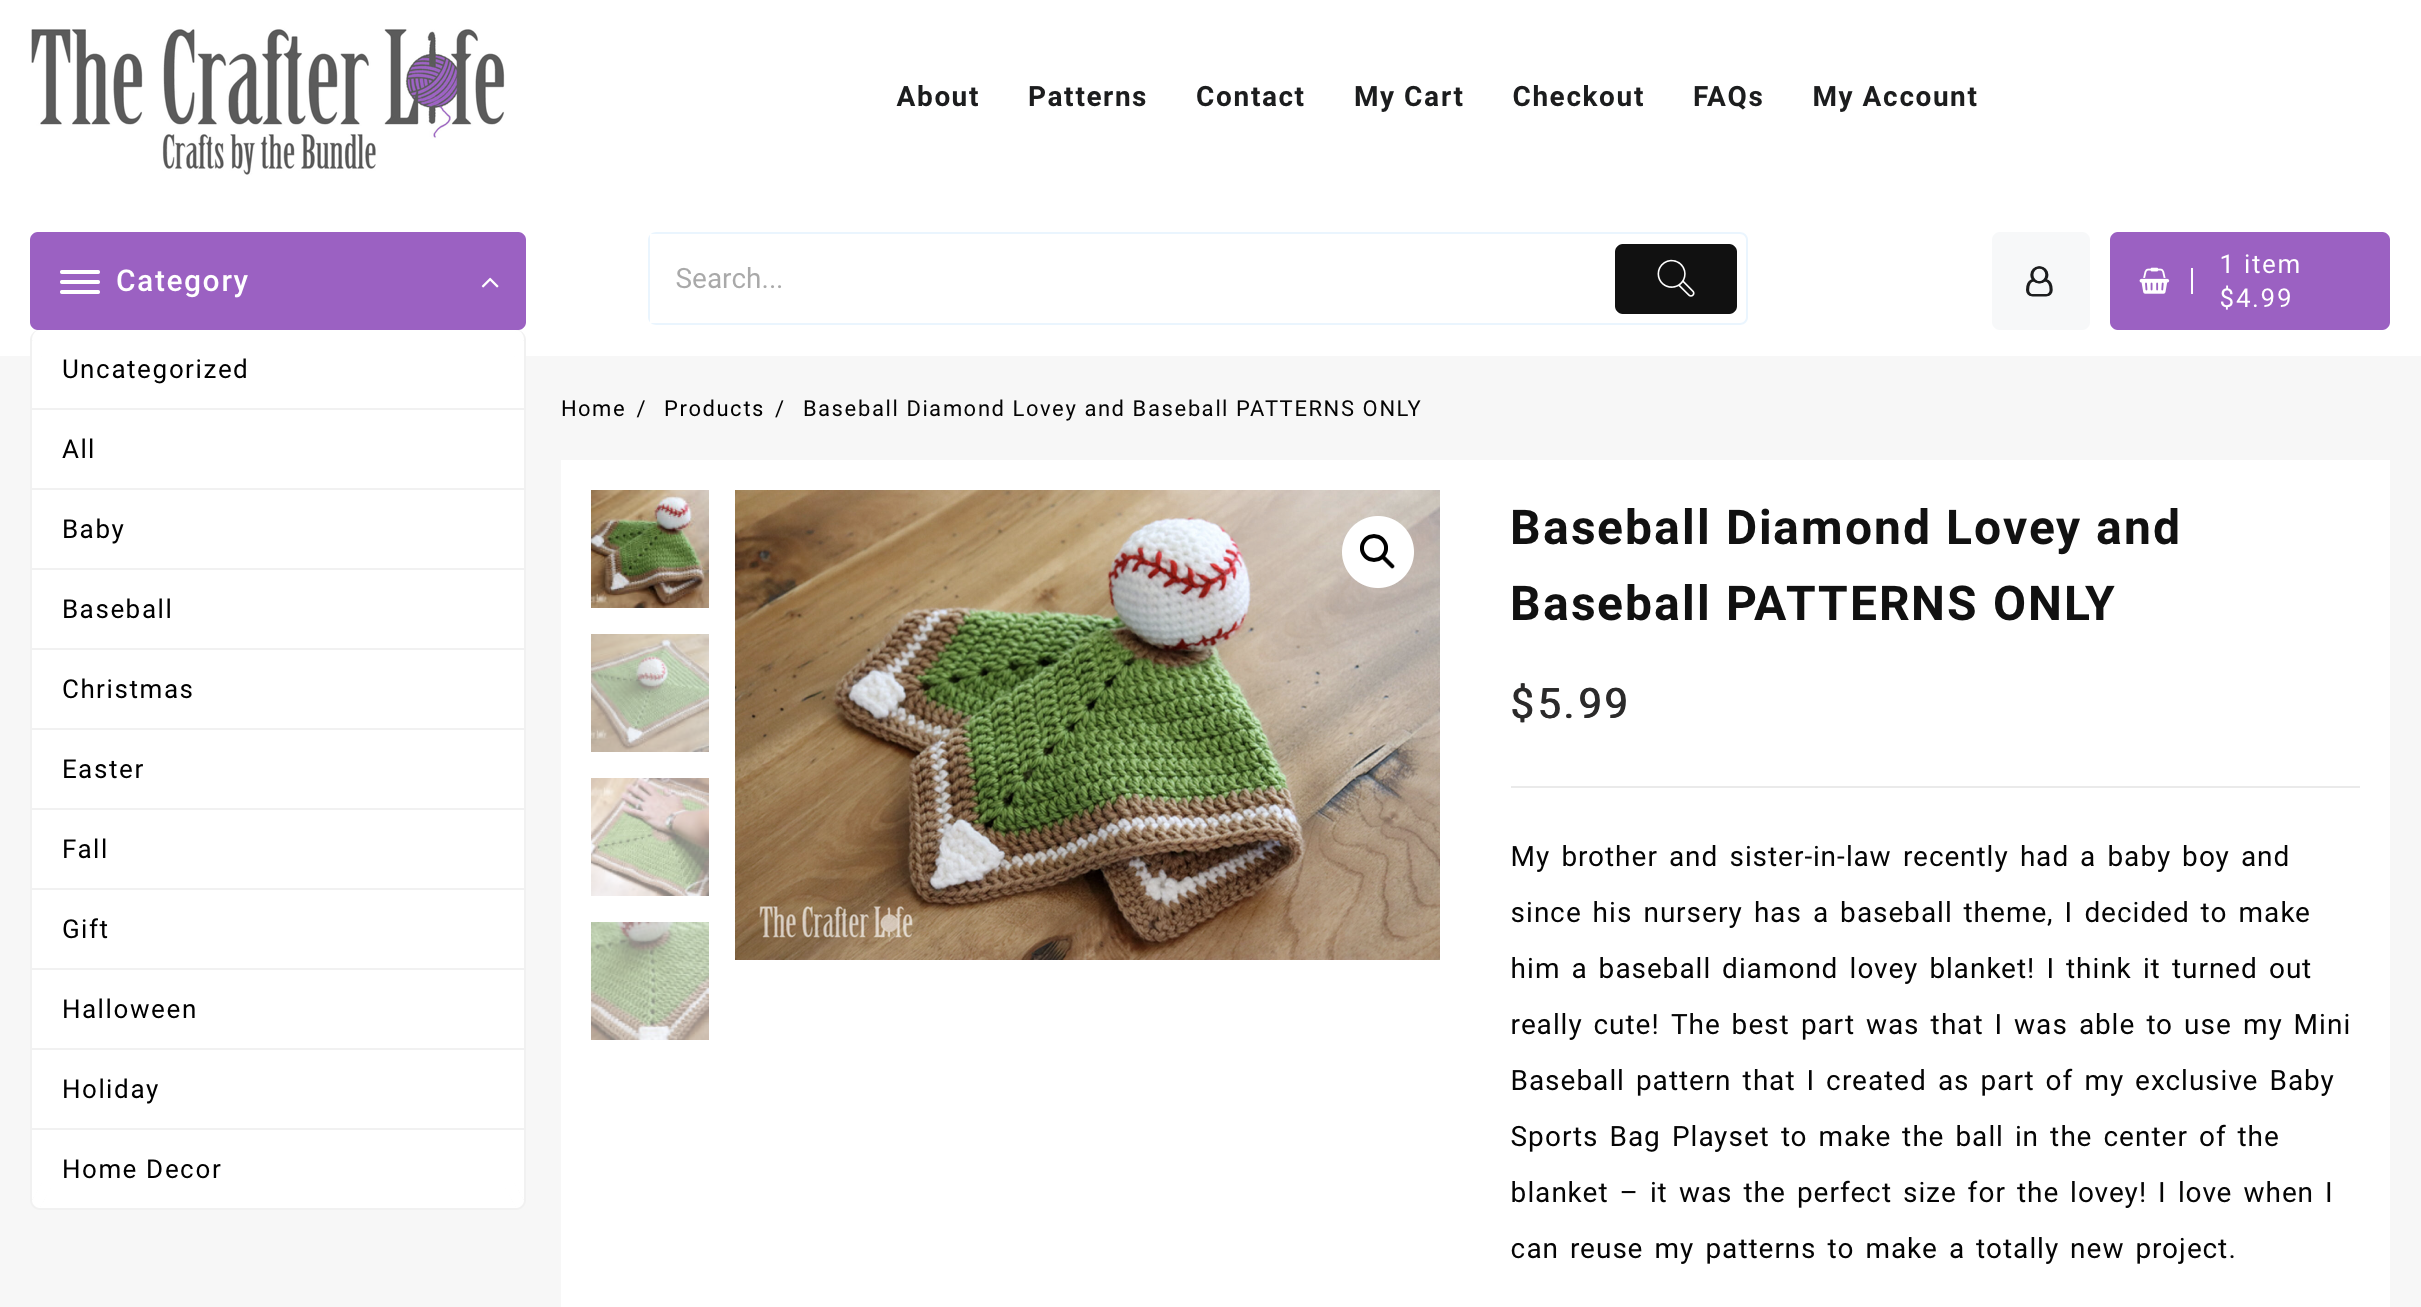
BASEBALL DIAMOND LOVEY
My brother and sister-in-law recently had a baby boy and since his nursery has a baseball theme, I decided to make him a baseball diamond lovey blanket! I think it turned out really cute! The best part was that I was able to use my Mini Baseball pattern that I created as part of my exclusive Baby Sports Bag Playset to make the ball in the center of the blanket – it was the perfect size for the lovey! I love when I can reuse my patterns to make a totally new project. If you are interested in making a Baseball Diamond Lovey, see below for my pattern.
Baseball Diamond Lovey
This pattern is written to be used as a small lovey blanket for a baby. It could also be used to decorate a sports-themed nursery.
FINISHED MEASUREMENTS
The finished lovey blanket is approximately 11 inches wide by 11 inches long.
MATERIALS
– Size H/8/5.00mm crochet hook or size needed to obtain gauge
– Worsted weight (4) acrylic yarn in Light Brown/Tan (I used Red Heart With Love yarn in Tan.)
– Worsted weight (4) acrylic yarn in Green (I used Lion Brand Vanna’s Choice yarn in Kelly Green.)
– Worsted weight (4) yarn in White (I used Red Heart Super Saver in White.)
– Materials needed for Mini Baseball pattern (found in the Mini Baseball pattern available on Etsy or TheCrafterLifePatterns)
– Scissors
– Tapestry needle for weaving in ends
– Stitch markers (Optional – if needed for counting/marking stitches)
– Straight Pins (Optional – if needed for holding parts in place when sewing together)
– Measuring tape
ABBREVIATIONS
– ch = chain
– chs = chains
– dc = double crochet
– hdc = half double crochet
– sc = single crochet
– slst = slip stitch
– sp = space
– sps = spaces
– st = stitch
– sts = stitches
GAUGE
4 dc = 1 inch
2 rows of dc = 1 inch
PATTERN NOTES
- The lovey is actually a granny square with a circle in the center. The ch-2 at the beginning of each round counts as the first dc of the round. The first actual double crochet stitch of each round is always worked in the same stitch as the chain-2. Each round ends with a slip stitch (slst) in the top of the first actual dc made and NOT in the ch-2.
- The yarn is cut after each color change.
- The bases are made separately in rows of single crochet stitches. They are then attached to the top of the lovey.
- The baseball is made following my Mini Baseball Pattern found on Etsy and TheCrafterLifePatterns
DIRECTIONS
Granny Square Body of Lovey
*Use your 5.00 mm hook and brown yarn to begin the granny square.
*Remember that beginning ch-2 of each round counts as first dc of round, but do not slst in top of ch-2 at the end of the round – instead, work the final (joining) slst in the first actual dc stitch you made after ch-2.
*Once the blanket begins to square off (after the inner circle is made), the corners of the granny square blanket are made in the chain spaces.
Round 1: Ch 4, slst in 4th ch to create a ring, ch 2 (counts as first dc), work 11 dc in ring, slst in first dc st made (do not slst in starting ch-2). (12 dc)
Round 2: Ch 2 (counts as first dc), dc in same st (you will slst in this dc at end of round), 2 dc in next 10 sts around, 2 dc in slst, slst in first dc (not the starting ch-2), fasten off and weave in loose ends. (24 dc)
Round 3: Attach Green Yarn to the next dc of Round 2 (the st next to the dc in which you worked the slst at the end of Round 2), ch 2, dc in same st, ch 1, 2 dc in next st, hdc in next st, sc in next 2 sts, hdc in next st, 2 dc in next st, ch 1, 2 dc in next st, hdc in next st, sc in next 2 sts, hdc in next st, 2 dc in next st, ch 1, 2 dc in next st, hdc in next st, sc in next 2 sts, hdc in next st, 2 dc in next st, ch 1, 2 dc in next st, hdc in next st, sc in next st, sc in slst from Round 2, hdc in space after slst (which is the dc stitch in which you worked your final slst of Round 2), slst in first dc (not ch-2). (16 dc, 8 hdc, 8 sc; 32 total sts)
Round 4: Ch 2, dc in same st, work (2 dc, ch 2, 2 dc) in ch-1 sp, dc in next 8 sts, work (2 dc, ch 2, 2 dc) in next ch-1 sp, dc in next 8 sts, work (2 dc, ch 2, 2 dc) in next ch-1 sp, dc in next 8 sts, work (2 dc, ch 2, 2 dc) in next ch-1 sp, dc in next 6 sts, slst in first dc (not ch-2) (48 dc)
Round 5: Ch 2, dc in same st, dc in next 2 sts, work (2 dc, ch 2, 2 dc) in ch-2 sp, dc in next 12 sts, work (2 dc, ch 2, 2 dc) in ch-2 sp, dc in next 12 sts, work (2 dc, ch 2, 2 dc) in ch-2 sp, dc in next 12 sts, work (2 dc, ch 2, 2 dc) in ch-2 sp, dc in next 8 sts, slst in first dc (not ch-2). (64 dc)
Round 6: Ch 2, dc in same st, dc in next 4 sts, work (2 dc, ch 2, 2 dc) in ch-2 sp, dc in next 16 sts, work (2 dc, ch 2, 2 dc) in ch-2 sp, dc in next 16 sts, work (2 dc, ch 2, 2 dc) in ch-2 sp, dc in next 16 sts, work (2 dc, ch 2, 2 dc) in ch-2 sp, dc in next 10 sts, slst in first dc (not ch-2). (80 dc)
Round 7: Ch 2, dc in same st, dc in next 6 sts, work (2 dc, ch 2, 2 dc) in ch-2 sp, dc in next 20 sts, work (2 dc, ch 2, 2 dc) in ch-2 sp, dc in next 20 sts, work (2 dc, ch 2, 2 dc) in ch-2 sp, dc in next 20 sts, work (2 dc, ch 2, 2 dc) in ch-2 sp, dc in next 12 sts, slst in first dc (not ch-2). (96 dc)
Round 8: Ch 2, dc in same st, dc in next 8 sts, work (2 dc, ch 2, 2 dc) in ch-2 sp, dc in next 24 sts, work (2 dc, ch 2, 2 dc) in ch-2 sp, dc in next 24 sts, work (2 dc, ch 2, 2 dc) in ch-2 sp, dc in next 24 sts, work (2 dc, ch 2, 2 dc) in ch-2 sp, dc in next 14 sts, slst in first dc (not ch-2). (112 dc)
Round 9: Ch 2, dc in same st, dc in next 10 sts, work (2 dc, ch 2, 2 dc) in ch-2 sp, dc in next 28 sts, work (2 dc, ch 2, 2 dc) in ch-2 sp, dc in next 28 sts, work (2 dc, ch 2, 2 dc) in ch-2 sp, dc in next 28 sts, work (2 dc, ch 2, 2 dc) in ch-2 sp, dc in next 16 sts, slst in first dc (not ch-2). (128 dc)
Round 10: Ch 2, dc in same st, dc in next 12 sts, work (2 dc, ch 2, 2 dc) in ch-2 sp, dc in next 32 sts, work (2 dc, ch 2, 2 dc) in ch-2 sp, dc in next 32 sts, work (2 dc, ch 2, 2 dc) in ch-2 sp, dc in next 32 sts, work (2 dc, ch 2, 2 dc) in ch-2 sp, dc in next 18 sts, slst in first dc (not ch-2), fasten off and weave in ends. (144 dc)
Round 11: Attach Brown Yarn to the first dc of Round 10 (the same st in which you worked the slst to end Round 10), ch 2, dc in same st, dc in next 14 sts, work (2 dc, ch 2, 2 dc) in ch-2 sp, dc in next 36 sts, work (2 dc, ch 2, 2 dc) in ch-2 sp, dc in next 36 sts, work (2 dc, ch 2, 2 dc) in ch-2 sp, dc in next 36 sts, work (2 dc, ch 2, 2 dc) in ch-2 sp, dc in next 20 sts, slst in first dc (not ch-2), fasten off and weave in ends. (160 dc)
Round 12: Attach White Yarn to the first dc of Round 11 (the same st in which you worked the slst to end Round 11), ch 1, sc in same st, sc in next 16 sts, work (2 sc, ch 2, 2 sc) in ch-2 sp, sc in next 40 sts, work (2 sc, ch 2, 2 sc) in ch-2 sp, sc in next 40 sts, work (2 sc, ch 2, 2 sc) in ch-2 sp, sc in next 40 sts, work (2 sc, ch 2, 2 sc) in ch-2 sp, sc in next 22 sts, slst in first sc (not ch-2), fasten off and weave in ends. (176 dc)
Round 13: Attach Brown Yarn to the first dc of Round 12 (the same st in which you worked the slst to end Round 12), ch 2, dc in same st, dc in next 18 sts, work (2 dc, ch 2, 2 dc) in ch-2 sp, dc in next 44 sts, work (2 dc, ch 2, 2 dc) in ch-2 sp, dc in next 44 sts, work (2 dc, ch 2, 2 dc) in ch-2 sp, dc in next 44 sts, work (2 dc, ch 2, 2 dc) in ch-2 sp, dc in next 24 sts, slst in first dc (not ch-2), fasten off and weave in ends. (192 dc)
***After weaving in loose ends, the body of the lovey is complete. Follow the directions below to make the bases.
Bases (Make 3)
*Use your 5.00 mm hook and white yarn to make the bases.
Row 1: Ch 4, sc in 2nd ch from hook and in next 2 chs across (3 sc)
Row 2: Ch 1, turn, sc in each st across. (3 sc)
Row 3: Ch 1, turn, sc in each st across, fasten off, leaving a long tail for sewing onto the blanket. (3 sc)
Home Base
*Use your 5.00 mm hook and white yarn to make the home base.
Row 1: Ch 2, sc in 2nd ch from hook. (1 sc)
Row 2: Ch 1, turn, 2 sc in next st. (2 sc)
Row 3: Ch 1, turn, 2 sc in first st, 2 sc in next st. (4 sc)
Row 4: Ch 1, turn, sc in each st across. (4 sc)
Row 5: Ch 1, turn, sc in each st across, fasten off, leave long tail for sewing onto blanket. (4 sc)
Baseball
You can choose a baseball pattern of your choice or you can find my baseball pattern available for purchase with the Baseball Diamond Lovey on Etsy or TheCrafterLifePatterns.
***Once you have the bases and baseball made, follow the directions below for attaching them to the blanket.
Attaching the Bases
Use a tapestry needle and the long tails you left on each base to sew them in place at the corners of the white baselines on the blanket. You may want to use straight pins to hold the bases in place to aid in positioning and sewing. If you don’t want any white stitches to show on the brown areas on the bottom side of the blanket, make sure not to draw your needle/yarn all the way through the blanket to the bottom (instead, only sew it to the top layer of the brown area on the blanket). You can take your needle/yarn all the way through to the bottom of the blanket if it’s in a white area since you won’t notice white on white on the bottom. See pictures below. Make sure to knot/secure your yarn well once you are finished sewing so the bases stay firmly attached to the blanket.
Attaching the Baseball
Use a tapestry needle and a long strand of brown yarn to sew the baseball to the top of the blanket on the “pitcher’s mound” (brown circle). Position the baseball how you want it to show before sewing. Make sure you secure your yarn well so the ball stays attached.
*I didn’t actually sew my baseball permanently to the blanket. Instead, I used a strand of brown yarn that I wove several times through the bottom of the ball and tied to the blanket so it could be removed to play with later. If you choose this option, just make sure the ball is firmly attached and the parents are aware in case the baby unties the ball and gets a hold of the yarn strand you used to tie it onto the blanket. I wouldn’t suggest the baby be unattended with the lovey in this case. When the baby gets a little older, you can remove the ball from the blanket so they can play with it separately.
***Once you have securely attached all the bases and the baseball to the top of the blanket, your Baseball Diamond Lovey is now complete and ready to cuddle!
This pattern is property of TheCrafterLife.com
You may not sell my patterns or claim them as your own. You may make items to sell (i.e. on Etsy) from my patterns but I ask that you link back to my site (TheCrafterLife.com) and provide credit for the pattern. You are welcome to share my patterns on social media as long as you link back directly to my site by providing the link. No copying and pasting of any patterns will be allowed under any circumstances.


Mermaid Scale Accent Wall