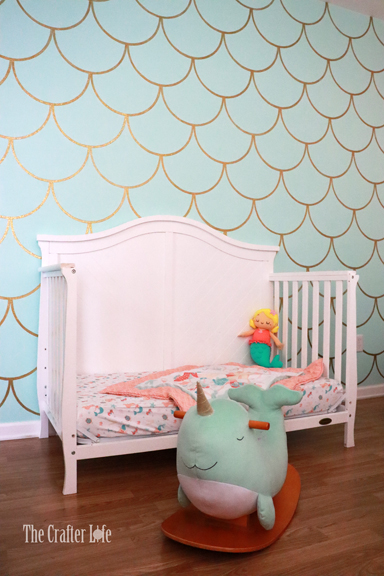
Mermaid Scale Accent Wall
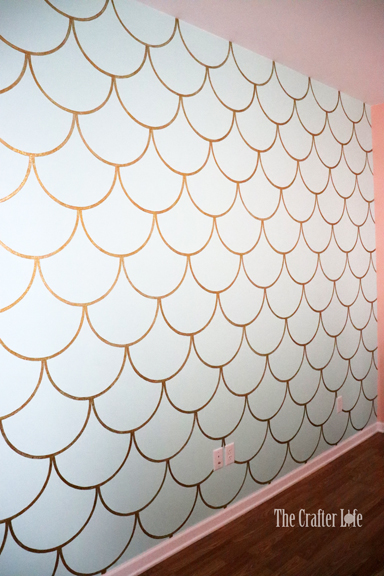
Last fall, I finally finished painting the aqua and gold mermaid scale wall I had been working on in my toddler daughter’s bedroom! I saw mermaid scale wallpaper a few years ago that was the inspiration for the idea. The wallpaper was too expensive so I figured I would paint the wall myself. The problem was that I wanted the mermaid scales to be LARGE and I couldn’t find any wall stencils that had big enough scales. I needed to create a stencil of my own.
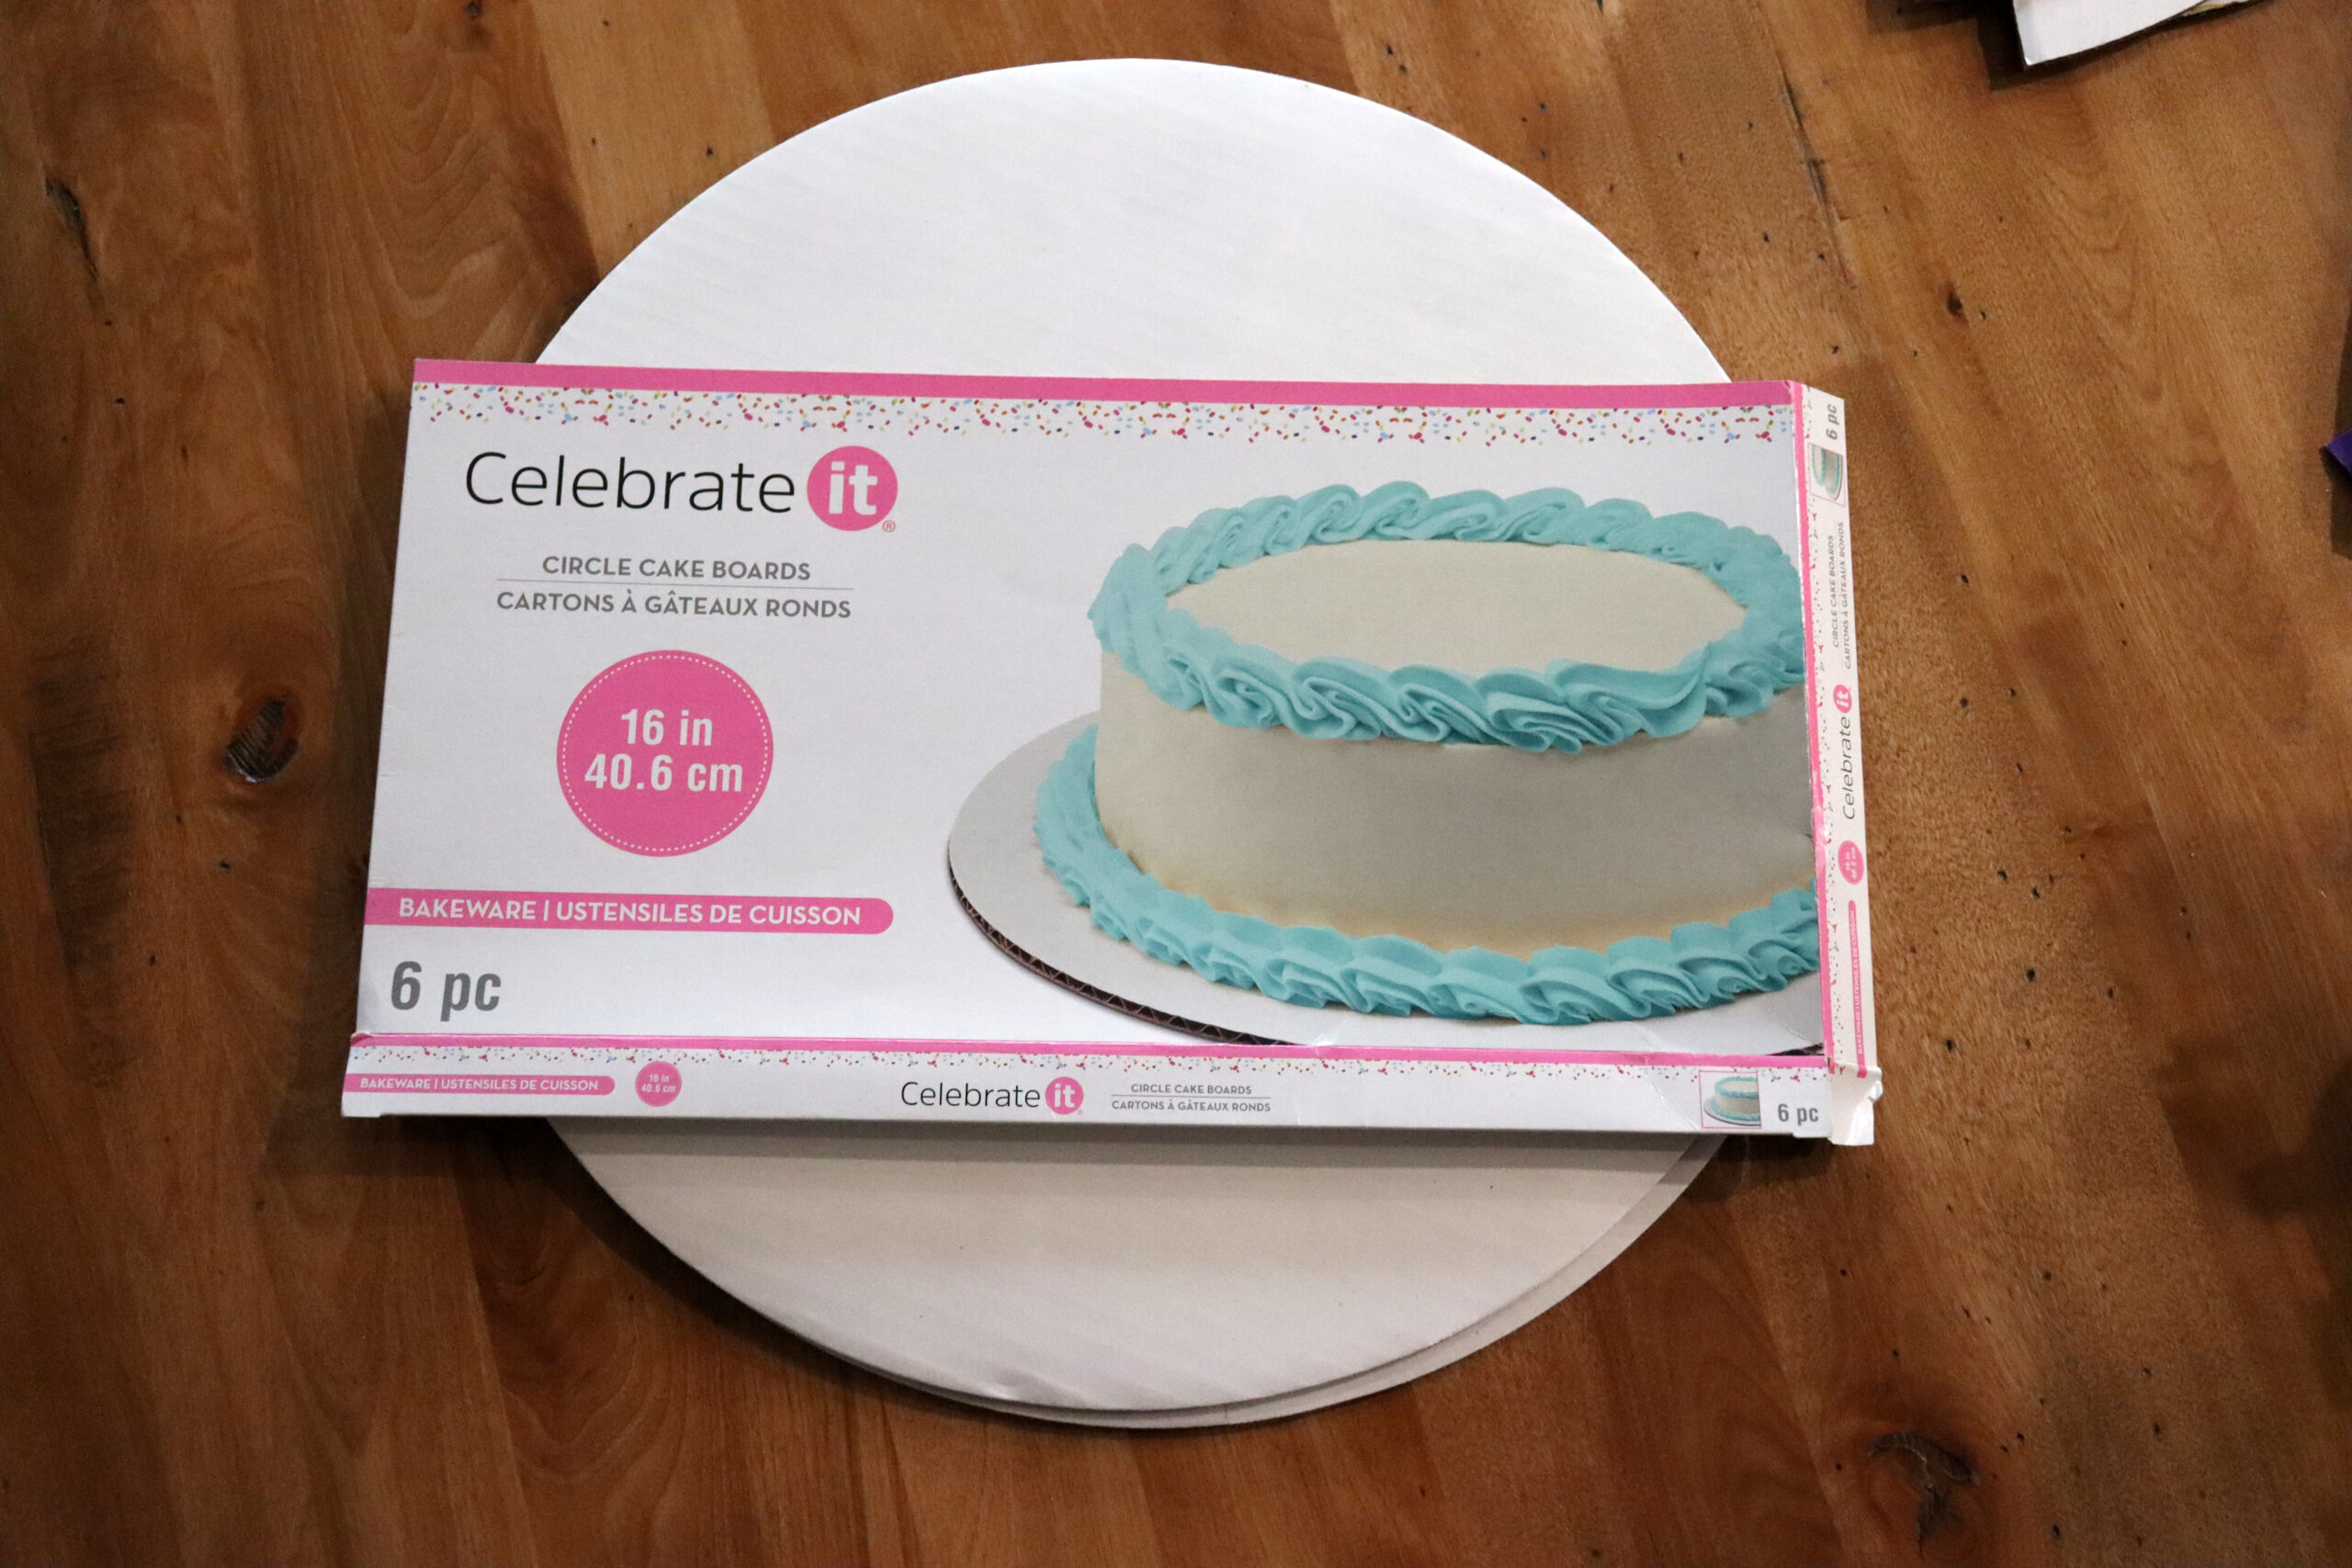
When thinking about the shape of the scales, I realized they are really just semicircles, so all I needed was a large enough circle to make my stencil. These sturdy 16-inch circle cake boards at Michaels were the perfect solution! I cut one in half and used it as my stencil for each scale on the wall. It is awesome that the cake circles are sold in a pack of 6 because I had to use a few others in order to make the partial pieces of the scales that were on the ends of each row on the wall since they didn’t fit perfectly across the wall. Since I wanted the scales to be thick, I also needed to create a slightly smaller semicircle than the main stencil I used in order to make the inner outline of each scale (so I used another cake board to make that stencil).
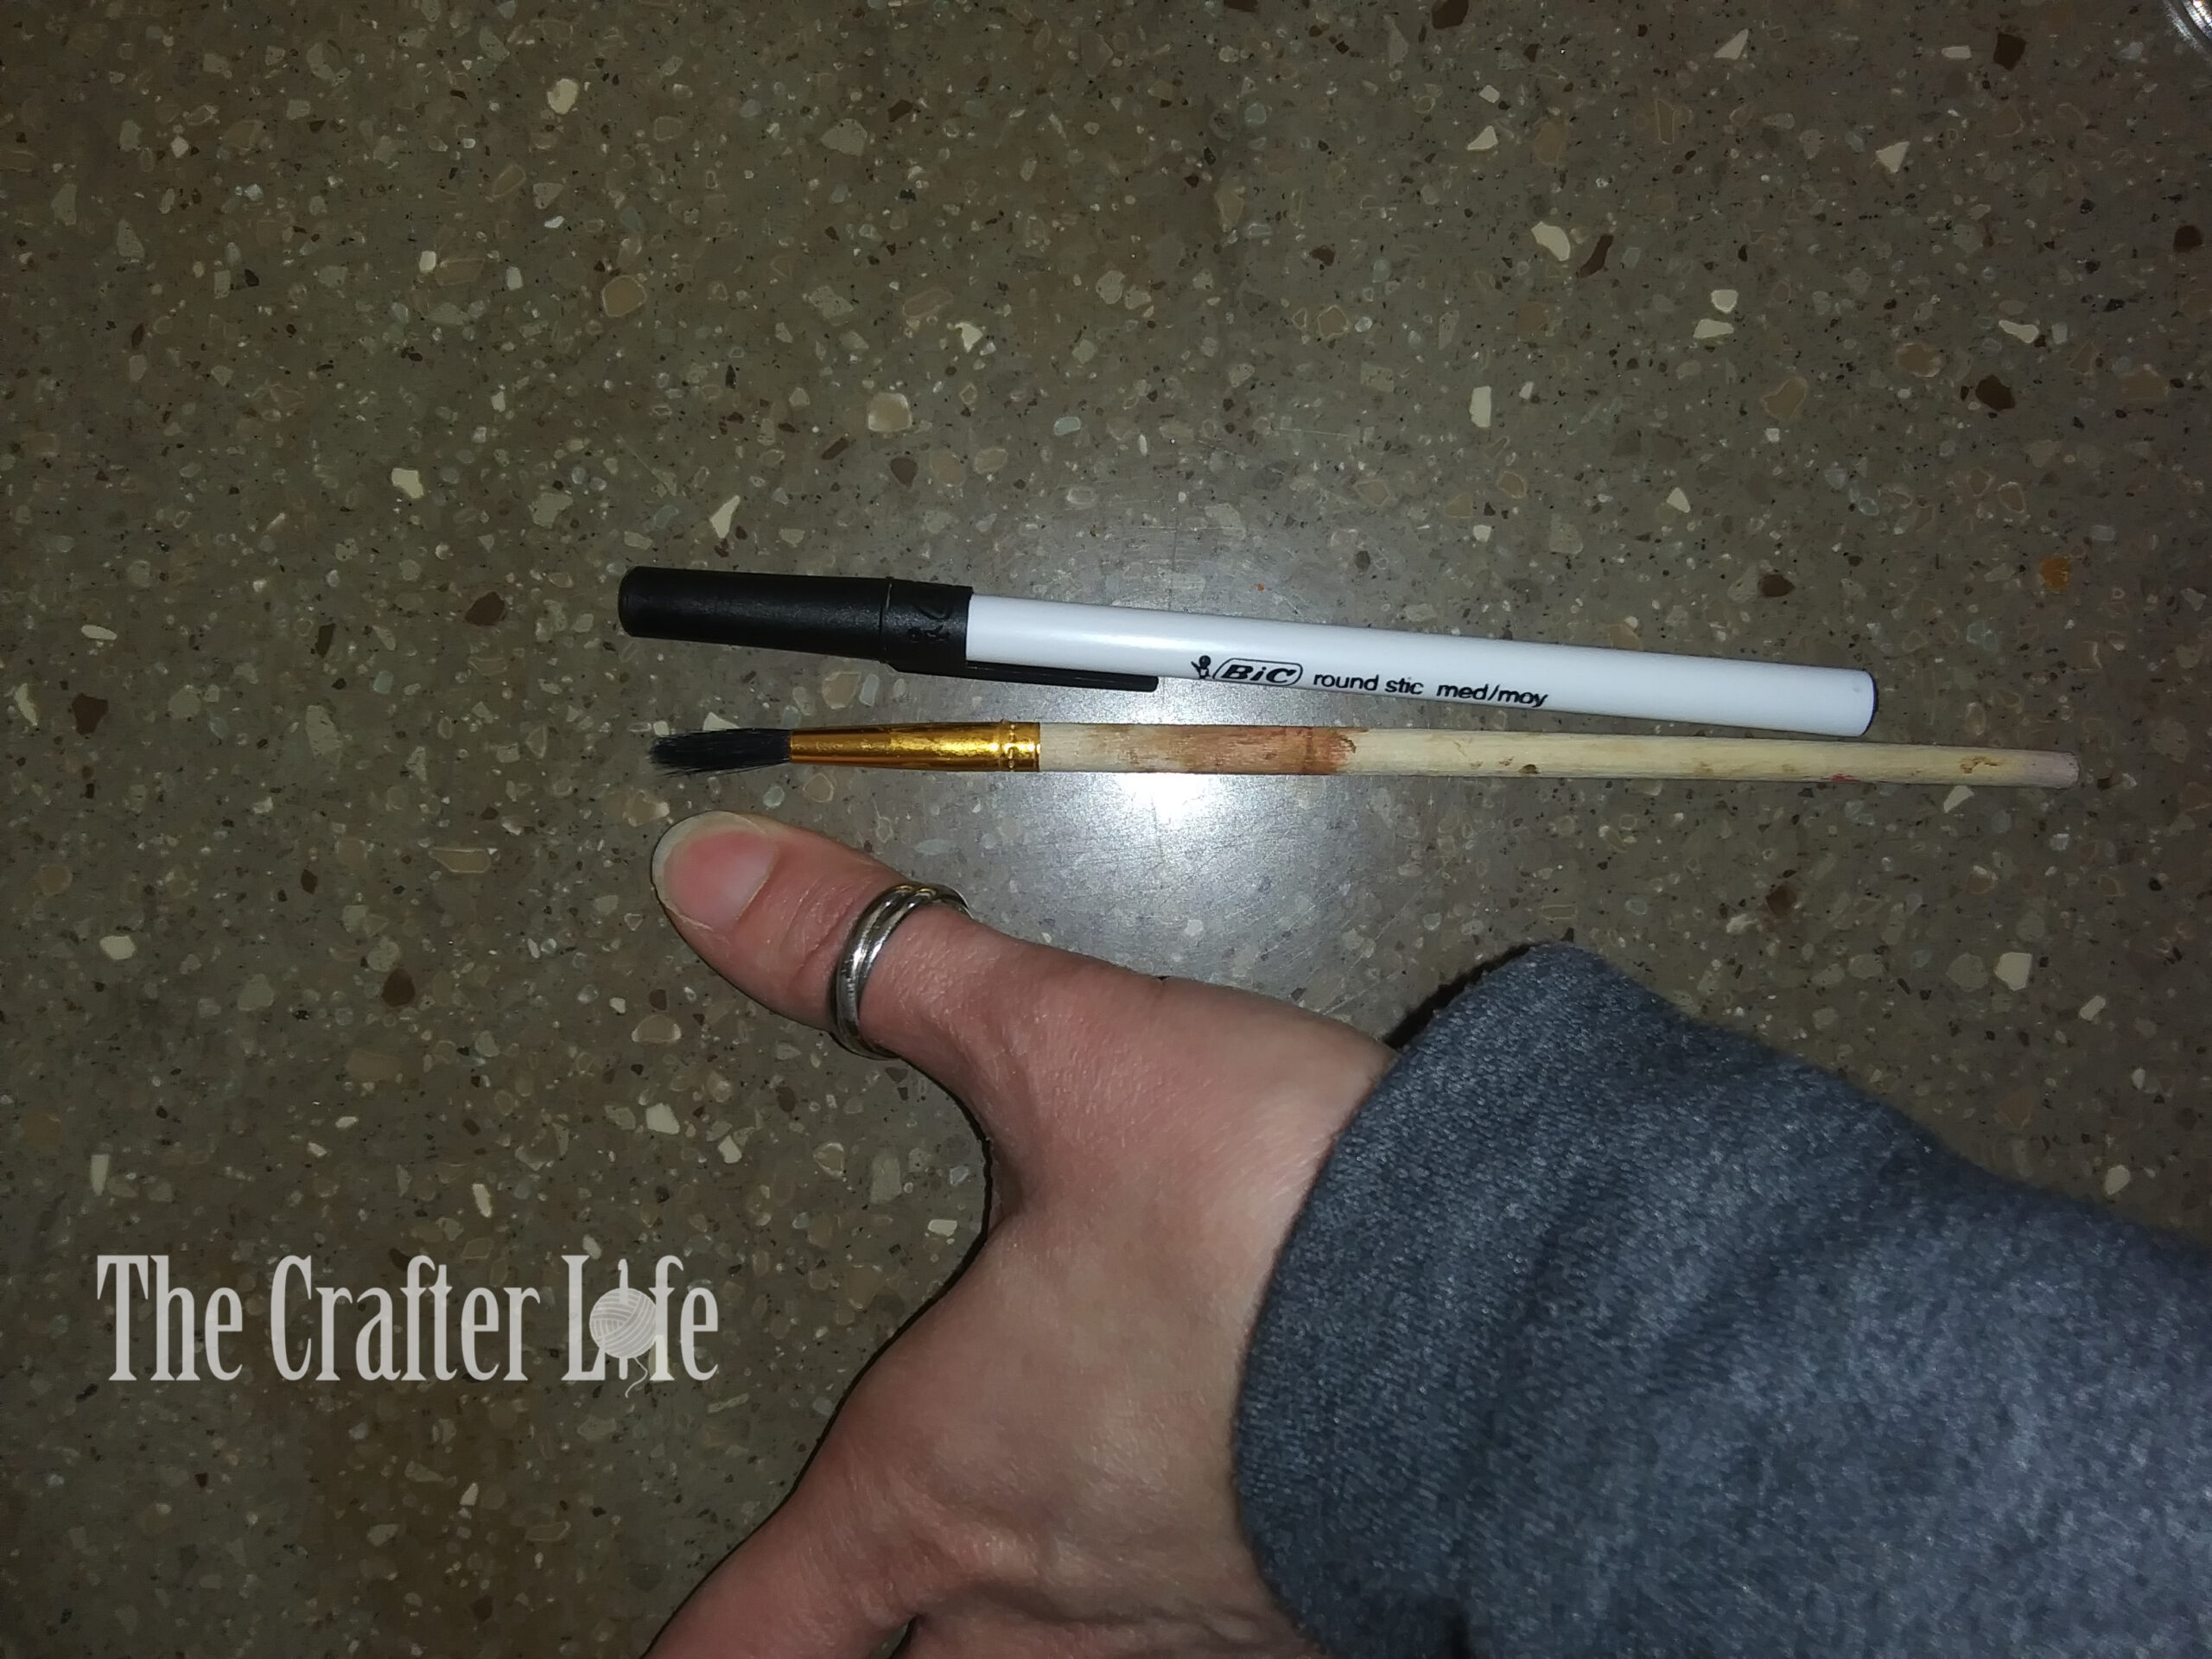
After stenciling all the scales on the wall with a pencil, all I had to do was paint them! That seemed easy enough, but took a much longer time than I anticipated because I found using a small paint brush on each scale worked best for keeping the outlines of the scales smooth. I had to paint each scale a second time using glitter paint in order to create the “sparkly” appearance I desired.
All in all, I am very happy with how the wall turned out and the fact that my method saved a lot of money compared with buying pre-made wall stencils or wallpaper. The only issue is the time involved. I can’t say exactly how long it took me from start to finish because I worked on it in random spurts throughout the year. I would take long breaks (sometimes months-long) before working on it again since I would become busy with other things in life. If I would have worked on it straight through without long breaks, I would say I could have had it complete within 2 weeks (1-2 days for stenciling, 10-12 days of painting). Of course, the time it takes all depends on many variables including the size of the wall, how many hours a day you can devote to it, and how fast you can paint the scales while keeping a steady hand. Some days I would only have an hour to work on it. If you have the time to commit and would like to create a custom mermaid scale wall of your own, see below for more detailed instructions on how I created mine.
MATERIALS
- Clean Blank Wall Painted in Background Color (I used Valspar Signature Eggshell paint in Sea Lily)
- Pencil
- Eraser
- Ruler
- Tape Measure
- 16-inch Circle Cake Boards (one pack of 6 should be plenty)
- Scissors
- Rotary Cutter & Cutting Board
- Gold Paint (I used Krylon Brilliant Metallic Paint in Gold Leaf)
- Gold Glitter Paint (I used FolkArt Glitterific Paint in Gold #5875)
- Small Paint Brush (you may want a few in case they wear out)
- Paper Towels/Wipes (something to clean paint mistakes)
DIRECTIONS
Making the Scale Stencil
- Find the center of the 16-inch cake circle. Mark the center with a point/dot using a pencil. To know you have the center marked correctly, when you measure from the point/dot you marked to any point along the outside of the circle, you should get 8 inches.
- Draw a line through the center of the circle so it cuts the circle in half (the diameter of the circle).
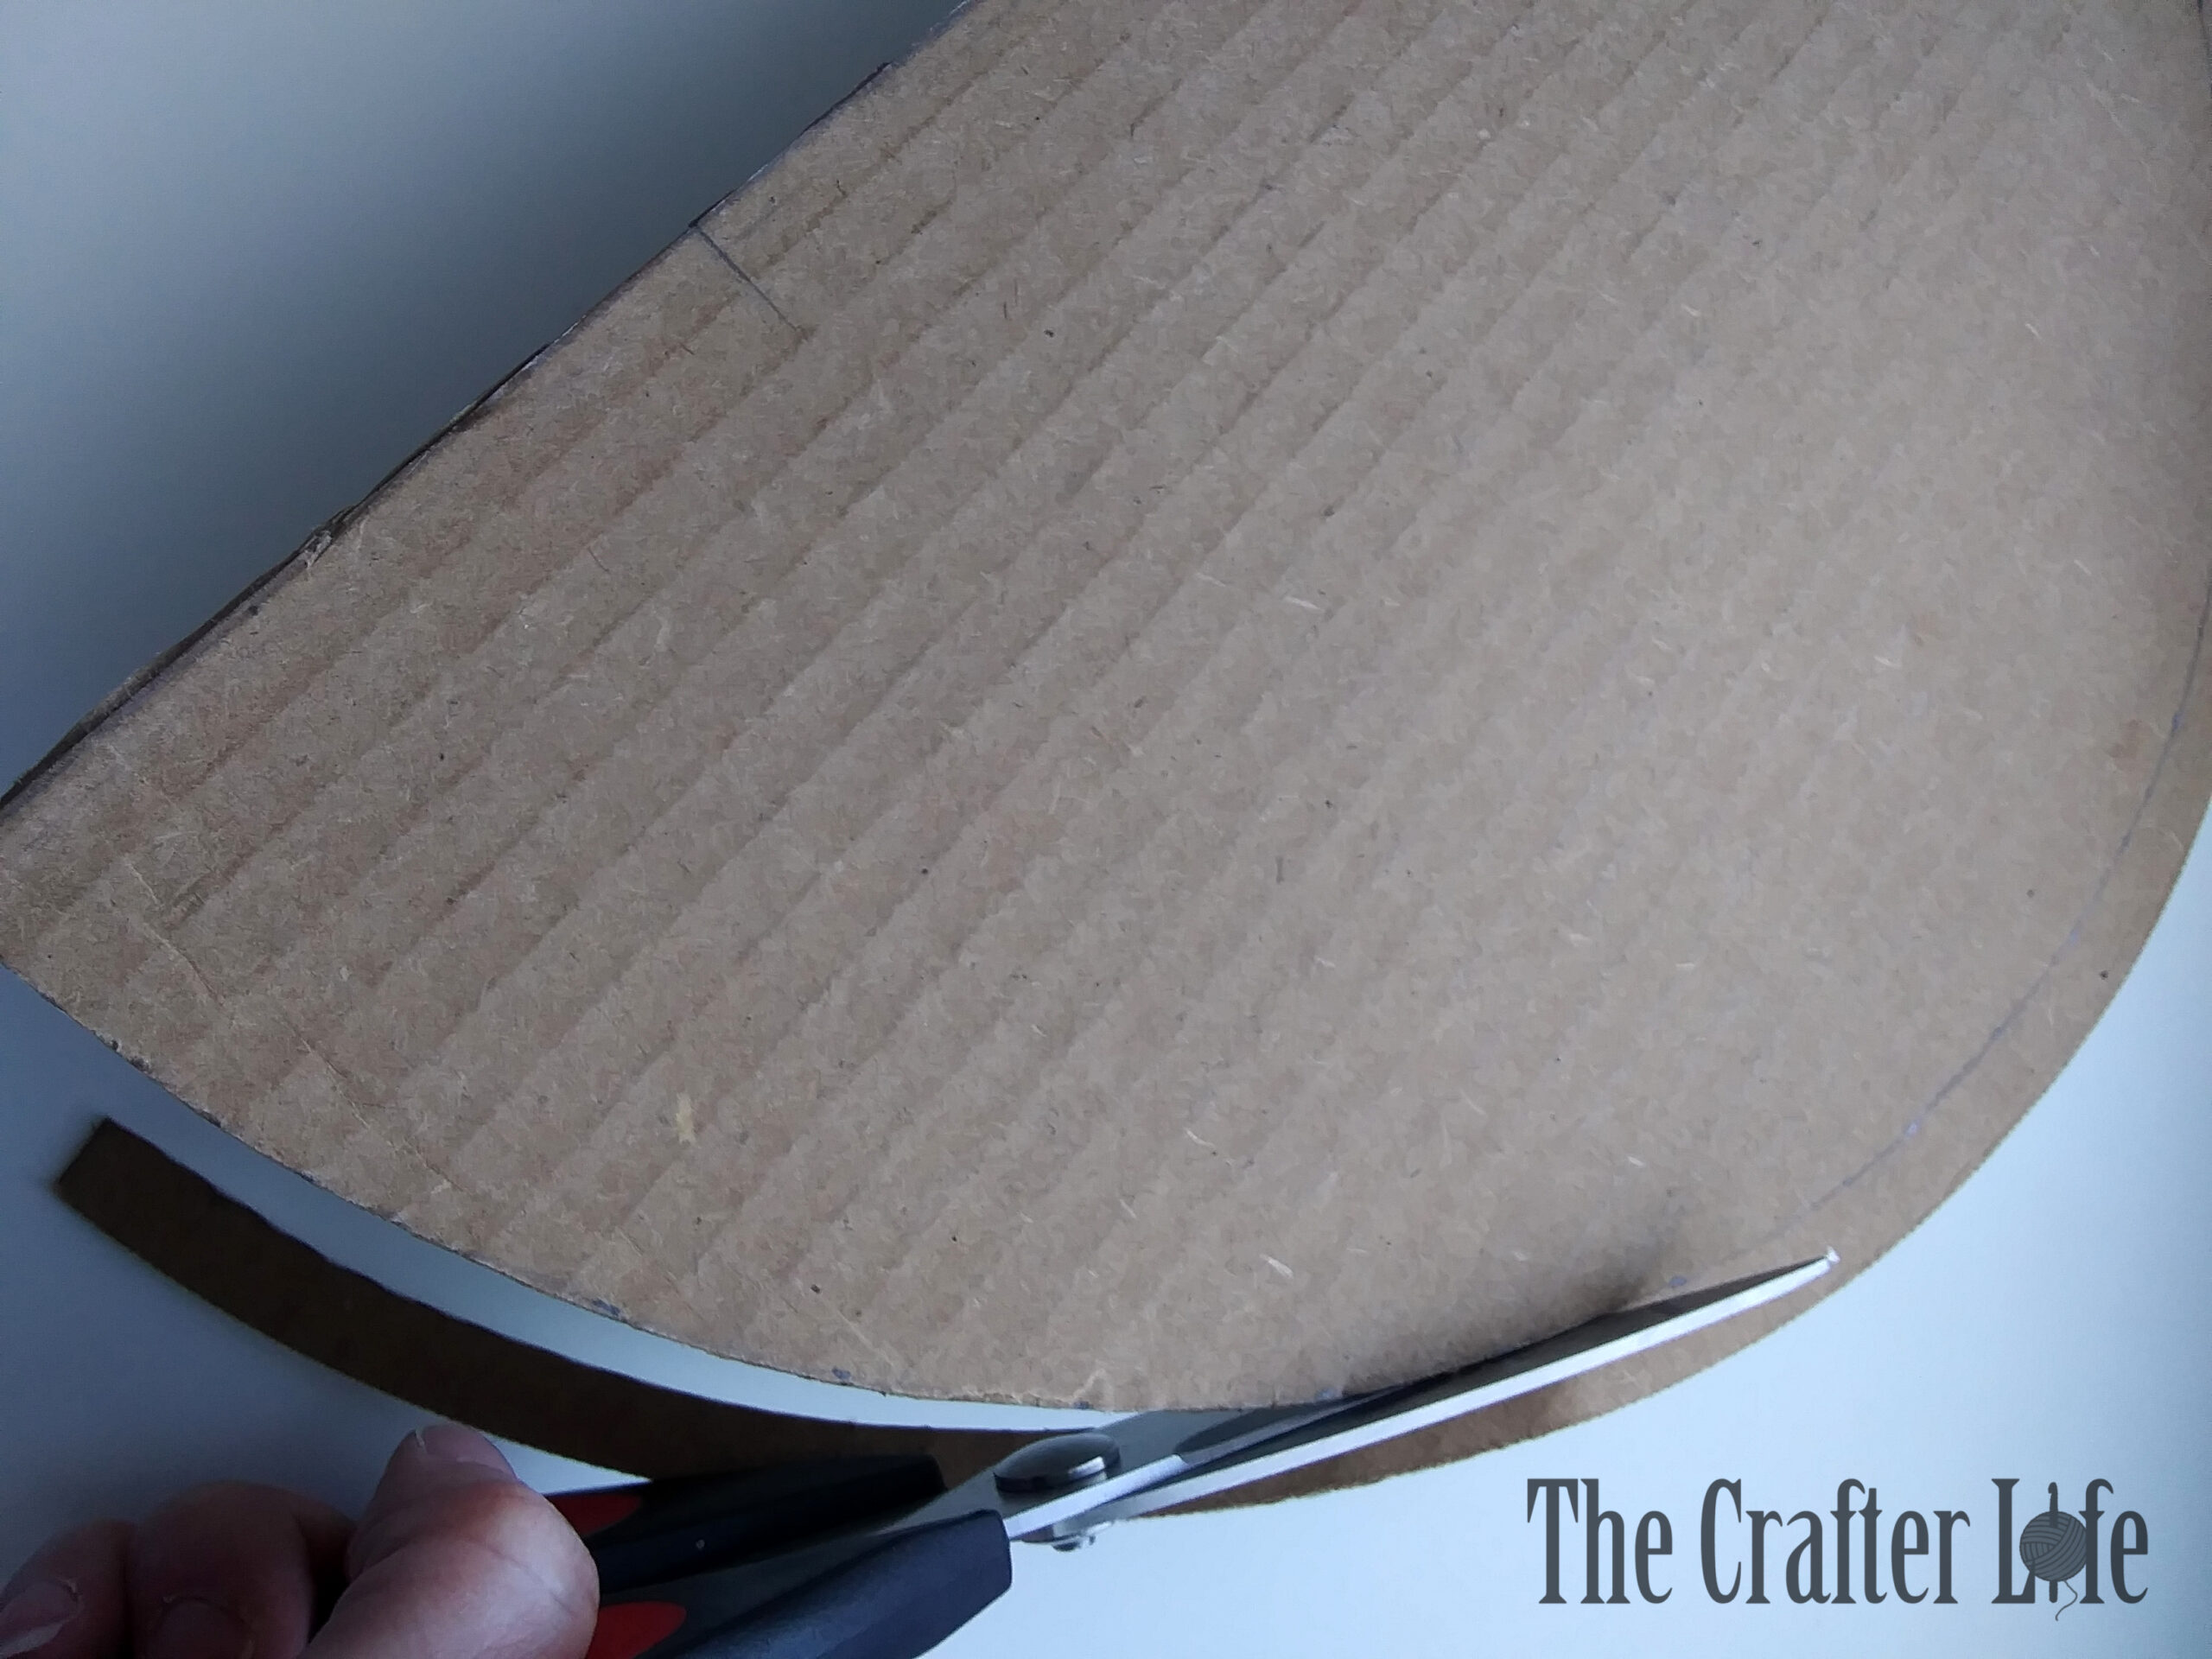
- Carefully cut the circle in half along the line (diameter) as straight and smooth as possible. A rotary cutter and cutting board work best for this since it creates a straighter/smoother cut. I used a ruler placed along the diameter as a guide for my rotary cutter to cut against. Scissors may be used, but might be difficult since the cardboard is thick. You should have 2 equal semicircles when finished. Pick the best one for your main stencil.
- Find the middle of the straight edge of your best semicircle and mark it with your pencil (it should be 8 inches in from each side of the straight edge if you cut your diameter correctly). You will use this middle mark to align it with the center of your wall when you begin to trace the stencil on the wall.
- Find the middle of the curved edge of your semicircle (it should be straight down from the middle of the straight edge) and mark it with your pencil. This will be helpful when aligning your stencil under each row of scales.
Tracing the Scale Stencil
- Measure the length of your wall. Find the middle and mark it at the TOP of the wall. This will be where you start tracing. You will start at the top of the wall in the center and then work the top row outwards from the center scale.
- Align the middle of the straight edge of your semicircle stencil with the middle mark you placed on the top of your wall. Make sure to hold your stencil so the straight edge is straight against the ceiling and the curve is at the bottom. You will NEVER trace along the straight edge – only the curved part of the stencil since that will form a scale shape.
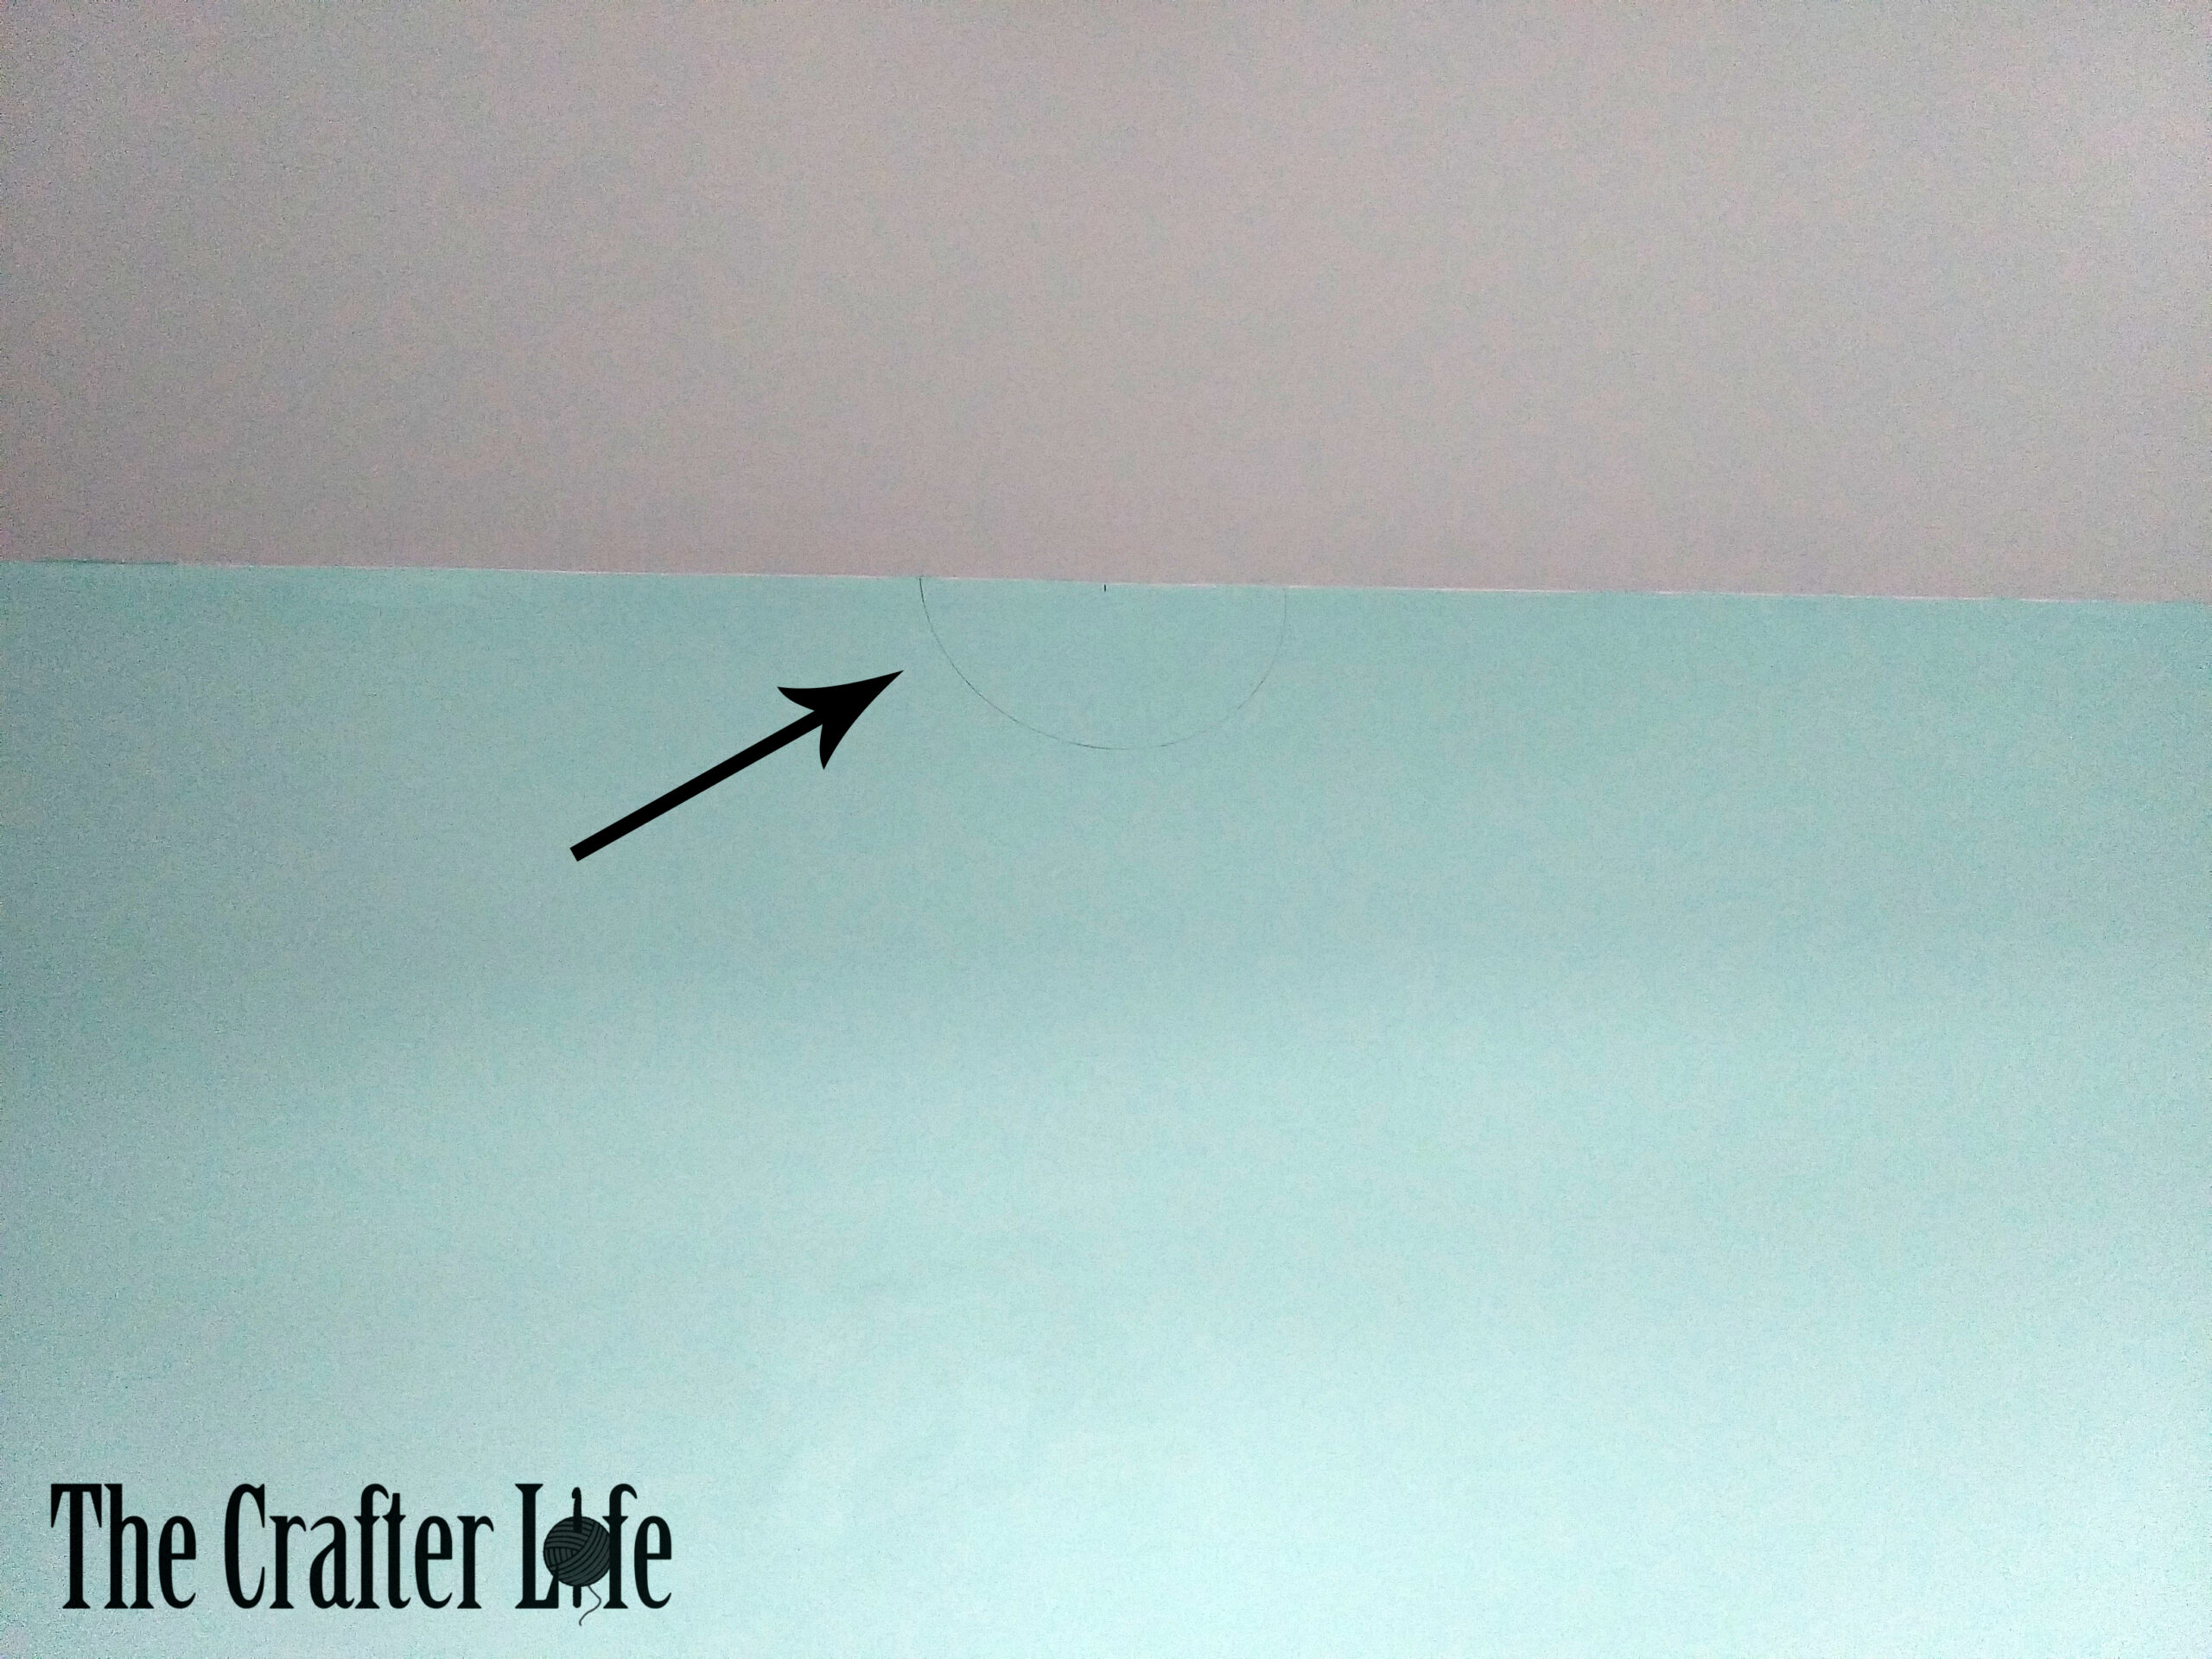
- Once you have the centers of the semicircle stencil and the wall lined up, hold the stencil perfectly still while you trace around it with a pencil. Start at one of the sides/corners of the straight edge of the stencil and trace downwards along the perimeter of the semicircle and then back upwards until you reach the ceiling at the other side/corner of the straight edge of the stencil. You should now have your first scale traced onto the wall in the center at the very top so it looks like it is attached to the ceiling.
- Measure the length of your wall. Find the middle and mark it at the TOP of the wall. This will be where you start tracing. You will start at the top of the wall in the center and then work the top row outwards from the center scale.
- Align the middle of the straight edge of your semicircle stencil with the middle mark you placed on the top of your wall. Make sure to hold your stencil so the straight edge is straight against the ceiling and the curve is at the bottom. You will NEVER trace along the straight edge – only the curved part of the stencil since that will form a scale shape.
- Once you have the centers of the semicircle stencil and the wall lined up, hold the stencil perfectly still while you trace around it with a pencil. Start at one of the sides/corners of the straight edge of the stencil and trace downwards along the perimeter of the semicircle and then back upwards until you reach the ceiling at the other side/corner of the straight edge of the stencil. You should now have your first scale traced onto the wall in the center at the very top so it looks like it is attached to the ceiling.
- Before moving the stencil, lightly mark the center of the curved bottom of the traced scale on the wall using the mark you made on the stencil. You should do this for every scale you trace to help you align the scales on the next row.
- Slide your stencil to one side of the traced scale in the center of the wall. Make sure to align it so that the sides/corners of the straight edges of the stencil and traced scale touch as if they were forming a “w” shape. It should also be straight along the ceiling again so that the ceiling aligns with the straight top edge of the stencil. Once you are satisfied with its position, hold it completely still and trace the stencil on the wall with your pencil. Mark the bottom center of the scale on the wall.
- Using the method in Step 5, keep sliding and tracing the stencil in the same direction along the top row until you can no longer fit a full scale because you are too close to the side of your wall.
- Now trace your stencil on the other side of the first scale you traced in the top center of the wall. Keep sliding and tracing the stencils using the same method in Step 5 until you reach the point where you can no longer fit a full scale because you are too close to the other side of your wall. In order to finish the top row of scales, follow the next set of directions to create a stencil for the partial scale you need for both ends of the row.
Making the Partial Scale Stencil
- Use the other semicircle piece you created in Step 3 of the Scale Stencil directions to make the stencil for the partial scale piece you need for the ends of the first row you traced on the wall.
- Measure the distance from the corner of the ceiling/wall to the top corner of the end scale you traced. Measure and mark that same distance on the straight edge of the cardboard semicircle (starting at one of the top corners).
- Draw a straight line from the mark you just made on the straight edge all the way down to the curved part of the semicircle. The section of the semicircle formed by the vertical line you drew should be the size/portion of the scale you need to fill in the ends of the top row of the wall.
- Carefully cut along the vertical line you made on the semicircle to create the stencil for the portion of the scale you need on both sides of the wall. This piece should work on both sides as long as you flip it over depending on which side of the wall you are on. Double check that it does and make adjustments as needed. Then pick back up at Step 8 below for tracing it onto the wall.
- Trace the partial scale stencil on each unfinished end of Row 1 on the wall (make sure to flip it on the correct side for each end).
- To begin tracing the second row of scales on the wall, place your scale (semicircle) stencil at the bottom of the center scale of Row 1 (the first scale you traced) so that the top corner is aligned with the center mark you made at the bottom of the center scale and the other top corner is aligned with the center mark you made at the bottom of the center of the scale next to it. The scale you are about to trace should be in the middle of the two scales above it. Using your pencil, trace the stencil starting at one of the center marks you made on the bottom of the scales above it (which should be at a top corner of the stencil) just as you did when you traced the stencil for the top row. When finished tracing, you should have ended at the center mark of the other scale above it. Mark the bottom center of the scale on the wall.
- Slide your stencil over to one side of the scale you just traced, align it as you did with Row 1, and trace it using the bottom center marks of the scales in Row 1 as your guide. Remember to mark the bottom center of the scale on the wall before you move the stencil. Keep sliding the stencil and tracing it until you can no longer fit a full scale on the end of the row.
- Slide your stencil over to the other side of the first scale you traced in Row 2, align it with the bottom center marks of the two scales above in Row 1, and trace it, making sure to mark the bottom center of the scale to help you when you make Row 3. Continue tracing the scales in this direction until you reach the point where you can no longer fit a full scale on that end of the wall.
- Create a new stencil for the partial scale you need to complete each side of Row 2 by first making another semicircle from a 16” cake circle (follow directions above for “Making Scale Stencil). Once you make the new semicircle, use it to make a stencil of the partial scale piece you need on each end of Row 2 on the wall (follow directions above for “Making the Partial Scale Stencil).
- Trace the partial scale stencil on each side of Row 2 to complete that row of scales (flip the stencil based on which side you are on of the row). Mark the bottom center of the partial scale piece on the wall, if applicable. Row 2 is then completely traced.
- Continue tracing each row of scales as you did for Rows 1 and 2 until you reach the bottom of the wall. At the bottom of the wall, the bottom portion of your scales will probably be cut off (only trace what fits). If traced correctly, every other row of scales should be the same, so you shouldn’t really need to create new partial pieces for the ends of the rows. However, I noticed my rows were slightly off and I had to make some of the partial pieces on the ends slightly smaller in order to get the stencil to fit on the ends of the rows. You can adjust your stencils as needed. Once you have all rows of scales traced, follow the directions below to make the smaller (inner) scale stencil.
Making the Inner Scale Stencil
- Follow the directions above for ‘Making the Scale Stencil” to make another semicircle stencil (if you don’t already have one made).
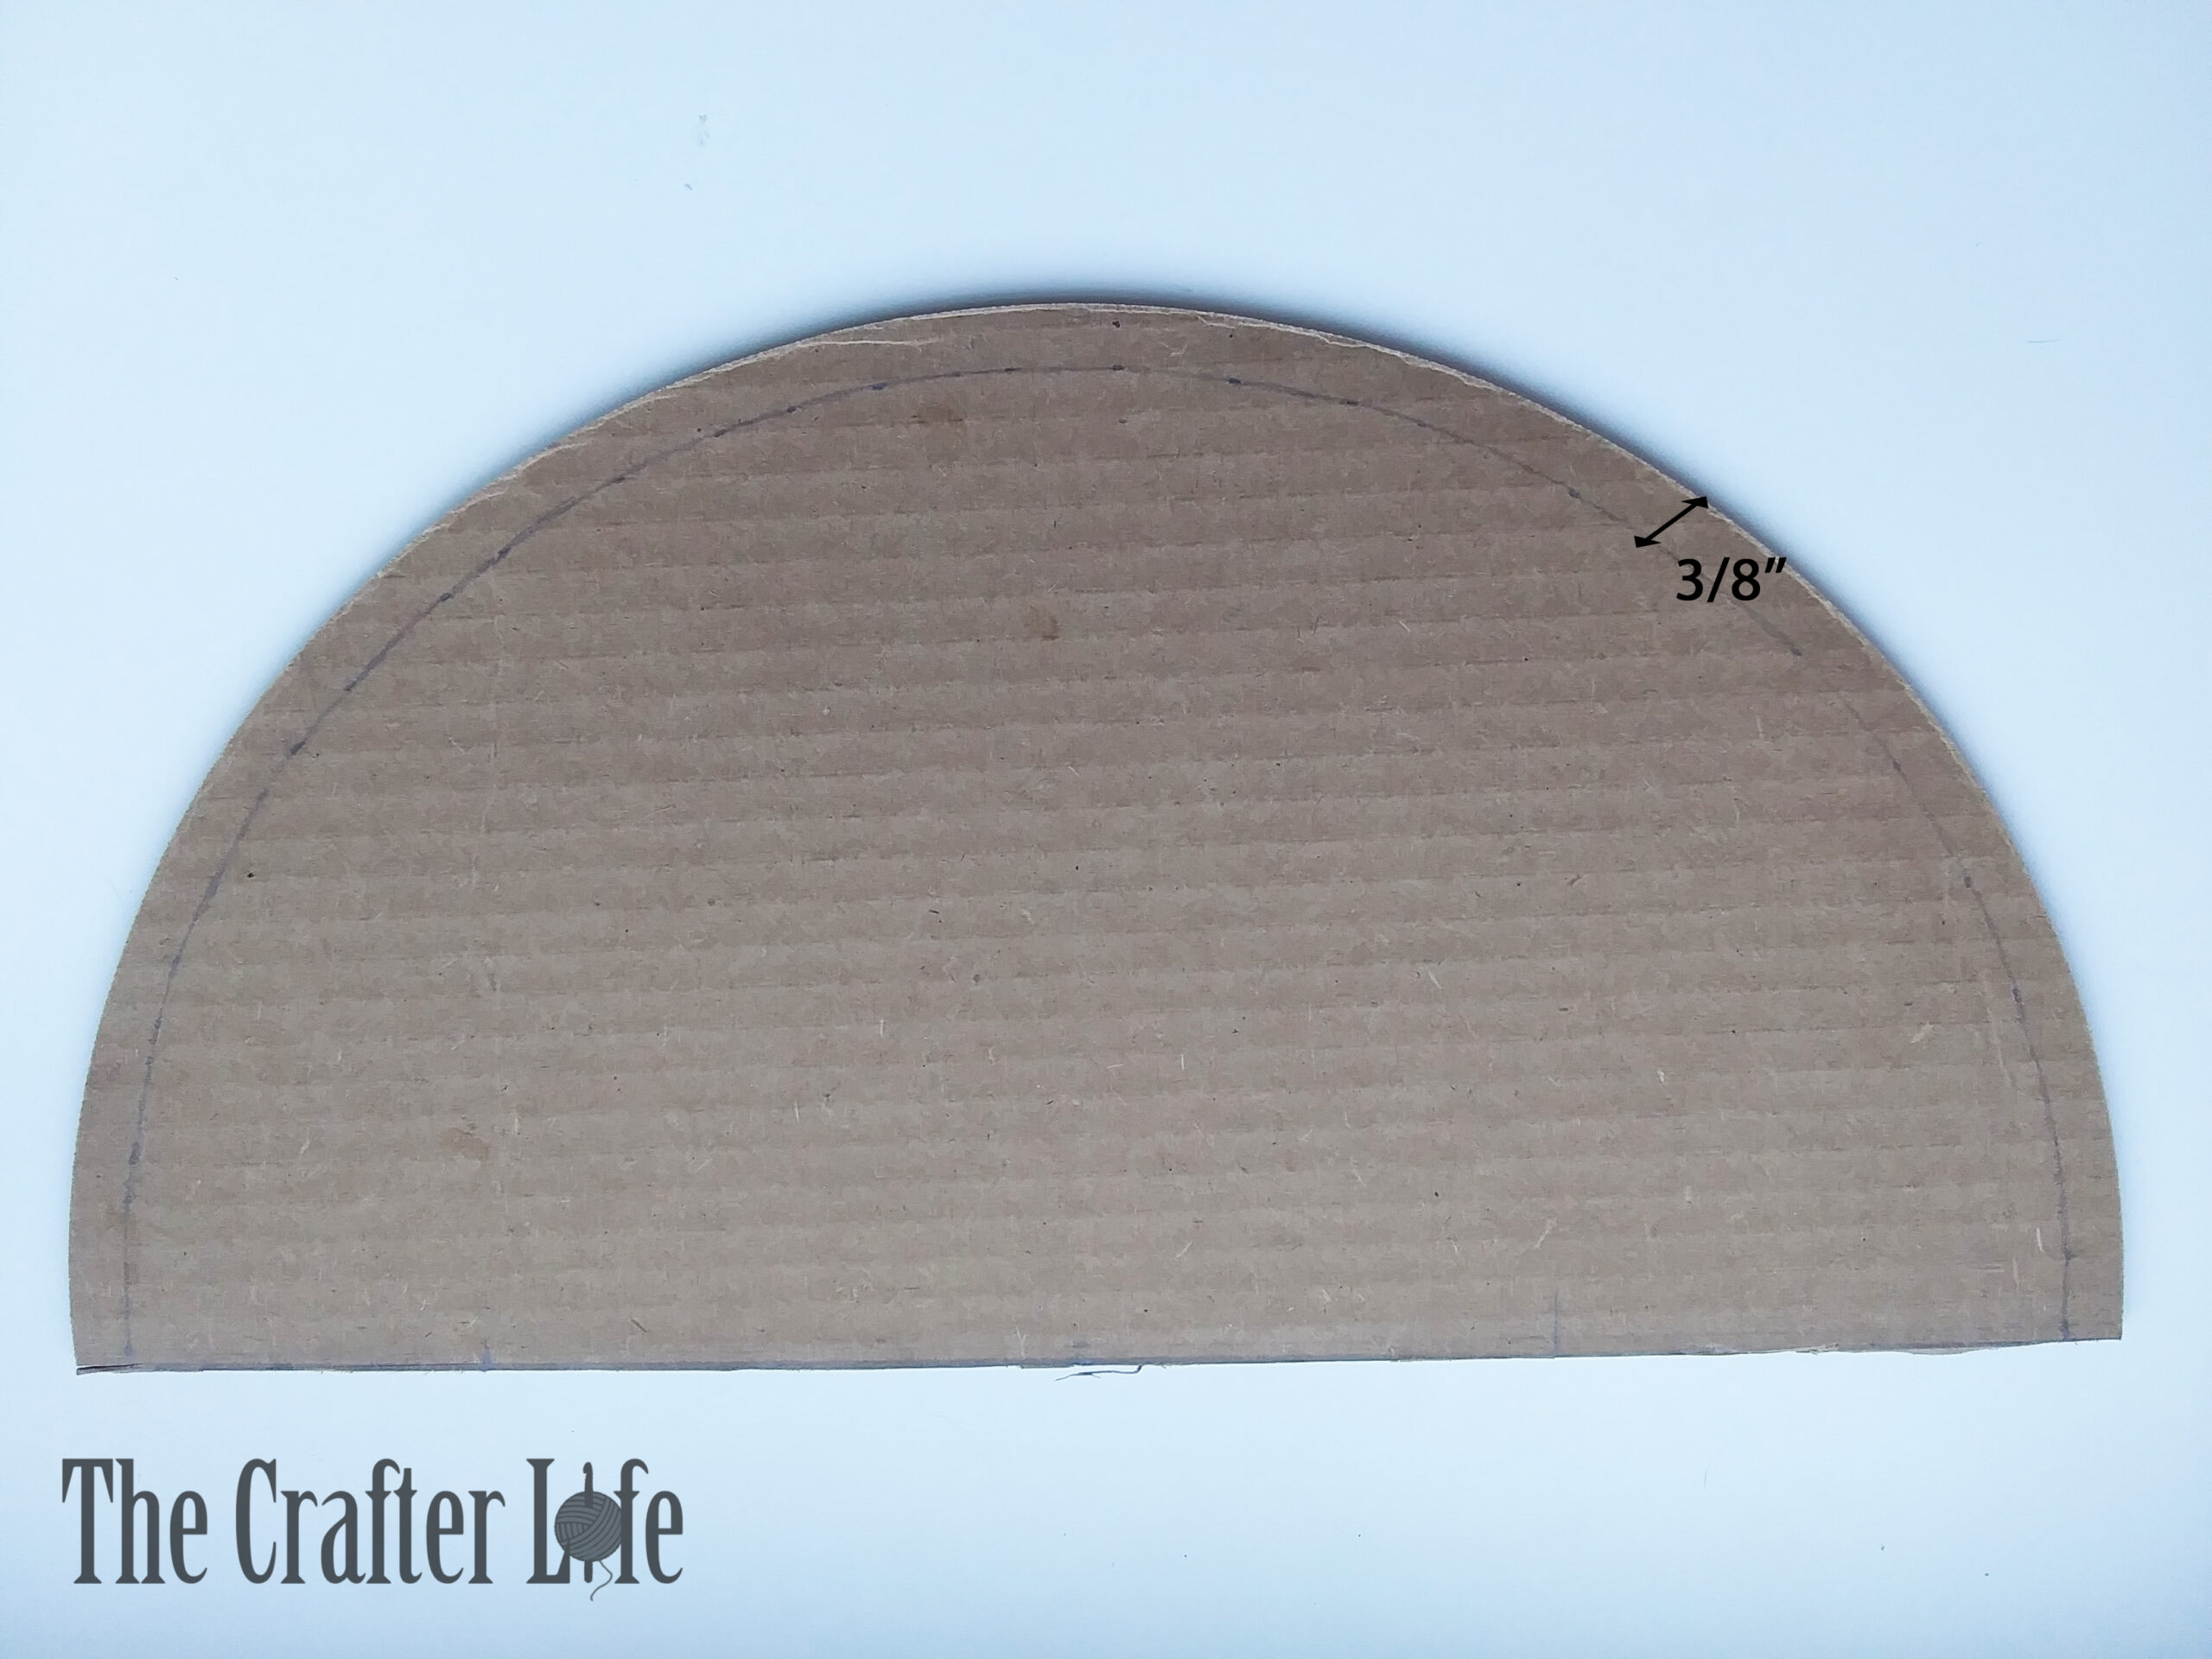
- Use a ruler to make a lot of little tick marks all around the curved edge of the semicircle that are 3/8 inch in from the curved edge. This is to create a smaller semicircle that we can use for the inner scale stencil. The diameter of the smaller semicircle should be 15 1/4 inches. You should have enough marks around the entire curved edge that you can smoothly cut along the path of the marks to form a smaller semicircle. Use scissors to cut along the path of the tick marks to make the inner scale stencil. Mark the top and bottom center of the inner scale stencil. When you are finished, place the inner scale stencil on top the larger scale stencil so that the centers of their straight edges align. There should be an even (3/8 inch) border around the inner scale stencil. This border will be the size of the space you will need to paint after you trace the inner scales on the wall.
- Trace the inner scales on the wall in the same manner you did with the larger scales. When tracing an inner scale, place the stencil on top of a larger scale on the wall so that its straight edge lies on top of the straight edge of the larger scale and the center matches up with the center of the larger scale. Once you have it aligned so there is an even 3/8 inch border around the outside of the inner scale and on the inside of the larger/outer scale, trace the inner scale. Do this for every full scale on the wall.
- You will need to make smaller/inner partial scale pieces for the partial scales on the ends of the rows. You should be able to use the partial scale stencils you already made by placing tick marks 3/8 inch in around their curved edges and then cutting along the tick marks to form a smaller/inner partial scale piece. Trace these inner partial scale pieces inside the corresponding partial scale pieces on the ends of the wall. Once you have all the inner scale pieces traced, follow the directions below to paint the scales.
Painting the Scales
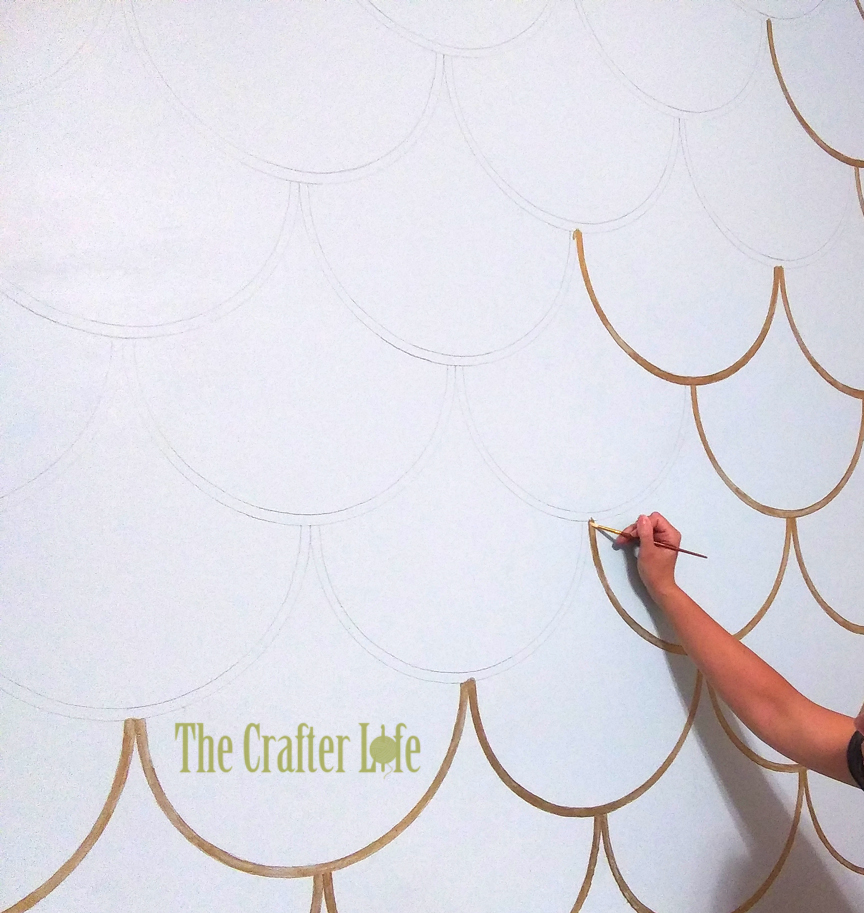
- Use gold paint and a small paintbrush to paint the ½ inch scale borders on the wall. It may help to first paint the outlines of the borders and then the insides of the borders. You need to try to keep a steady hand in order to keep the outlines smooth. After you paint a few scales, you should have a technique down that works for you. I had to wash my paintbrush pretty frequently to keep the paint from drying out the bristles. You may have to add another coat of paint to the scales once the first coat dries. Hand painting the scales is very time consuming. I played music while I worked to make it less boring. Having paper towels, baby wipes, etc. on hand helps to quickly clean/fix any mistakes.
- Use the gold glitter paint to as a top coat for the gold scale outlines. I found it easiest to use my finger to apply the glitter paint as opposed to a paintbrush. You can experiment to decide what works best for you. You may need to apply multiple coats of glitter depending on how much shimmer you want.
- After the paint has dried, thoroughly inspect the wall and touch up any mistakes. Also, erase all pencil marks that are showing.
***Your wall is now finished and ready for you to admire!***

Crochet Baseball Bat