Minnie Mouse Picture Display
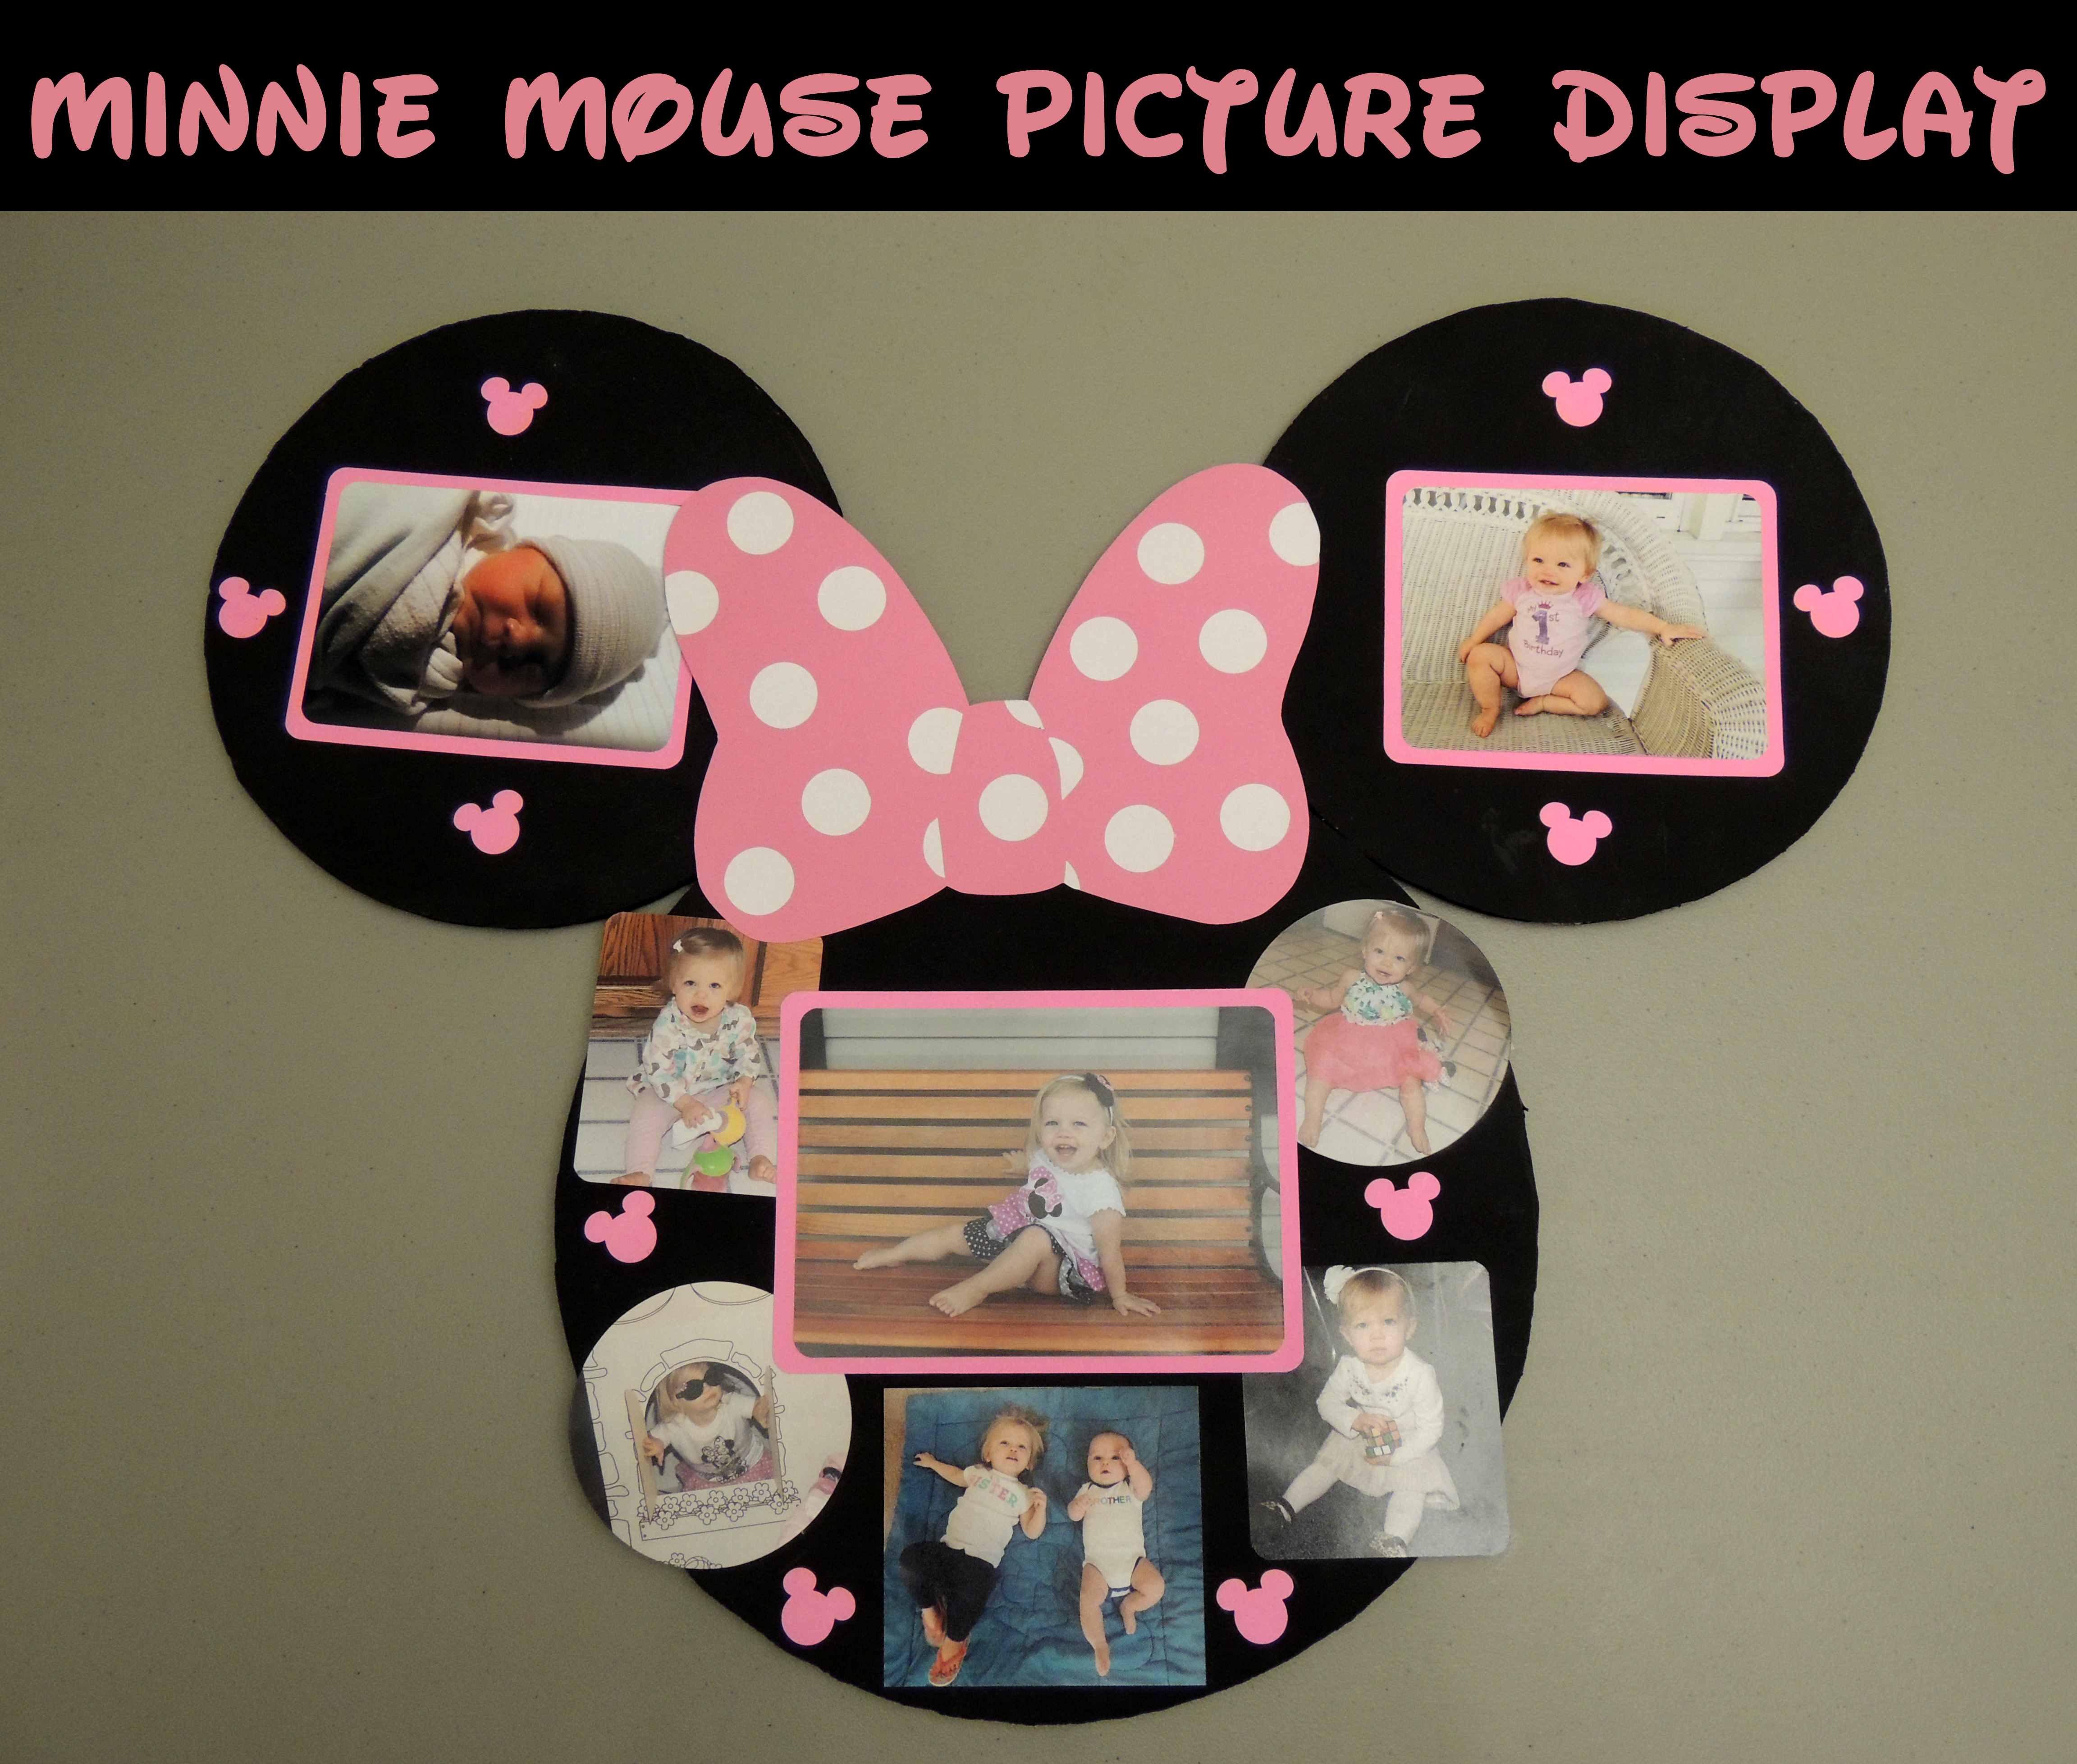
Here is an easy and inexpensive picture display to make for a Minnie Mouse themed room or party! Of course, you could always make it a Mickey Mouse picture display by taking away the bow. It was a great way to display pictures of my daughter for her 2nd birthday party.
Materials
– Cardboard
– Black acrylic paint
– Foam paint brush
– Toothpicks
– Hot glue gun/hot glue (optional)
– ¾” white circle sticker labels
– Double-sided tape
– Pink cardstock
– Mickey Mouse punch
– Pictures to display
– Optional: Cardstock for framing photos, circle cutter (for photos), round corner punch (for photos)
Directions
1. Cut one large circle and two smaller circles (of the same size) from cardboard. I traced the bottom of a 5-gallon water bottle for the large circle and a bowl lid for the two smaller circles. The larger circle is approximately 14 inches in diameter and the smaller circles are approximately 10 inches in diameter.
2. Paint the circles using a foam paint brush with black acrylic paint. You may have to apply more than one coat of paint. Allow them to dry.
3. Use toothpicks to attach the smaller circles (the ears) to the larger circle (the head) by inserting one end of a toothpick into the side of the large circle (where you want to place an ear) and then sliding the other end into the side of a smaller circle. You will need to use more than one toothpick for added support. Do this for both of the smaller circles. If you are going to lean the picture display against the wall, this may be all you need to do to keep the ears attached to the head. If you are going to hang the picture display, you should use hot glue for extra reinforcement.
4. Trace the bow (found on the bow printable) onto pink cardstock and cut it out with scissors.
5. Place the white circle sticker labels on the bow to make a polka dot pattern like Minnie Mouse’s bow. Believe it or not, I did not draw any lines on the bow to form its center. I created the illusion of lines by cutting the white circle sticker labels and placing them where the lines would be for the center of the bow.
6. Use double-sided tape (or glue) to stick the bow to the top of the large circle head in between the smaller circle ears.
7. Now you can tape your pictures to the Minnie Mouse head however you would like to display them. I displayed my daughter’s previous two birthday pictures on the ears and placed her current birthday picture in the center of the head. I then put pictures from the previous year around the current photo on the head. This is when you may want to use a circle cutter or corner punch to do creative things with your pictures. You may also want to frame them with cardstock.
8. Use a Mickey Mouse (found here on Amazon) punch with pink cardstock to create silhouettes for added decoration around your photos.
9. Now you are ready to display your creation! It makes a great birthday party decoration. I sat mine on the kitchen counter and leaned it against the wall to display at my daughter’s party.
Feel free to post comments here or on my Facebook page!
**If you like what you see, feel free to pin, share, and link back to my site. Thank you for visiting!