
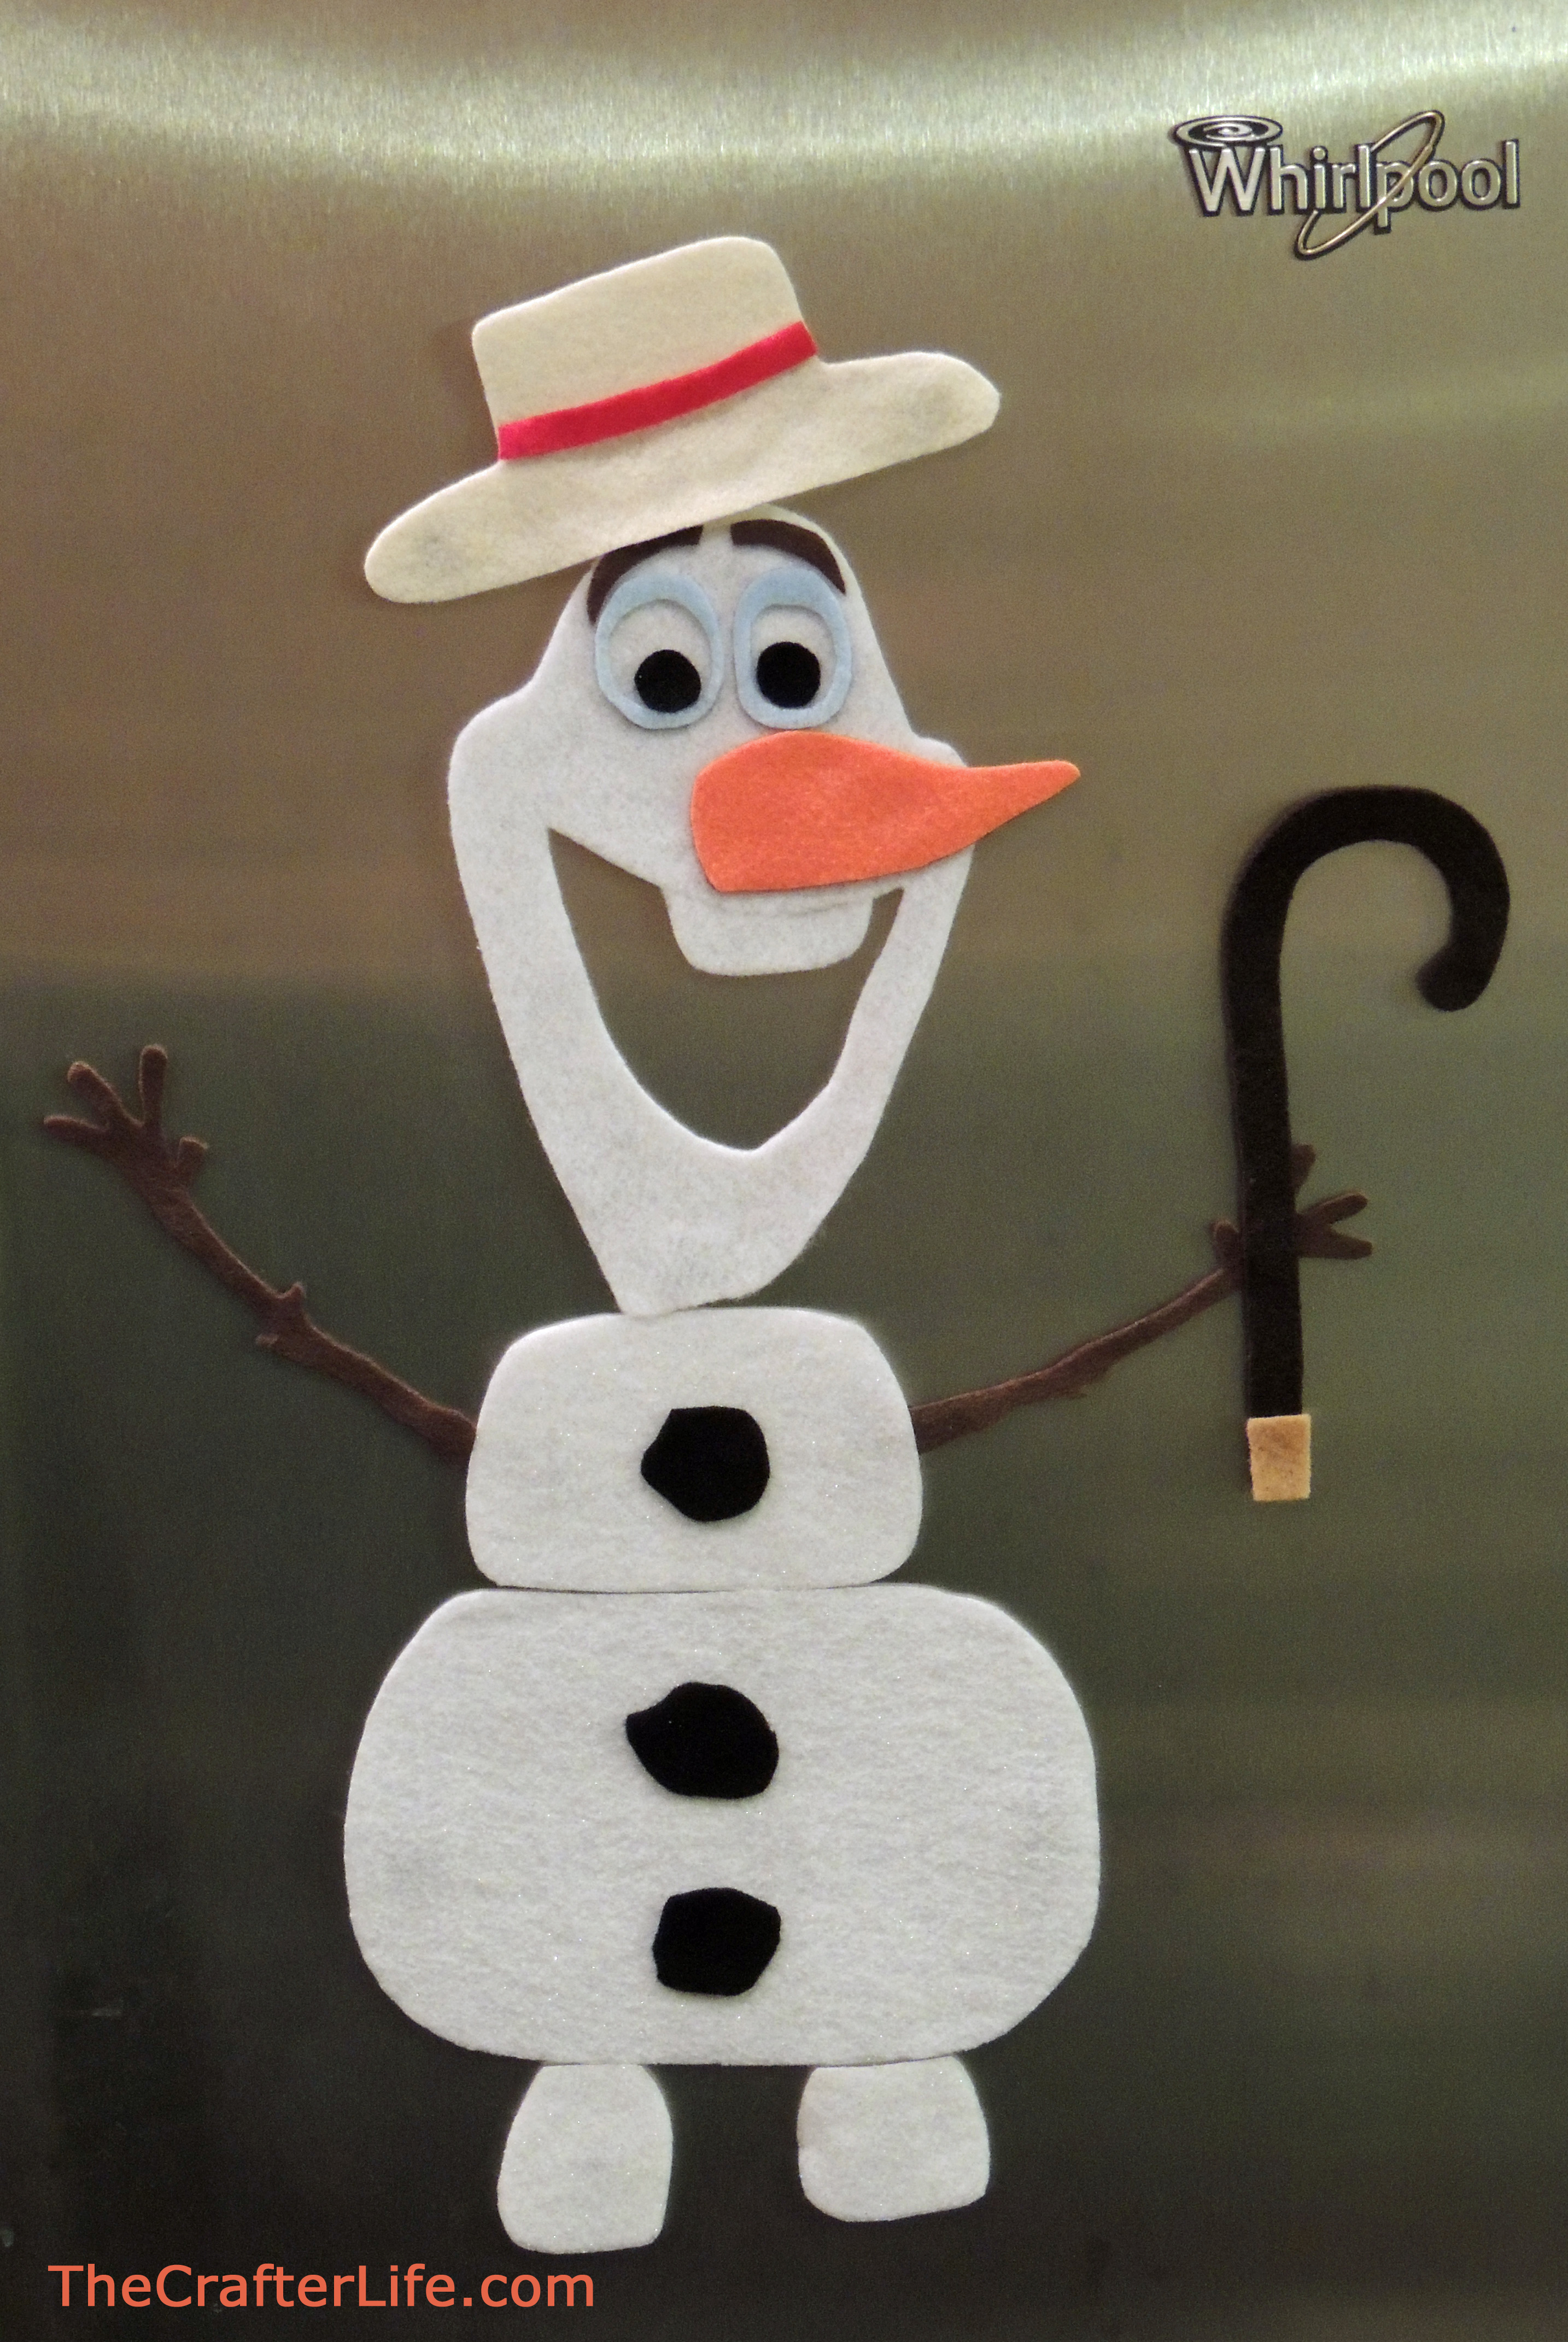
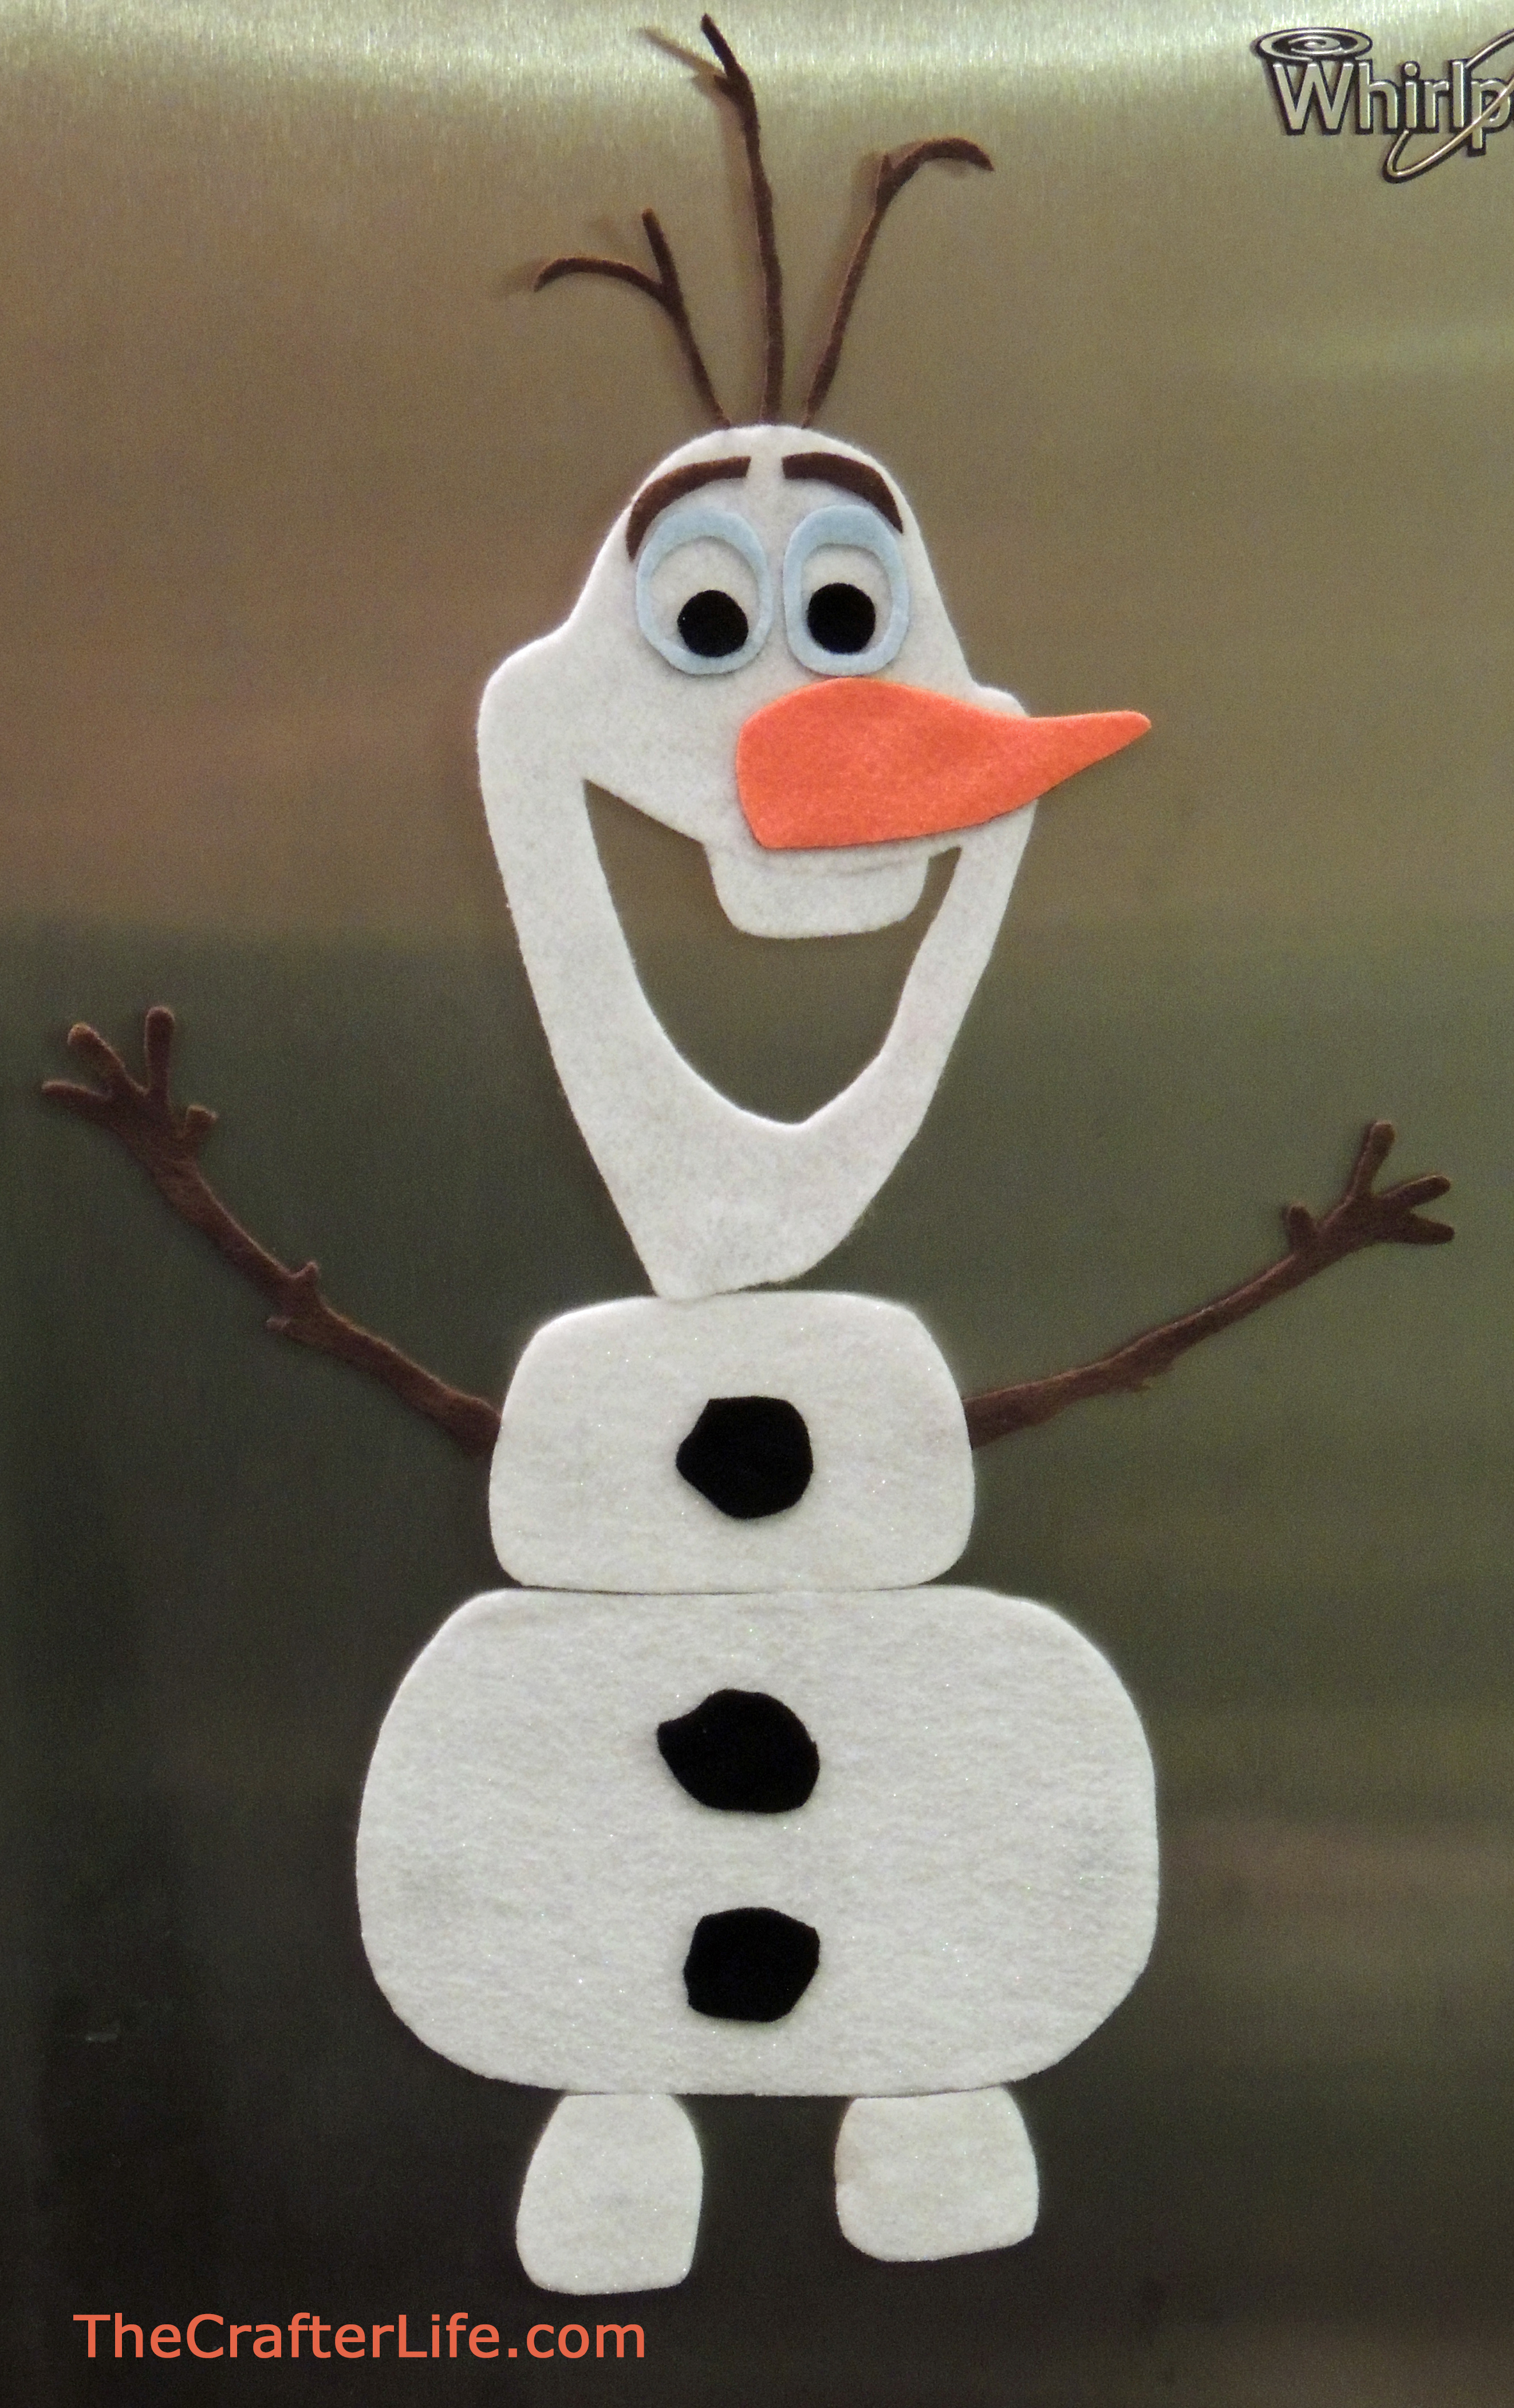
Do You Want to Build a Snowman? Magnetic Felt Olaf Activity with Printable
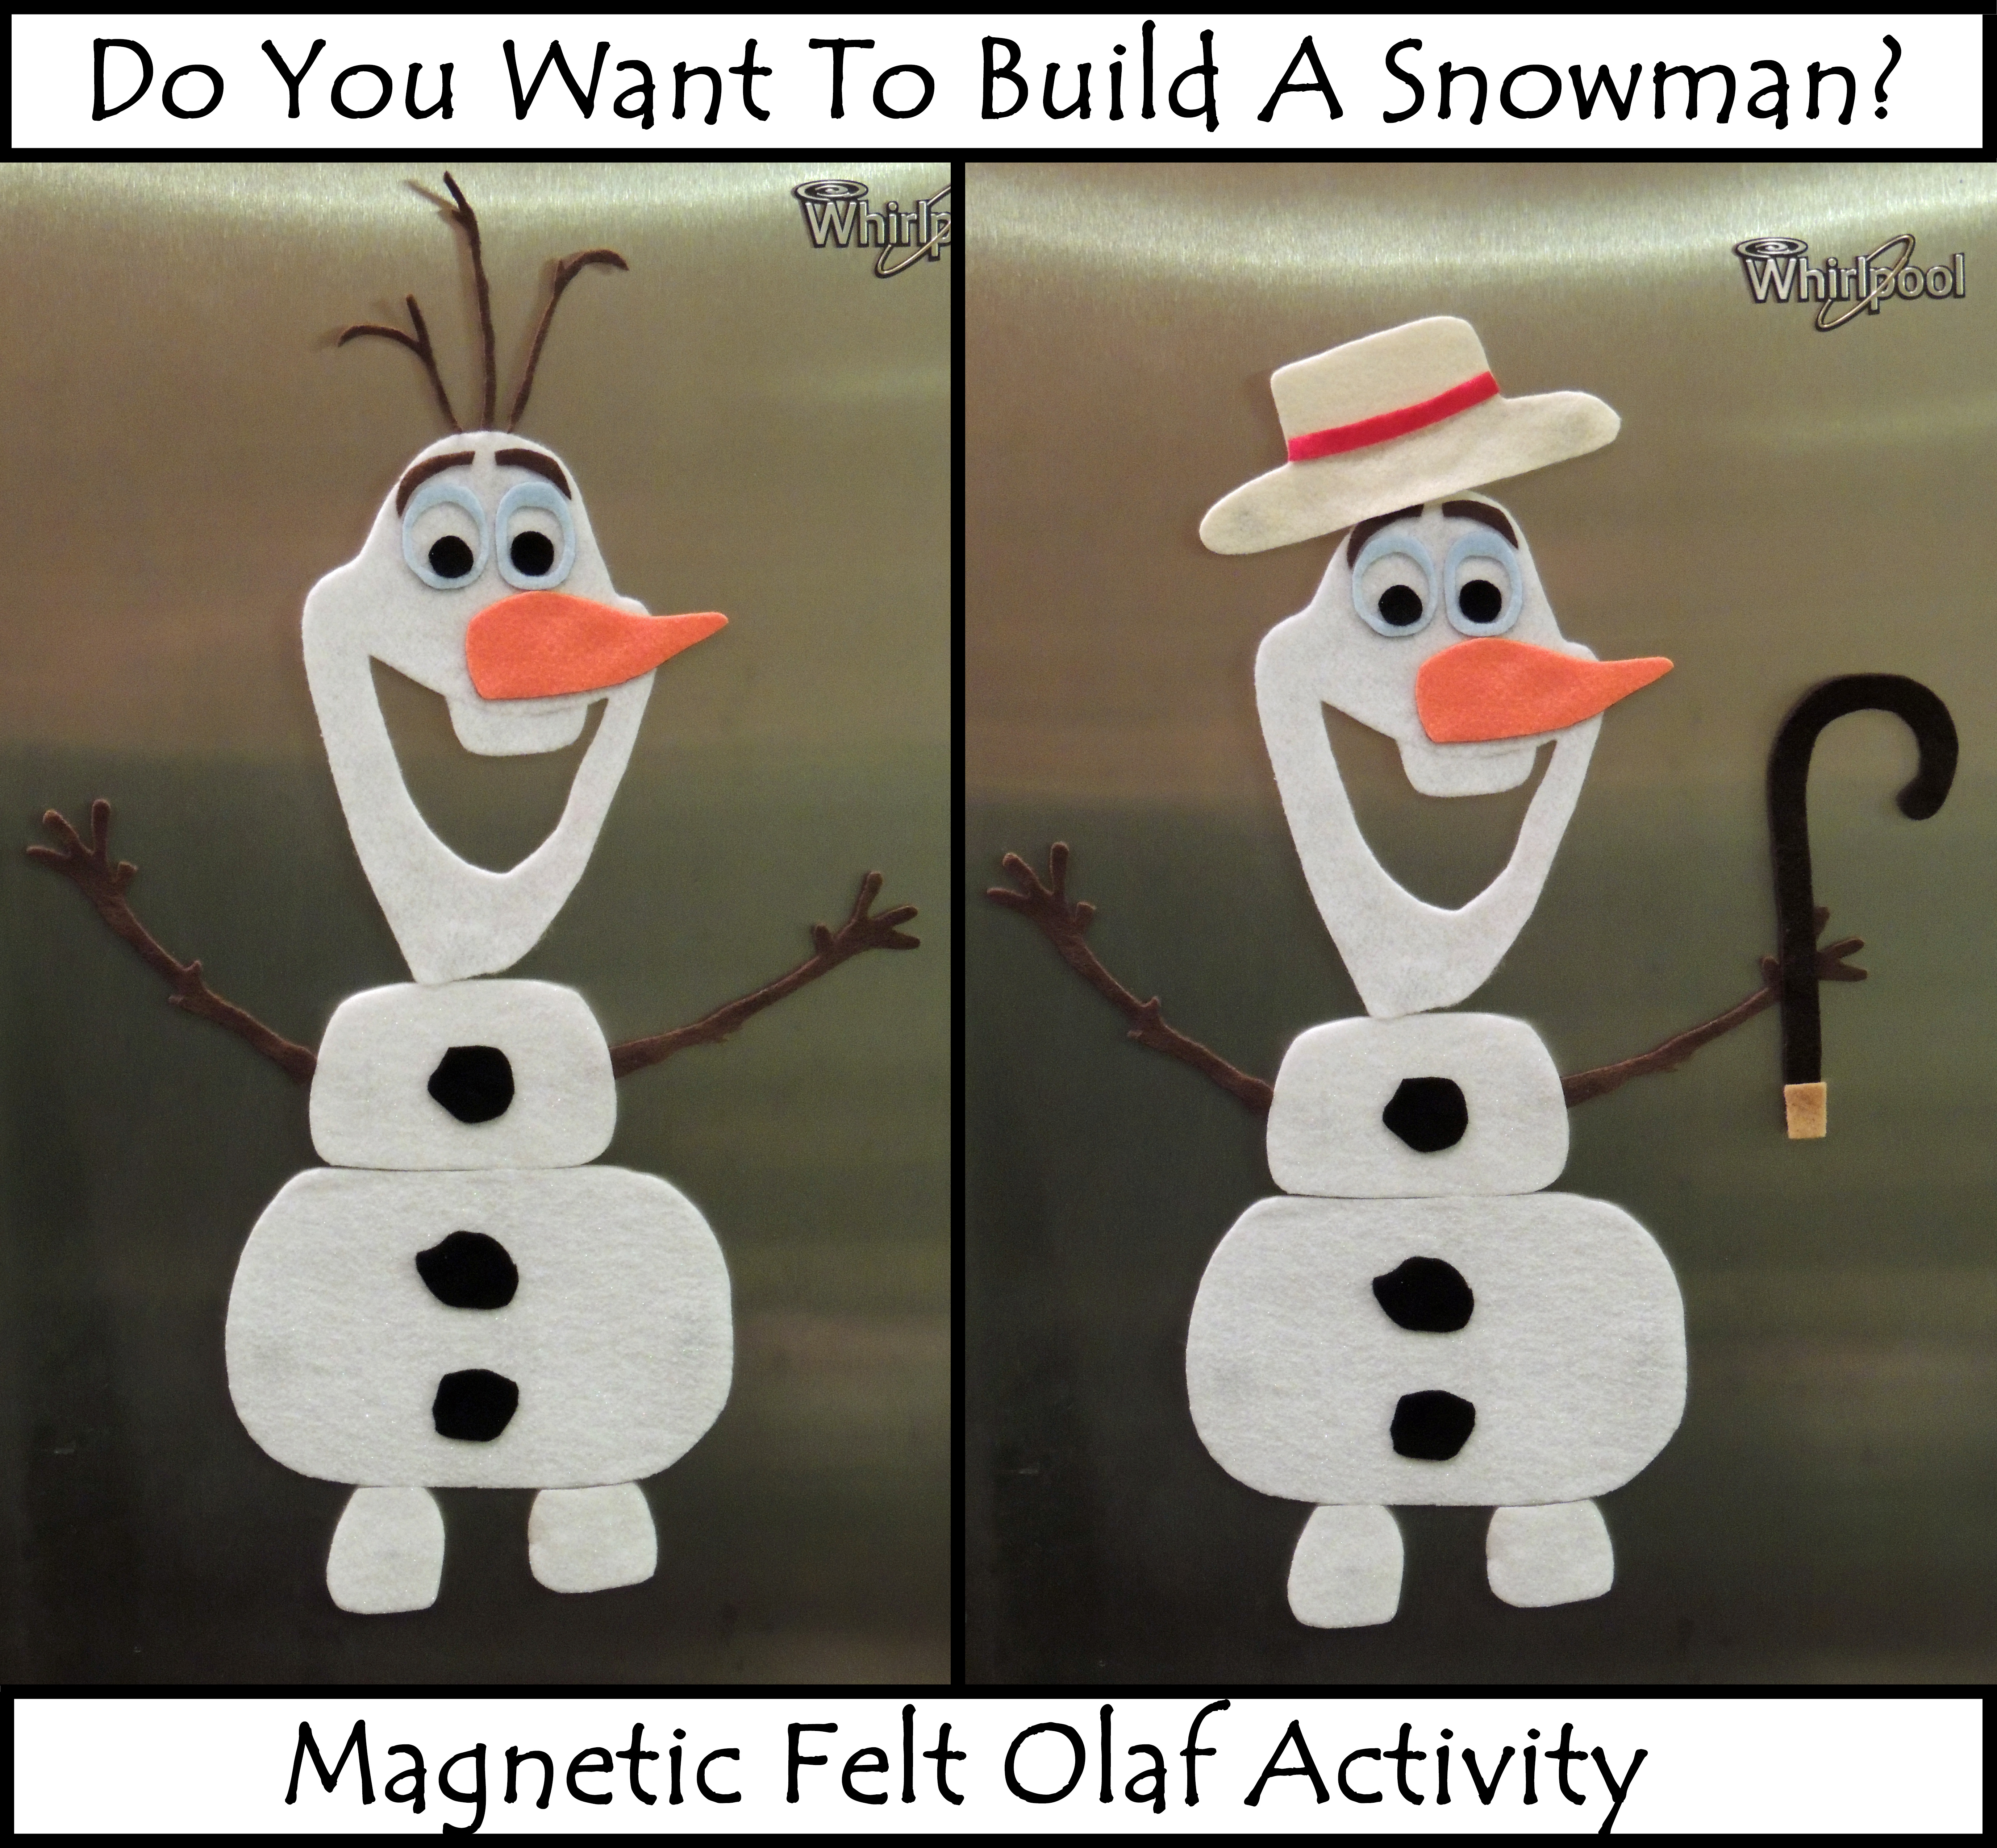 My 2-year-old daughter is a bit OBSESSED with the animated movie, Frozen. Even my 10-month-old loves it. Since it snowed here this week and the temperature has been way too cold to go outside, I thought a fun activity would be to build a snowman indoors using felt and magnetic tape. And what better snowman to build than Olaf, the famous snowman from the film?! This activity was a big hit with my daughter, who loves placing Olaf in different poses and giving him different accessories and expressions. The best part is that he will not melt and she can build him over and over again. If you are interested in making your own felt Olaf, read below – no snow required!
Materials
– Felt (white, white with sparkles, black, brown, dark brown, light brown, beige, orange, light blue, and red)
– Pen
– Scissors
– Magnetic tape
– Hot glue gun/hot glue (optional)
– Printable(s) (optional)
Directions:
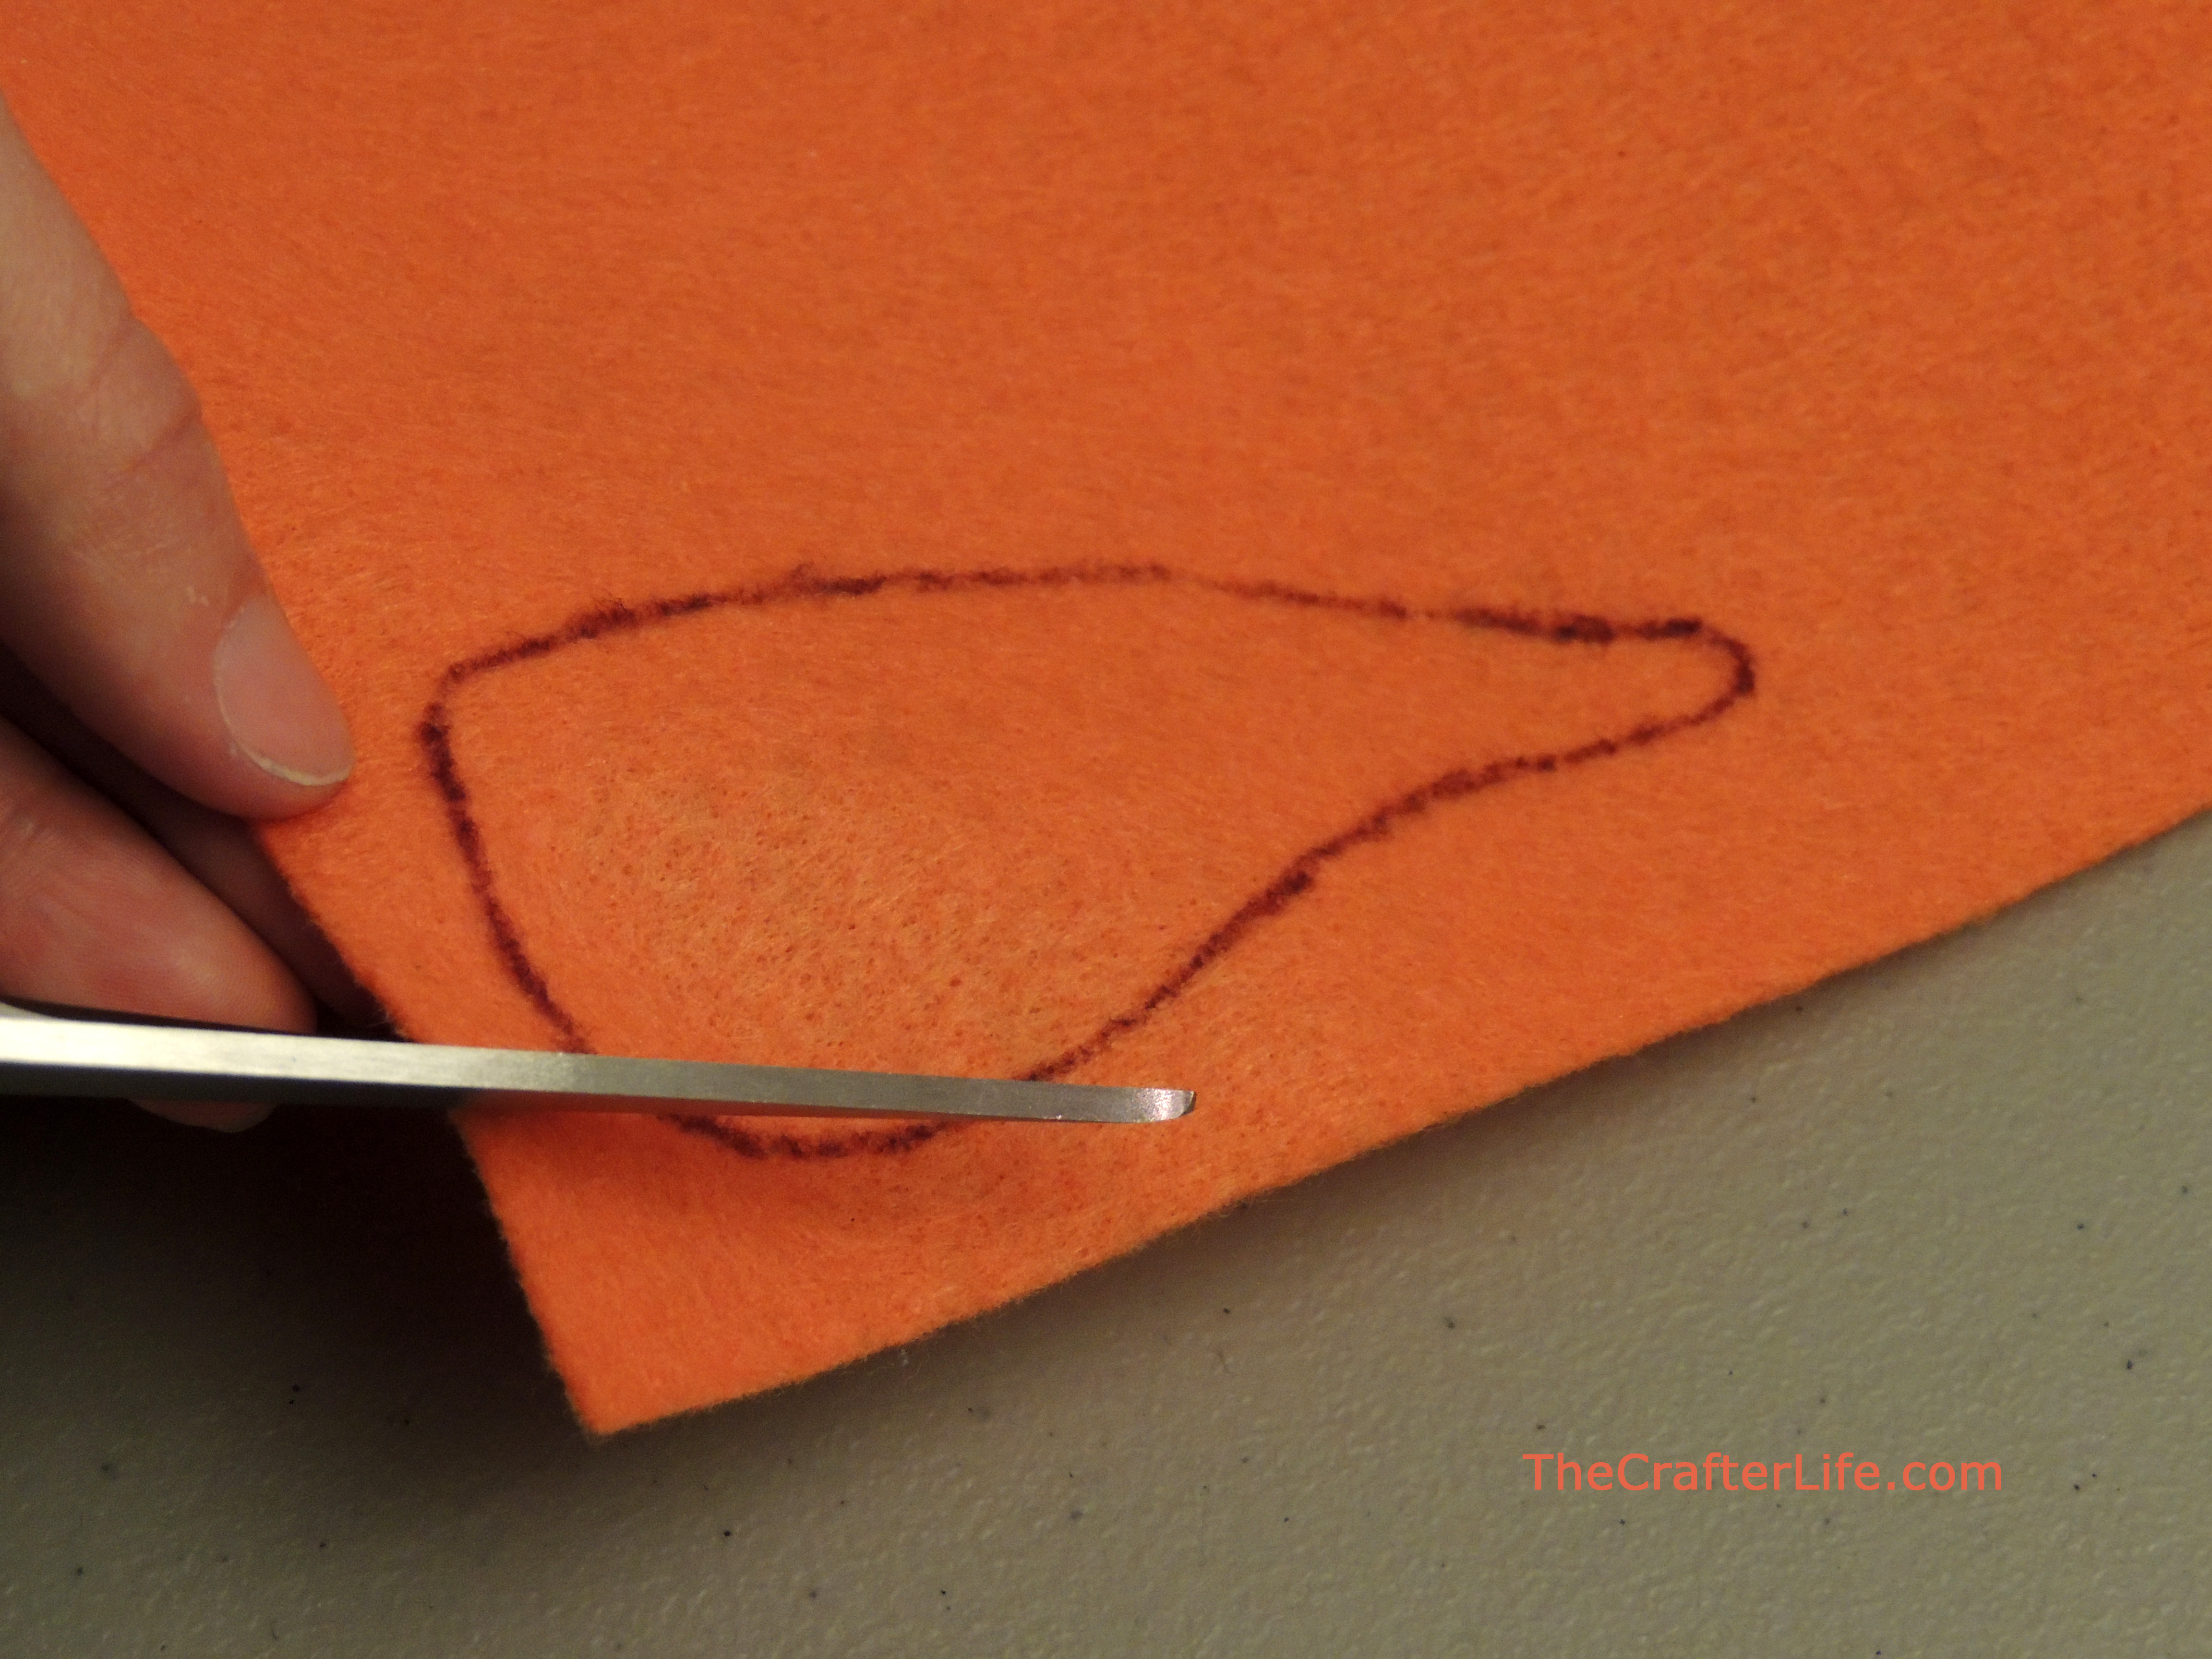
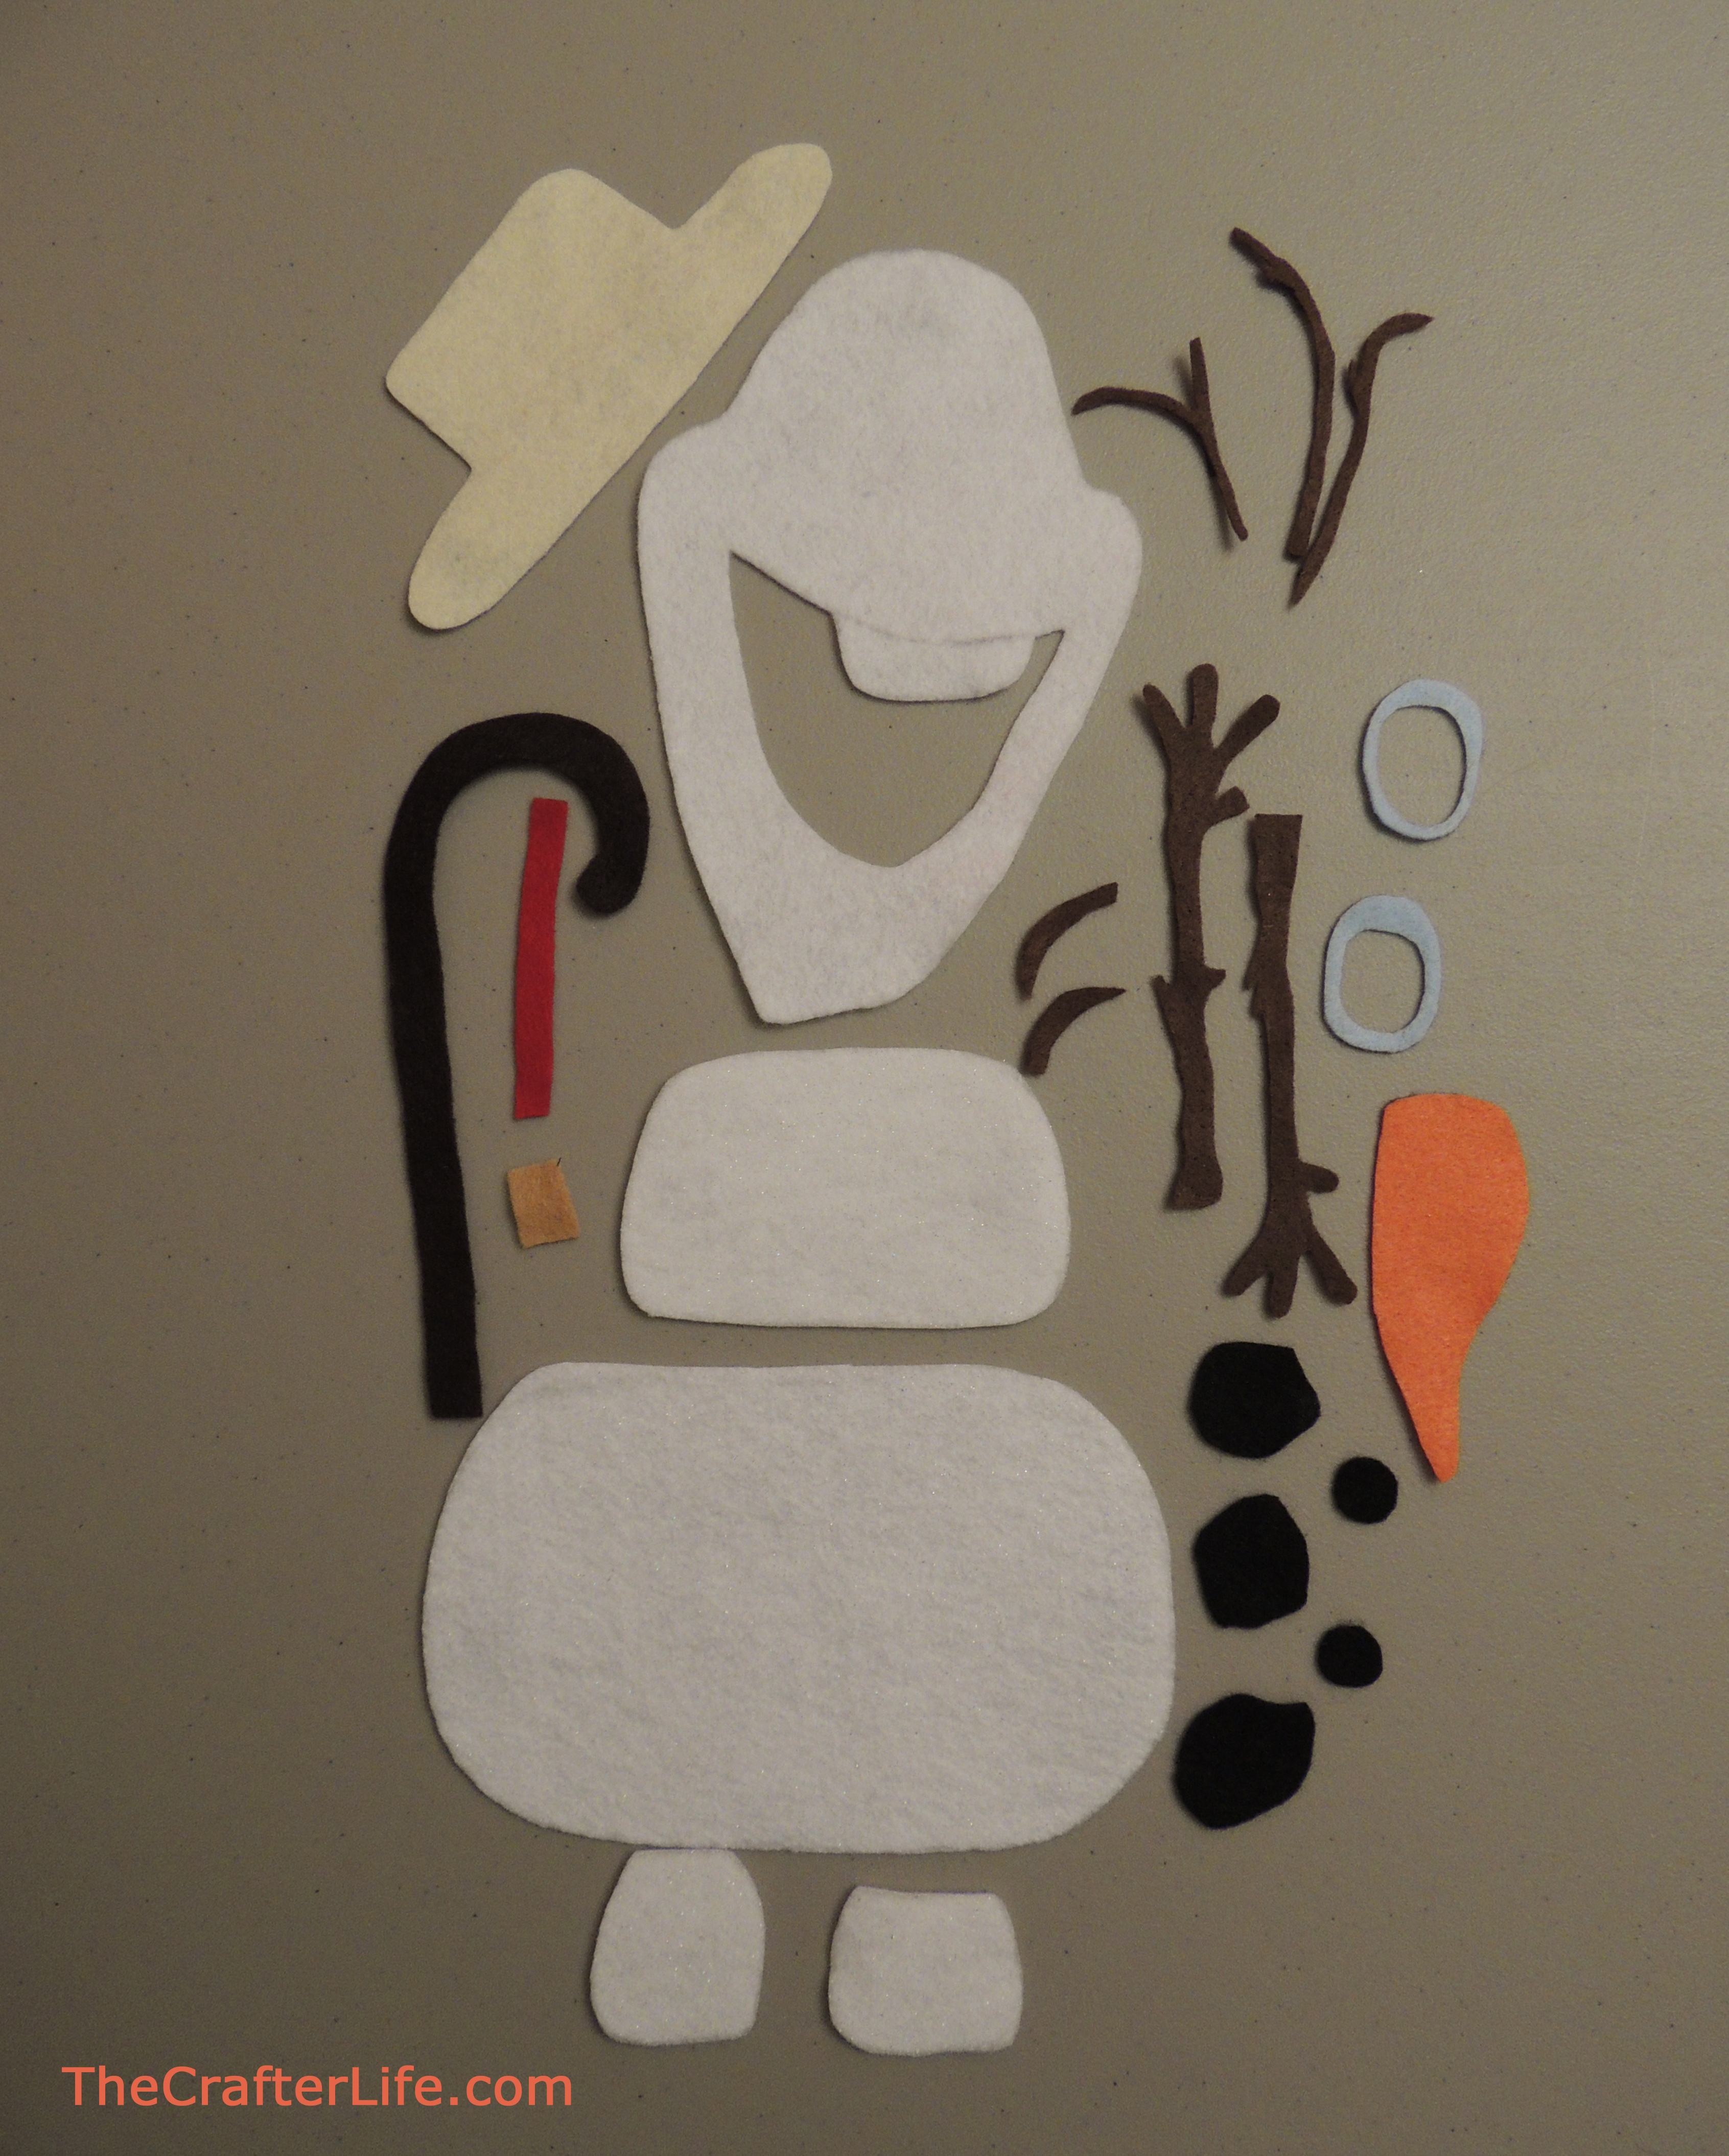
1. Sketch your own Olaf body parts on paper or print my printable (below). You should have: 1 head, 2 bottom body pieces, 2 legs, 2 arms, 2 eyebrows, 3 “hair strands”, 3 buttons, 2 pupils, 2 eye outlines, 1 carrot nose, 1 hat, 1 stripe for the hat, 1 cane, and 1 bottom piece of the cane. Then cut out the shapes you traced. These will be used as your stencils for the felt.
2. Trace Olaf’s head on plain white felt. Then trace the two bottom pieces of his body and his legs on the sparkly white felt. Trace his arms, eyebrows, and hair on brown felt. Trace his buttons and pupils on black felt. Trace the outline of his eyes on light blue felt. Trace his carrot nose on orange felt. Trace his hat on beige felt. Trace the stripe on his hat on red felt. Trace his cane on dark brown felt. Trace the bottom of the cane on light brown felt.
3. Cut out all of the body parts you traced in Step 2.
4. Place pieces of magnetic tape on the back of the head, both bottom body pieces, both legs, both arms, the three hair pieces, the hat, and the cane. They will need to be pretty thin pieces for the hair. You may want to hot glue the pieces of magnetic tape so they stay in place better (especially if a curious toddler tries to pull them off the felt…ahem).
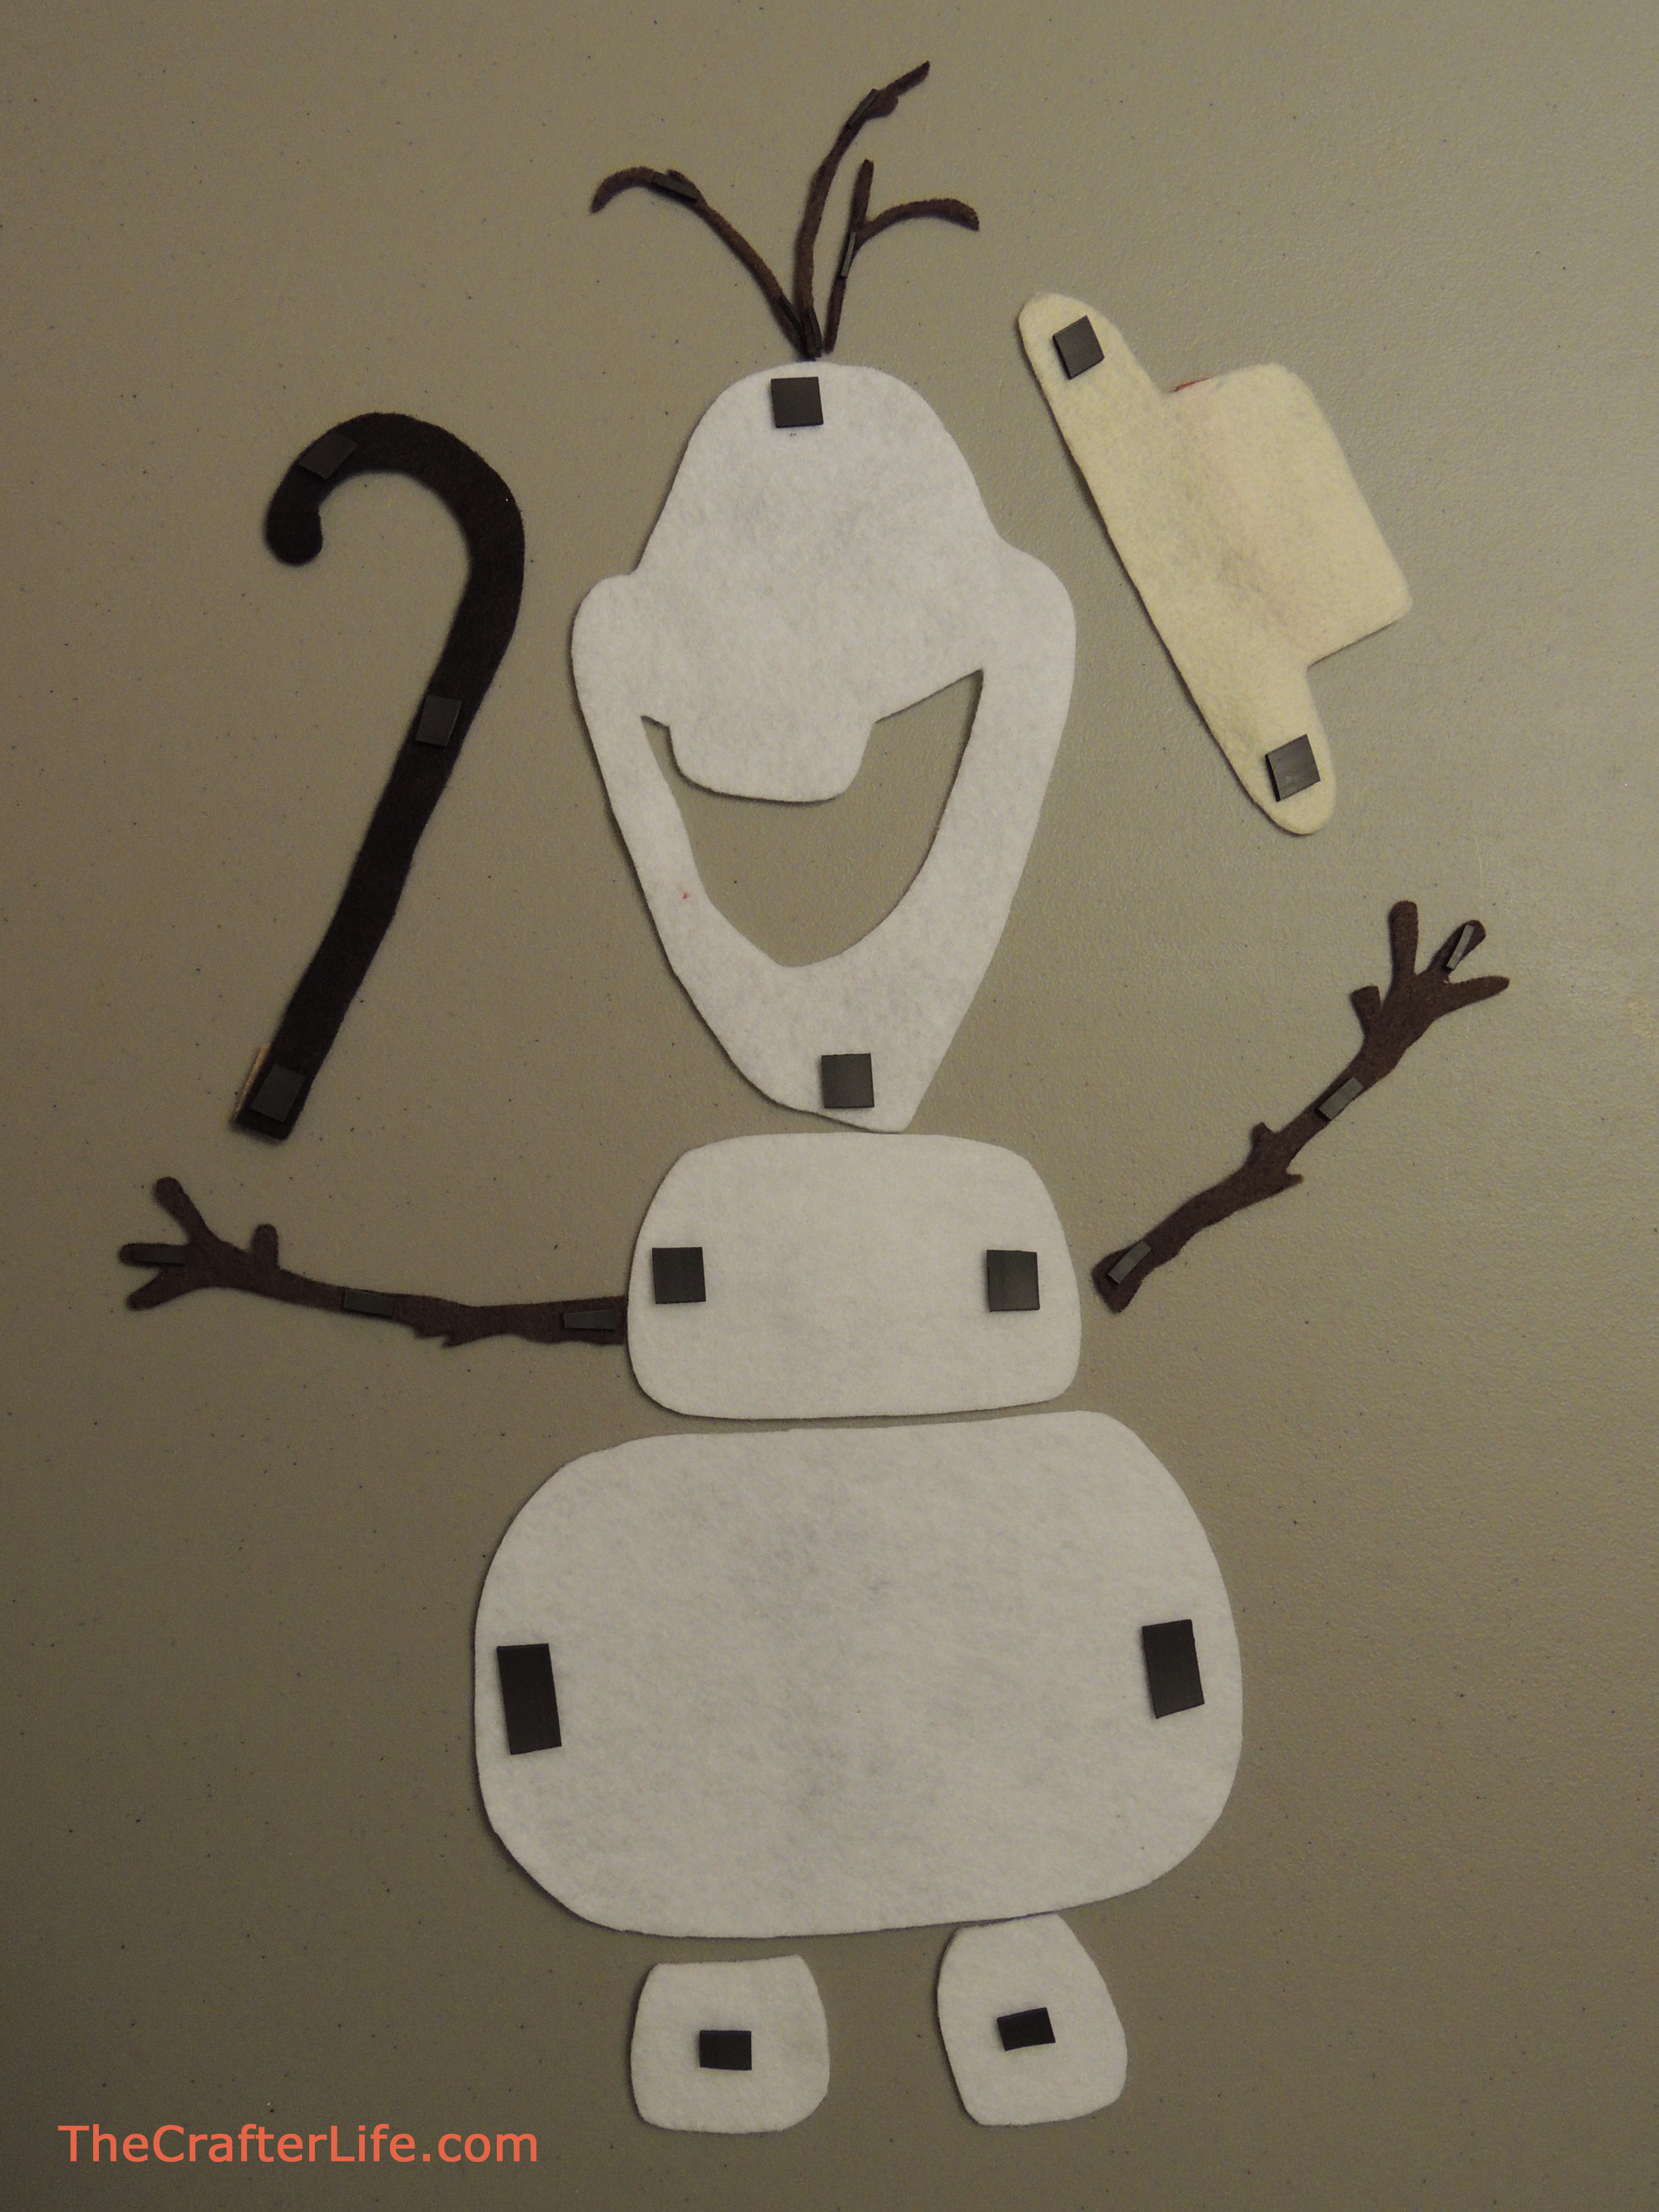
5. You are now ready to build Olaf! Place the magnetic pieces from Step 4 on the refrigerator to form Olaf’s body (you may choose to give him a hat or hair on the top of his head). Then place the rest of the felt pieces in place to form his buttons and his face (the felt should stick to itself without any adhesive). Have fun giving him different expressions and poses.
Possible Toddler Activity
Take a few pictures of your magnetic Olaf in various poses with different expressions and accessories. Give your toddler the pictures and have them try to pose Olaf to mimic each photo.
Olaf.Printable.1 Olaf.Printable.2 Olaf.Printable.3
**If you like what you see, feel free to pin, share, and link back to my site. Thank you for visiting!

You May Also Like
Father’s Day Frame
Teacher Wipe- Off Board
