Love Bites: Red Velvet Mini Cupcakes
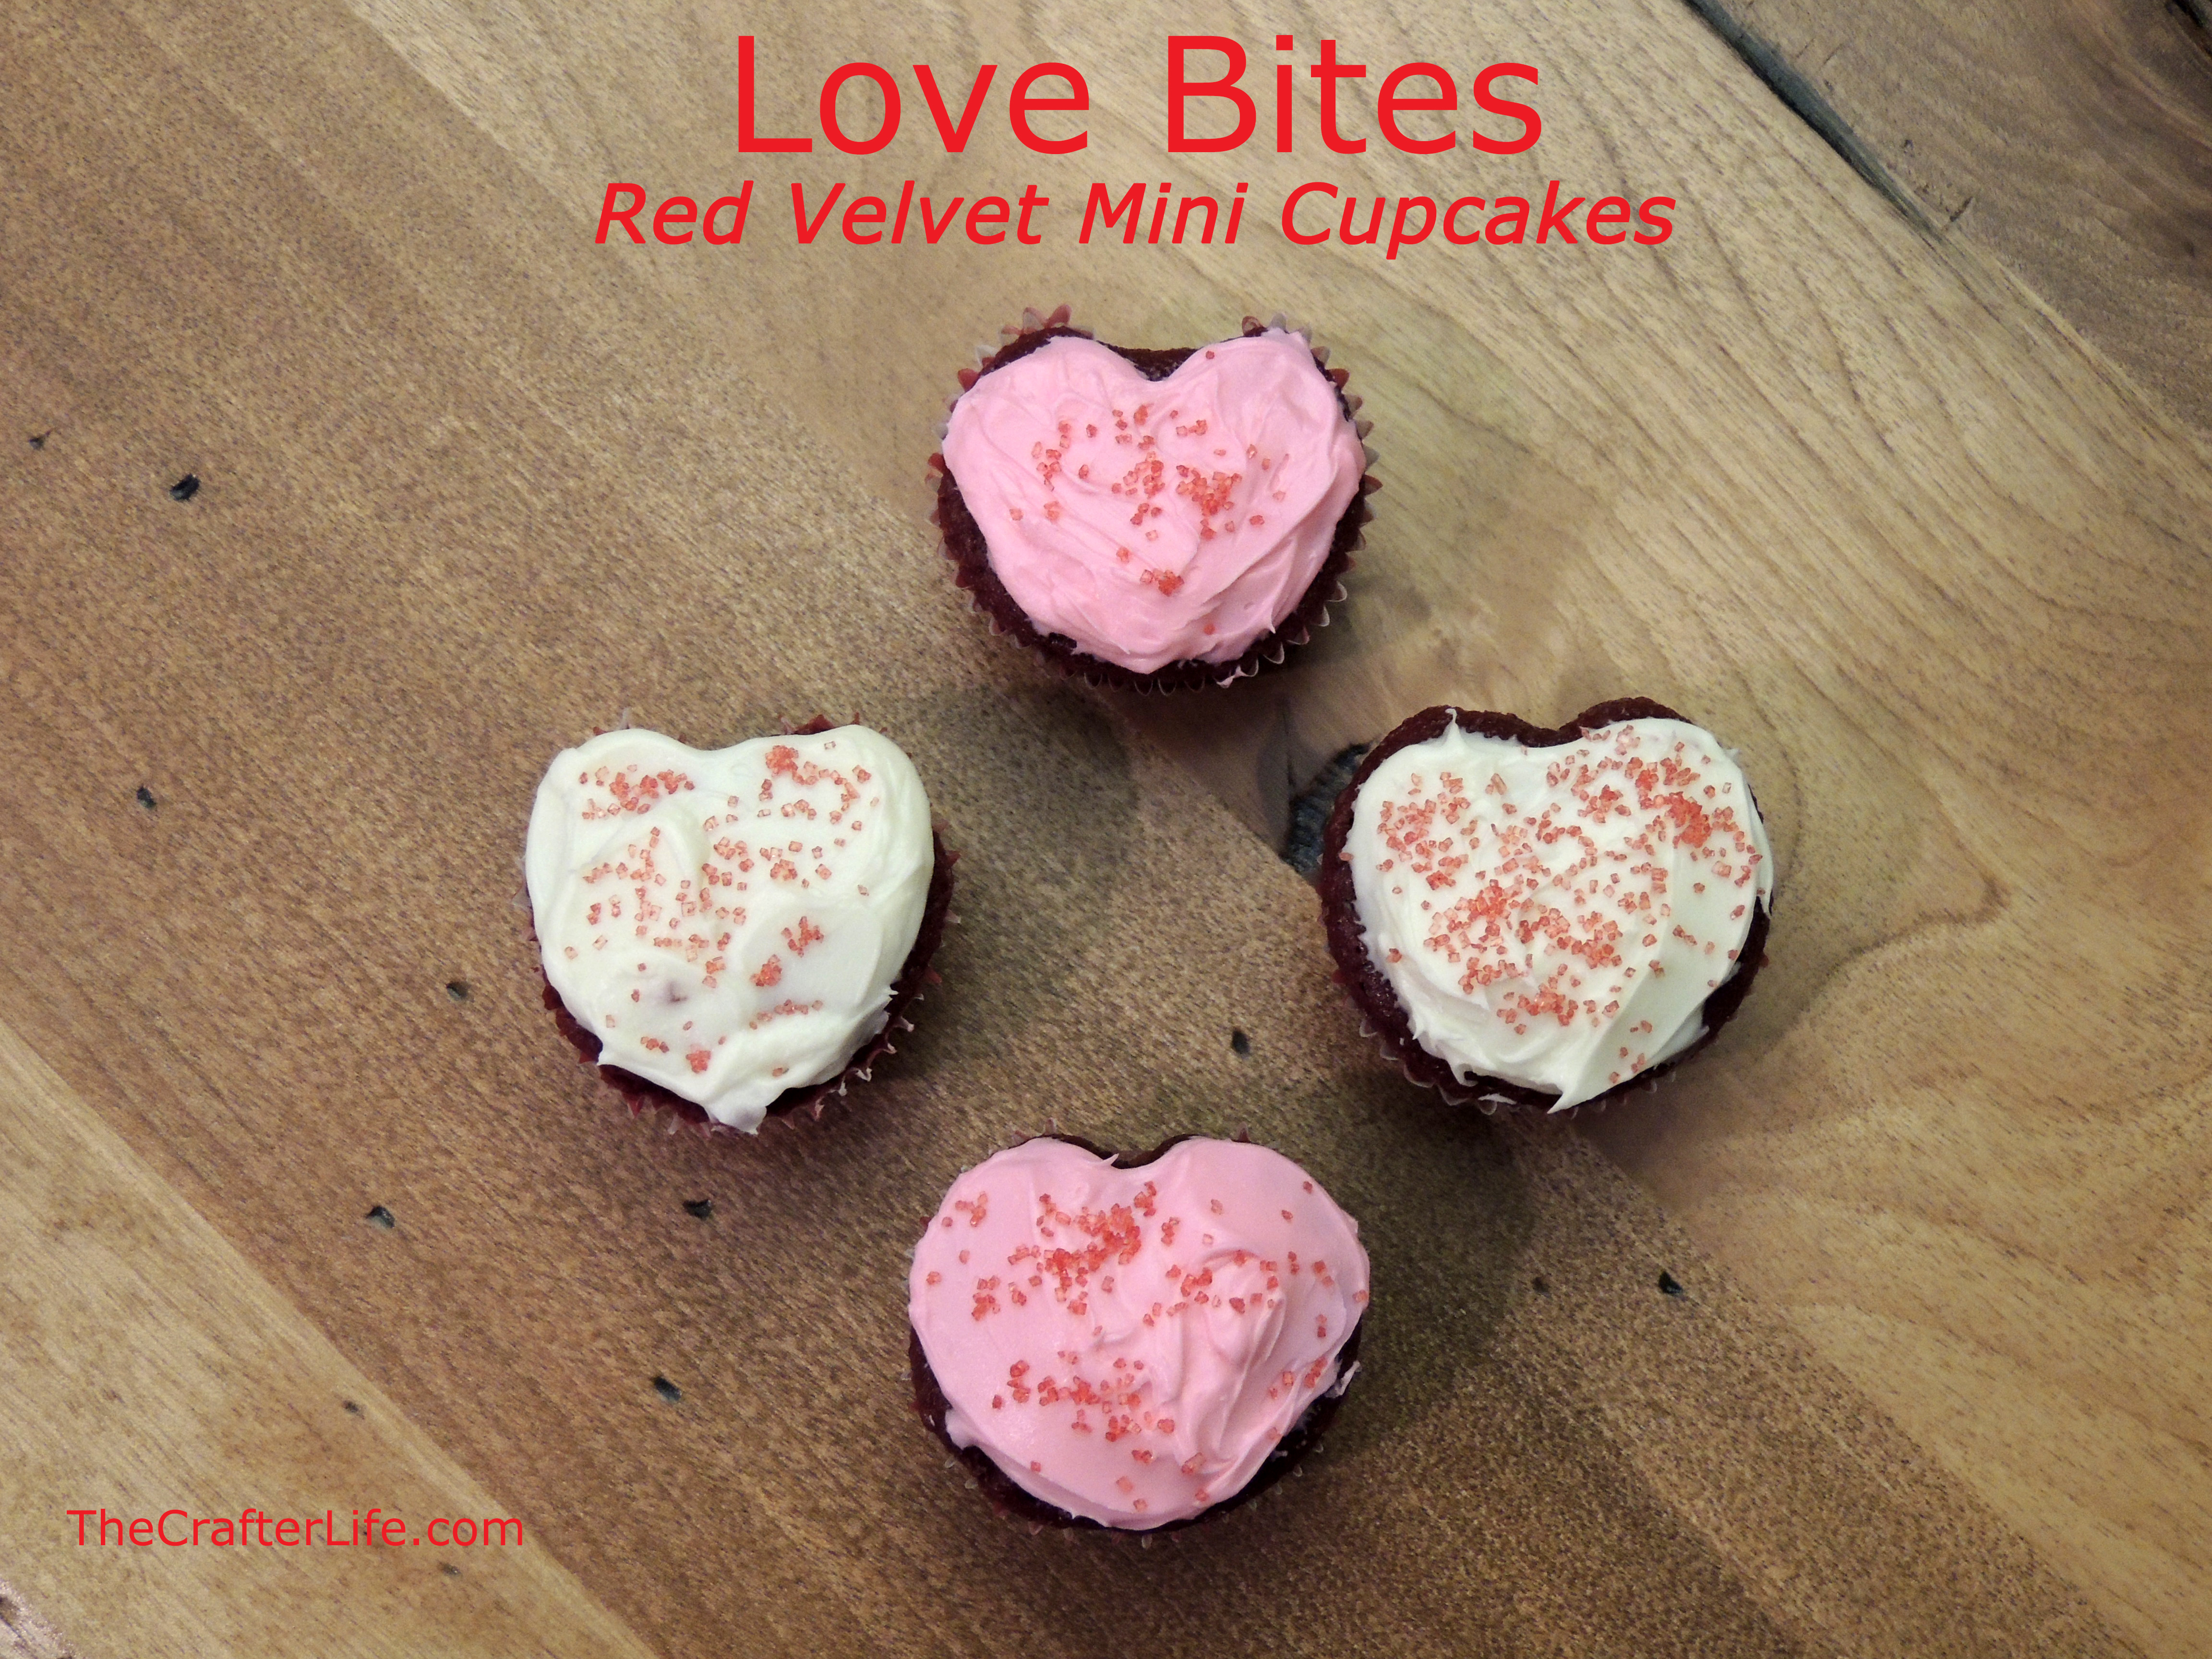
Happy Valentine’s Day!!! I had an old box of red velvet cake mix in the pantry that I wanted to use – and what better excuse than Valentine’s Day?! So last night, my daughter and I tried to make heart-shaped mini cupcakes. It was definitely a little trickier than I thought it would be to shape the cupcakes in a regular mini muffin pan. Plus, it was actually my first time using a mini muffin pan (I received one as a gift for Christmas). I quickly figured out that frosting can work wonders on even the most misshapen cupcake. Even though some of the cupcakes didn’t end up looking exactly like perfect hearts, they were still fun for us to make and they tasted great!
Materials (makes about 72 mini cupcakes)
– 1 box of red velvet cake mix/ingredients needed for your own recipe
– Mini muffin pan/mini baking cups
– Foil
– Cream cheese frosting
– Pink or red food coloring
– Red sprinkles
– OPTIONAL: Graham crackers + butter/Nilla wafers + butter
Directions
1. Line a mini muffin pan with mini paper baking cups.
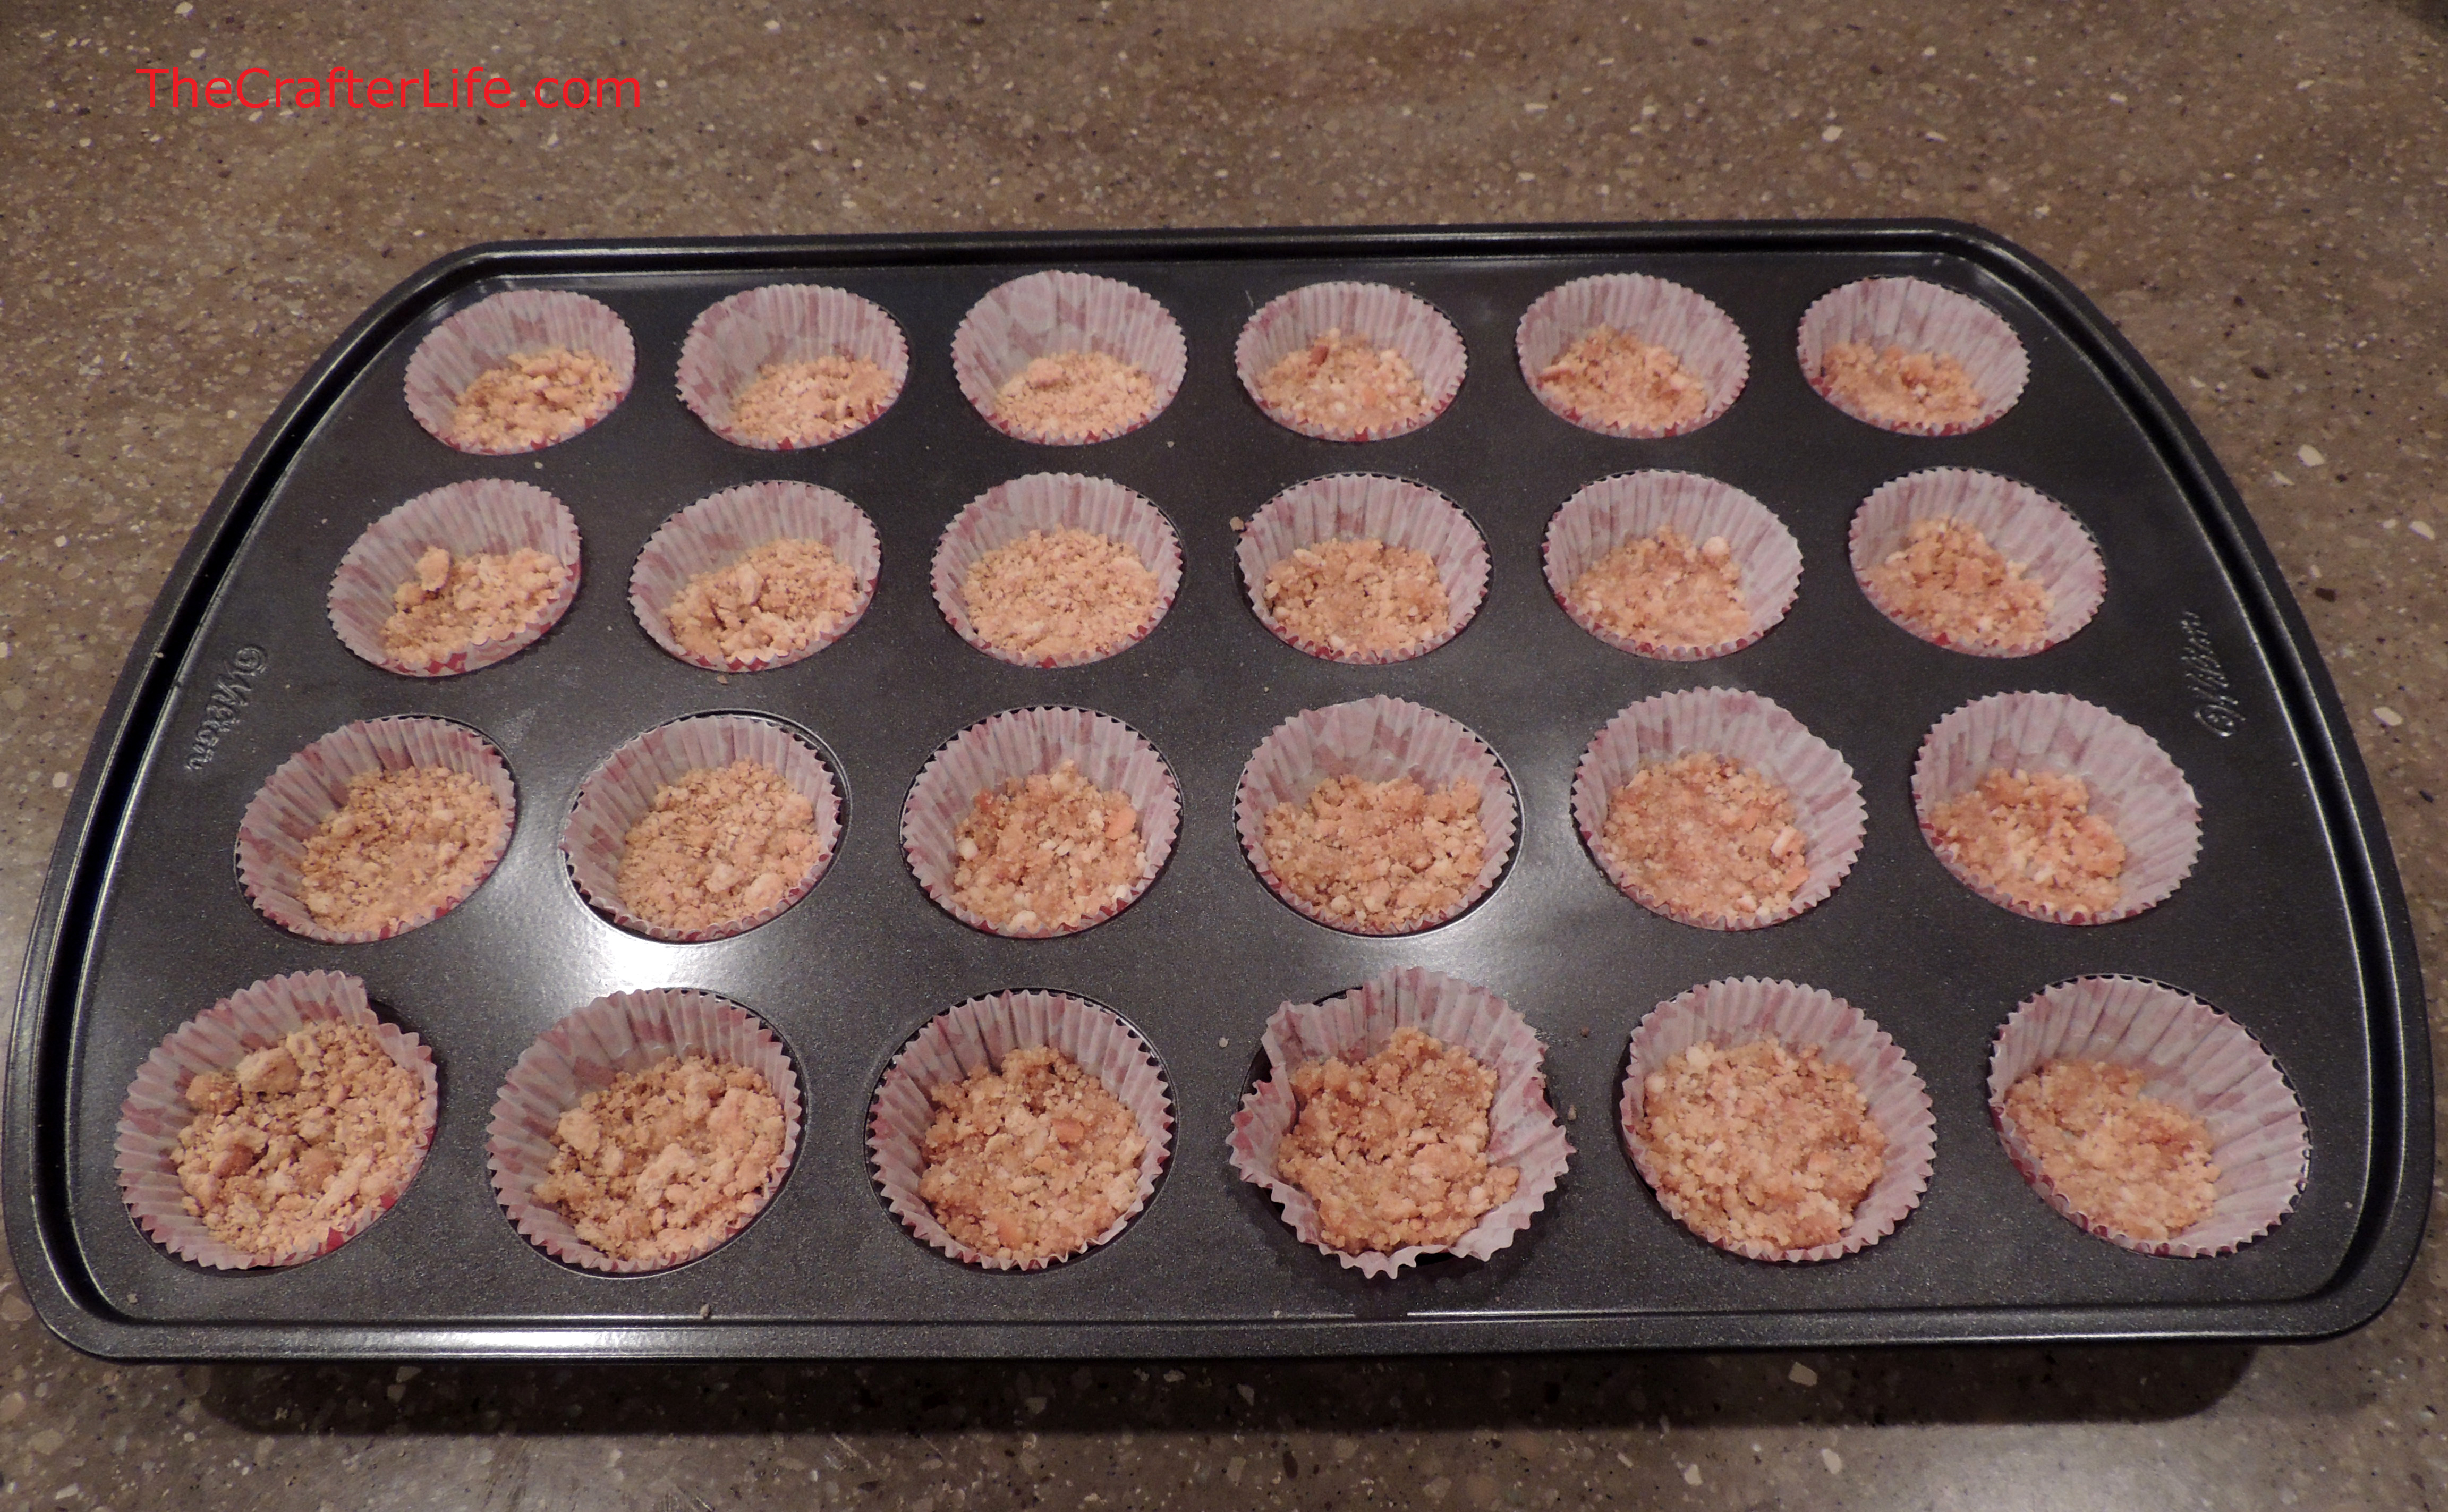
2. This step is for adding an optional crust to the bottom of the cupcakes, so if you aren’t interested, you can skip it. With a few of my cupcakes, I made a graham cracker crust and with a few others, I tried a Nilla wafer crust (for some reason, I felt like experimenting). Pre-heat the oven to 350 degrees. To make the graham cracker crust, simply put about two crackers in a Ziploc bag, seal it, and crush them to get fine crumbs. I used a rolling pin to help crush them easier. Then add about a tablespoon of melted butter to wet the crumbs. Place the cracker crumbs in the bottom of the baking cups and press them down to get a more compact crust. In order to make the Nilla wafer crust, add a few wafers to a Ziploc bag, seal it, and crush them into fine crumbs. Again, a rolling pin makes crushing them easier. Then add about a tablespoon of melted butter to cover the cookie crumbs. Add some crumbs to the bottom of the baking cups and press them firmly so the crust stays together. If you are doing a crust for all of you cupcakes, just do this using more crackers and butter. I only had a crust on about 24 of my mini cupcakes. Place the muffin pan in the pre-heated oven for about 5 minutes.
3. Pre-heat the oven to whatever temperature your directions/recipe state. If you skipped Step 1, place your paper baking cups in the muffin pan.
4. Make your cake batter according to your directions/recipe. Then fill your paper cups with the batter about 2/3 full. Be careful not to fill the cups too high (this was my problem as I wasn’t used to a mini muffin pan). Also, in order to keep the heart shape, it is better to have less batter.
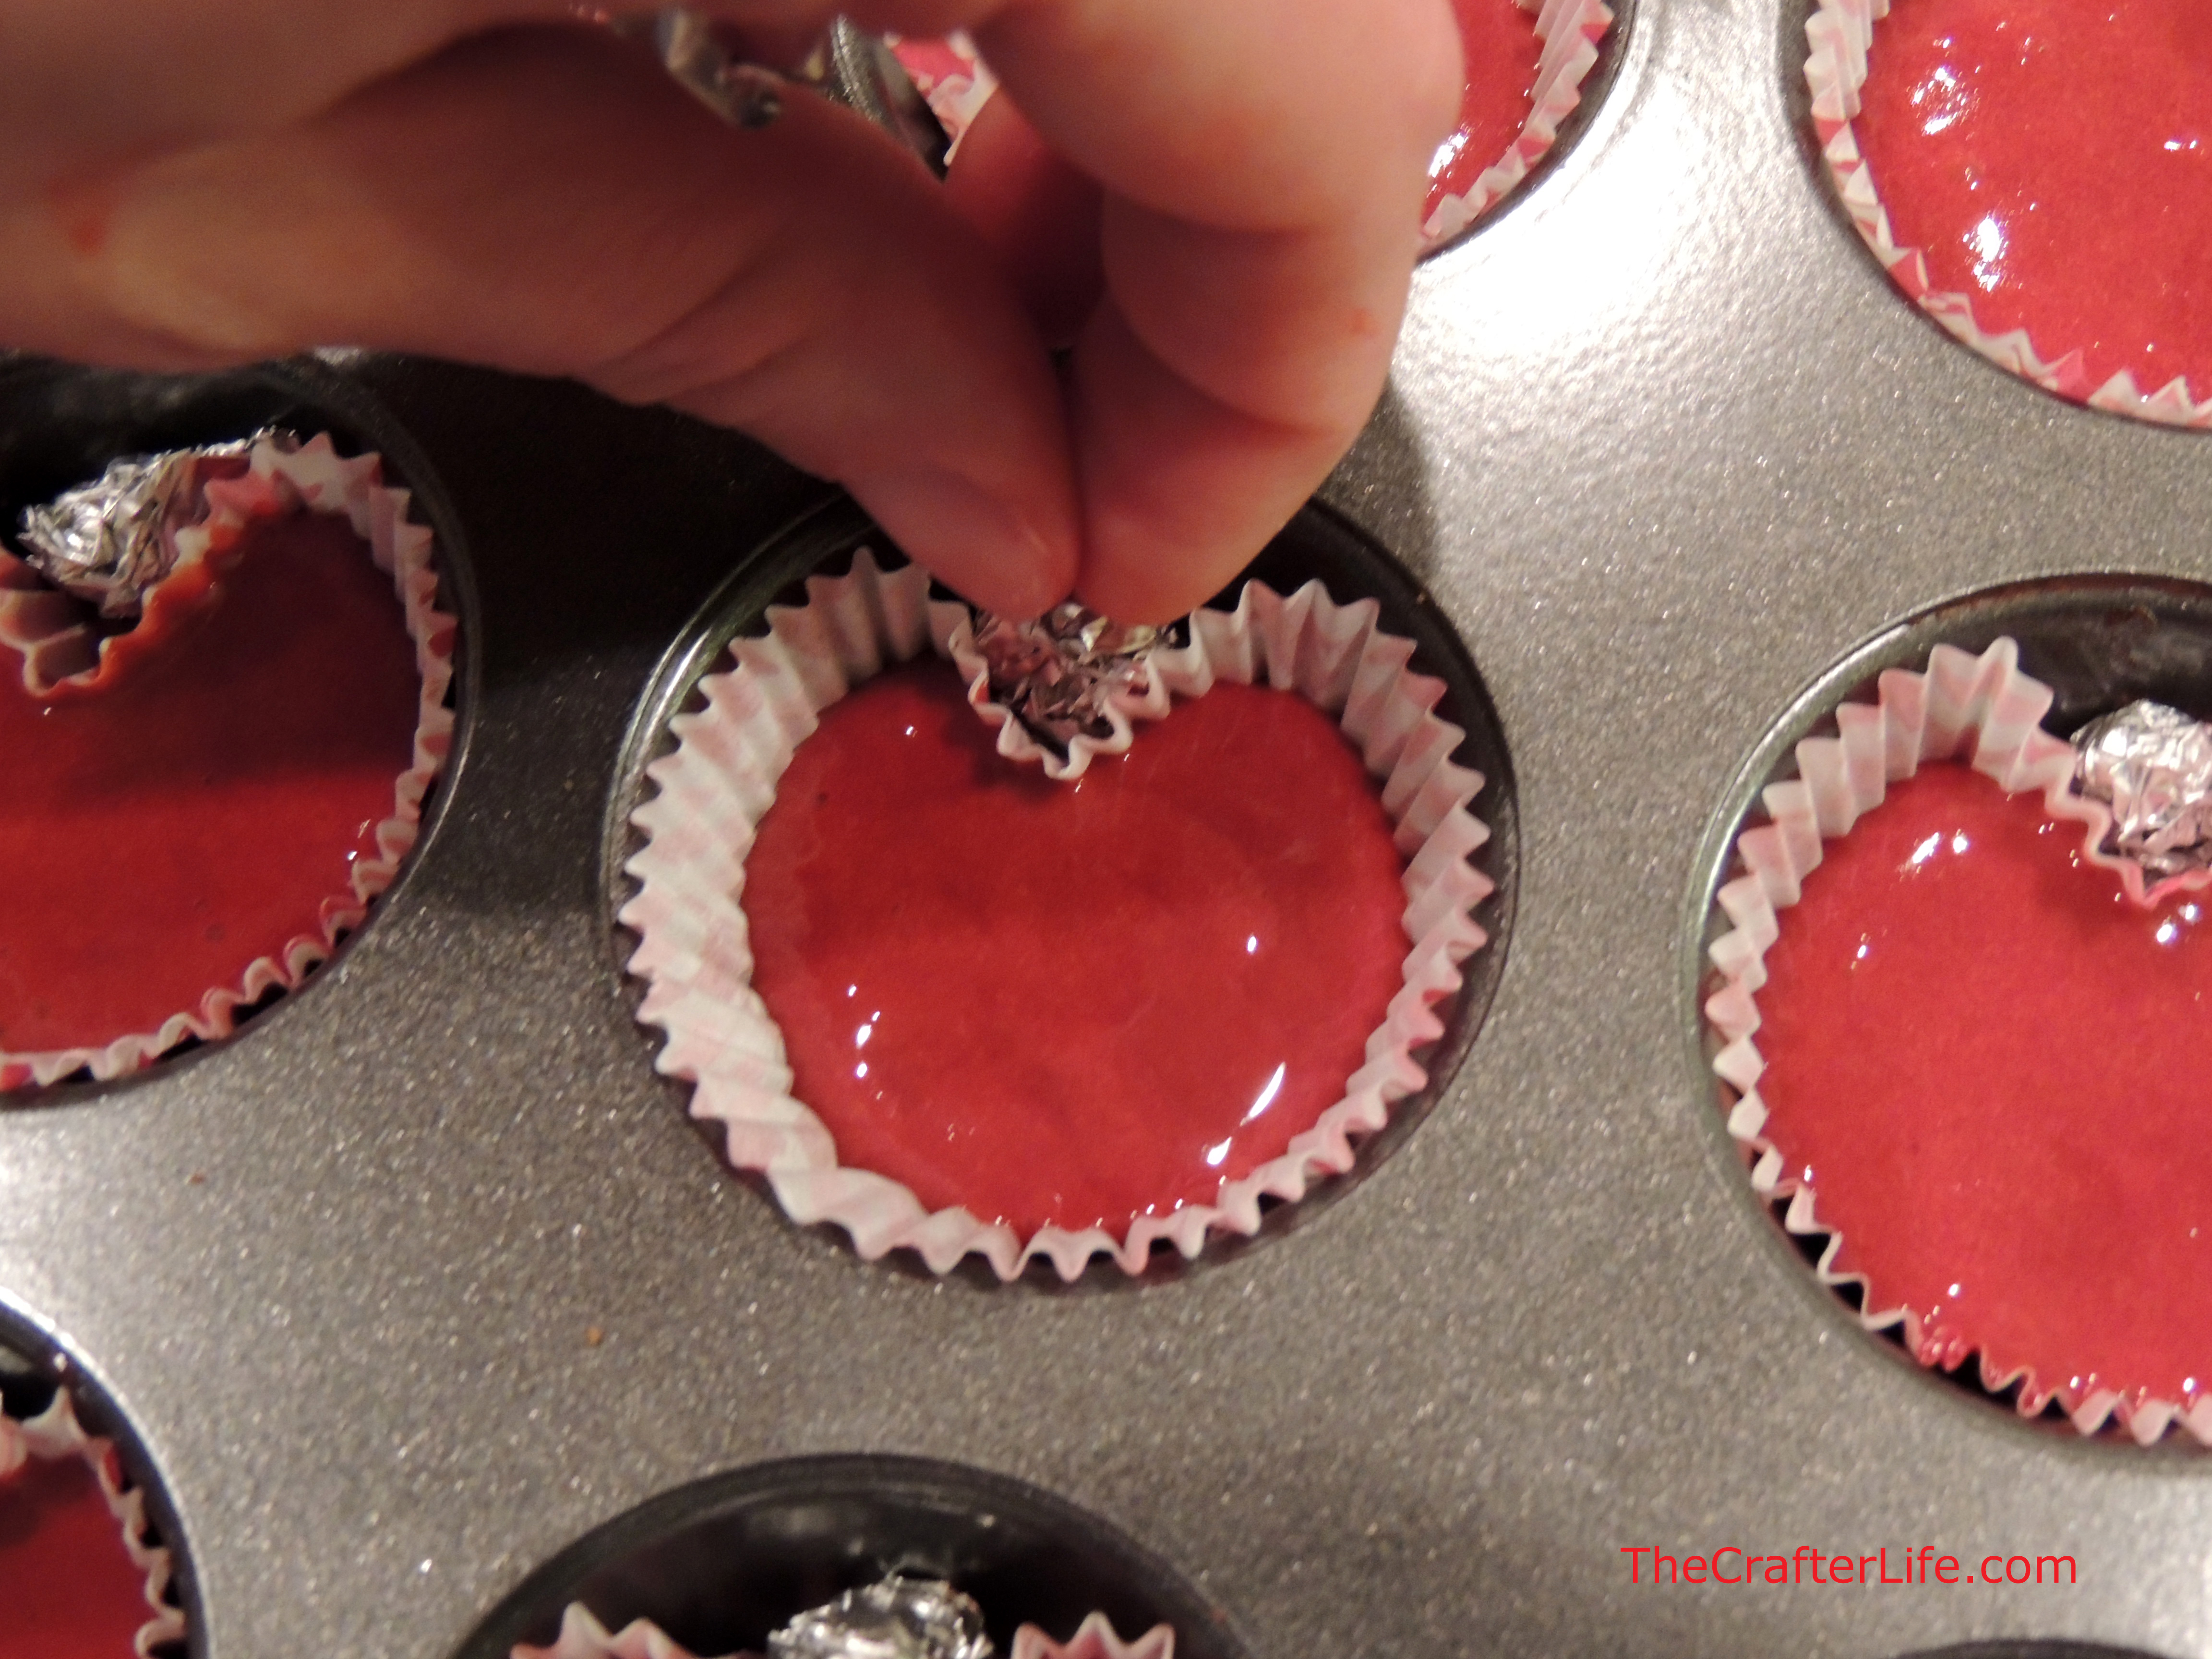
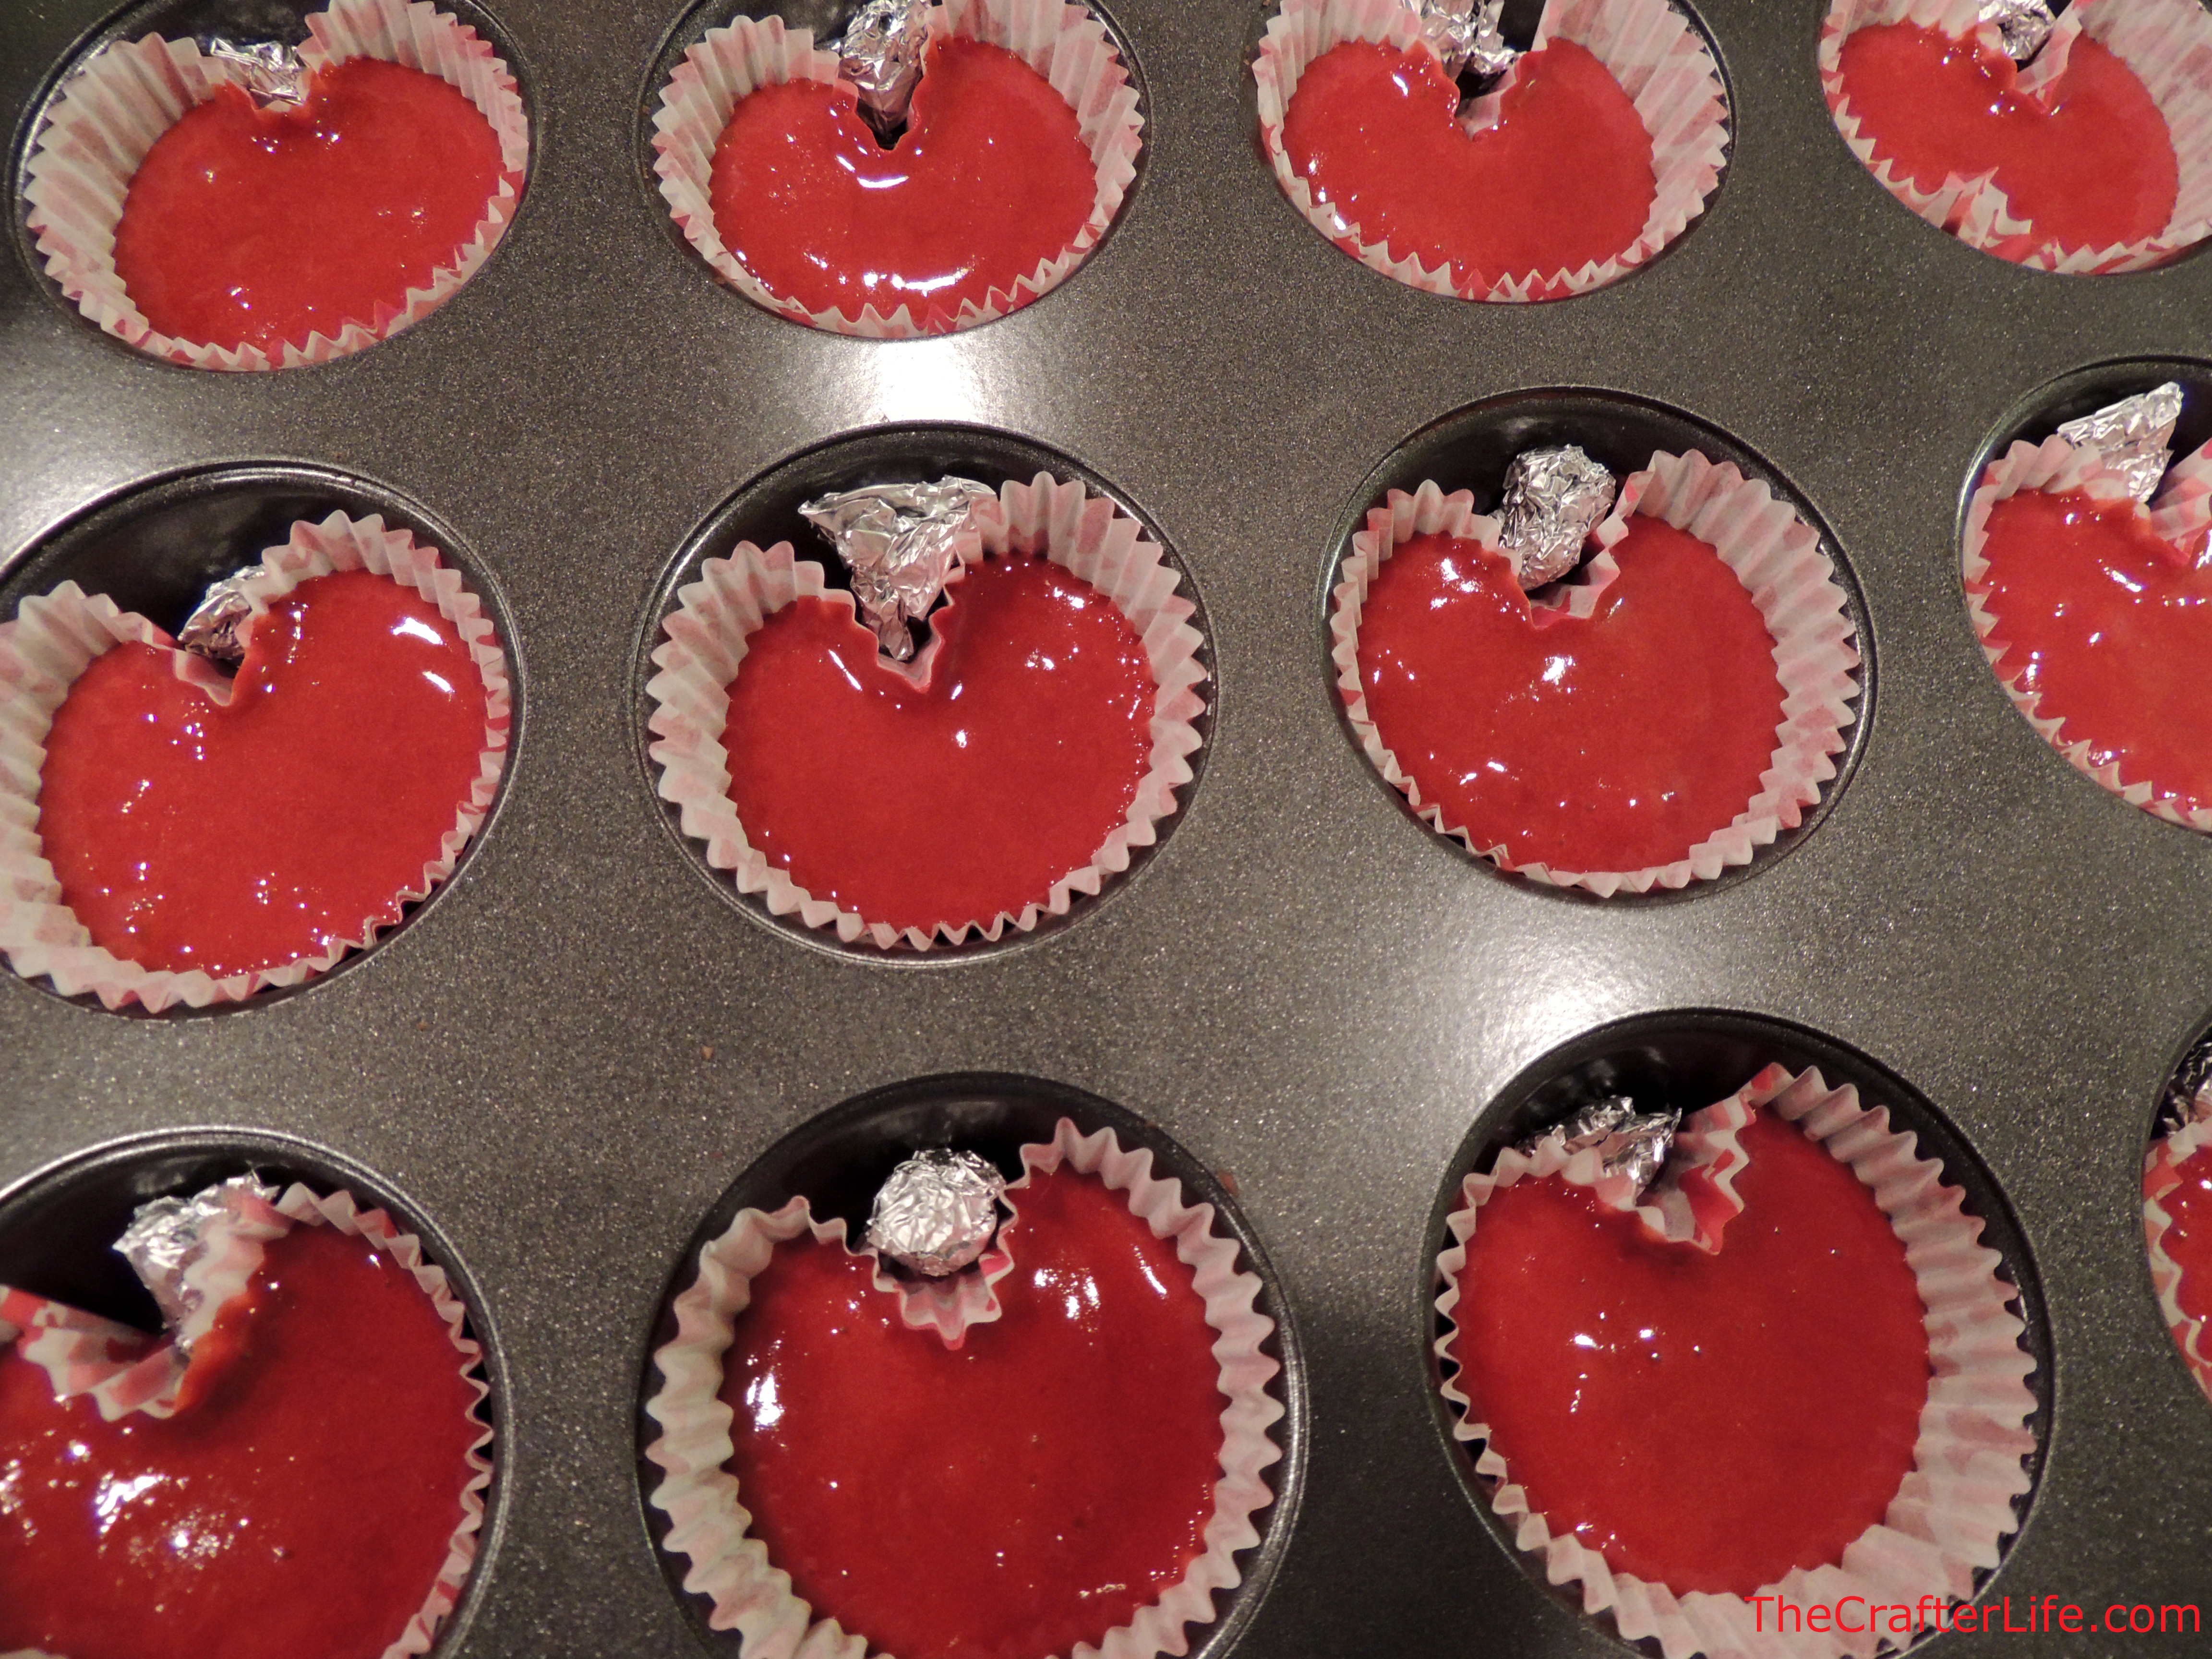
5. In order to shape the cupcakes, fold the baking cups at the point where the two arches of a heart would meet and place a small ball of foil there to hold the shape.
6. Bake your cupcakes according to your directions/recipe (I found that my cupcakes were done baking earlier than the package directions stated since they were so small).
7. Allow your cupcakes to cool completely after taking them out of the oven.
8. If you want pink frosting, dye your frosting using a little red or pink food coloring. I used store-bought cream cheese frosting and dyed half of it pink and left the other half white.
9. Frost your cupcakes (once cool) and try to apply the frosting in a heart shape. I am definitely not a professional cake decorator, so I used a butter knife to frost my cupcakes. I found that the frosting really helped make the cupcakes look like hearts if they didn’t keep their shapes in the oven.
10. Decorate your cupcakes with sprinkles or other embellishments. We just added some red sprinkles to ours – they seemed pretty small to go crazy with decorating.
11. Enjoy your love bites!!!