Christmas Tree Earring Holder
Looking for a cute and creative way to gift earrings to someone this year for the holidays? Don’t you think earrings make the cutest mini Christmas tree ornaments? If you are giving earrings to someone this year for Christmas or you are looking for a cute way to display your own holiday earrings for the season, check out my crochet Christmas Tree Earring Holder! I came up with this idea several years ago when I thought that earrings look like miniature Christmas ornaments and would be adorable decorating a mini tree. I thought it would be a cute way to give earrings to someone for Christmas. I finally brought my idea to life this year! My daughter decided to hang her earring tree in her room as a way to display her seasonal earrings and keep them all together in one place so they are easy to find. Not only is it awesome to hold earrings, but it can also be used on its own as an ornament once the earrings are removed from it. It’s a simple and fun project either way you use it – as an earring holder or as a Christmas ornament! I made a pattern for two sizes depending on how many earrings you wish to hang on it.
Christmas Tree Earring Holder
FINISHED MEASUREMENTS
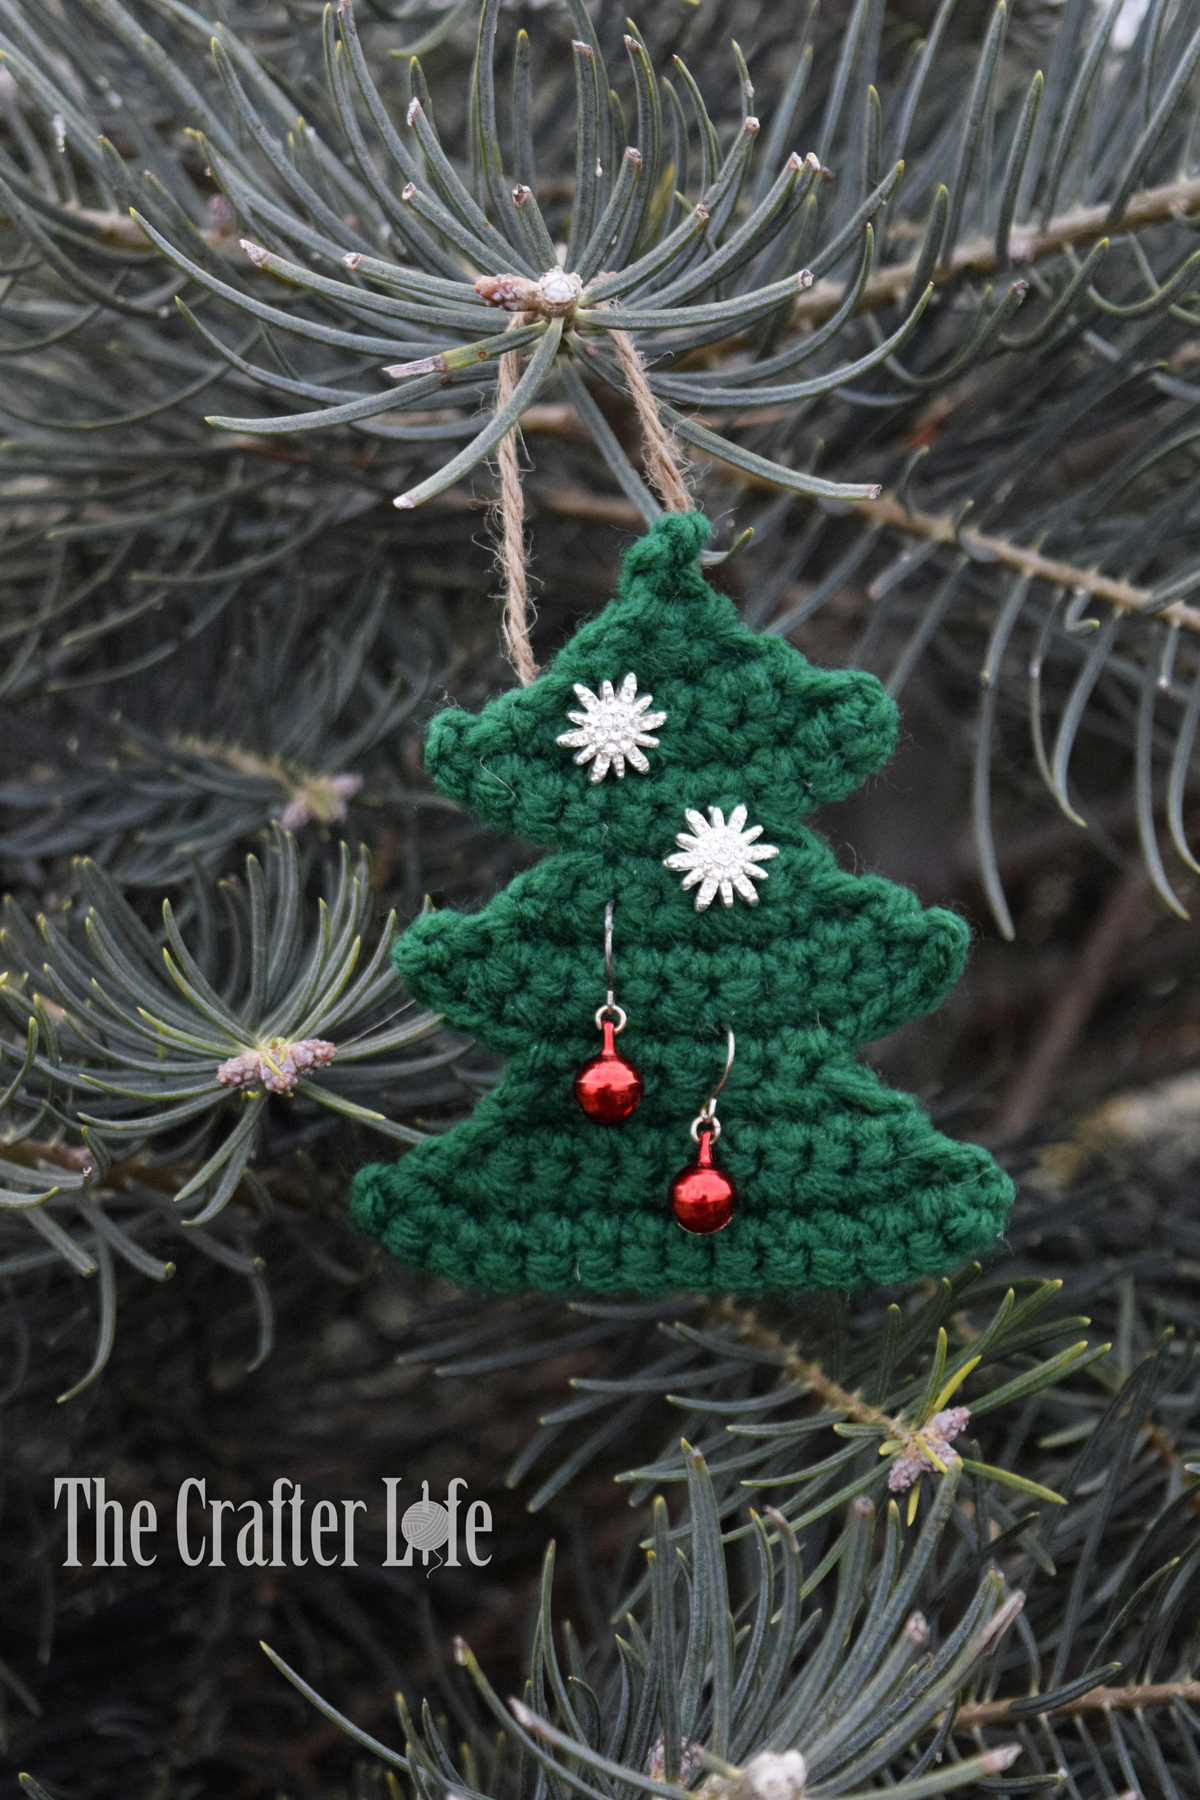
The smaller Christmas tree earring holder is about 3½ inches tall and 3 inches wide at the widest part (the bottom section). The larger Christmas Tree Earring Holder is about 4¼ inches tall and 3¼ inches wide at the widest part (the bottom section). The twine cord hanger adds about 1 inch (but you can adjust it to however long you want it to hang).
MATERIALS
– Size 4.50 mm crochet hook or size needed to obtain gauge
– Worsted weight (4) acrylic yarn in your choice of tree color (I used Red Heart Super Saver yarn in Paddy Green.)
– Jute twine
– Scissors
– Tapestry needle for weaving in ends
– Stitch markers
– Measuring tape
ABBREVIATIONS
– ch = chain
– chs = chains
– sc = single crochet
– st = stitch
– sts = stitches
GAUGE
5 sc = 1 inch
5 rows of sc = 1 inch
DIRECTIONS
Tree
*Use your 4.50 mm hook and green/main color worsted weight yarn to complete the tree earring holder.
*While working the tree, the yarn is fastened off between sections.
Row 1: Ch 2, sc in 2nd ch from hook. (1 sc)
Row 2: Ch 1, turn, 2 sc in first st. (2 sc)
Row 3: Ch 1, turn, 2 sc in first st, 2 sc in last st. (4 sc)
Row 4: Ch 1, turn, 2 sc in first st, sc in next 2 sts, 2 sc in last st. (6 sc)
Row 5: Ch 1, turn, 2 sc in first st, sc in next 4 sts, 2 sc in last st. (8 sc)
Row 6: Ch 1, turn, 2 sc in first st, sc in next 6 sts, 2 sc in last st, fasten off, weave in loose ends. (10 sc)
*After completing Row 6, turn work, skip the first 3 stitches and attach yarn to 4th stitch of Row 6 to begin Row 7.
Row 7: Ch 1, sc in 4th st of Row 6 (same stitch as you attached yarn), sc in next 3 sts. (4 sc)
Row 8: Ch 1, turn, 2 sc in first st, sc in next 2 sts, 2 sc in last st. (6 sc)
Row 9: Ch 1, turn, 2 sc in first st, sc in next 4 sts, 2 sc in last st. (8 sc)
Row 10: Ch 1, turn, 2 sc in first st, sc in next 6 sts, 2 sc in last st. (10 sc)
Row 11: Ch 1, turn, 2 sc in first st, sc in next 8 sts, 2 sc in last st, fasten off, weave in loose ends. (12 sc)
*After completing Row 11, turn work, skip the first 3 stitches and attach yarn to 4th stitch of Row 11 to begin Row 12.
Row 12: Ch 1, sc in 4th st of Row 11 (same stitch as you attached yarn), sc in next 5 sts. (6 sc)
Row 13: Ch 1, turn, 2 sc in first st, sc in next 4 sts, 2 sc in last st. (8 sc)
Row 14: Ch 1, turn, 2 sc in first st, sc in next 6 sts, 2 sc in last st. (10 sc)
Row 15: Ch 1, turn, 2 sc in first st, sc in next 8 sts, 2 sc in last st. (12 sc)
Row 16: Ch 1, turn, 2 sc in first st, sc in next 10 sts, 2 sc in last st, fasten off, weave in loose ends. (14 sc)
***If you are making the smaller-sized tree and are finished weaving in all loose ends, follow the directions to attach the twine hanger (directions found after next section of pattern for larger tree). If you are making the larger tree, complete the directions for Rows 17-21 below.***
*After completing Row 16, turn work, skip the first 3 stitches and attach yarn to 4th stitch of Row 16 to begin Row 17.
Row 17: Ch 1, sc in 4th st of Row 16 (same stitch as you attached yarn), sc in next 7 sts. (8 sc)
Row 18: Ch 1, turn, 2 sc in first st, sc in next 6 sts, 2 sc in last st. (10 sc)
Row 19: Ch 1, turn, 2 sc in first st, sc in next 8 sts, 2 sc in last st. (12 sc)
Row 20: Ch 1, turn, 2 sc in first st, sc in next 10 sts, 2 sc in last st. (14 sc)
Row 21: Ch 1, turn, 2 sc in first st, sc in next 12 sts, 2 sc in last st, fasten off, weave in loose ends. (16 sc)
*After completing Row 21 and weaving in all loose ends, follow the directions below to attach your twine hanger.
Twine Hanger
- Cut a strand of jute twine so that it is a little longer than you need it for your desired length.
- Thread a small tapestry needle with one end of the twine. Run it through a stitch on the back of the tree toward the center of the top section. Make sure you cannot see the twine from the front of the tree. Leave the end hang loose for now.
- Thread the tapestry needle with the other end of the twine and run it through another stitch on the back of the tree toward the center of the top section at even height with the stitch you used for the other end. The twin should now be forming a loop above the tree.
- Pull the ends of the twine so that the loop is at your desired length.
- Knot the ends together on the back of the tree to secure the loop in place. Use a tapestry needle to weave in the ends on the back of the work.
TIP: You may want to press and starch the tree to make it more flat and stiff.

***Your Christmas Tree Earring Holder is now finished and ready to hold some earrings! Have fun displaying your favorite seasonal earrings or gifting earrings in this cute holder to someone else. It also doubles as an ornament on its own!
This pattern is property of TheCrafterLife.com
You may not sell my patterns or claim them as your own. You may make items to sell (i.e. on Etsy) from my patterns but I ask that you link back to my site (TheCrafterLife.com) and provide credit for the pattern. You are welcome to share my patterns on social media as long as you link back directly to my site by providing the link. No copying and pasting of any patterns will be allowed under any circumstances