Advent Calendar Activity
Sorry this is a little late, but here is an idea for an activity kids can do when counting down the days until Christmas. It is a magnetic Advent calendar so you can put it on your refrigerator. Kids turn the date over to reveal a letter. After all the dates are flipped over, a holiday message is revealed. There are two different options that I describe below.
Option 1 (Simply flip the dates over exactly where they are on the tree to reveal the message)
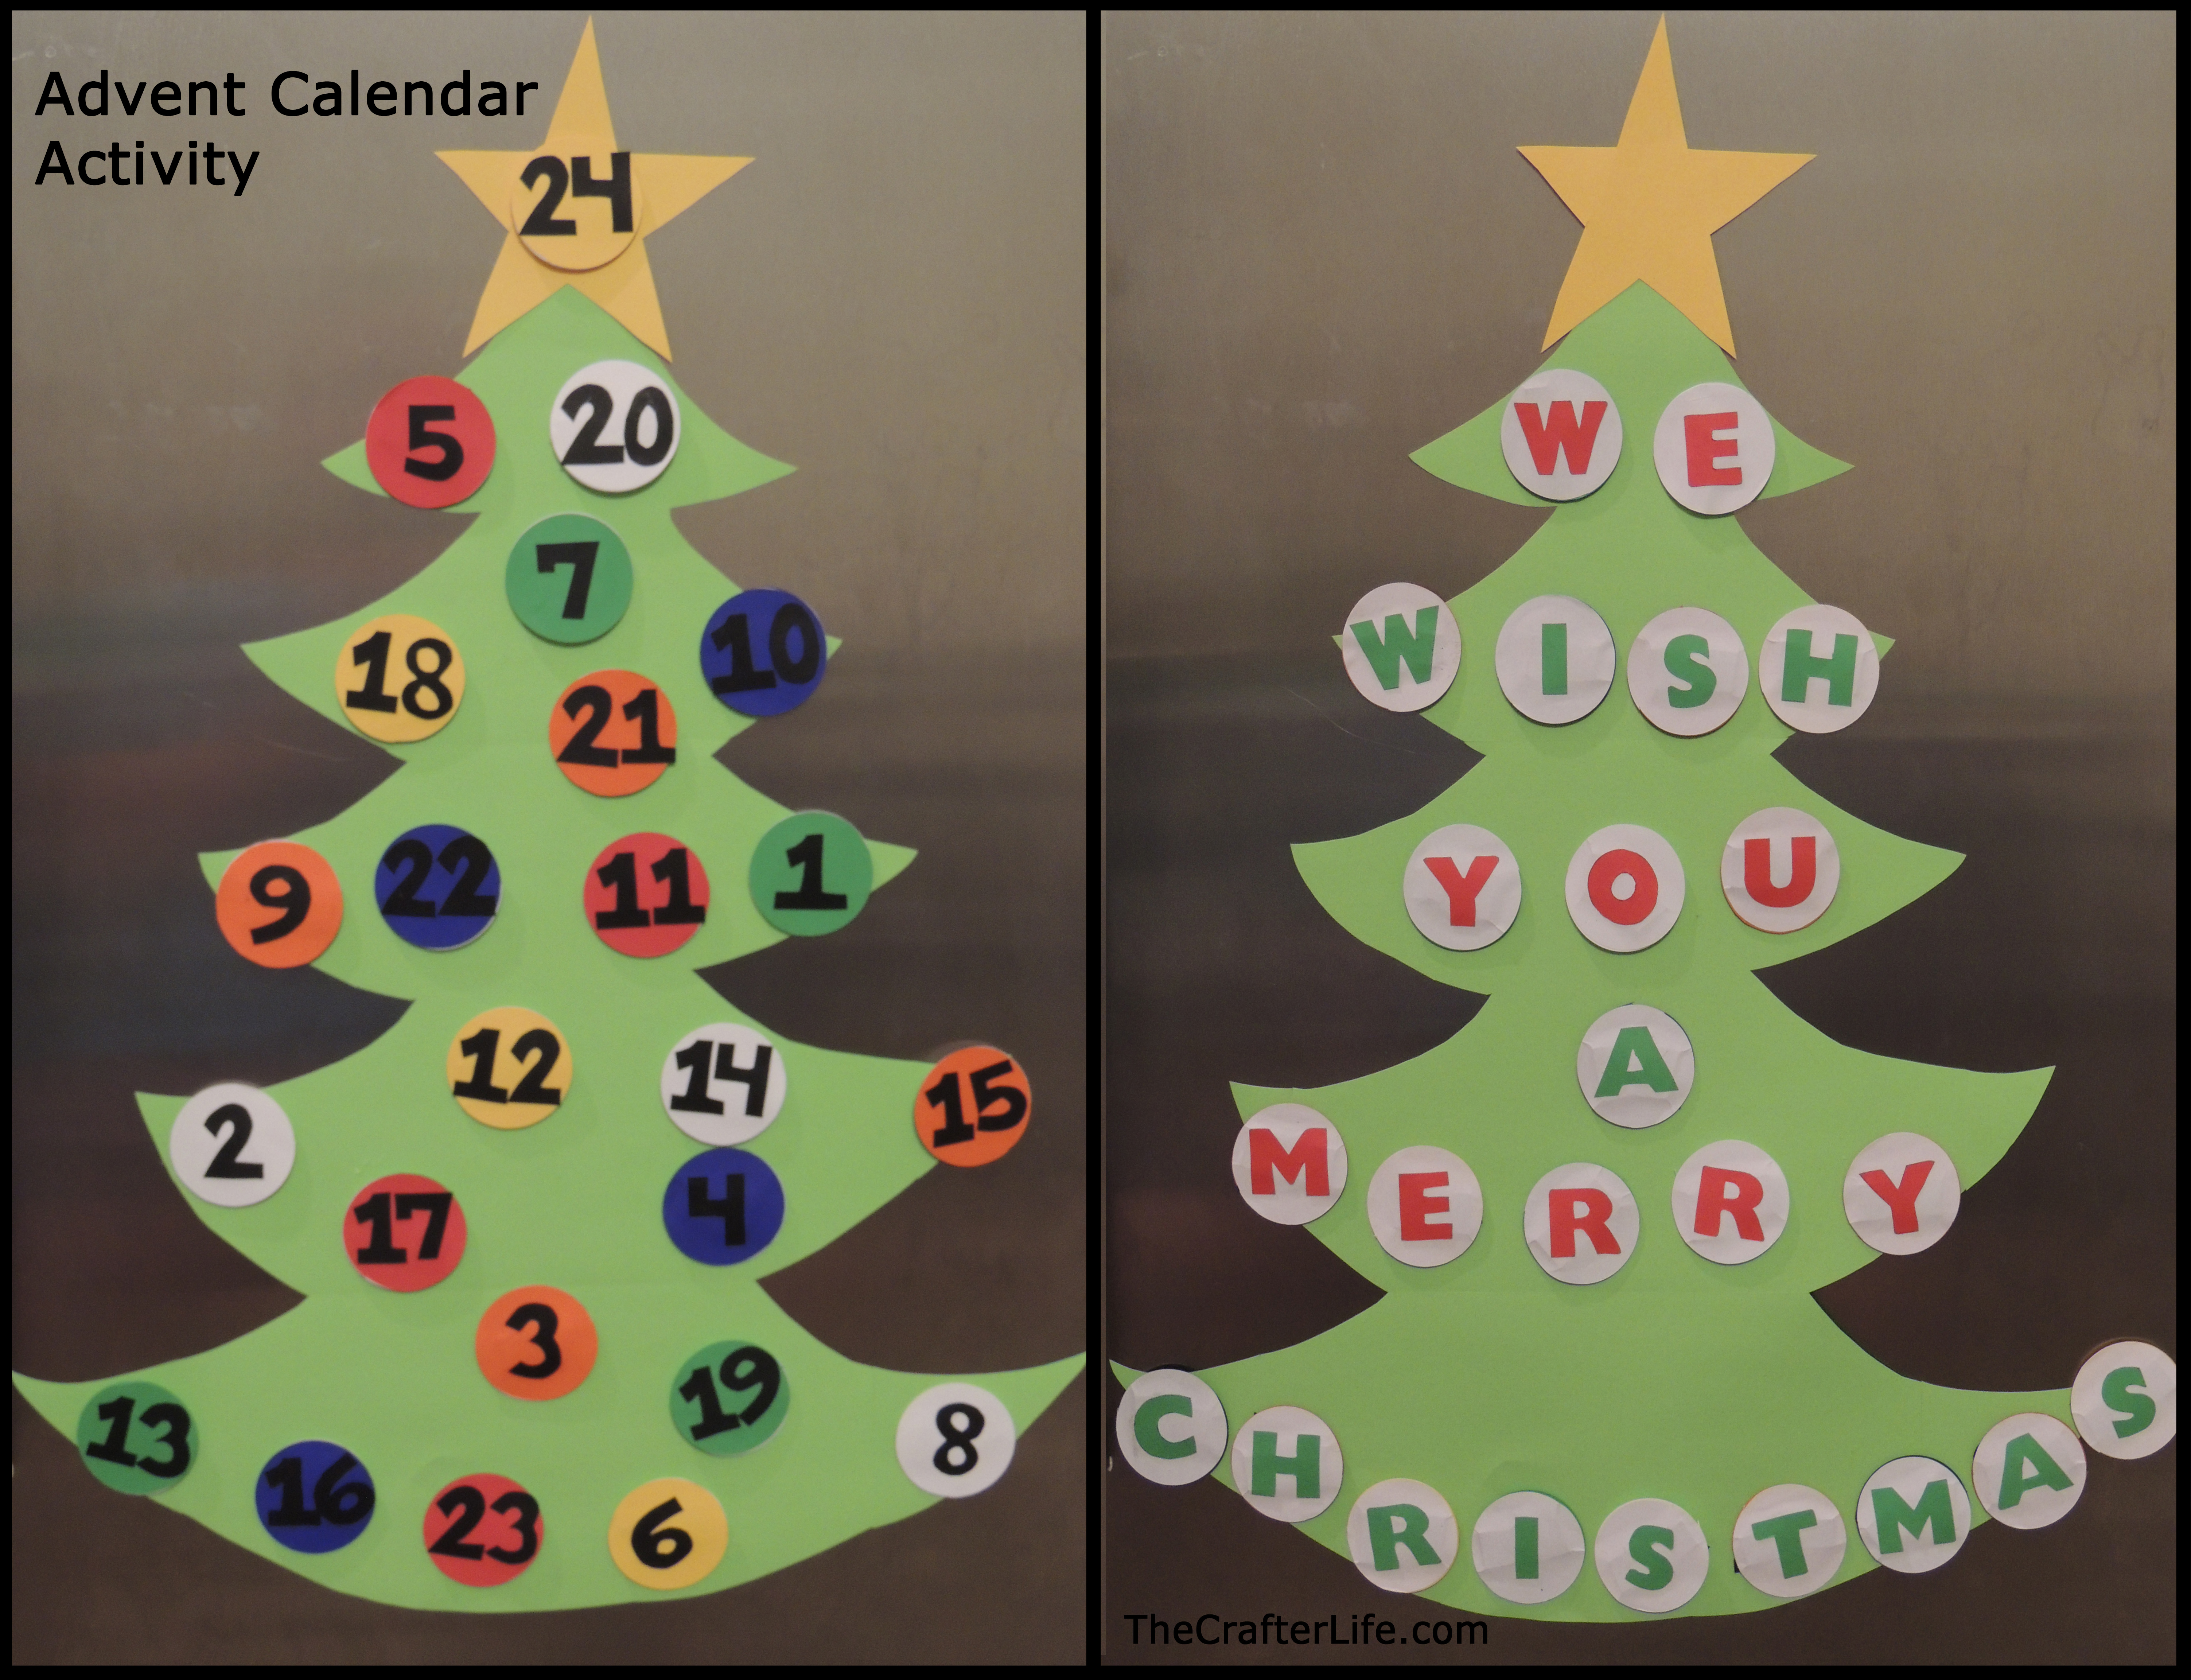
In this option, the dates are arranged in straight rows since you flip them over and leave them exactly where they were so the final message is displayed on the tree.
Materials
– Cardstock/Construction paper in colors red, green, white, yellow, blue, orange, and black
– White paper
– Roll of magnetic tape
– Glue stick
– Scissors
– Clear tape
Directions
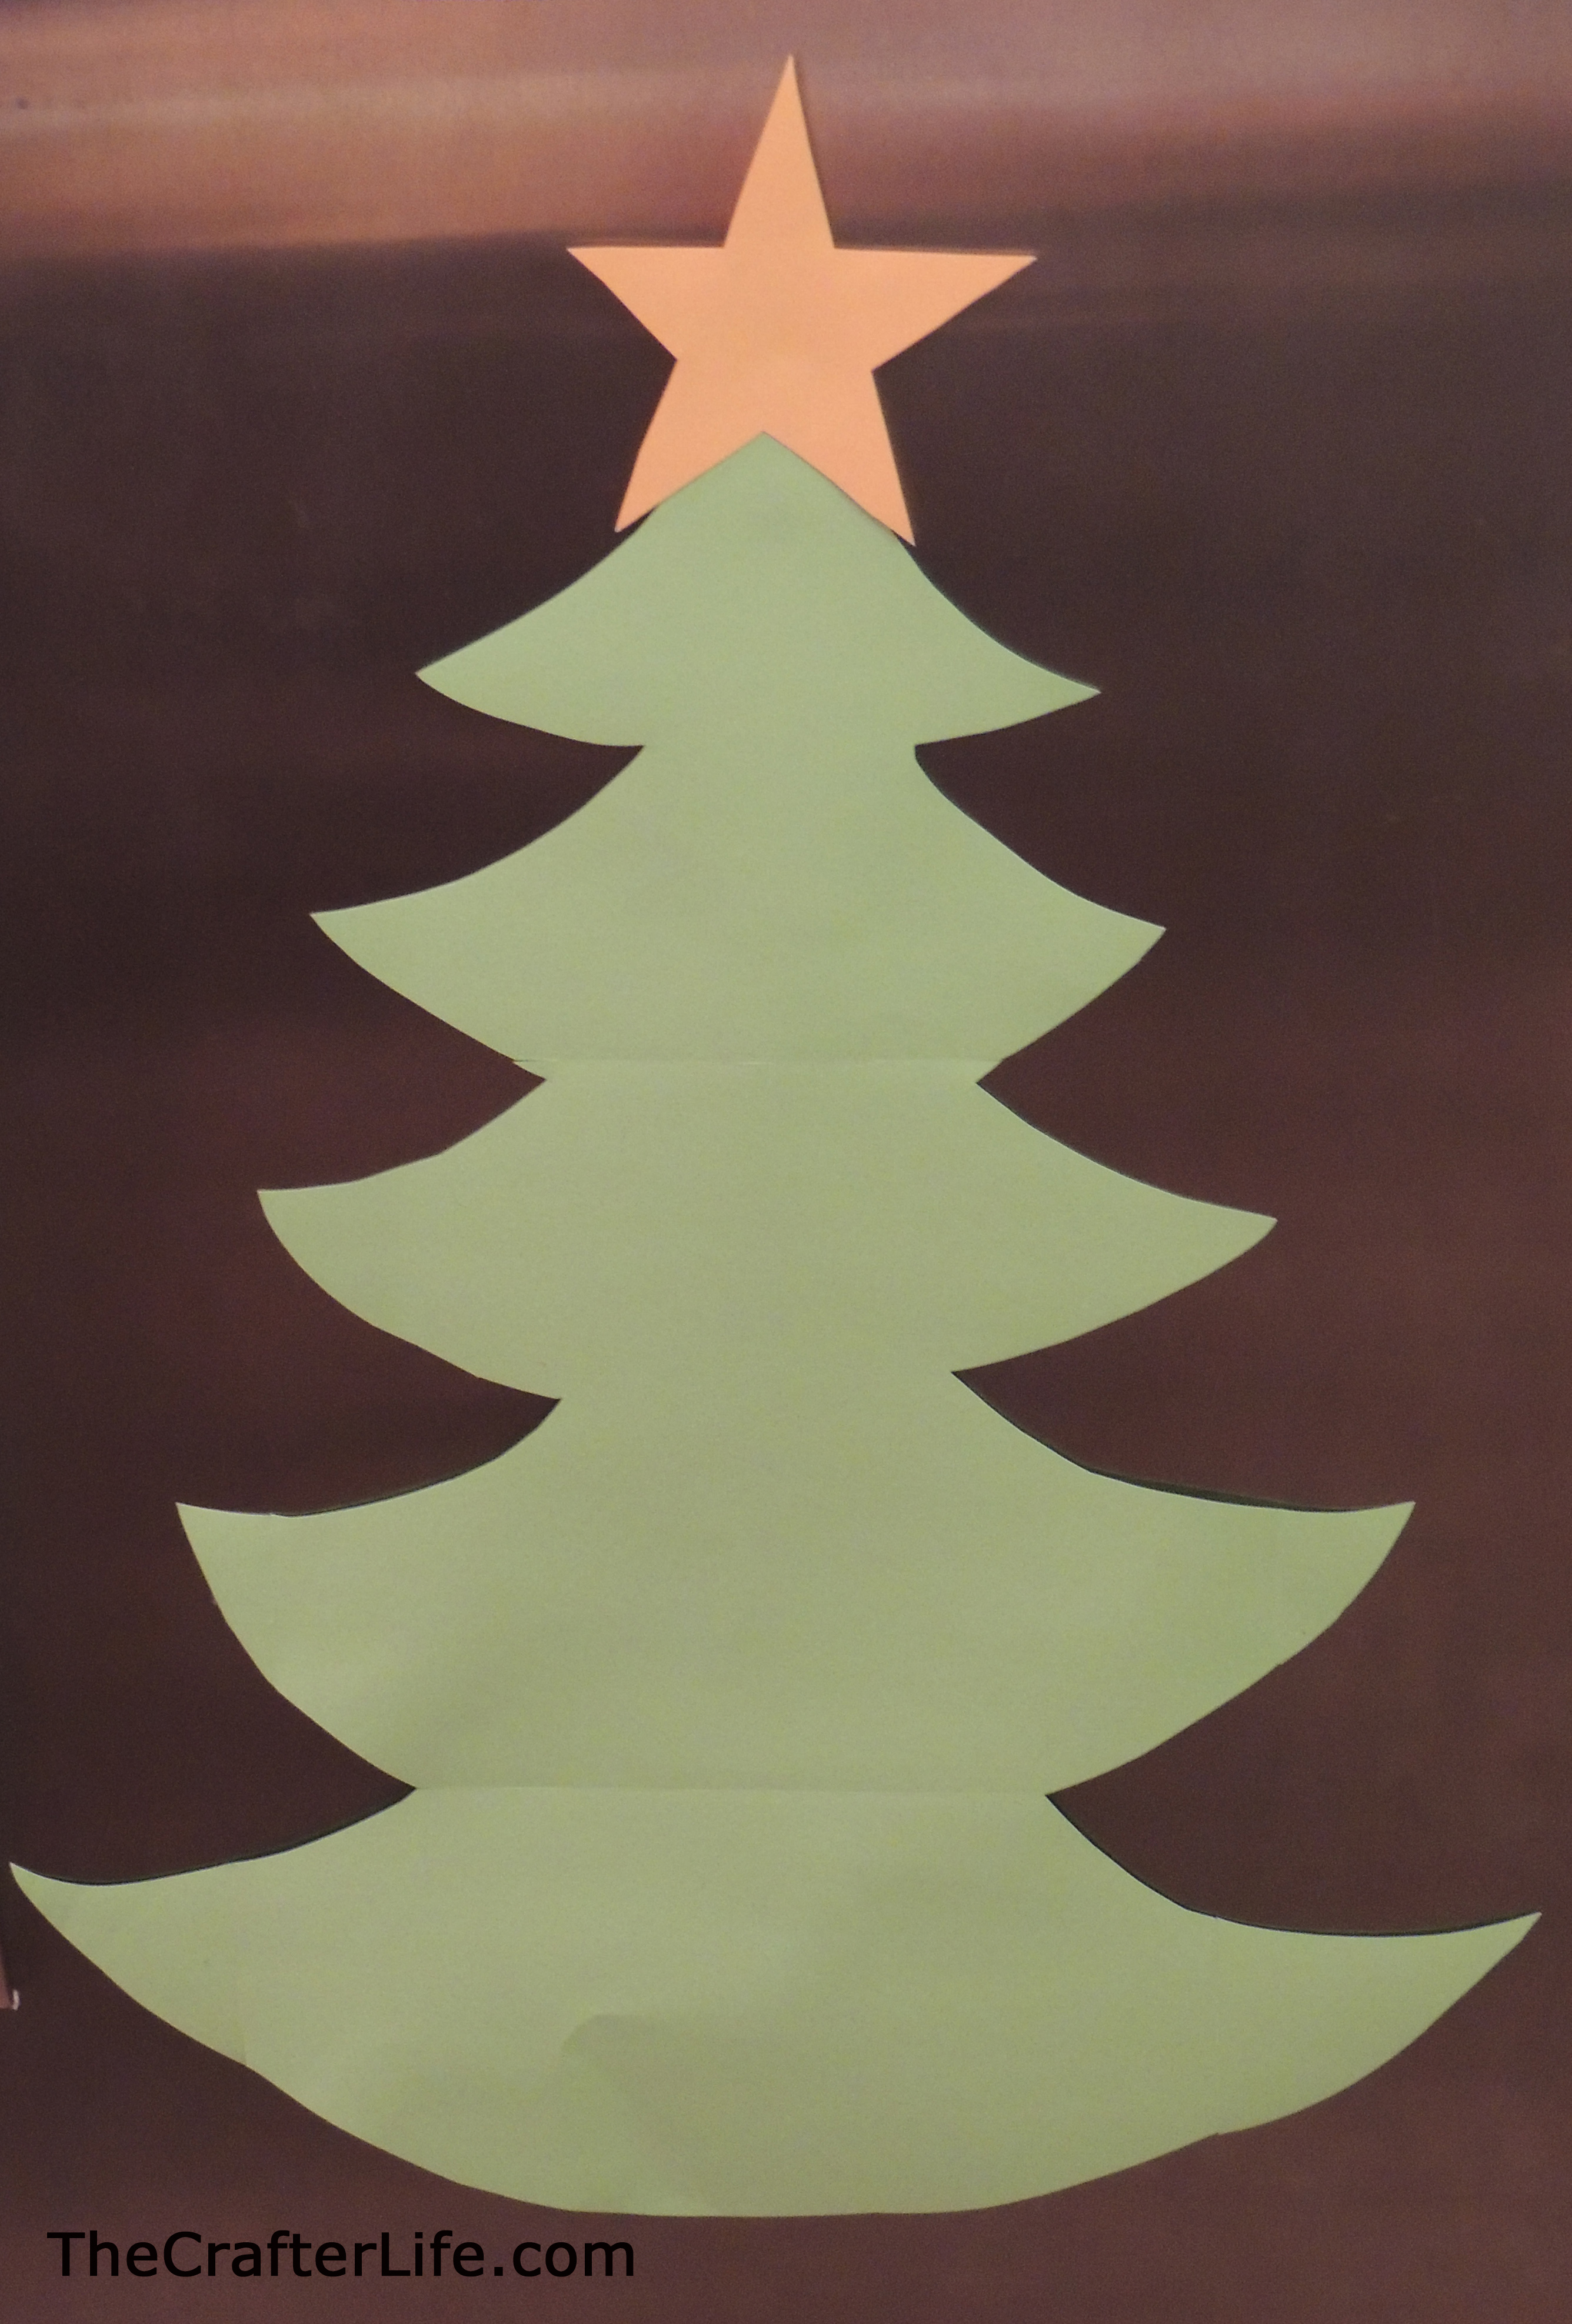
1. Cut a large Christmas tree from green cardstock. I had to use multiple sheets of cardstock and tape the pieces of the tree together. Make a star for the top out of yellow cardstock. Place a few pieces of magnetic tape on the back so that it can hang on your refrigerator.
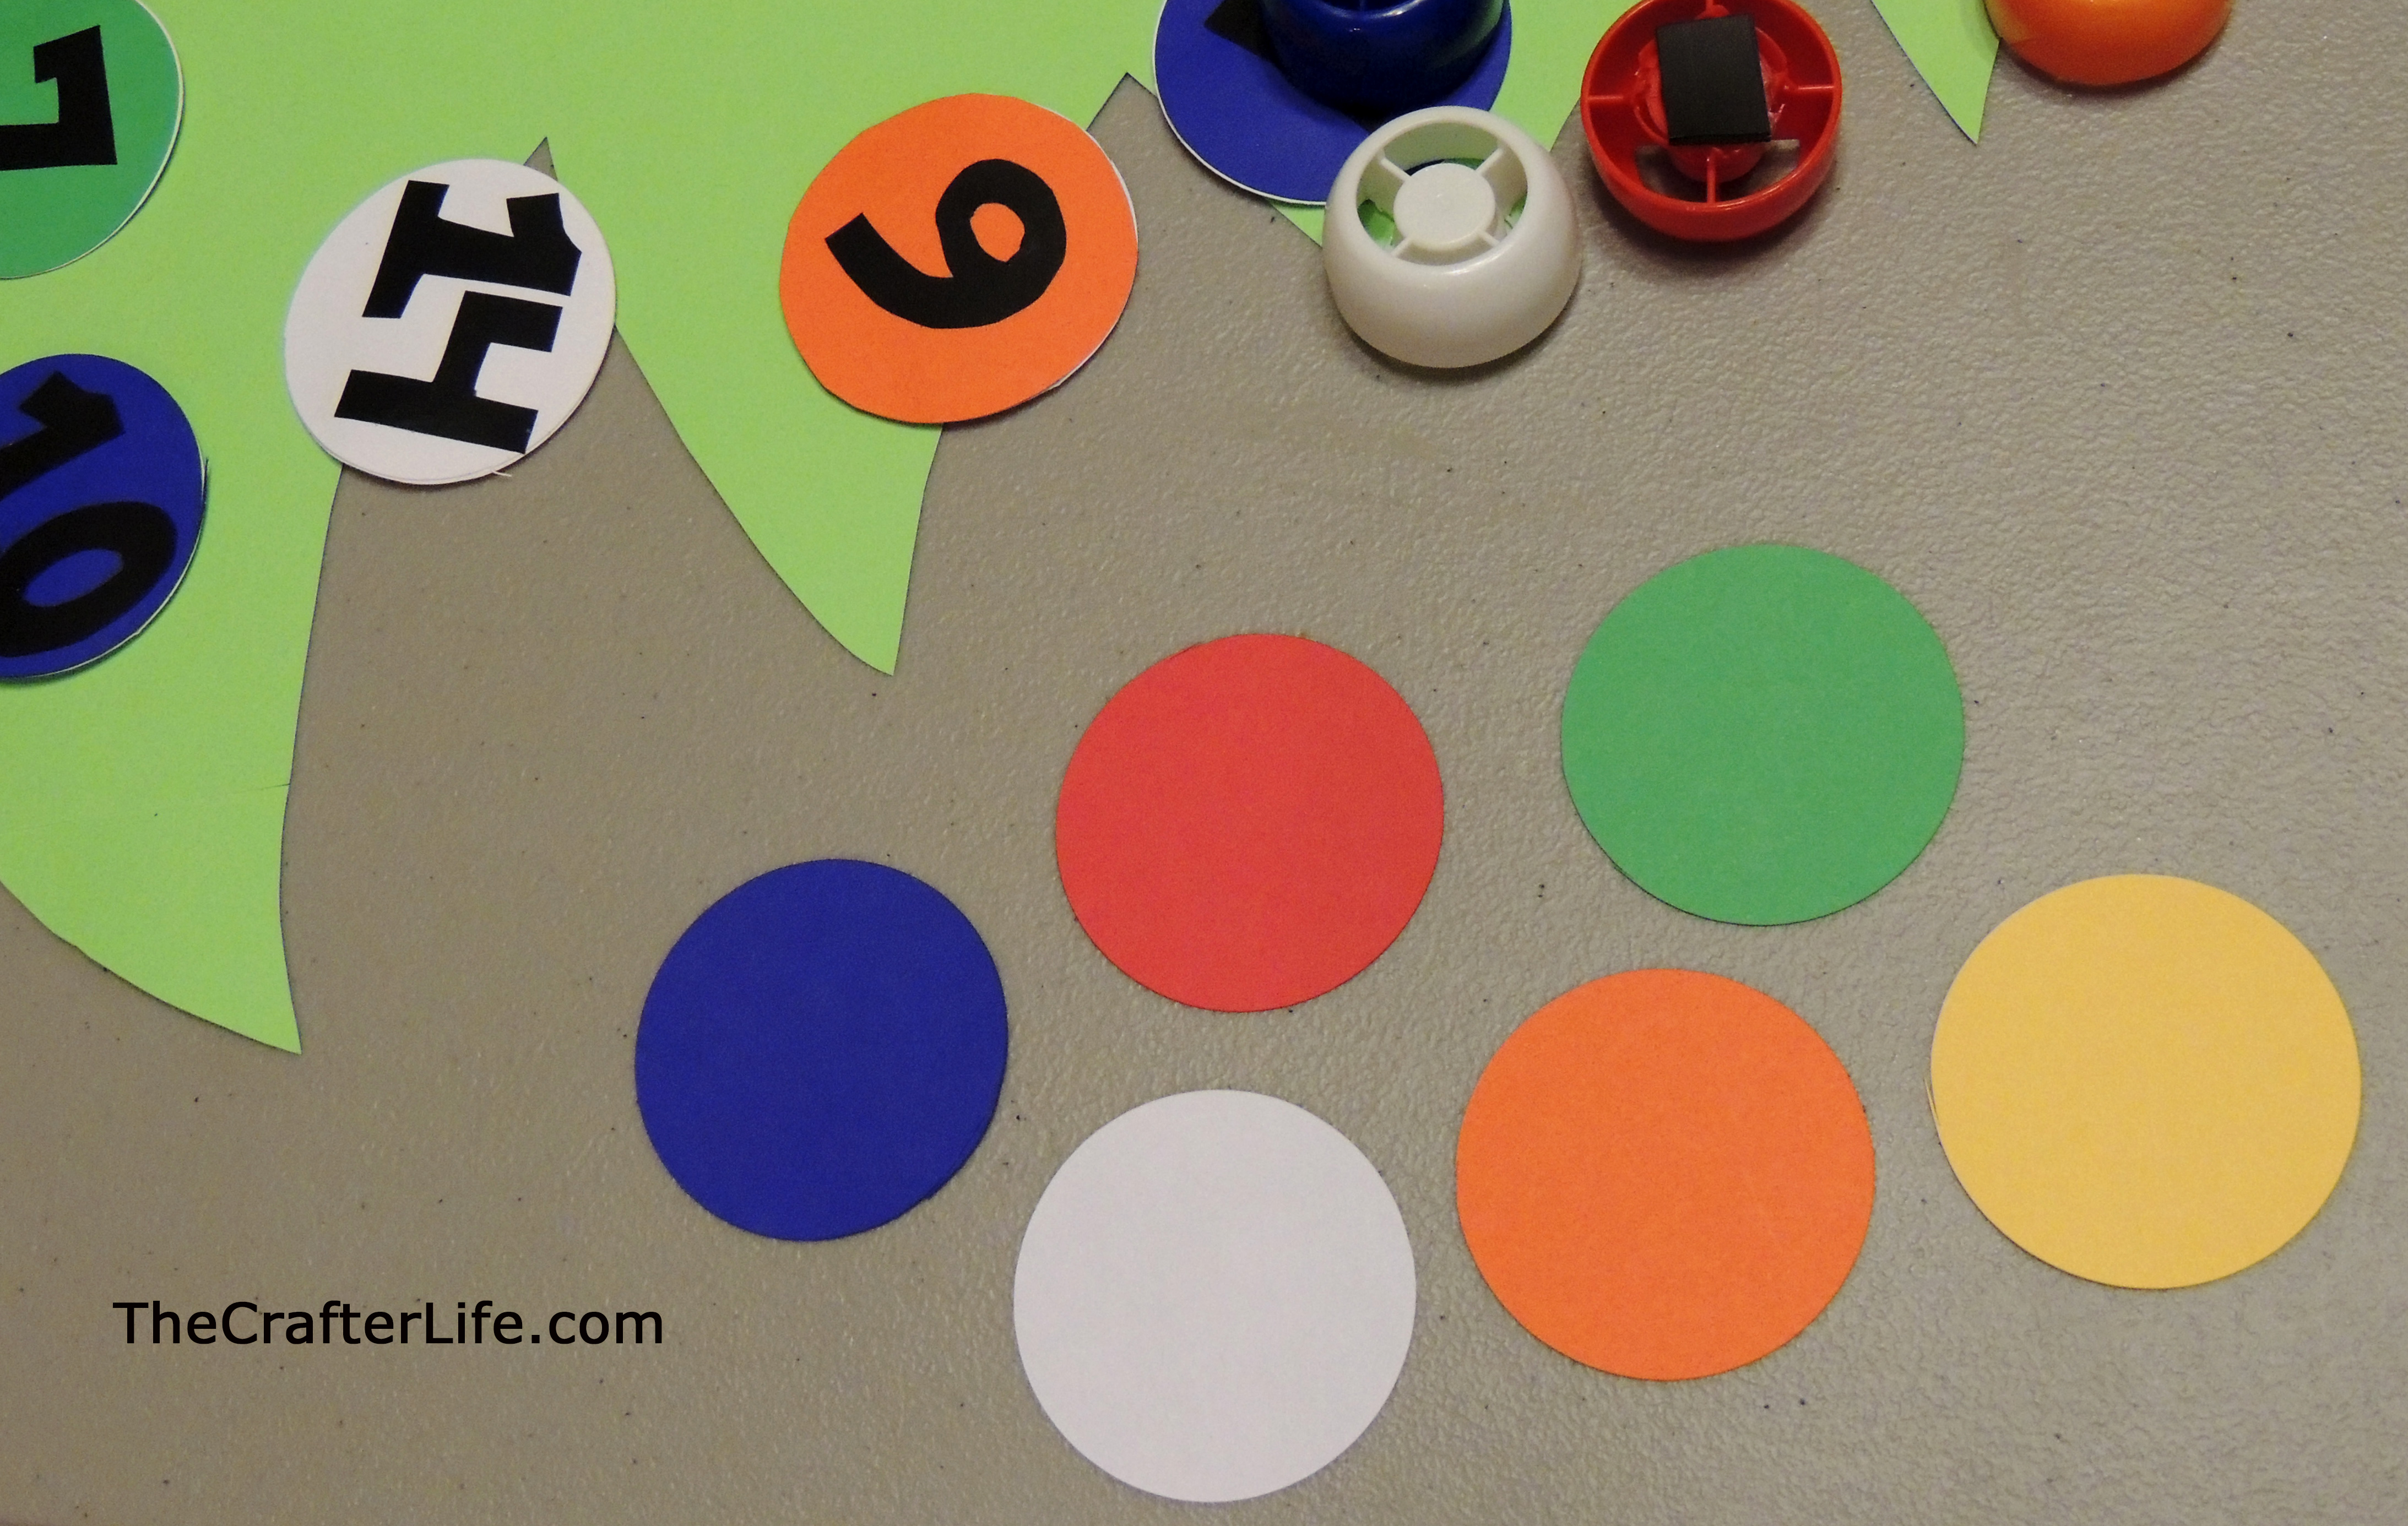
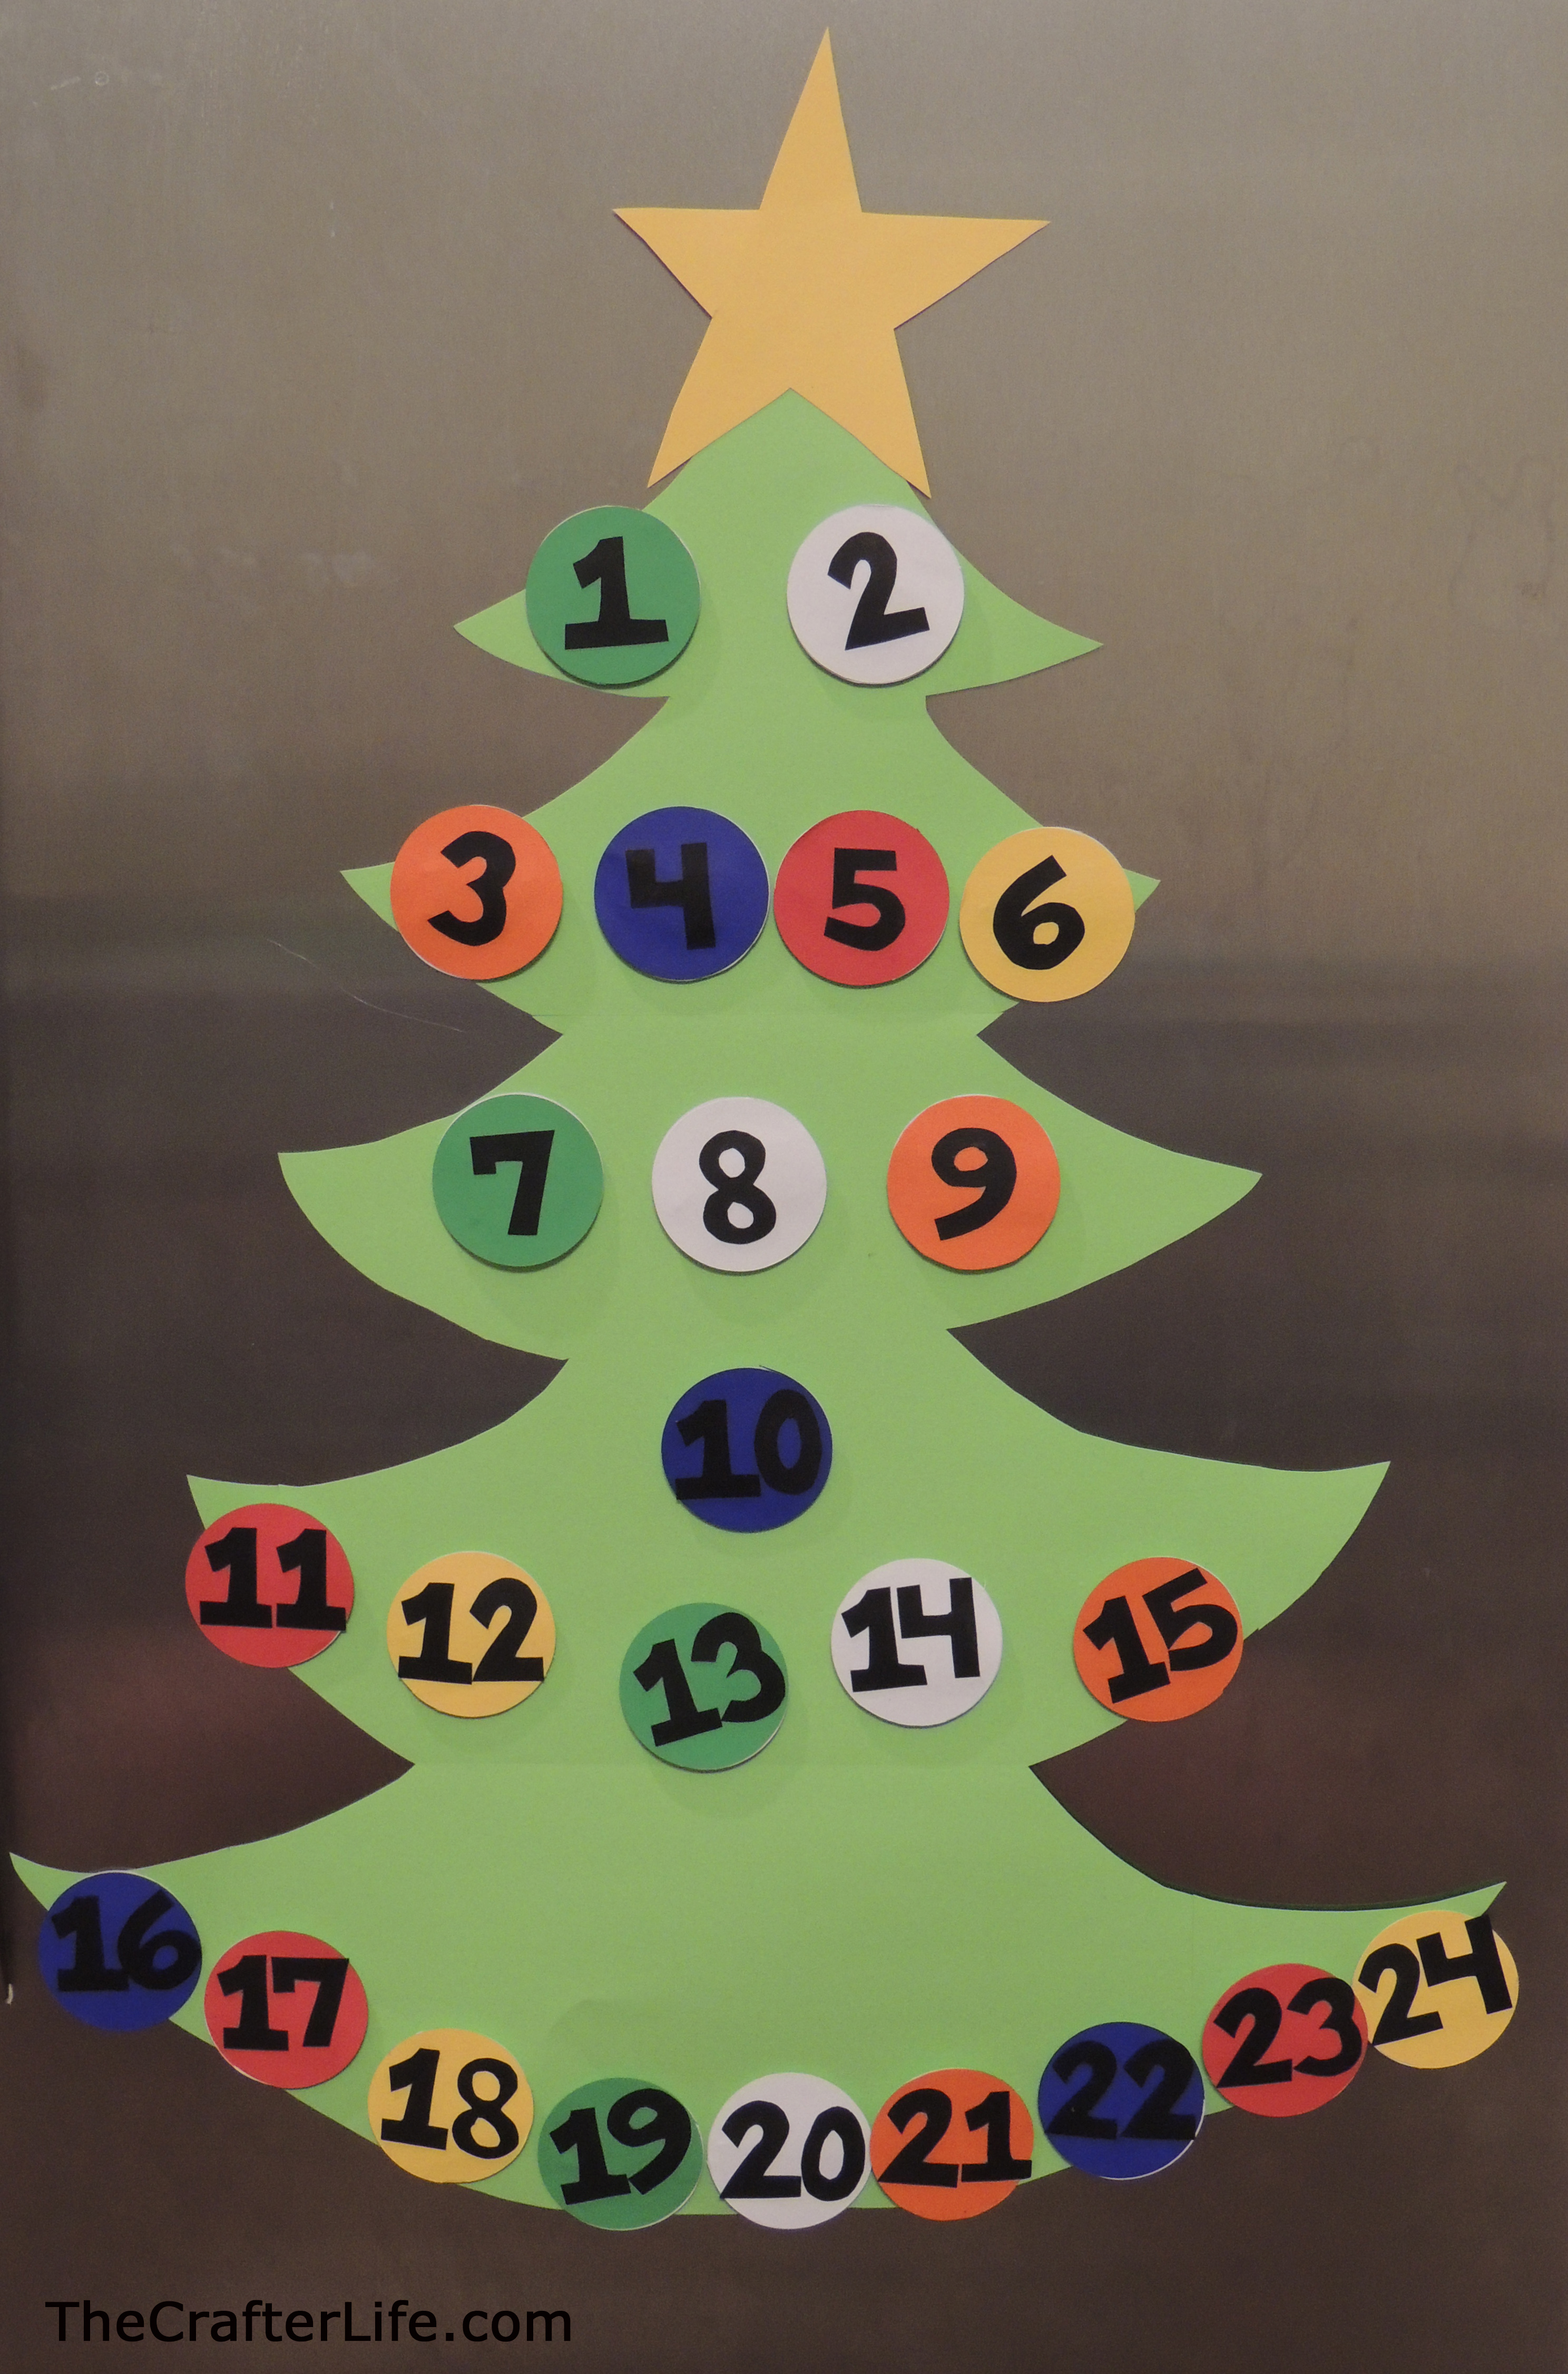
2. Cut 4 circles with a diameter of approximately 2 inches from each color of cardstock (except black). You should have 24 circles. The picture below shows circles cut from the six different colors of cardstock.
3. Cut out 24 circles of the same diameter as your colored circles from white paper.
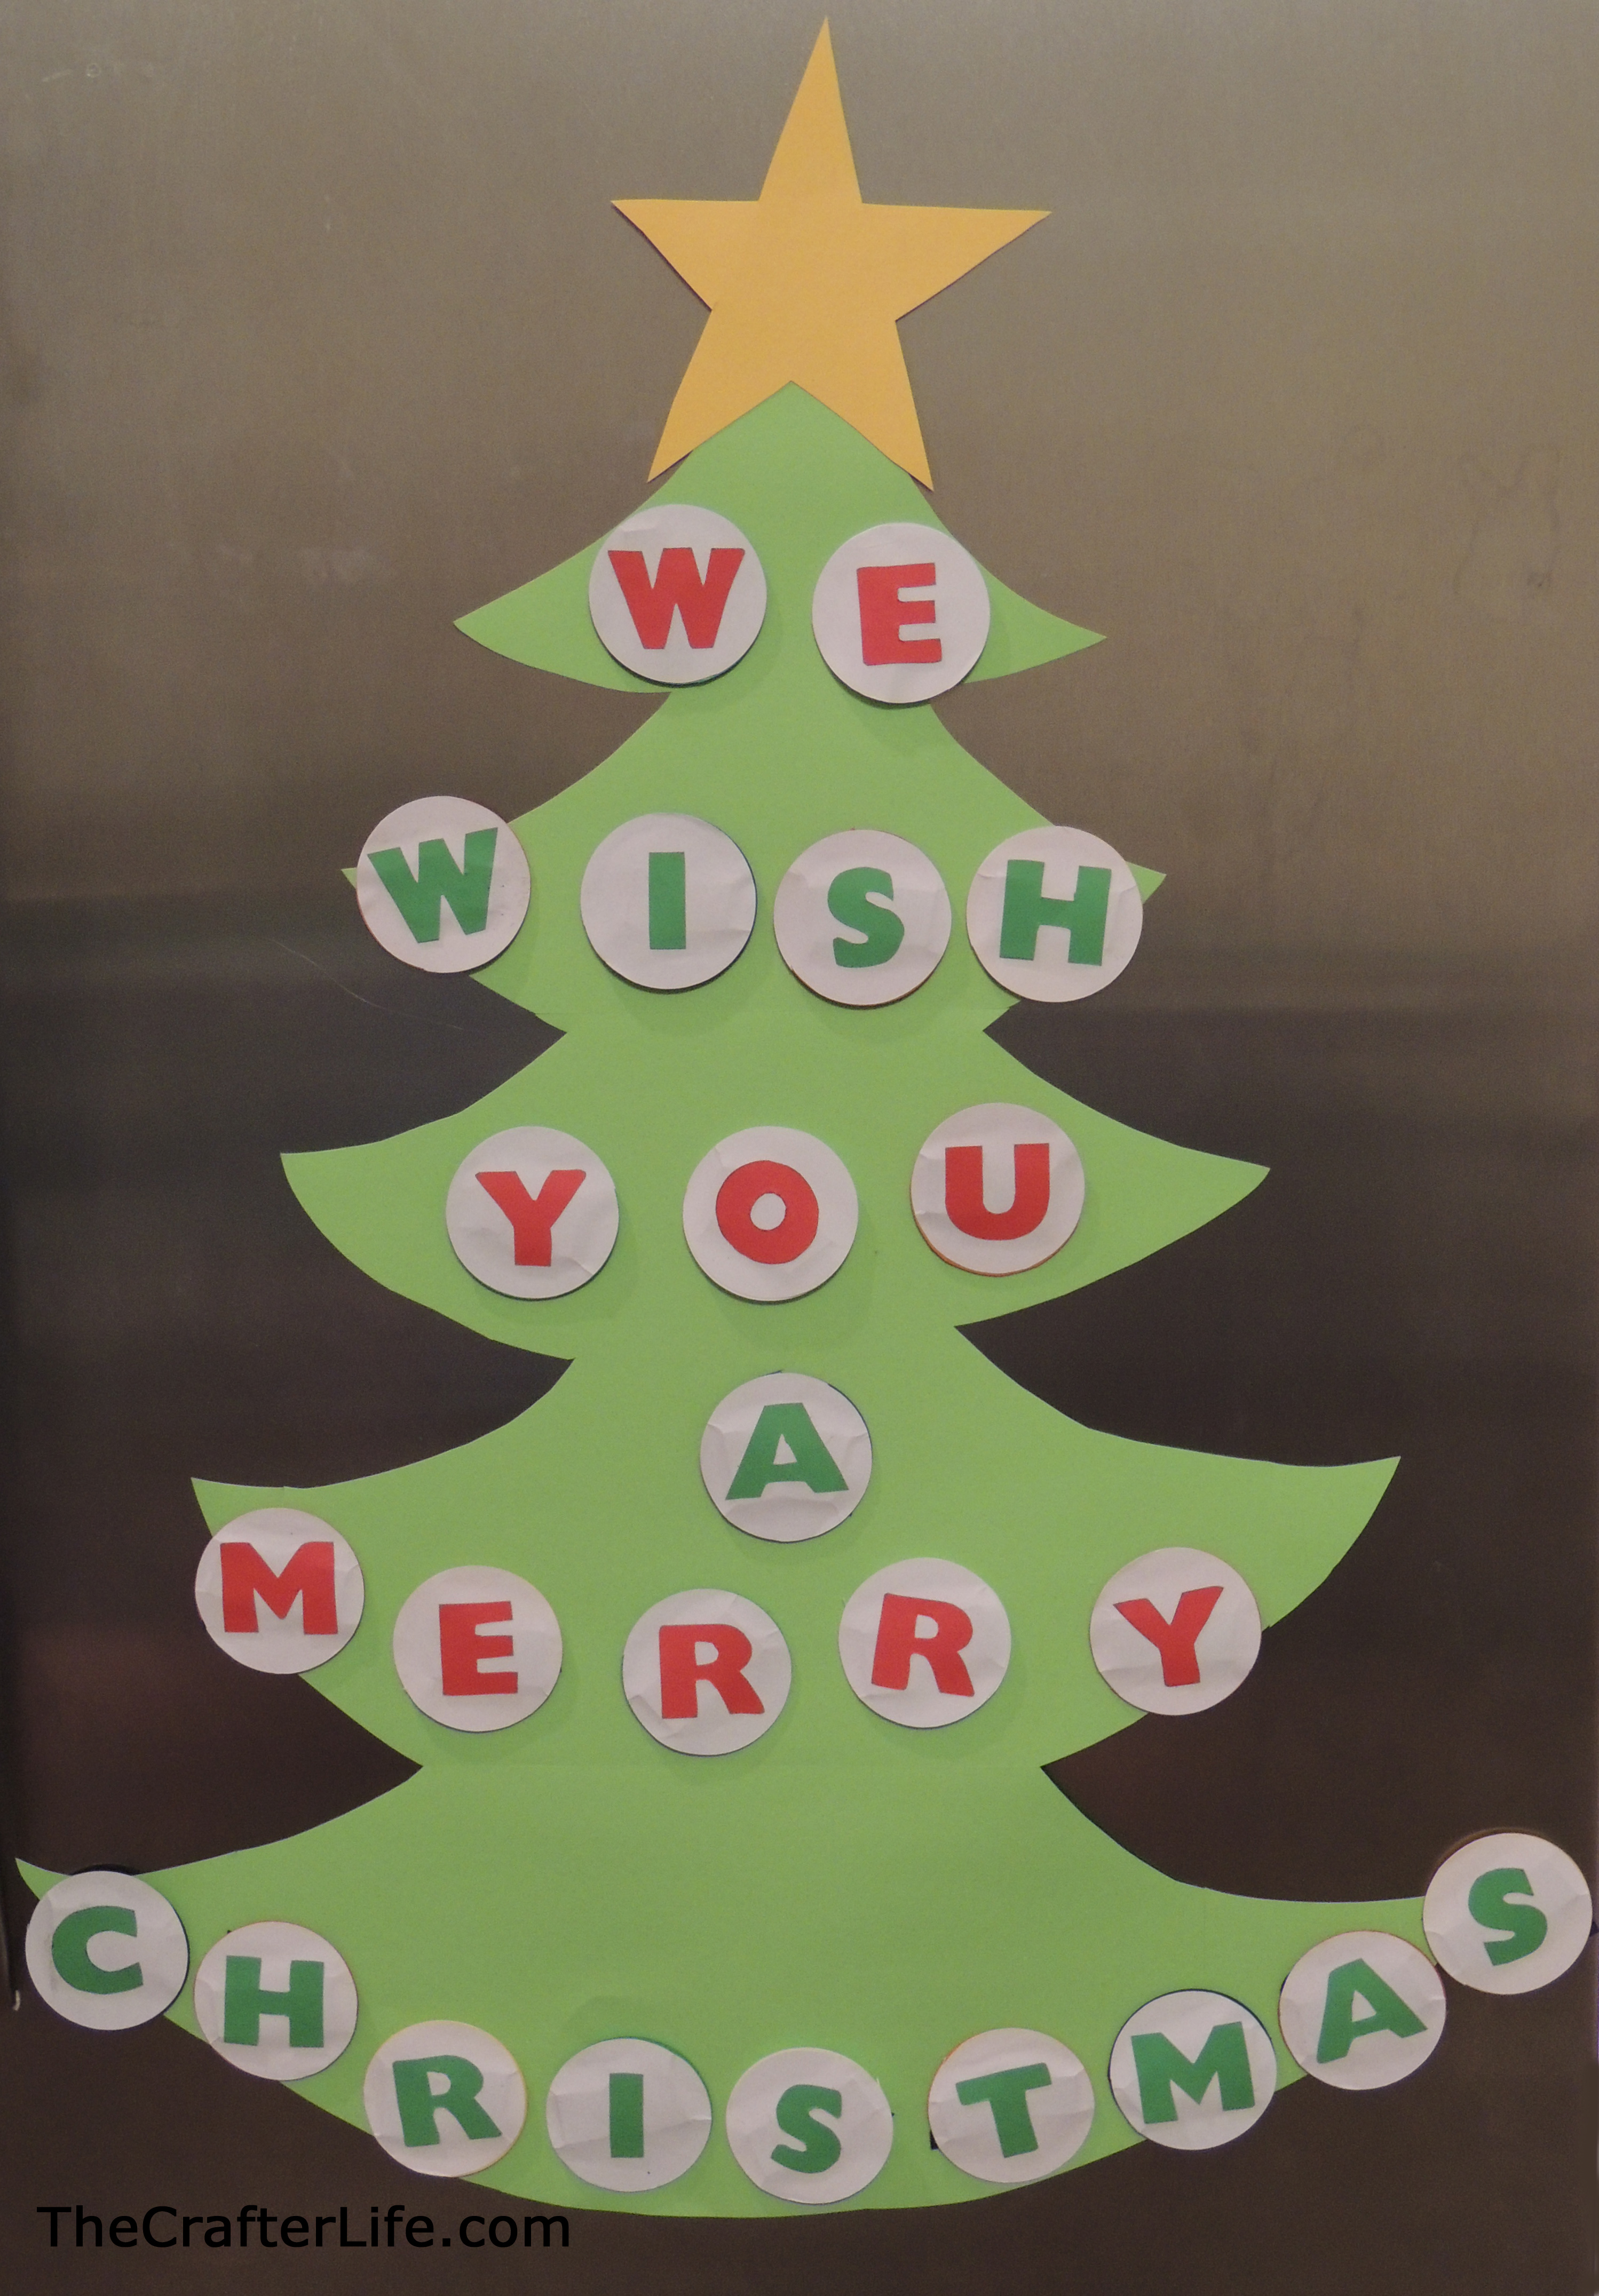
4. Cut out letters from the red and green cardstock that spell your holiday message (I used “WE WISH YOU A MERRY CHRISTMAS”). I alternated colors for each word so kids learning to read would have an easier time distinguishing the words. Make sure each of your letters are able to fit on the circles you cut. You don’t have to cut out the letters if you would rather write them on the circles yourself.
5. Use a glue stick to glue your each of your letters to the center of each circle you cut from the white paper. You can also write your letters on each white circle if you chose not to cut out letters.
6. Cut out the numbers 1 through 24 from the black cardstock. Make sure your numbers are able to fit on the circles you cut. Again, you may choose to write your numbers directly on the circles rather than cutting them out of the cardstock.
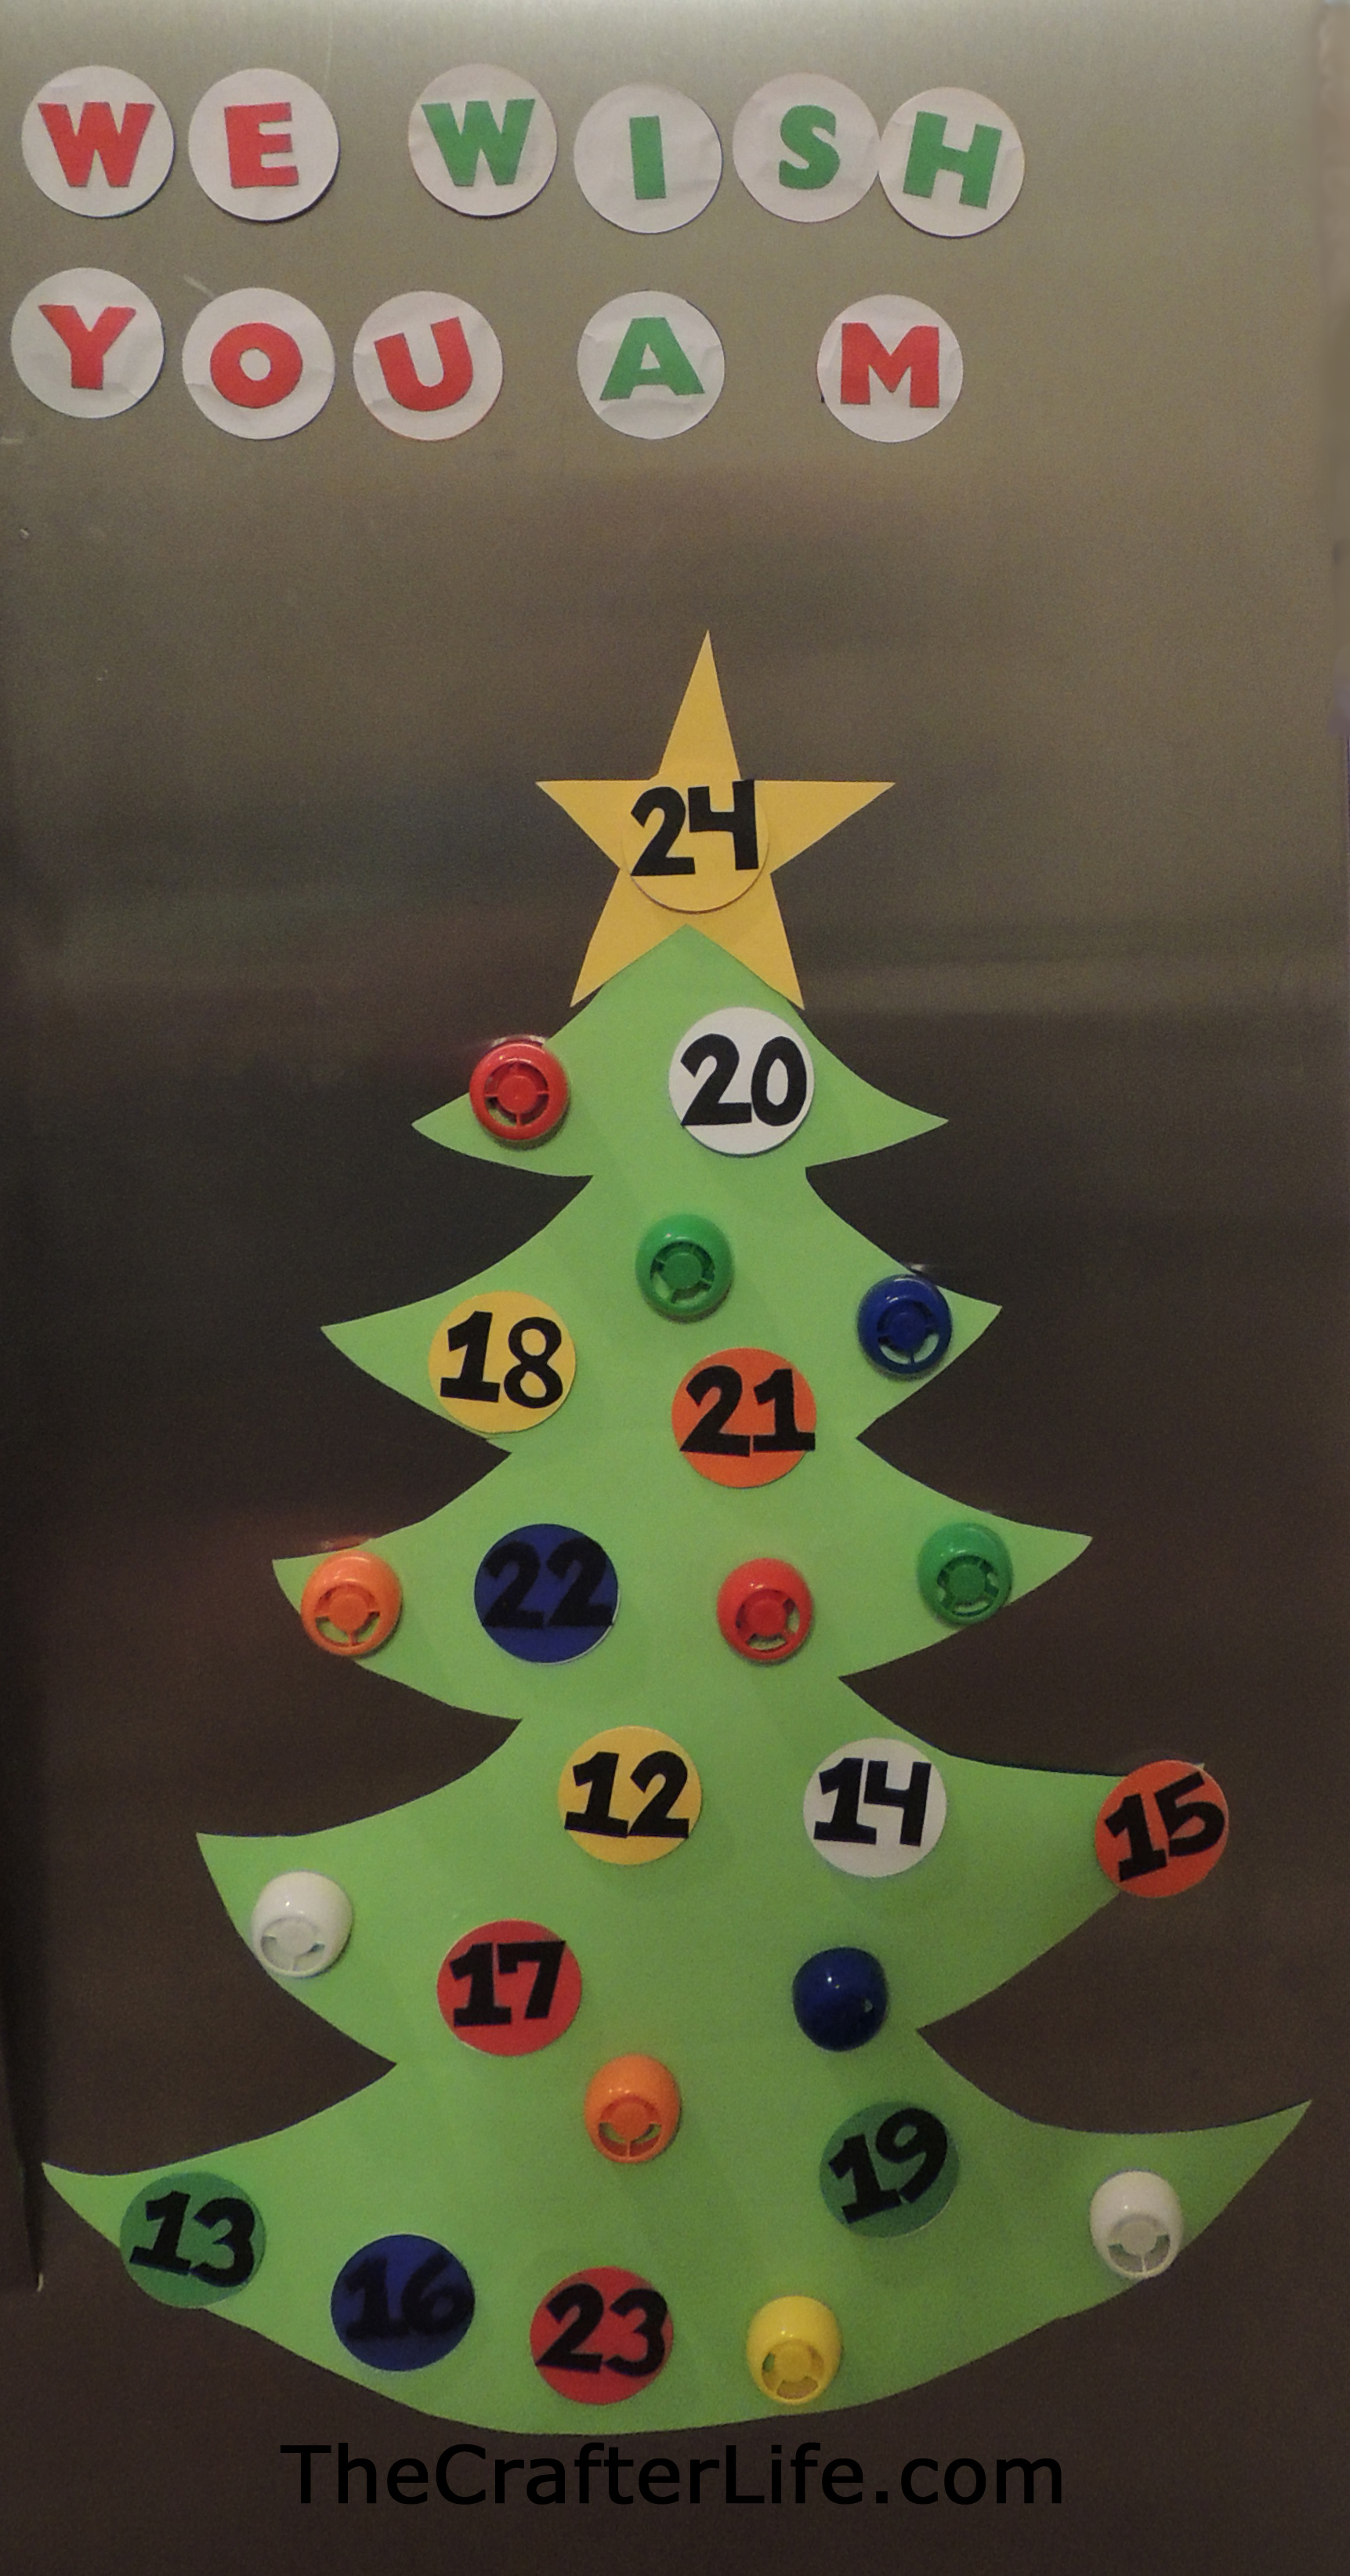
7. Arrange the colored circles on your tree (lay your tree flat on a table) so that the colors are spread out (I just repeated the pattern green, white, orange, blue, red, yellow) and aligning them in rows so that each row represents a word of your message and the number of circles in each row equals the number of letters in the word.
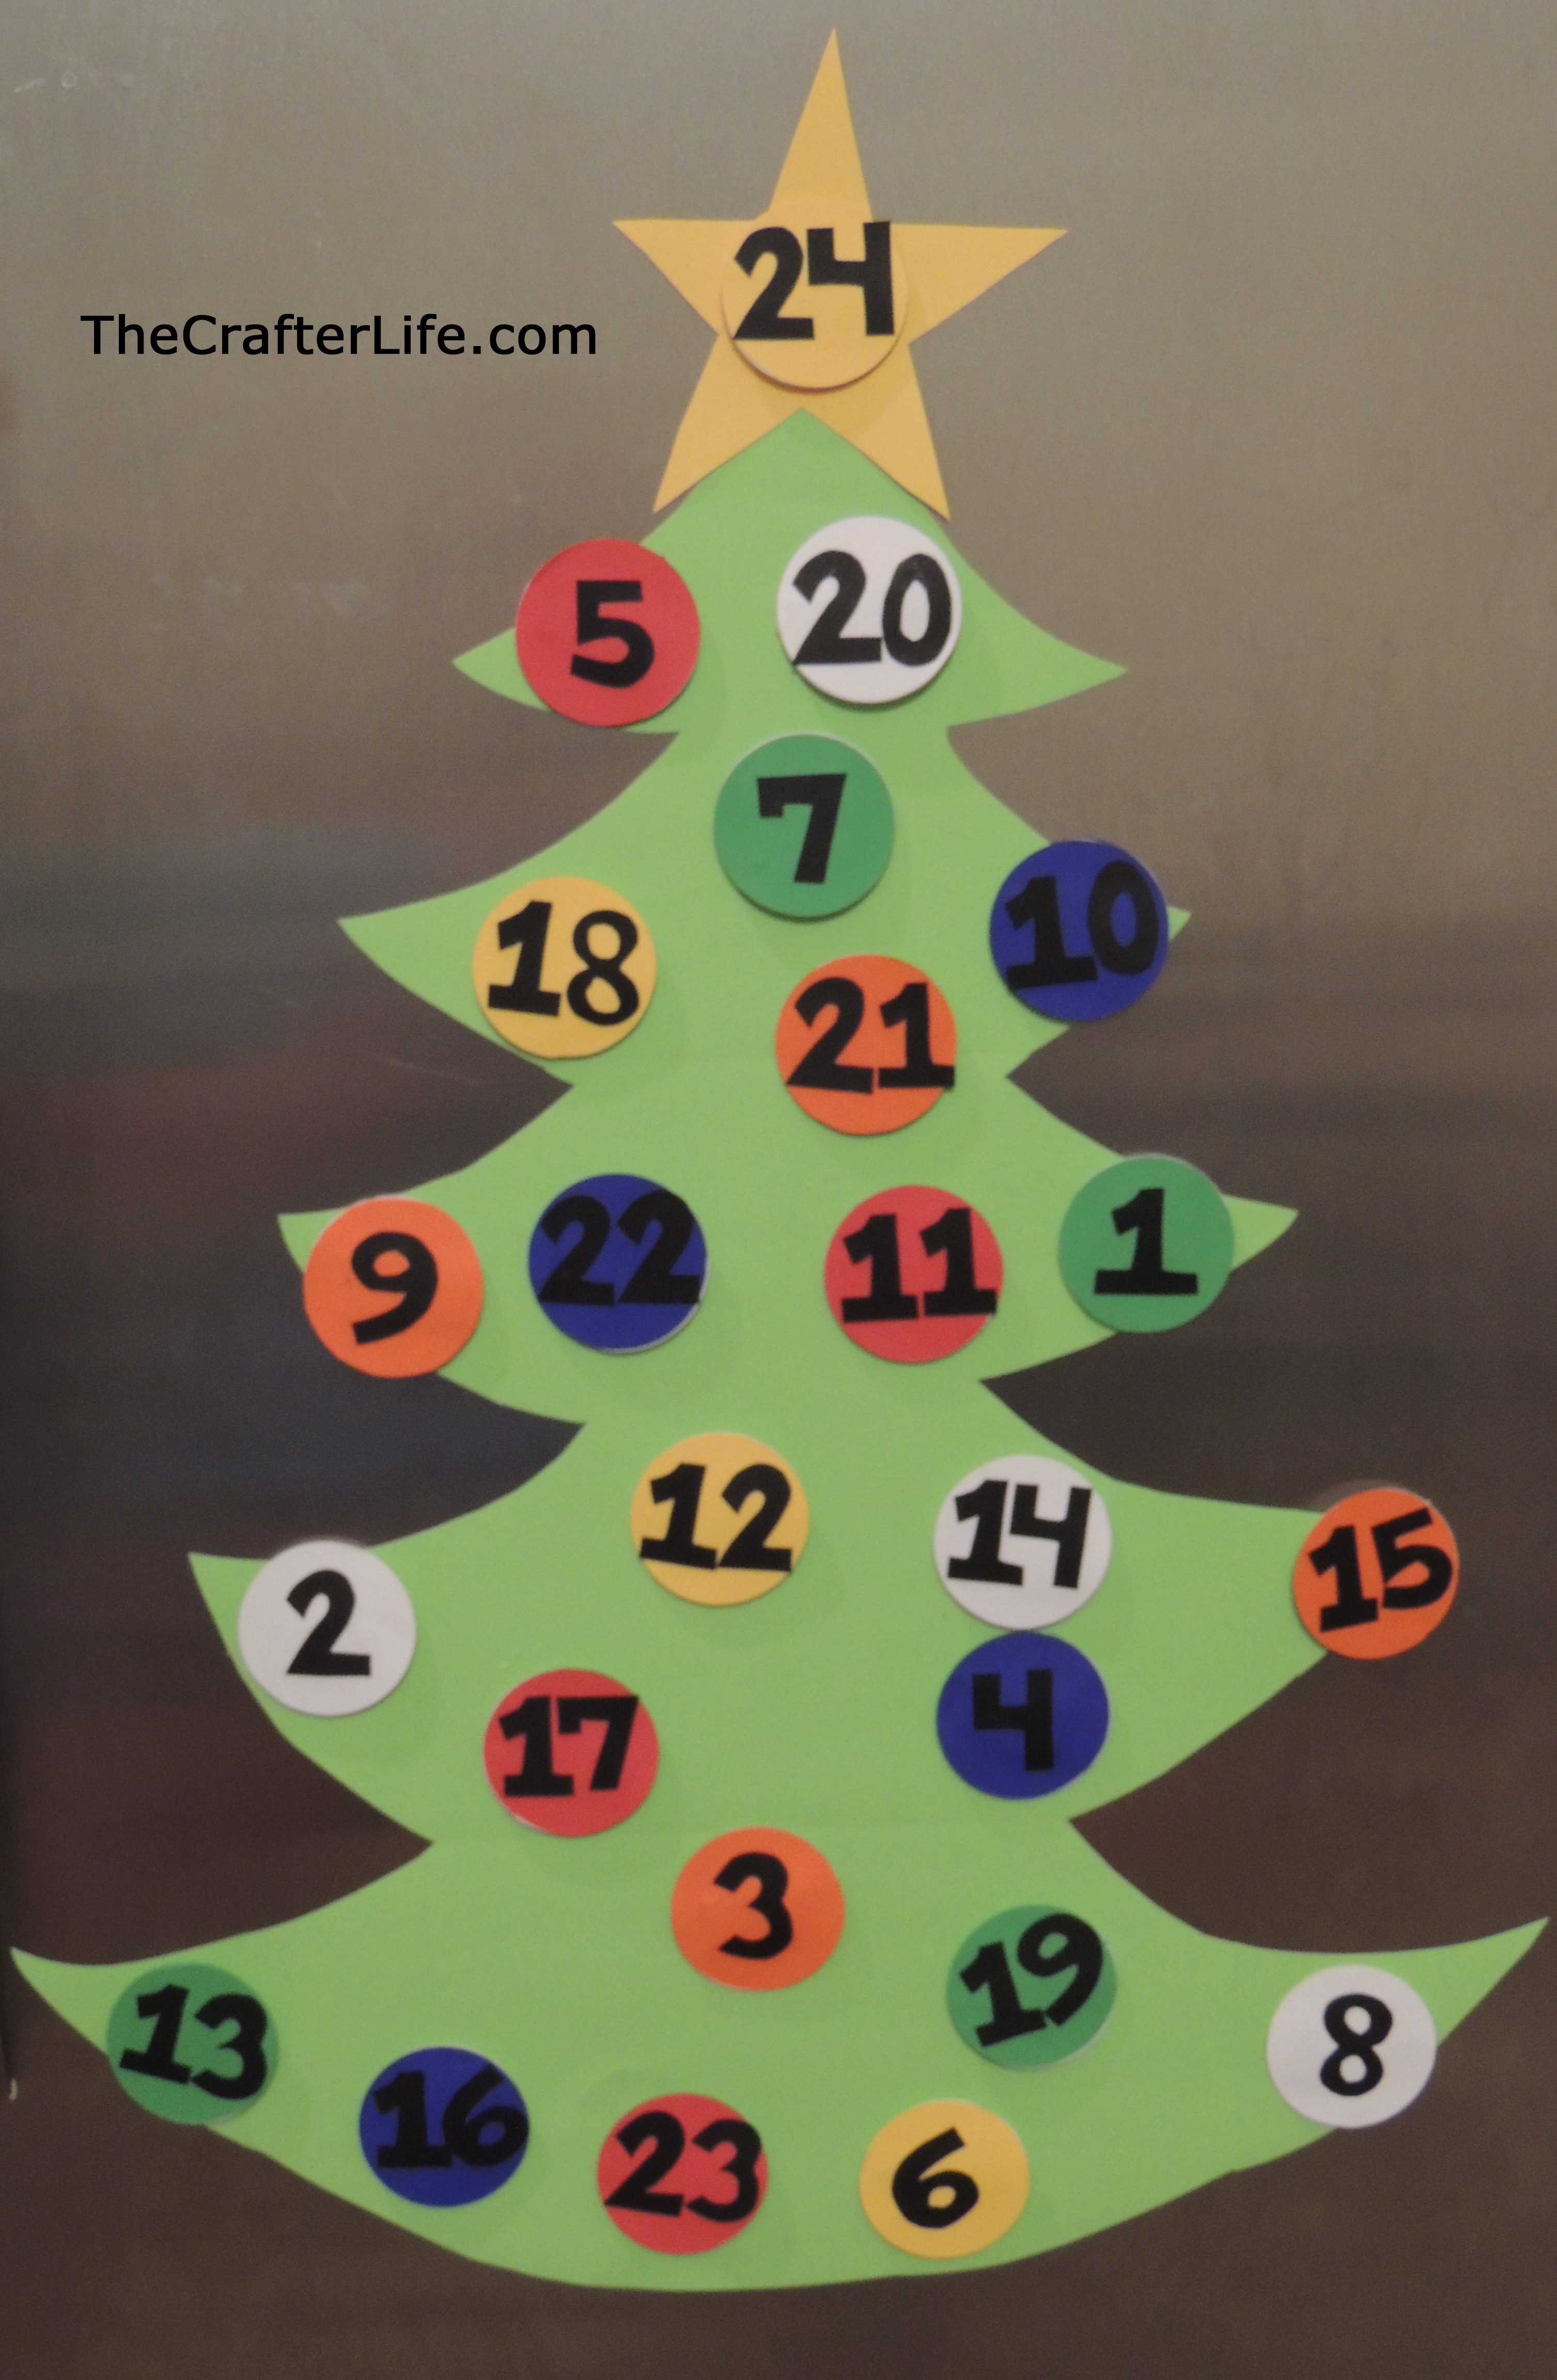
8. Use a glue stick to glue the numbers onto the colored circles on your tree. If the calendar is for an older child, you may want to randomize the numbers instead of putting them in ascending order from left to right. That way, it may not be as easy for them to guess the message as they turn over the dates each day.
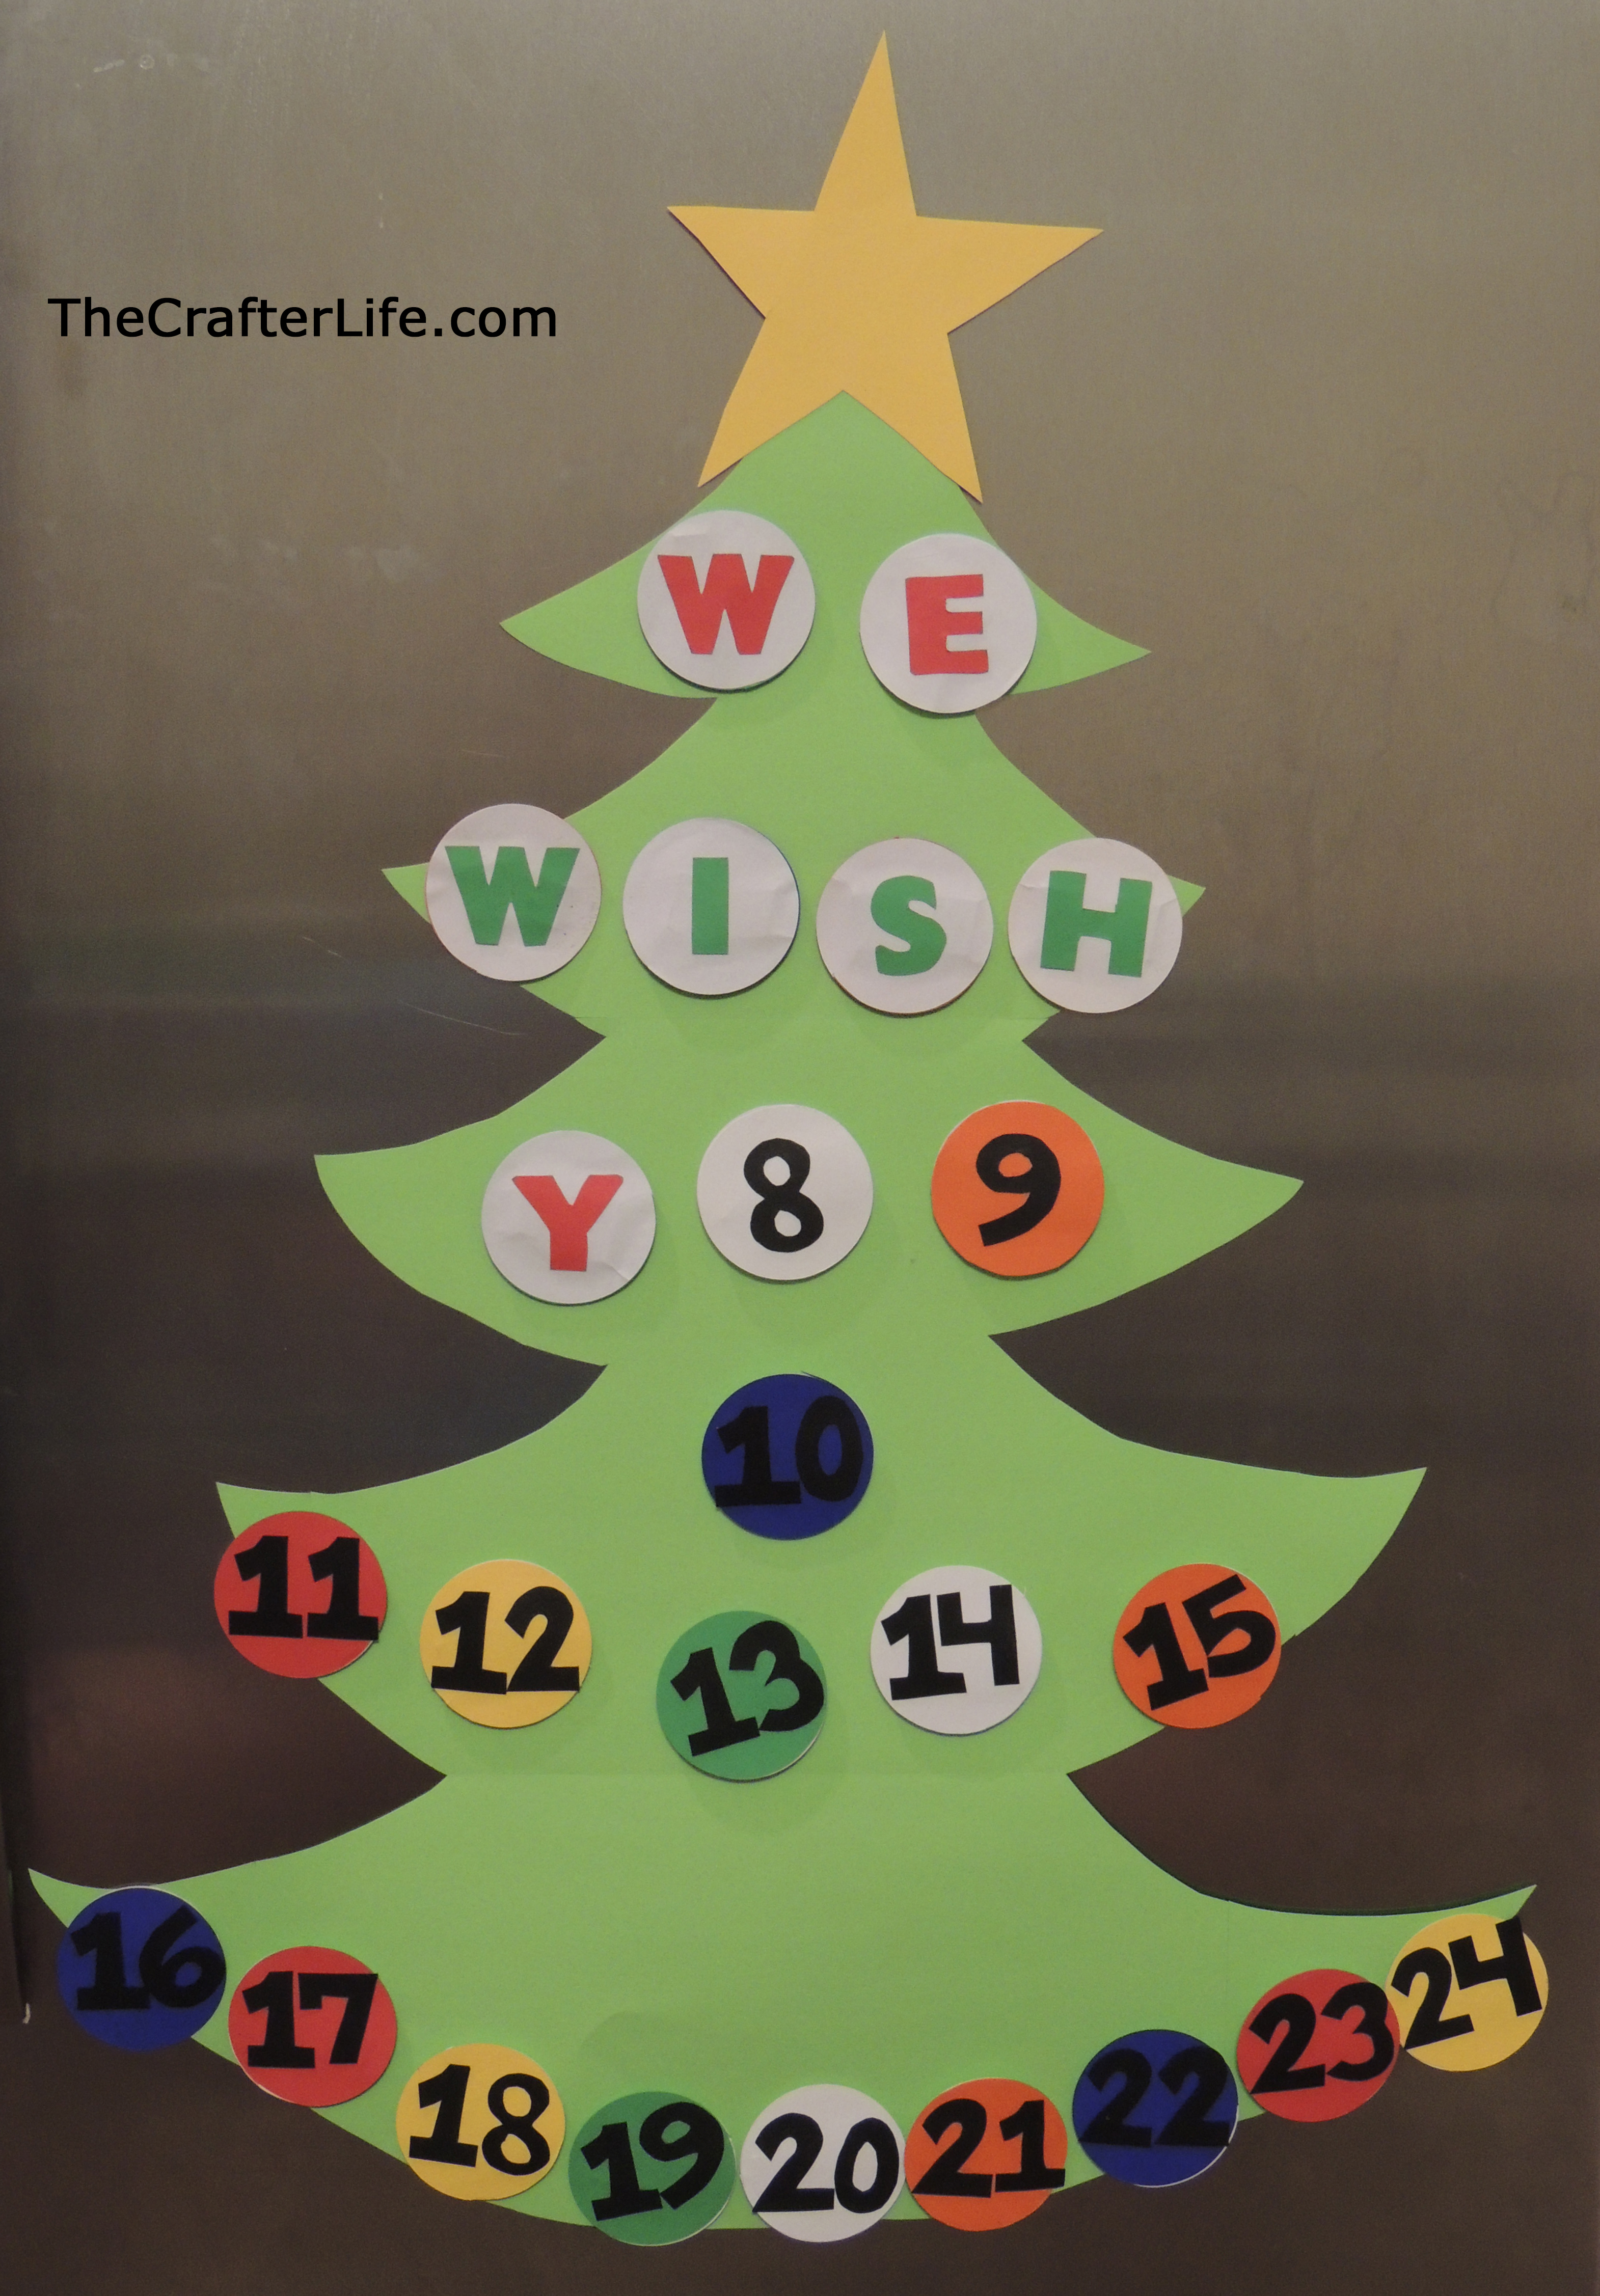
9. Match each numbered circle with its corresponding lettered circle.
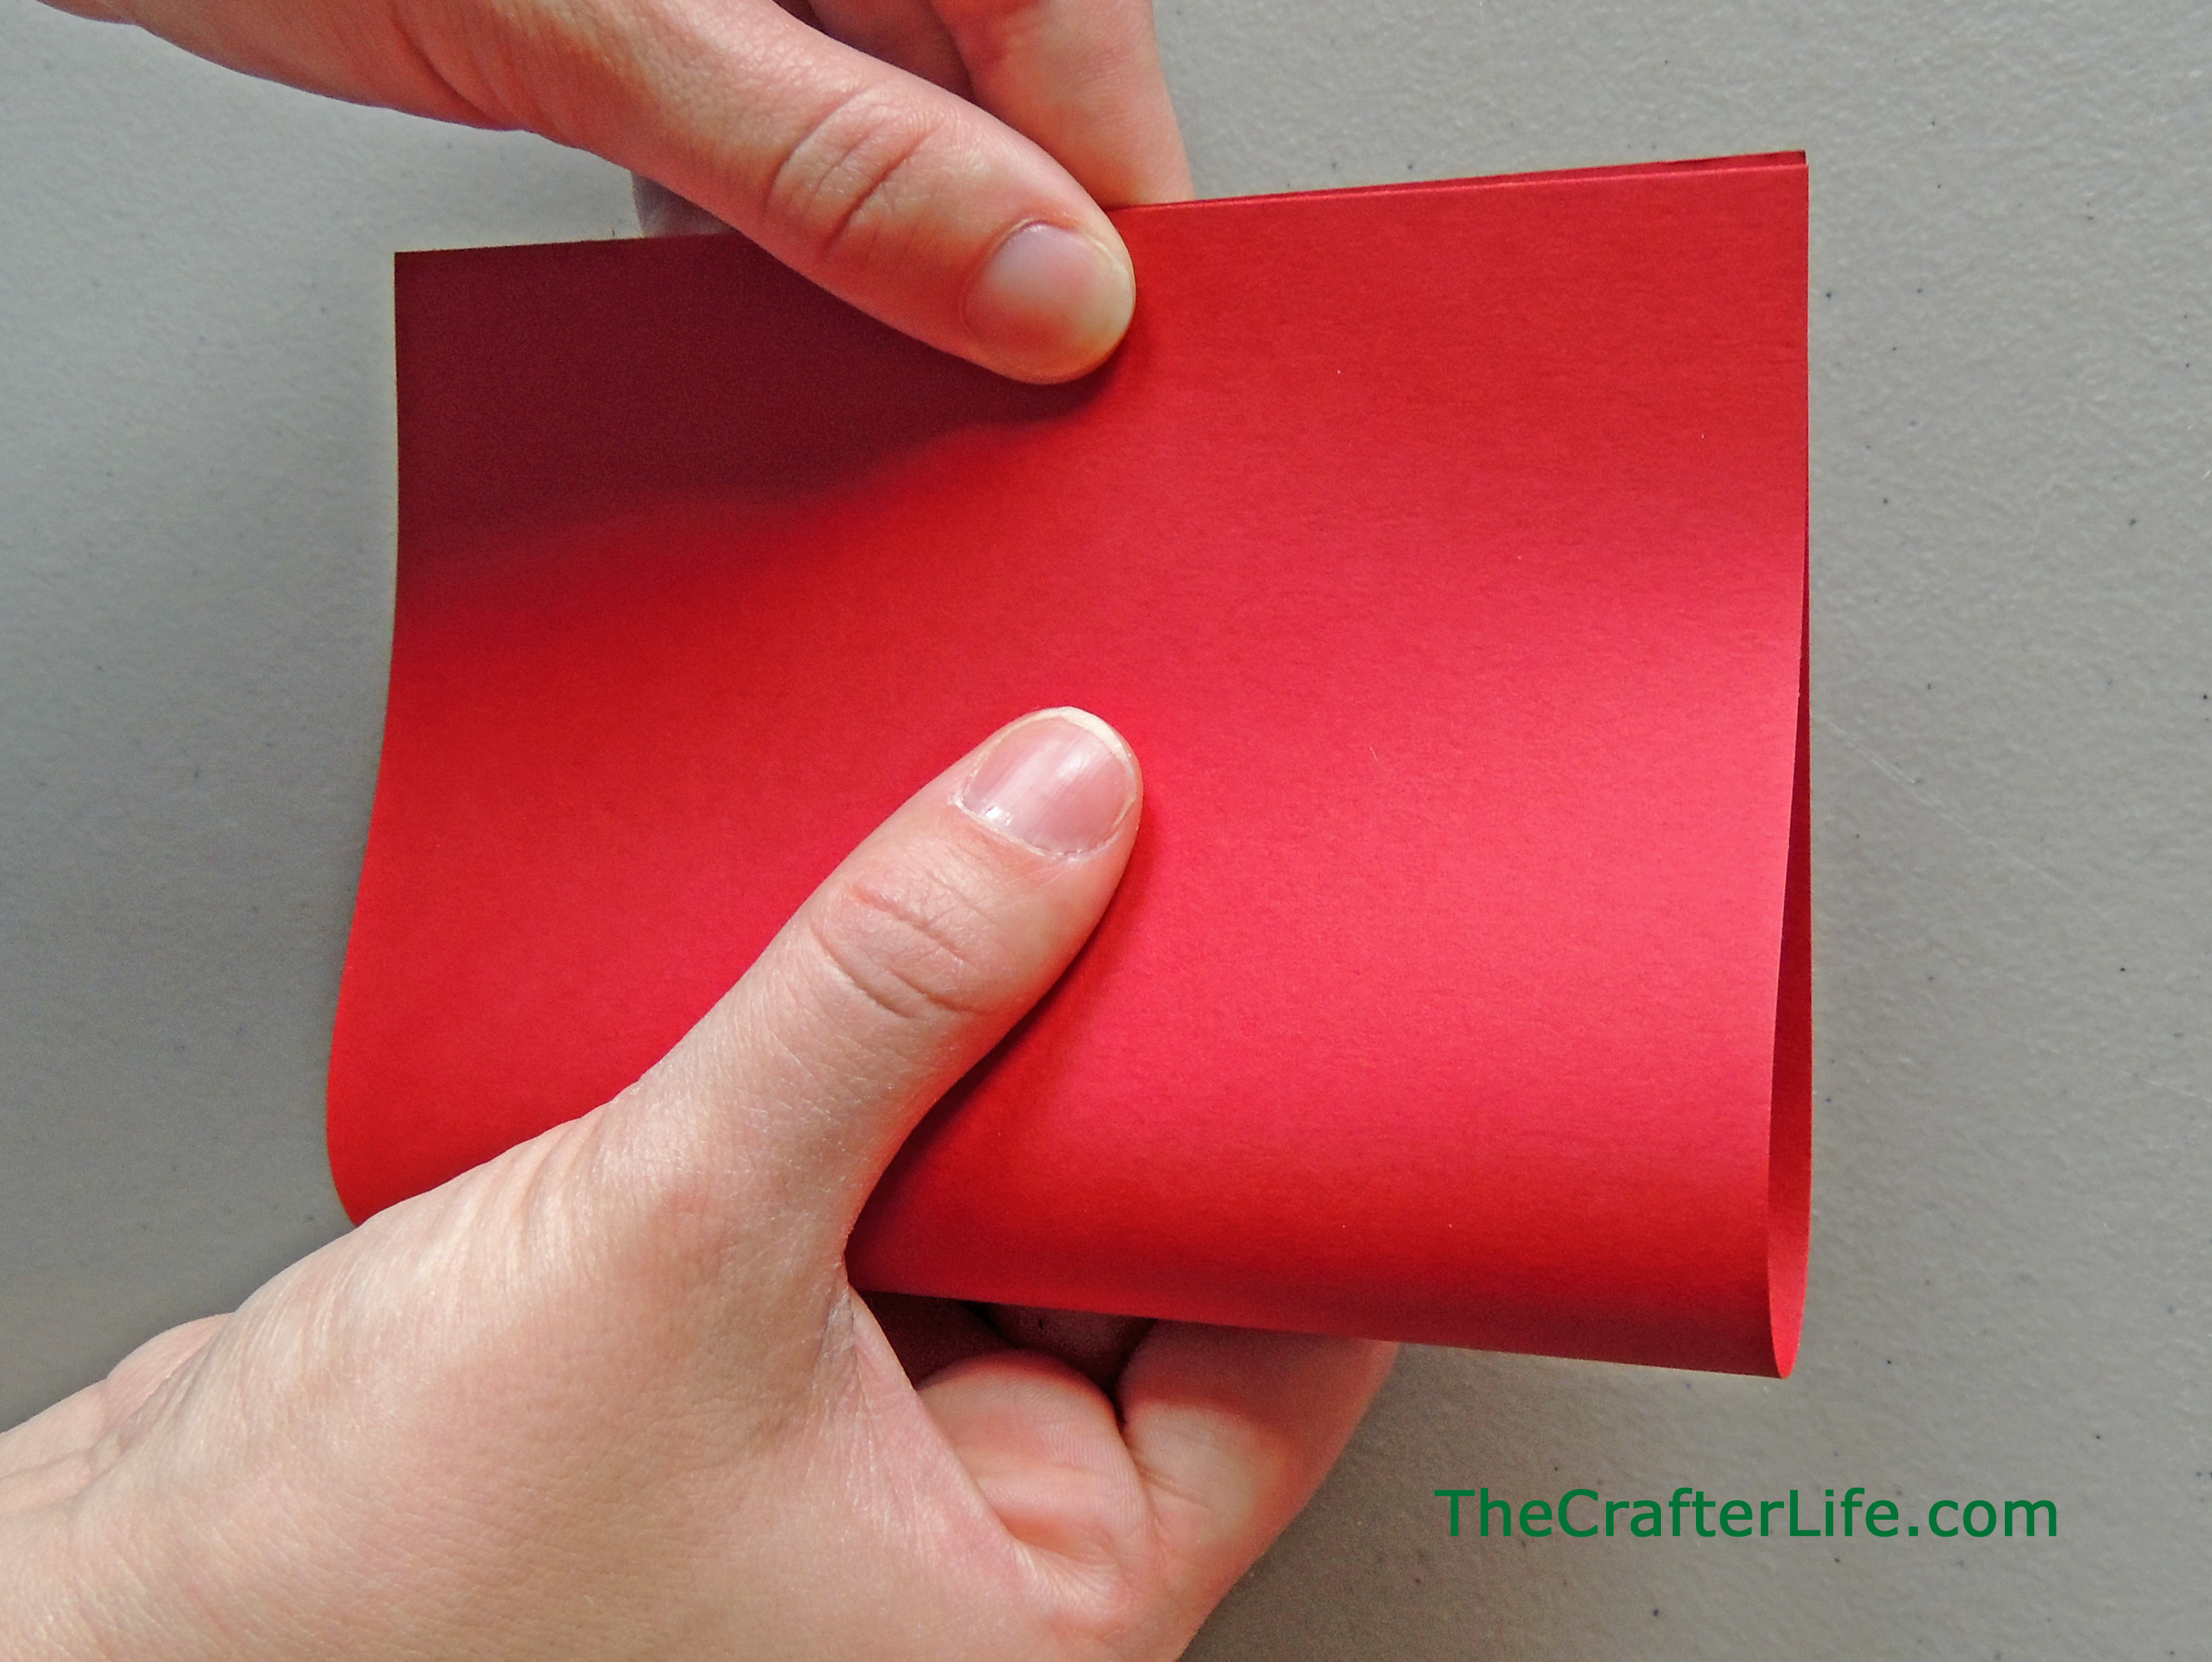
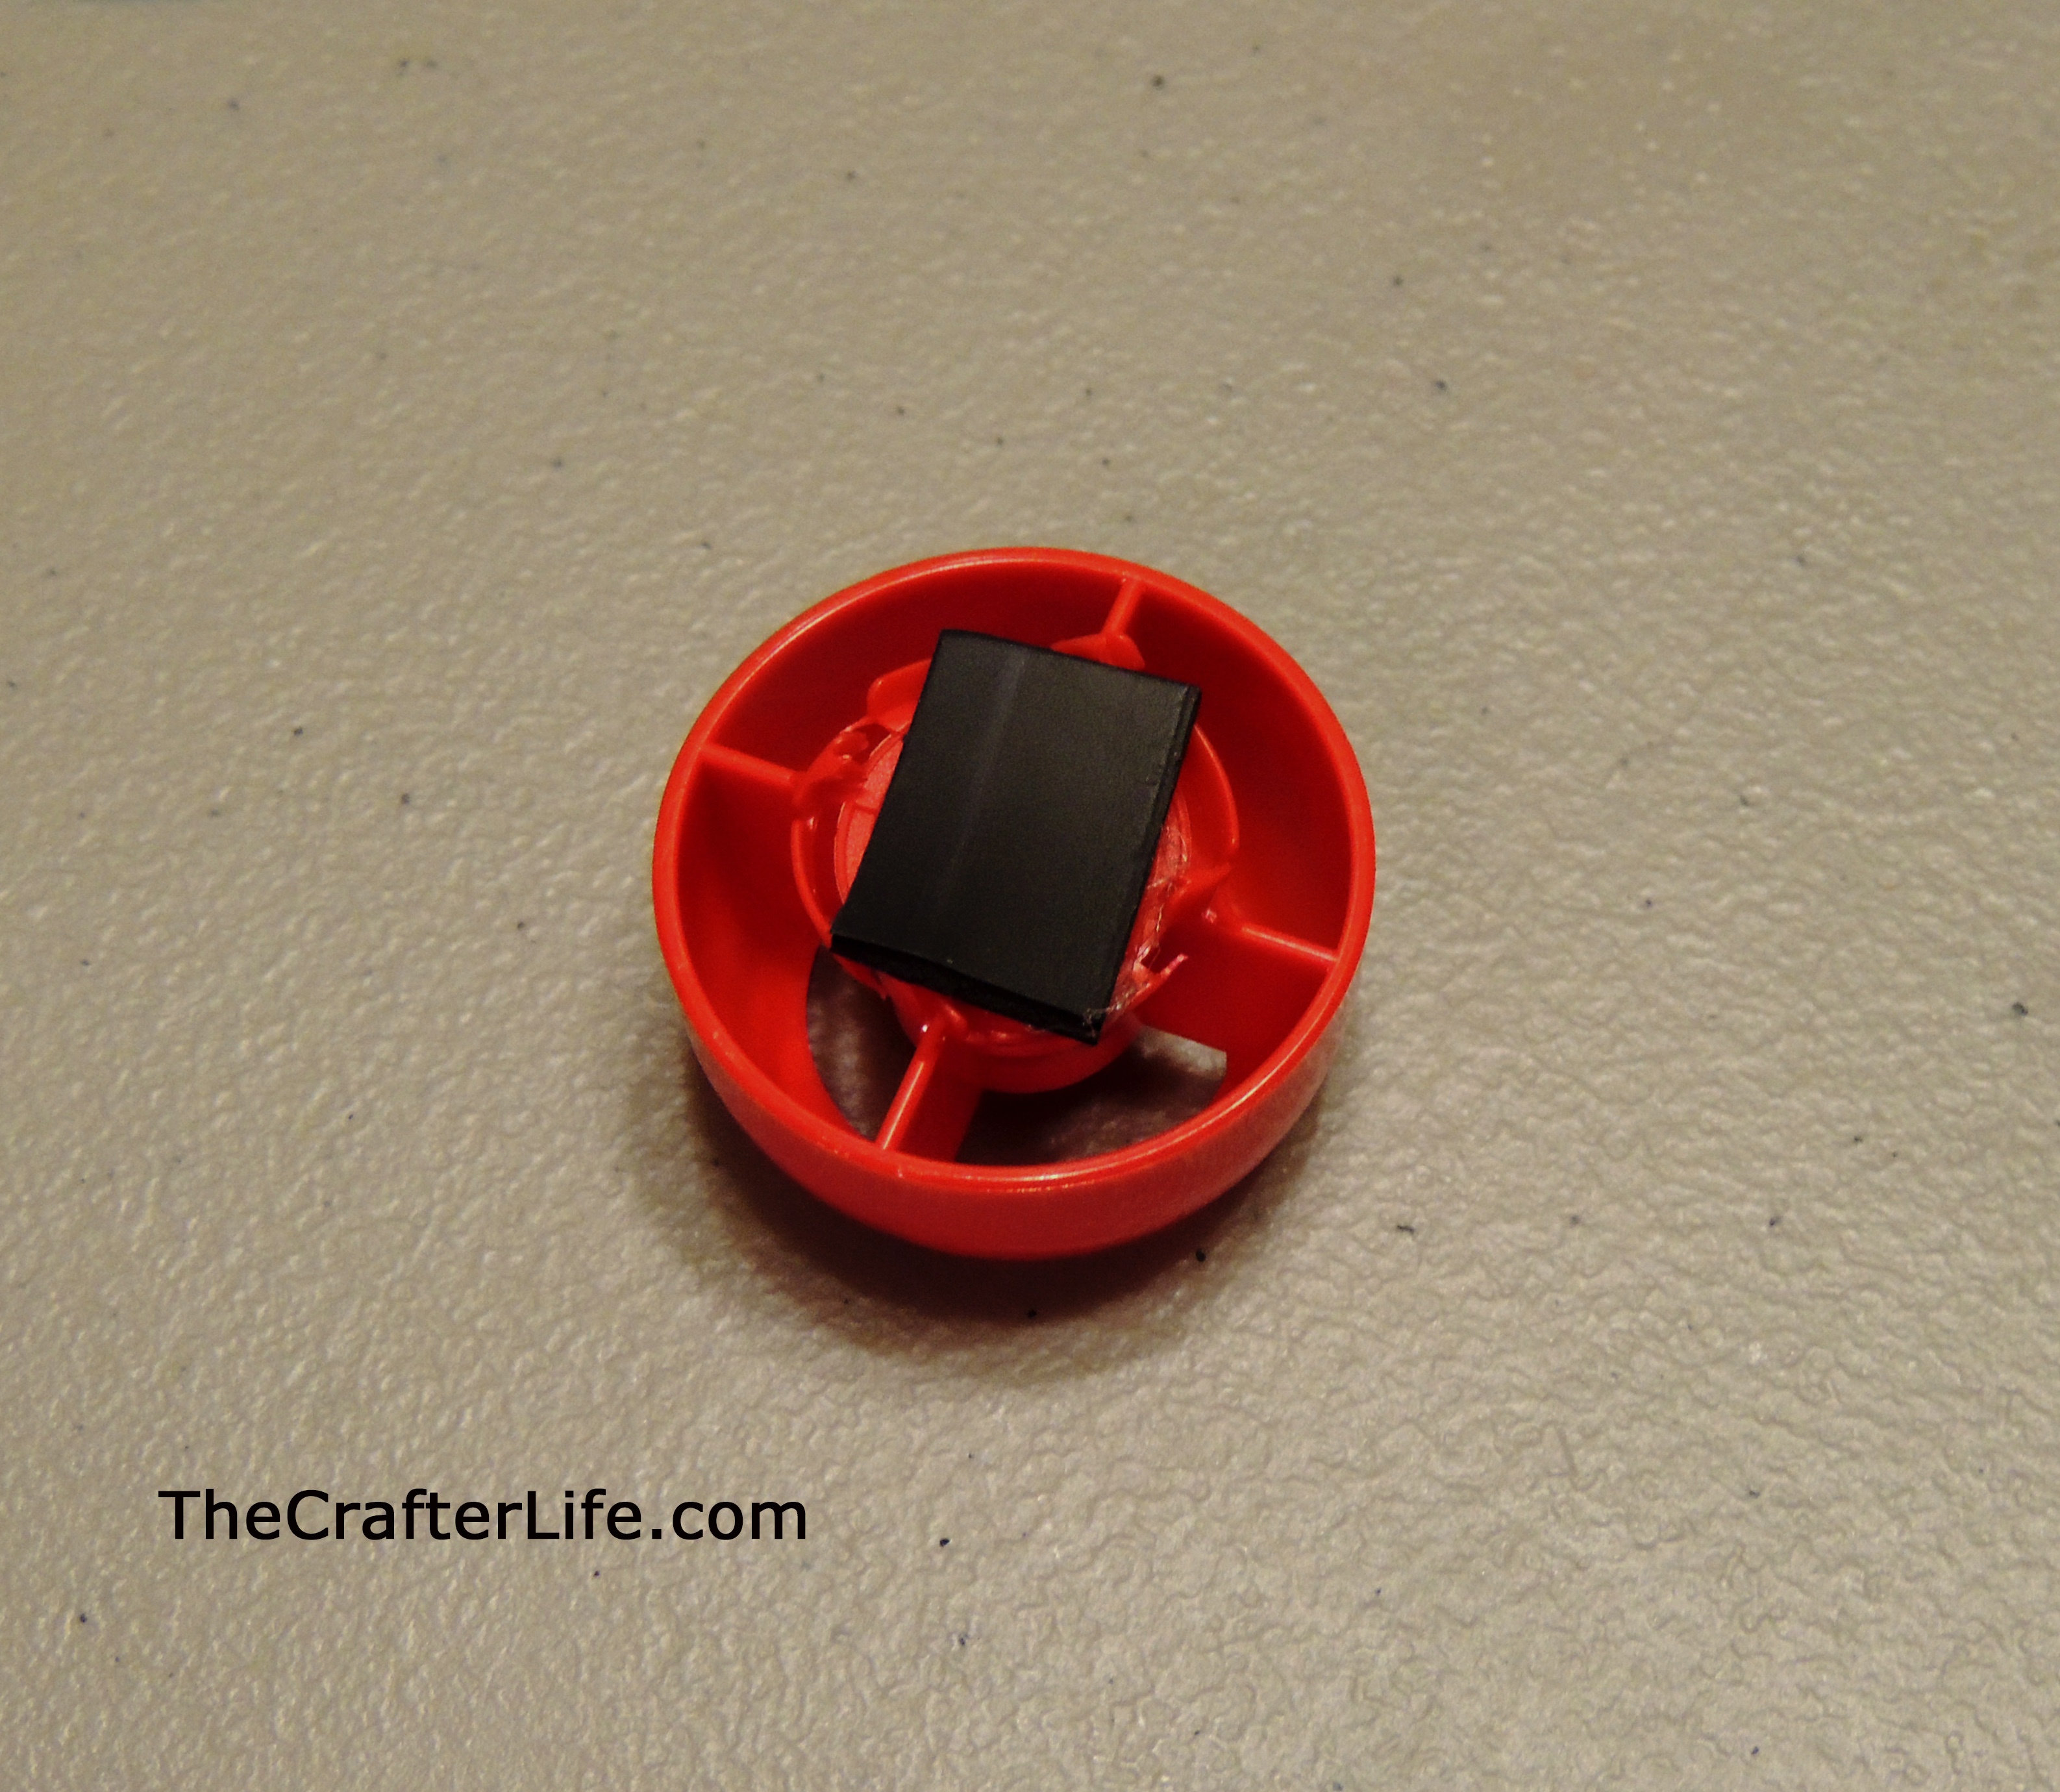
10. Stick a piece of magnetic tape to the back of each numbered circle and to the back of each lettered circle. See the pictures below.


11. Use a glue stick to glue each of the numbered circles to the corresponding lettered circles so that the number and its corresponding letter are on the outside and the two pieces of magnetic tape are on the inside.
12. Hang your tree on the refrigerator. Place the circles (number-side up) on your tree in the order you arranged them in Step 7. My magnetic tape was not very strong and in some cases, I had to place a piece of magnetic tape on the very back of the circle to get it to stay on the tree. Another suggestion would be to cut holes in the tree where the circles will be so the magnets can attach directly to the fridge.
13. Have your child turn over the number representing the date each day in December to reveal a letter in the holiday message. The message should be revealed on the day before Christmas.
Option 2 (“Button Art”- Use colored buttons or squeeze pouch lids to replace each numbered circle on the tree.)
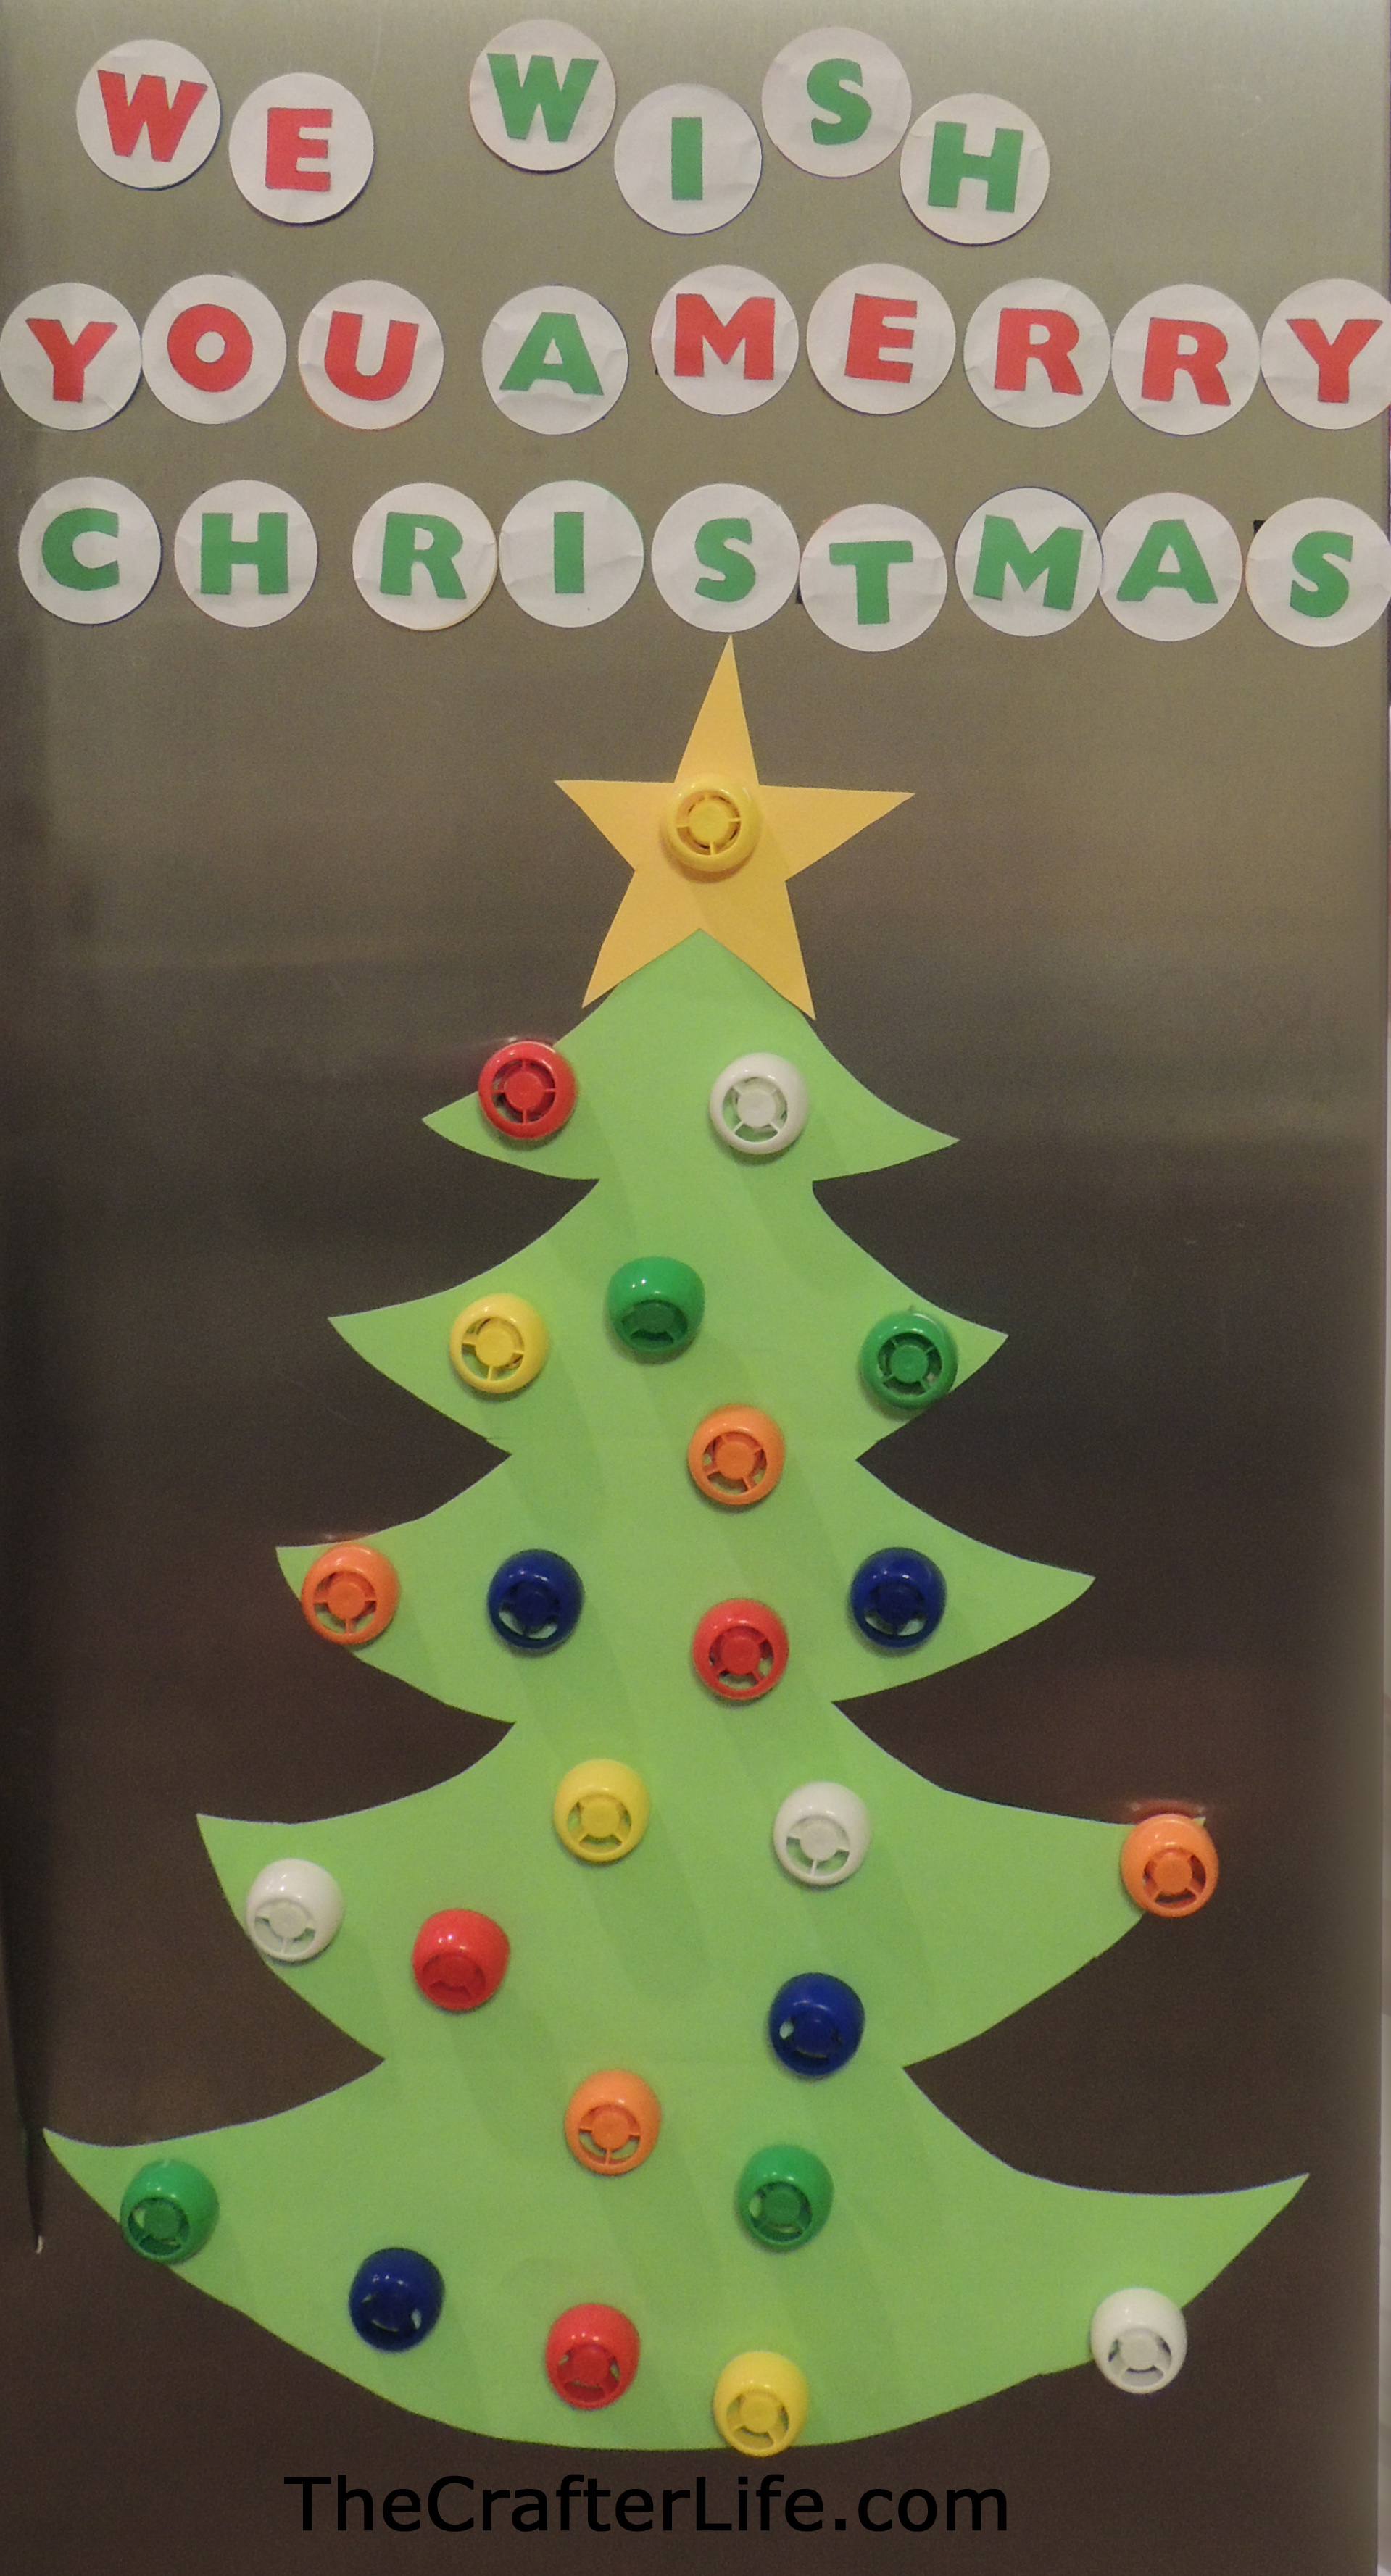
This option incorporates color recognition since the kids have to replace each colored circle with a button (or squeeze pouch lid) of the same color to decorate the tree. They still flip over the numbered circles on the tree to reveal a message, but they don’t leave the circles on the tree as in the first option. Thus, you can scatter the colored circles all over the tree so the kids have to find the number representing the date.
Materials
– Cardstock/Construction paper in colors red, green, white, yellow, blue, orange, and black
– White paper
– Roll of magnetic tape
– Glue stick
– Scissors
– Squeeze pouch lids or colored buttons in colors red, green, white, yellow, blue, and orange (4 of each color)
– Hot glue gun/hot glue
Directions
1. Follow the first 6 steps of Option 1 above.
2. Arrange the colored circles on your tree however you wish(lay your tree flat on a table to do this).
3. Use a glue stick to glue the numbers onto the colored circles on your tree. You can put the numbers on any circle – there is no rule for this option.
4. Match each numbered circle with its corresponding lettered circle. For example, the number 1 would pair with the letter W for the message, “WE WISH YOU A MERRY CHRISTMAS,” since W is the first letter of the message. Of course, you do not have to do it this way. If it is for an older child, you may want to randomize the pairing of numbers with letters so the child has to unscramble the letters at the end of the countdown.
5. Stick a piece of magnetic tape to the back of each numbered circle and to the back of each lettered circle. See the pictures below.
6. Use a glue stick to glue each of the numbered circles to the corresponding lettered circles so that the number and its corresponding letter are on the outside and the two pieces of magnetic tape are on the inside.
7. Hang your tree on the refrigerator. Place the circles (number-side up) using your arrangement from Step 2. My magnetic tape was not very strong and in some cases, I had to place a piece of magnetic tape on the very back of the circle to get it to stay on the tree. Another suggestion would be to cut holes in the tree where the circles will be so the magnets can attach directly to the fridge.
8. Hot glue a piece of magnetic tape on the back of each squeeze pouch lid or colored button. Place them in a container or you could stick them all on your refrigerator so your child can access them each day.
9. Have your child find the numbered circle that represents the date on the tree. Then they should find a squeeze pouch lid/button of the same color and replace the colored circle with the colored lid/button. They can flip the colored circle over to reveal a letter and place it elsewhere on the fridge. The holiday message will be revealed on the day before Christmas and the tree will have all of its new “ornaments”!
Feel free to post comments here or on my Facebook page!
**If you like what you see, feel free to pin, share, and link back to my site. Thank you for visiting!