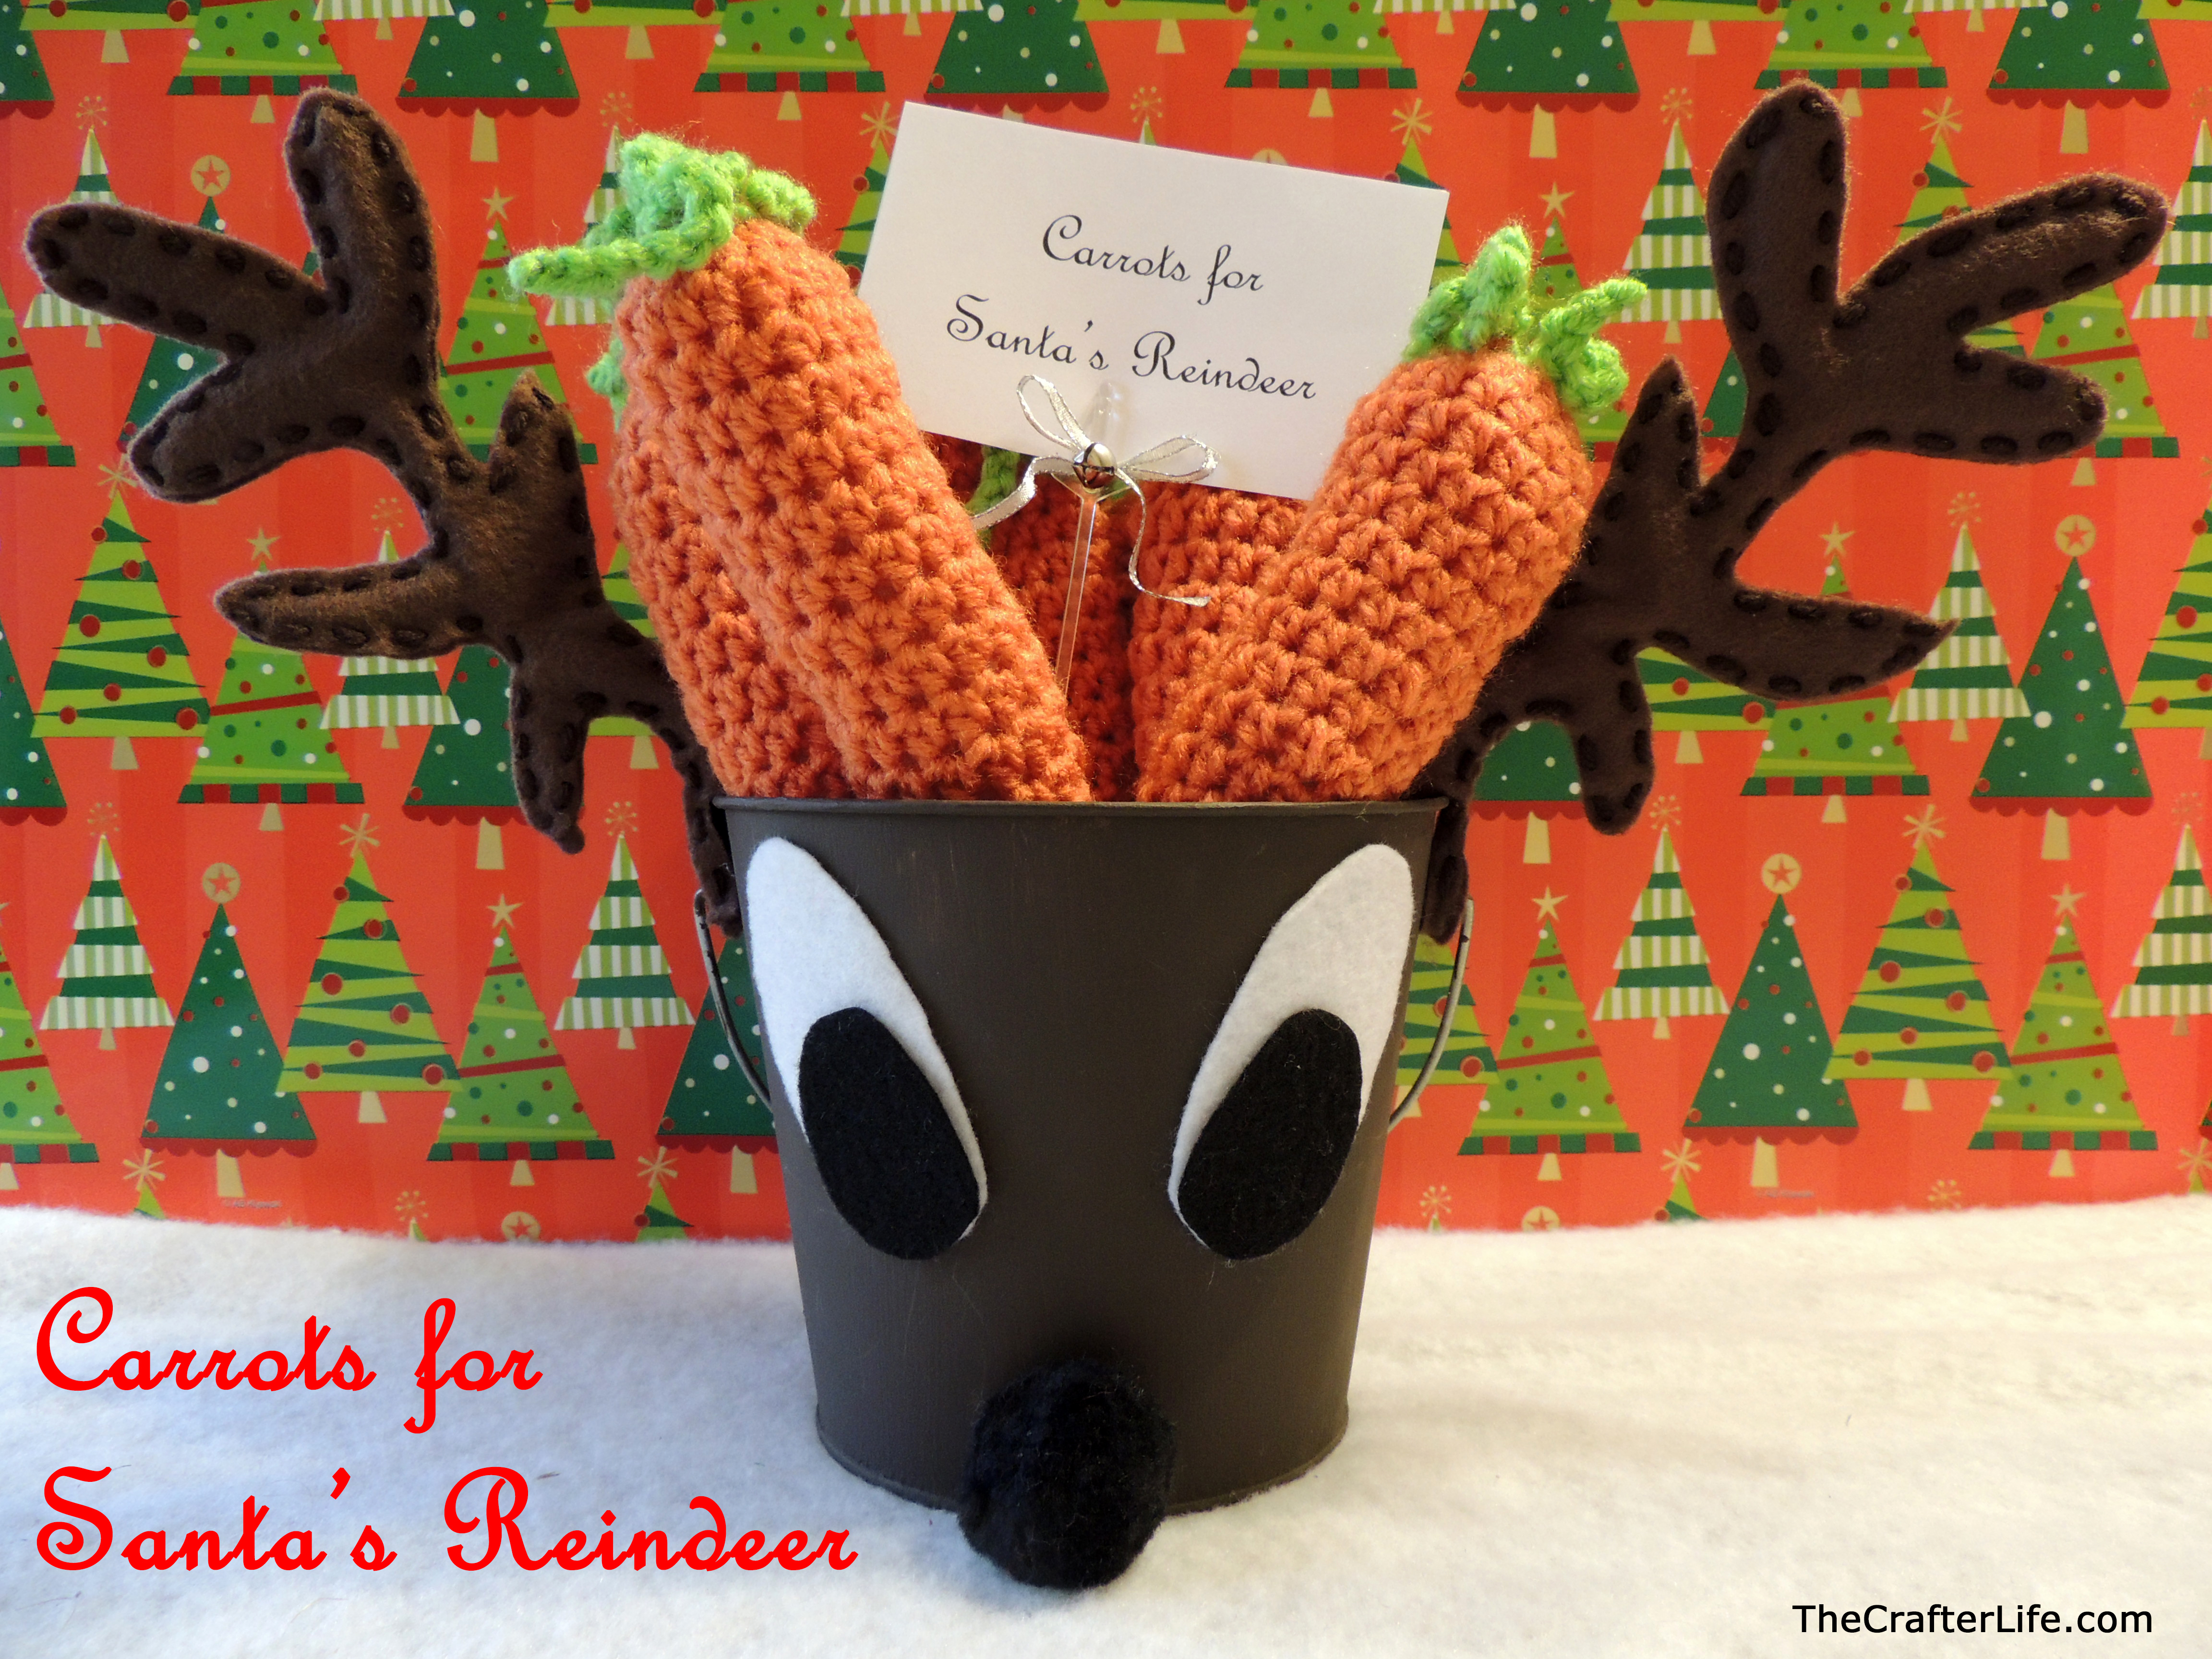
Reindeer Pail and Crochet Carrots with Pattern and Printable
Carrot Pattern could also be used for a fun decorative Easter Carrot!
Reindeer Pail Directions
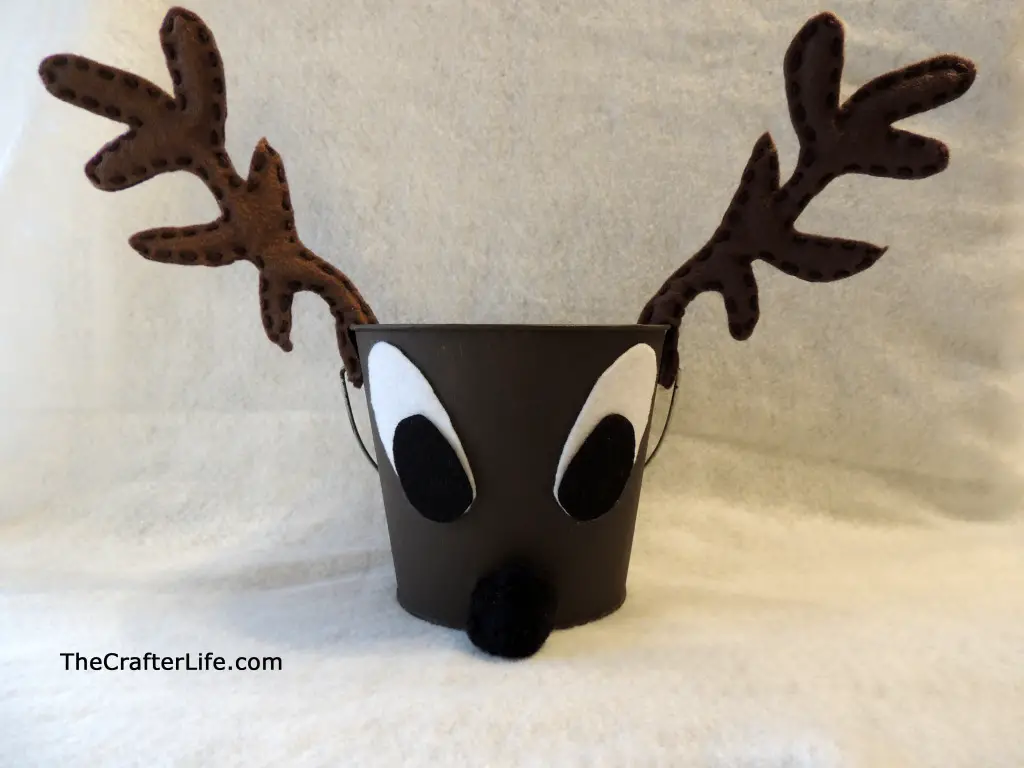
We all know Santa works hard for his cookies on Christmas Eve, but don’t forget about his reindeer! Similar to a cookie plate for Santa, I thought the reindeer should have a special “dish” to hold their favorite type of fuel: CARROTS! Make this with the kids so you have something to place real carrots in on Christmas Eve. You can put fake carrots in it for the rest of the holiday season for a cute decoration around the house. I am providing a crochet pattern for the carrots in case you would like to make a crochet version for the pail. Please read below if you are interested in making my reindeer pail or crochet carrots.
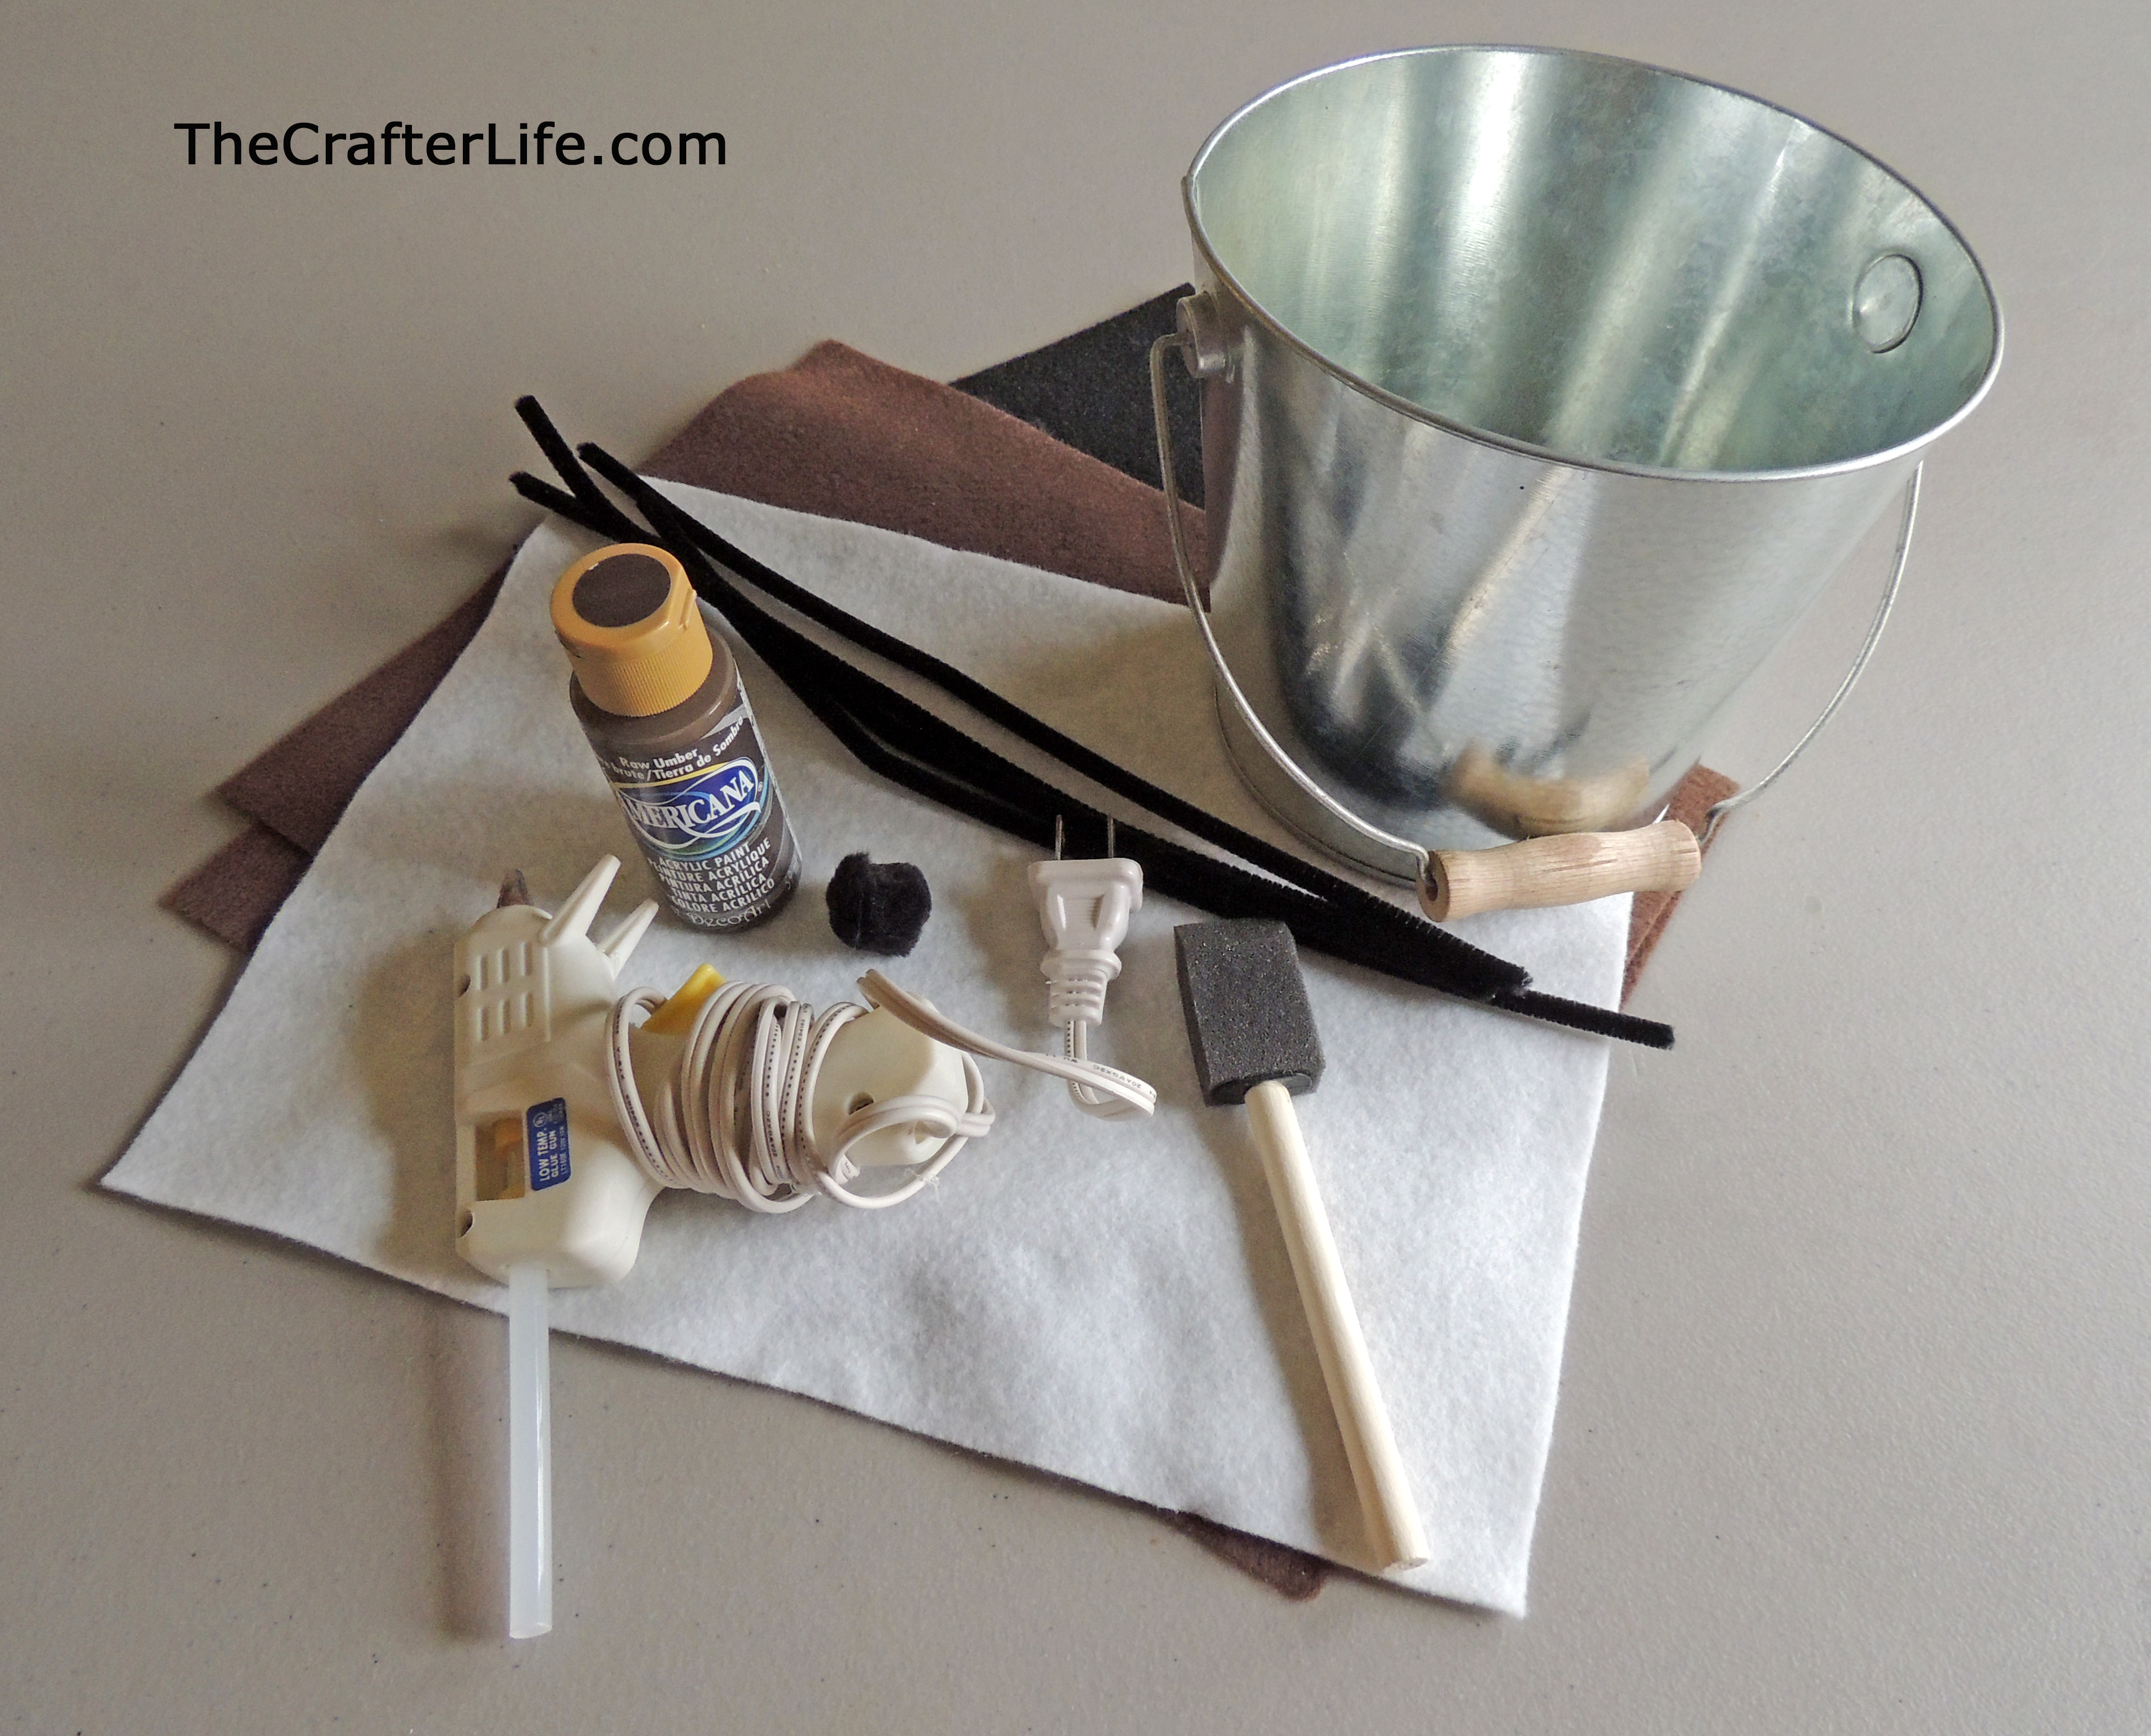
Materials
– Tin pail
– Brown paint
– Paint brush/sponge
– 2 sheets of brown felt, one sheet each of black and white felt
– 8 pipe cleaners
– Medium size pompom in either black or red (for nose)
– Hot glue gun/hot glue
– Scissors
– Optional: Yarn and needle for stitching around the antlers (you could glue them instead)
Directions:
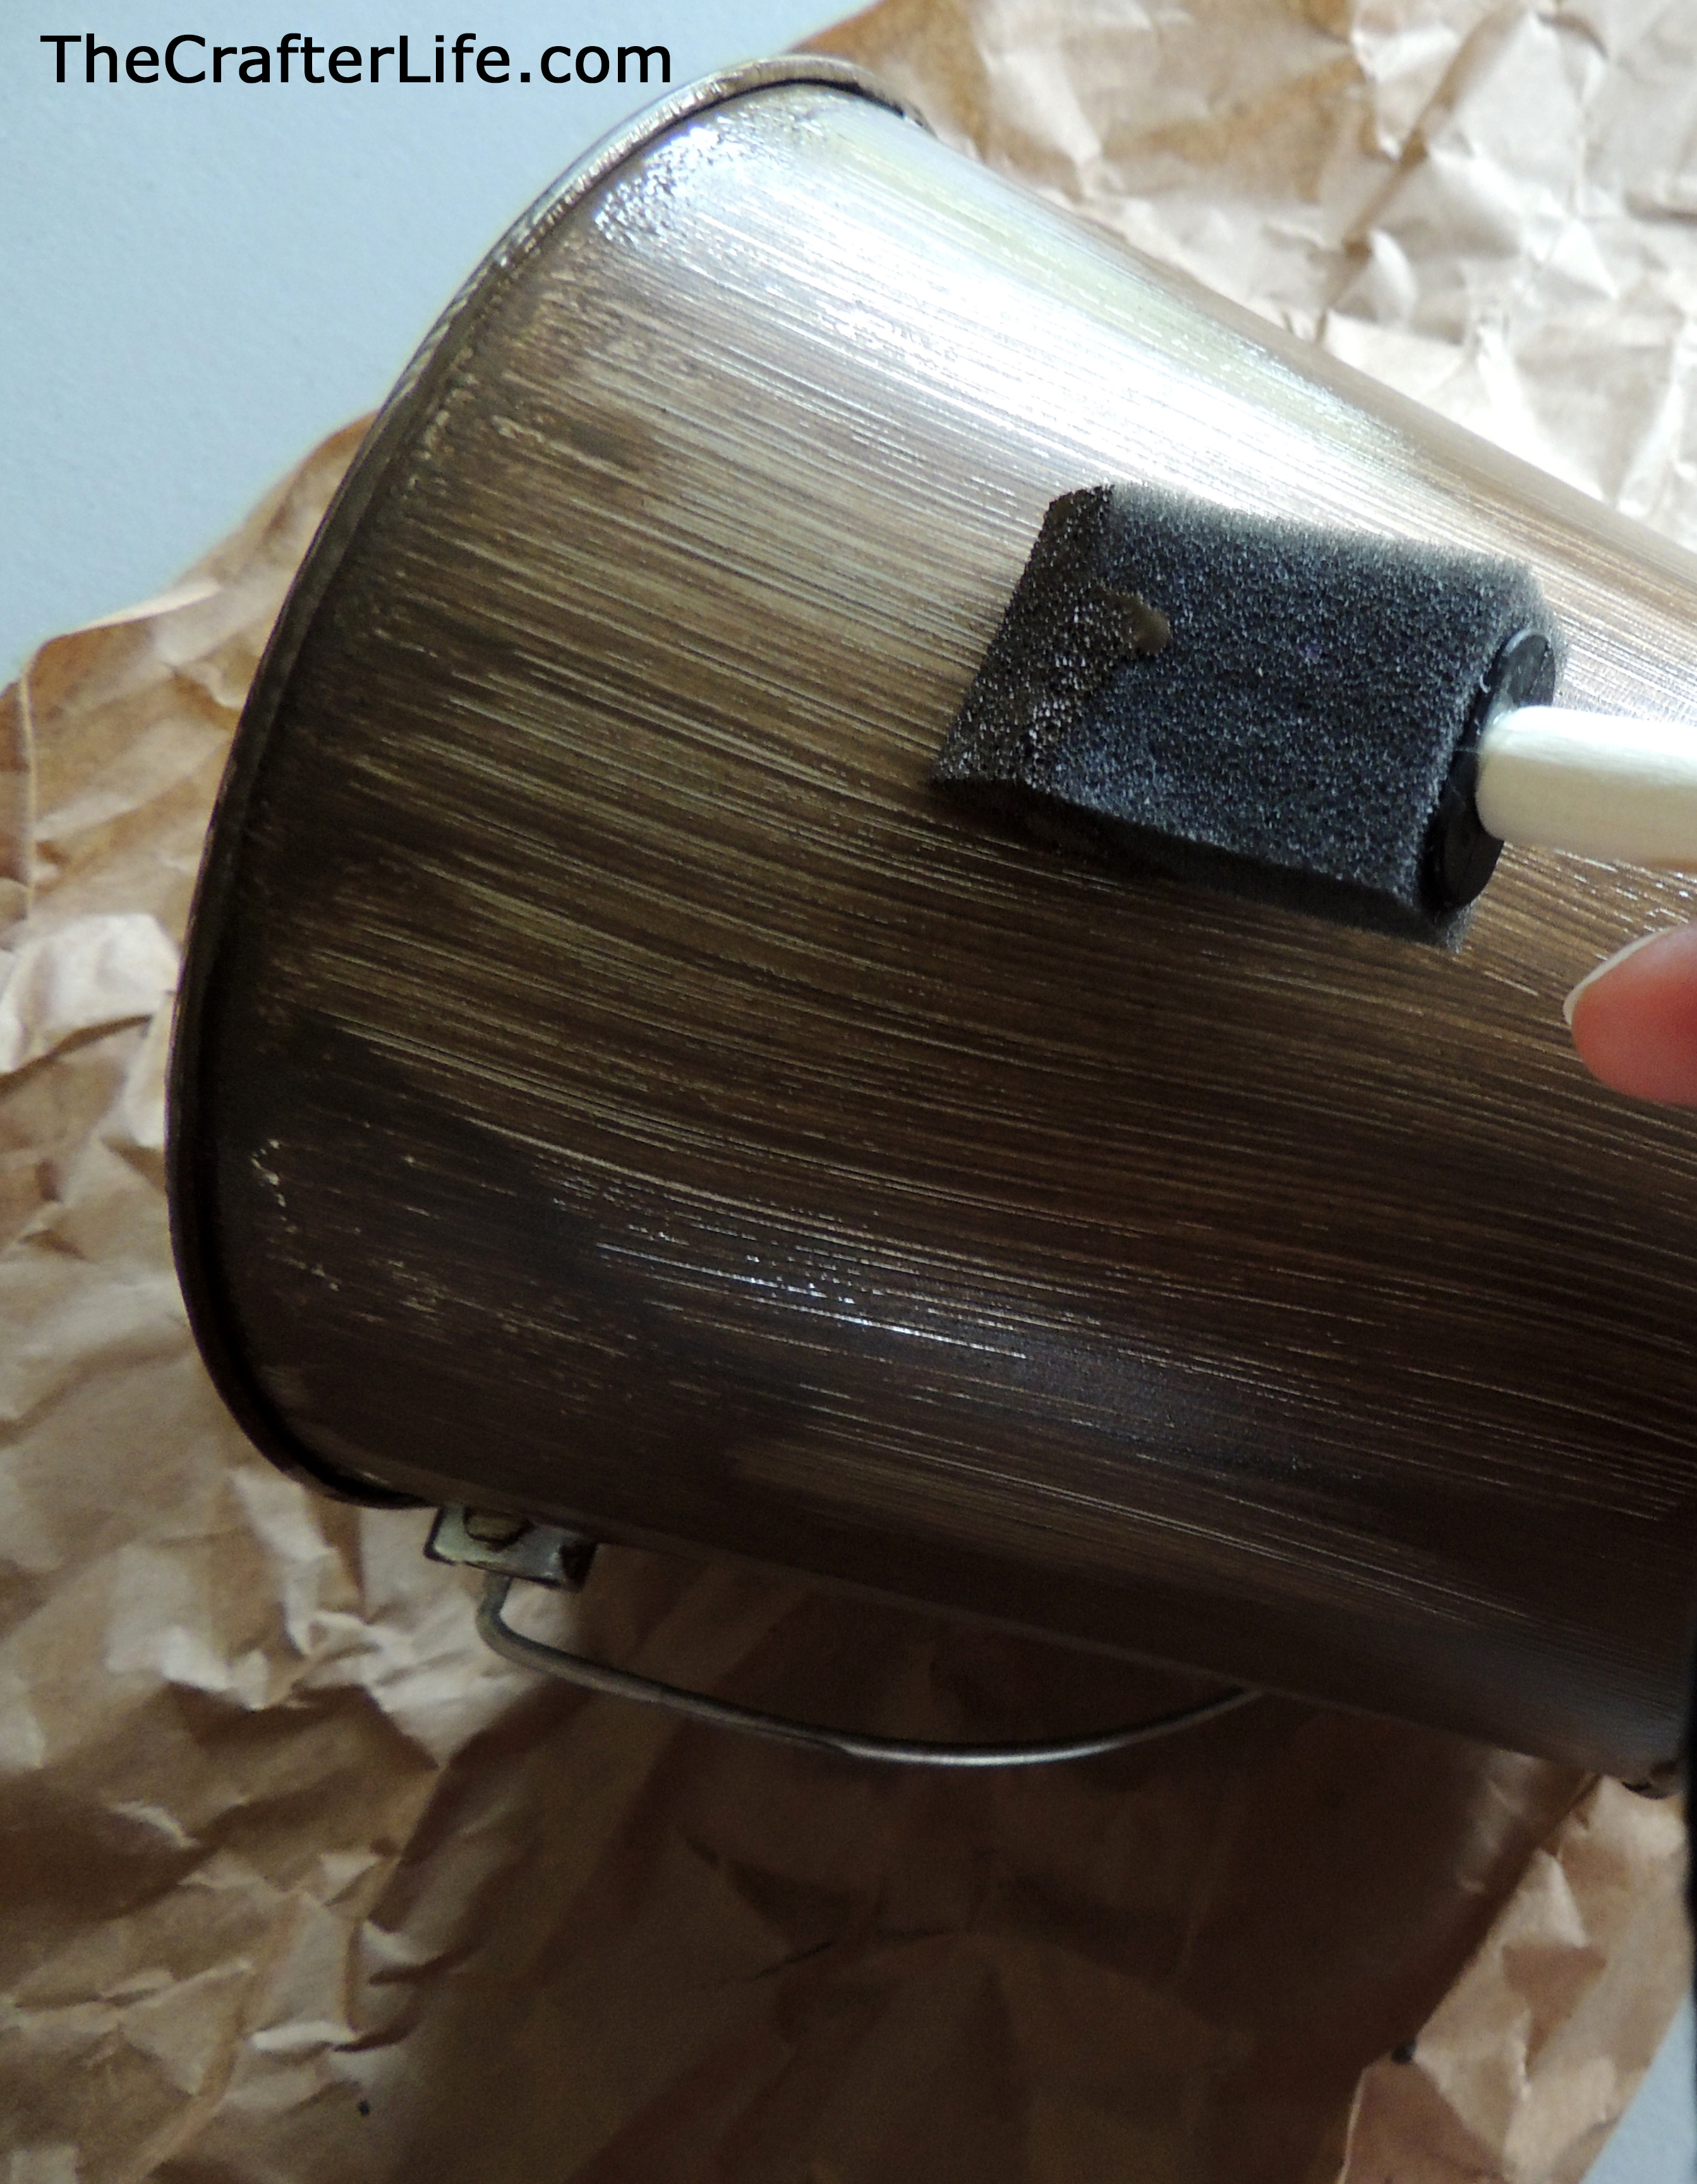
- Paint the pail brown. Allow it to dry.

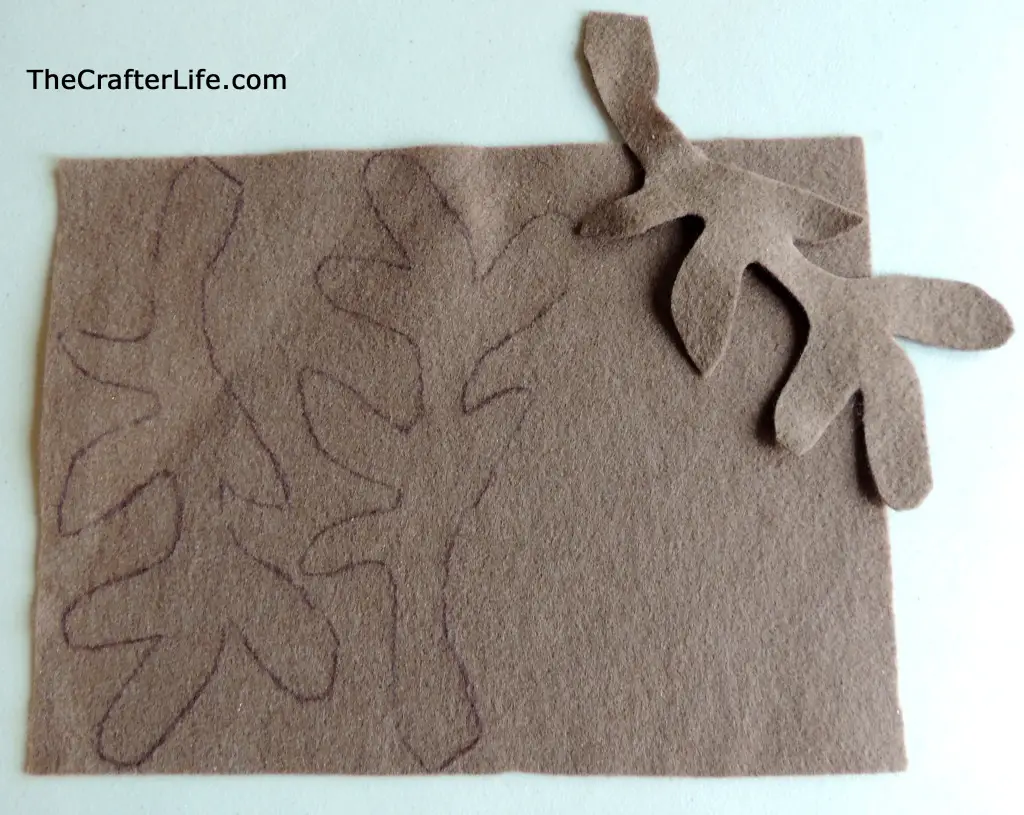
- Cut out an antler shape from the brown felt. Trace and cut out 3 more antlers (you need a total of four). If you do not want to draw an antler by hand, I provided a printable (at the end of the post) of the antler I drew that you can use.
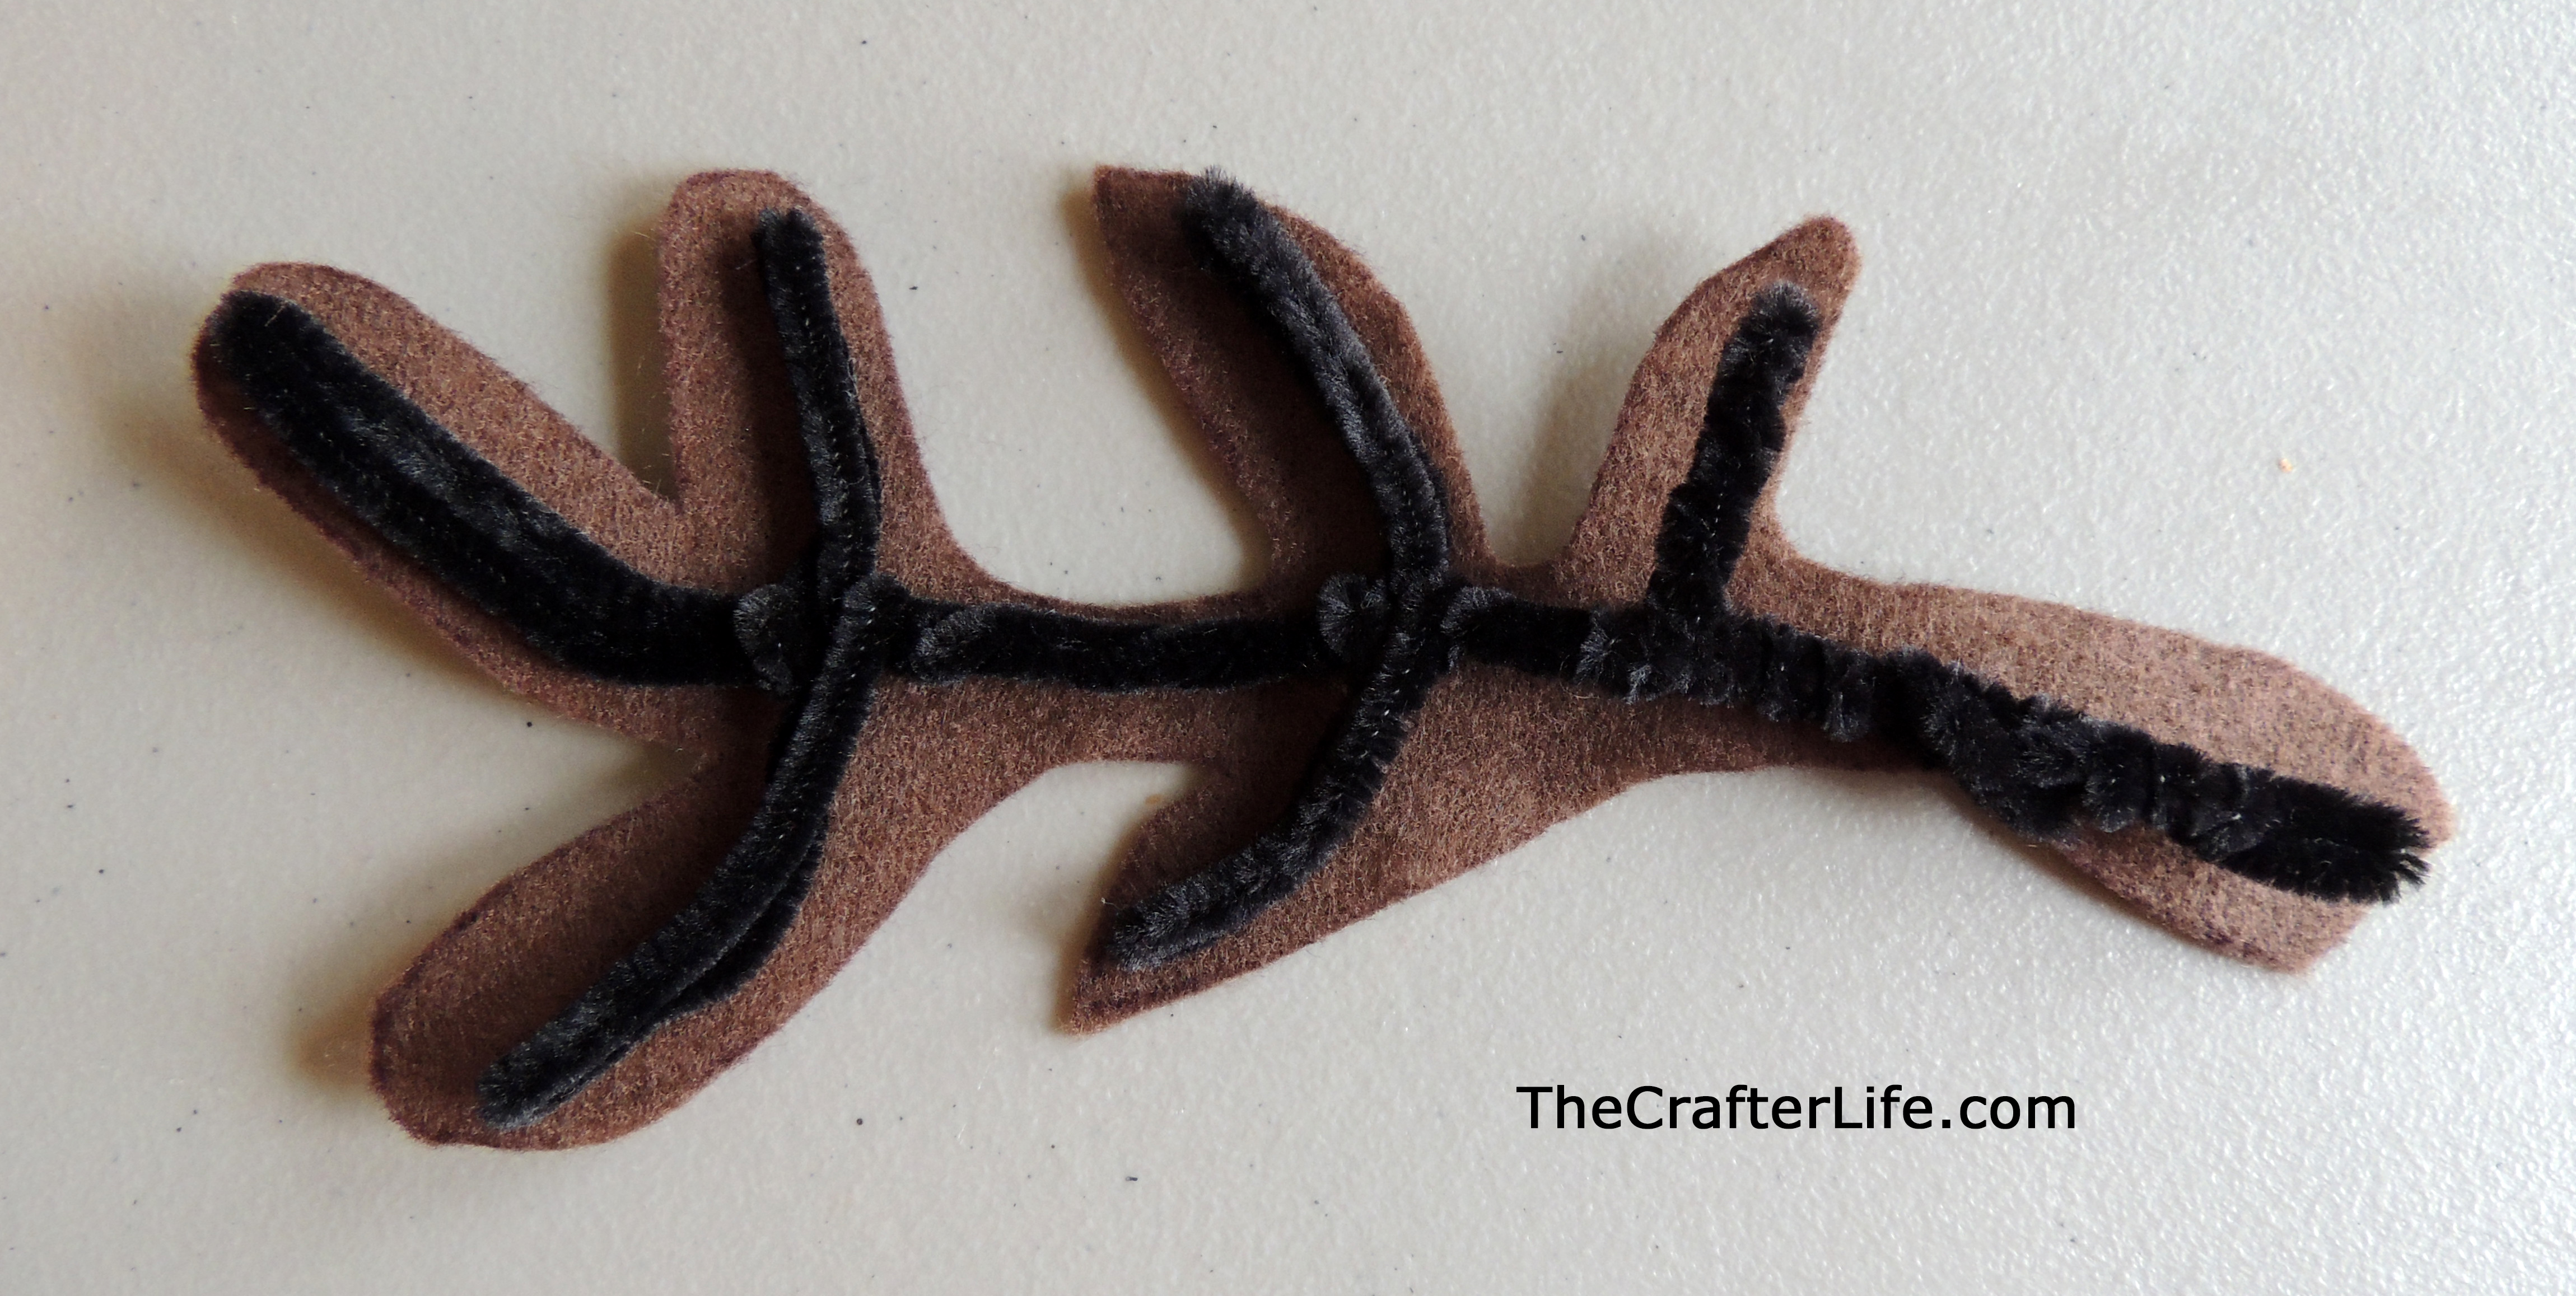
- Take a pipe cleaner and place it along the entire “spine” of an antler piece you cut from the felt. Fold the excess pipe cleaner over on itself at the top of the antler to make it thicker. Then take another pipe cleaner and place it in the middle of the next two “branches” of the antlers. Make sure to bend it over on itself to make the support thicker for each branch. Every time the pipe cleaner crosses the middle, wrap it around the first pipe cleaner you used to form the main support of the antler. Take another pipe cleaner and use it to support the rest of the small “branches” by folding it and wrapping it around the main pipe cleaner so it lies in the middle of the branches. Use a fourth pipe cleaner to reinforce the base of the antler by wrapping it around the bottom of the first pipe cleaner over and over again. See the pictures below.
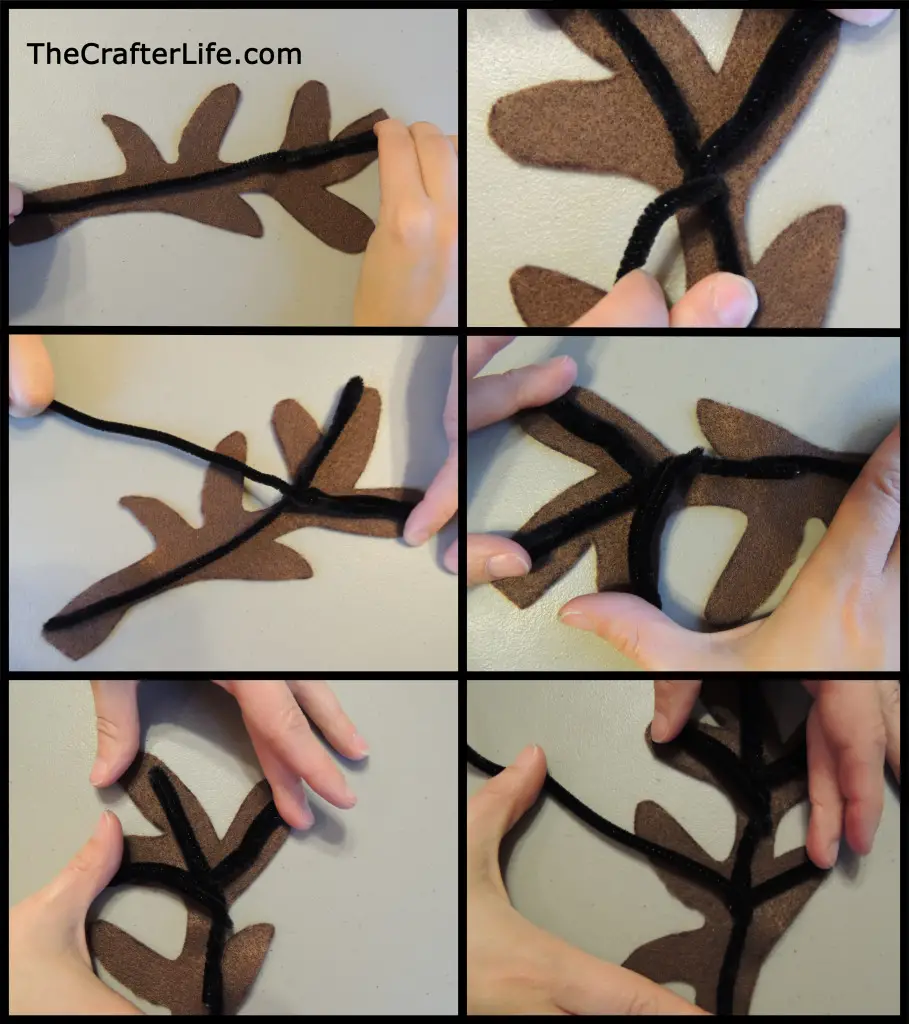
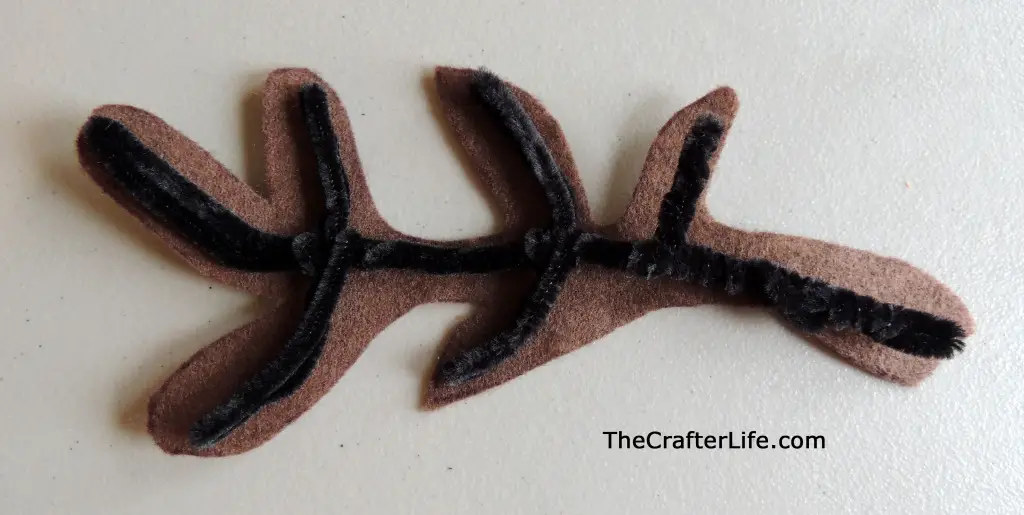
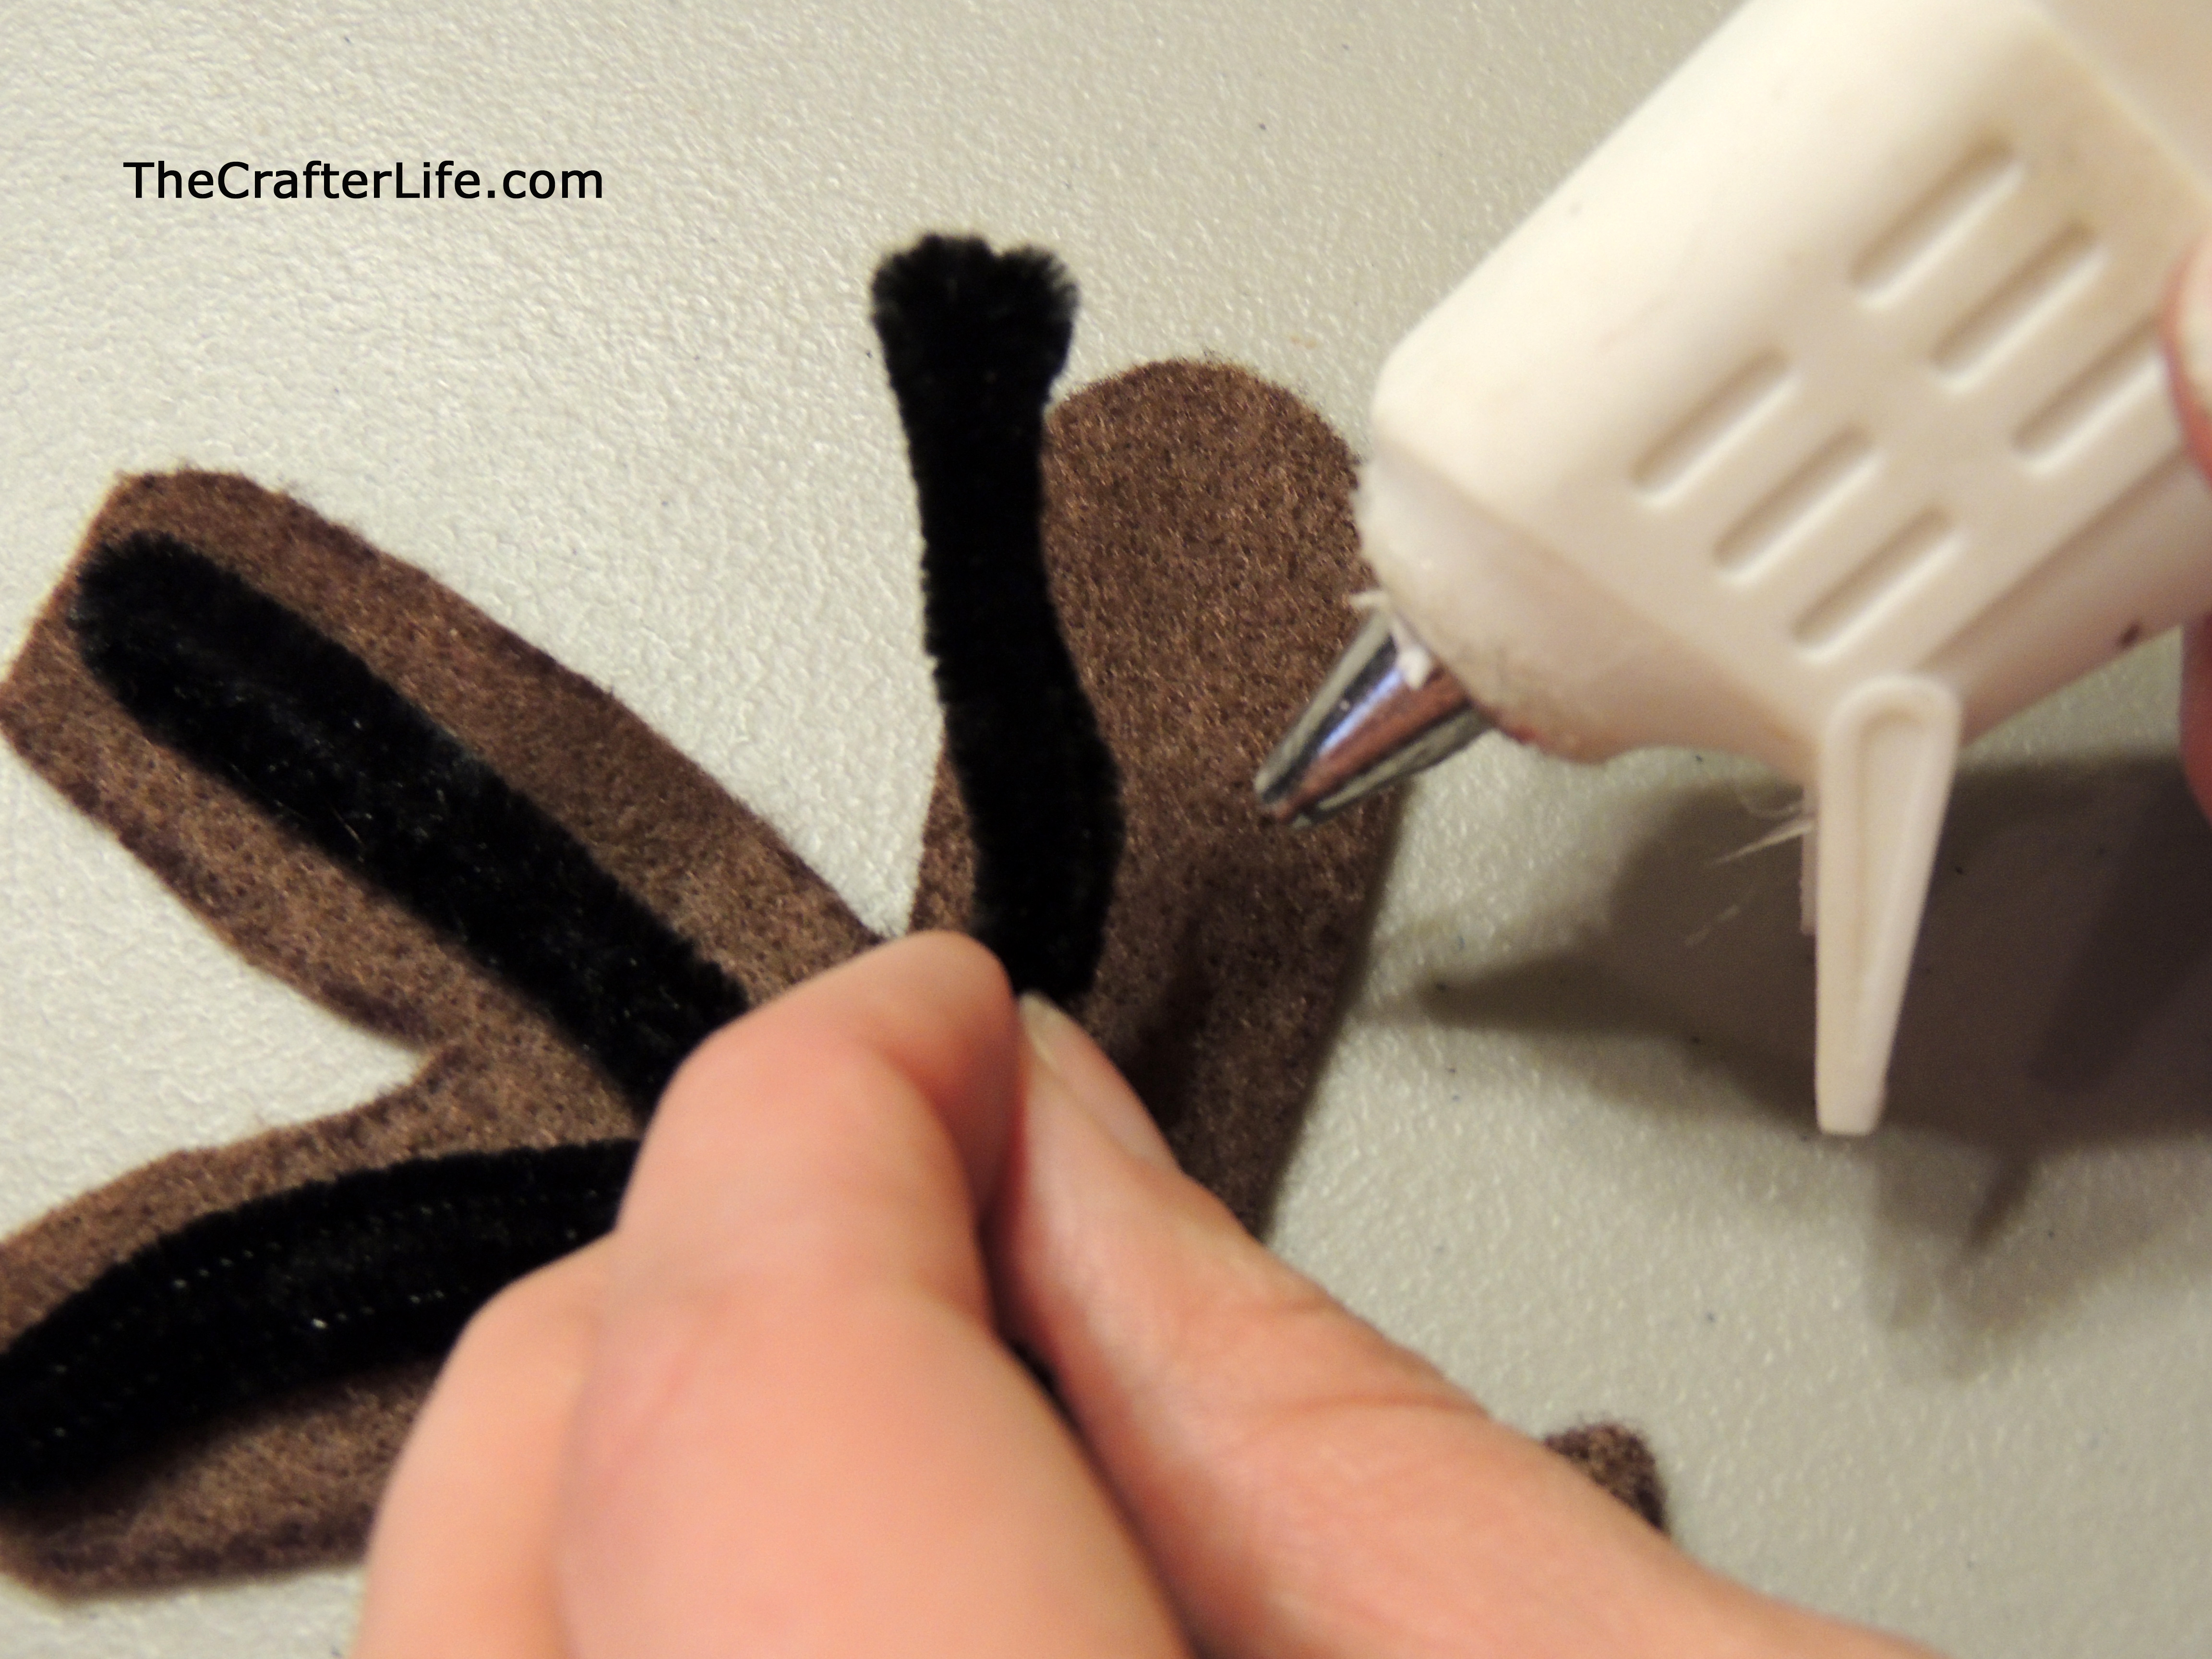
- Hot glue the pipe cleaners in place on top of the felt antler.

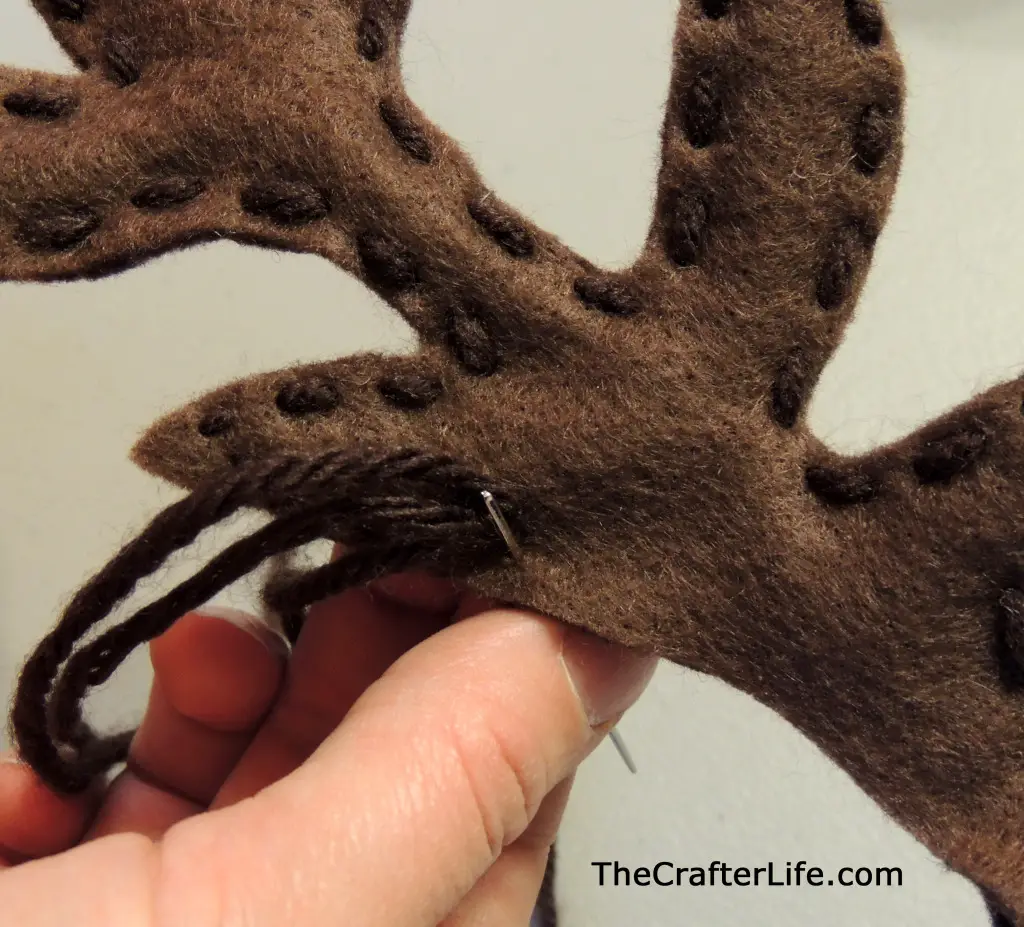
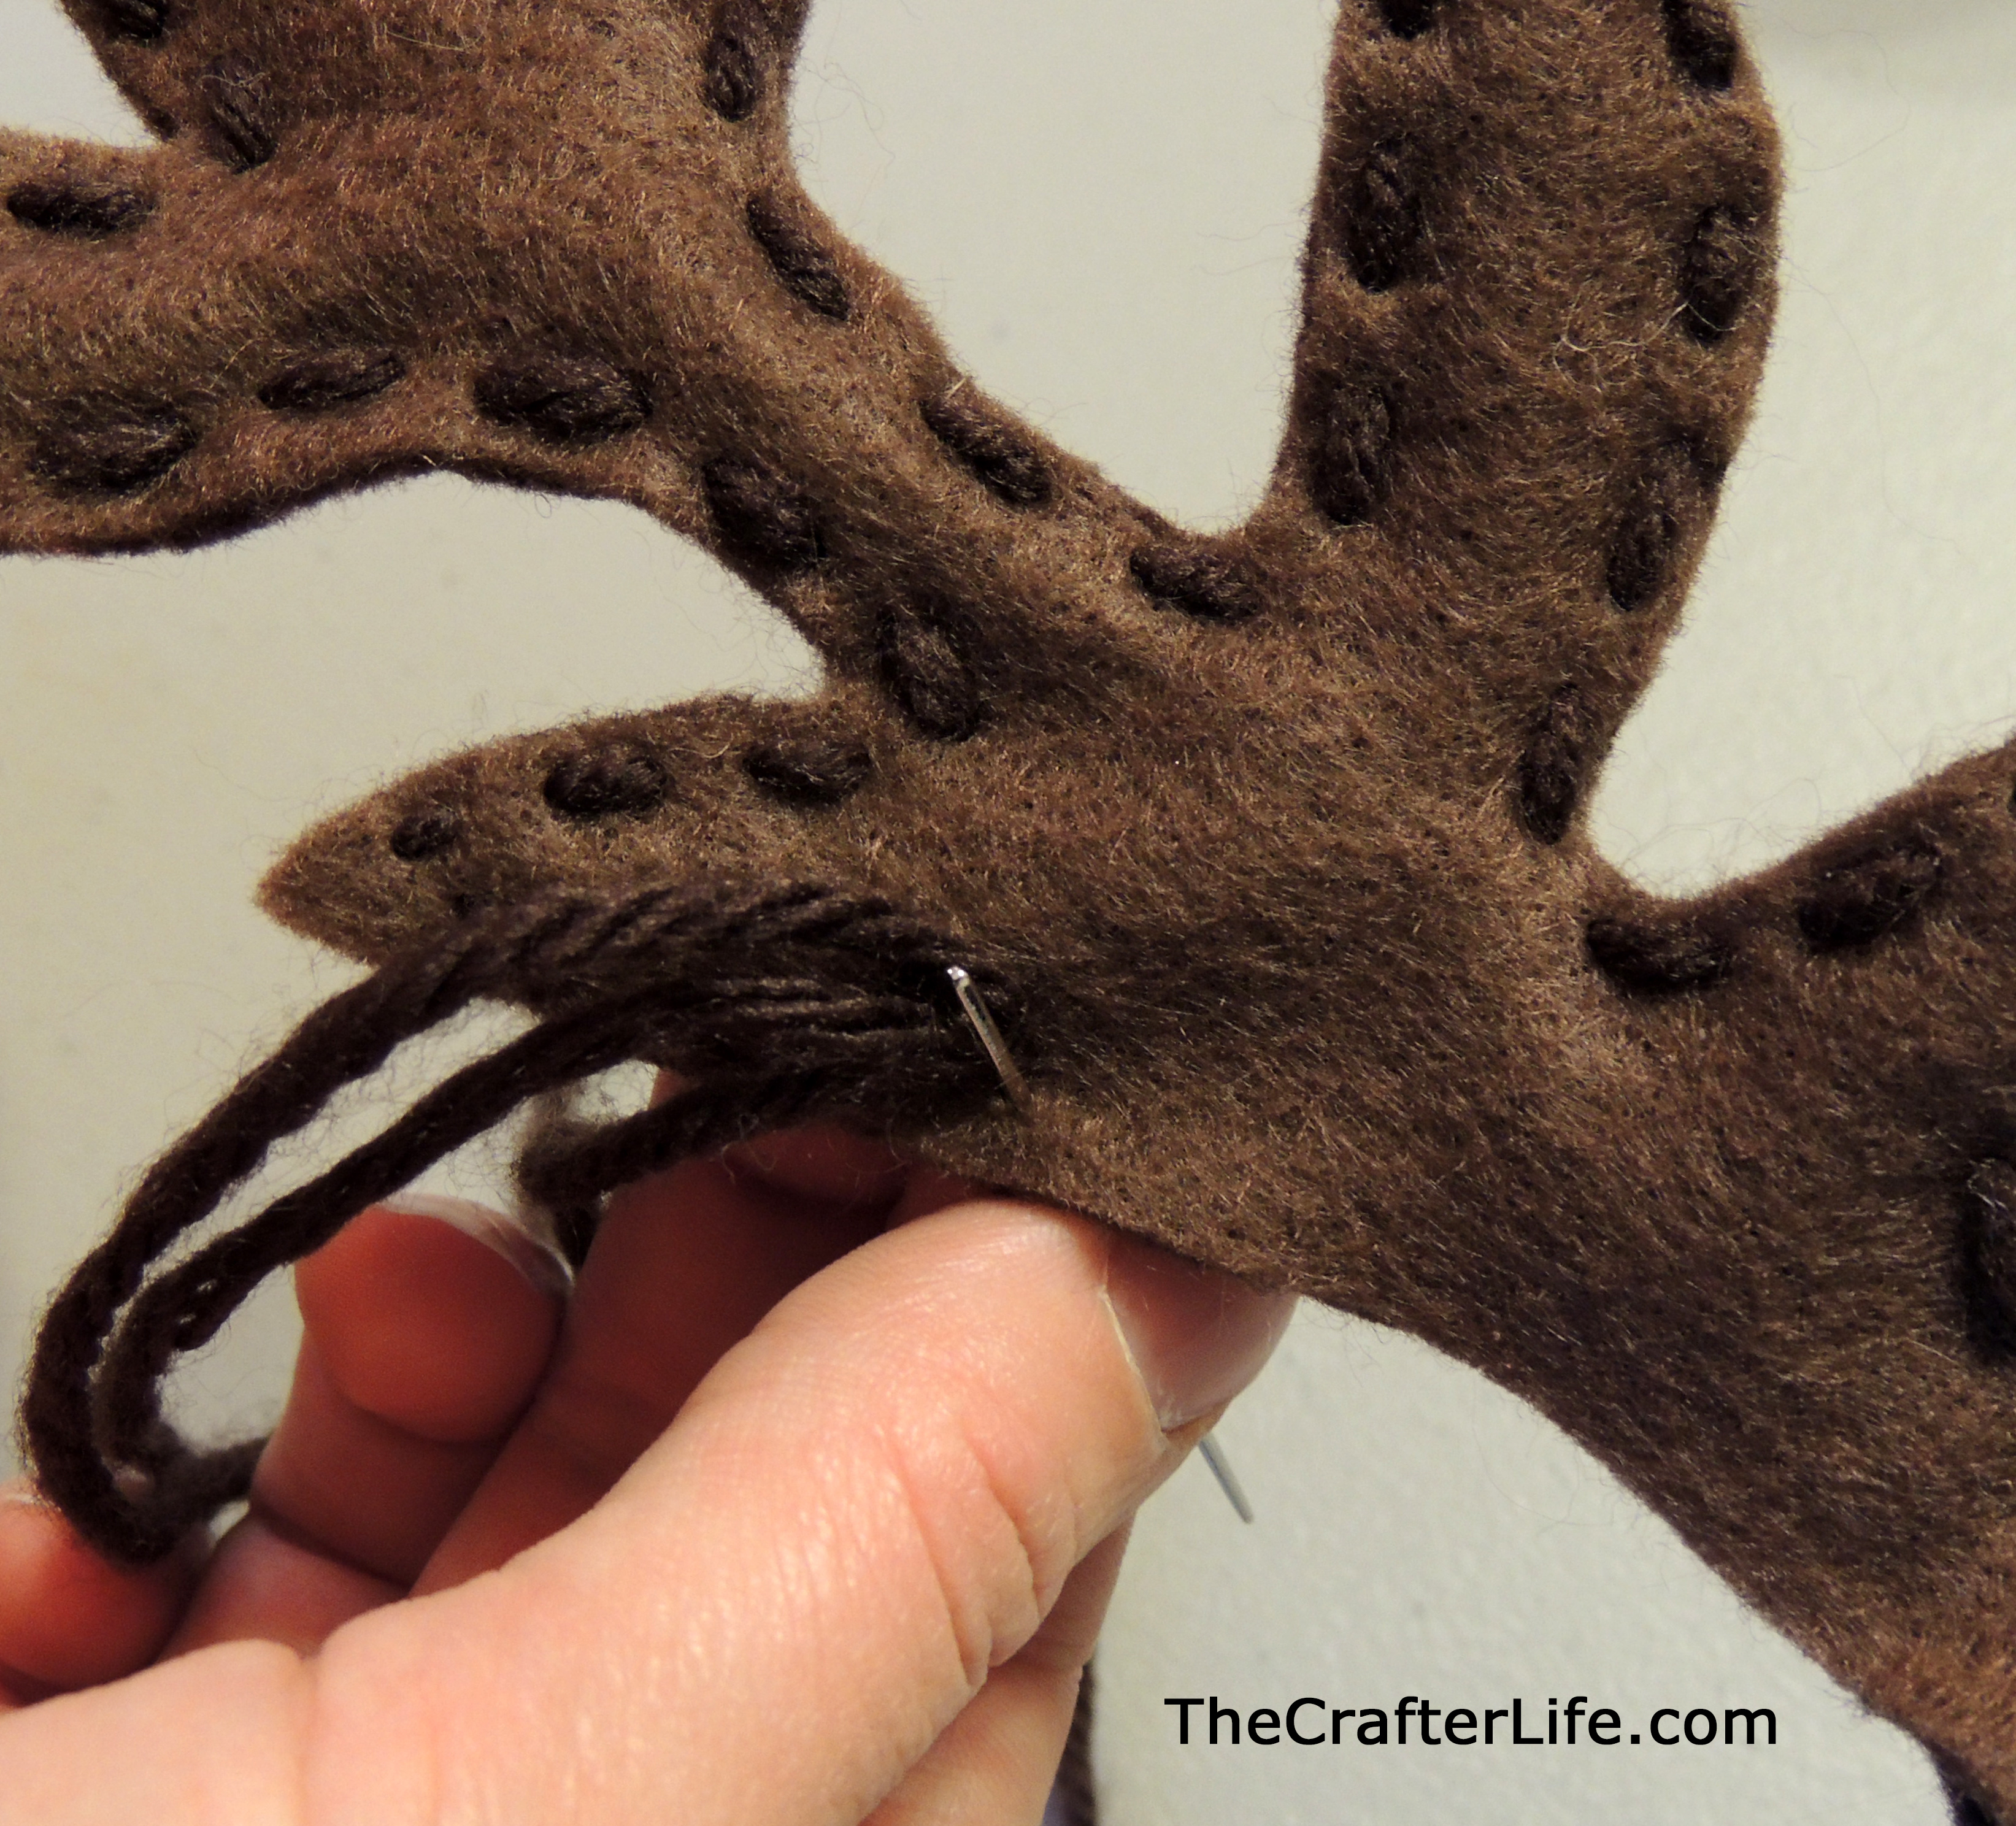
- In order to finish the antler, you can either use hot glue or needle and yarn. If you choose hot glue, simply glue another felt antler piece you cut over the antler with the pipe cleaner so that the pipe cleaner is in the middle. If you choose the needle and yarn method, simply stitch another antler piece to the antler piece with the pipe cleaner so that the pipe cleaner is in the middle. Stitch an outline around the antler pieces to close the edges. You should not have one completed antler. Repeat steps 3 through 5 to make the second antler.
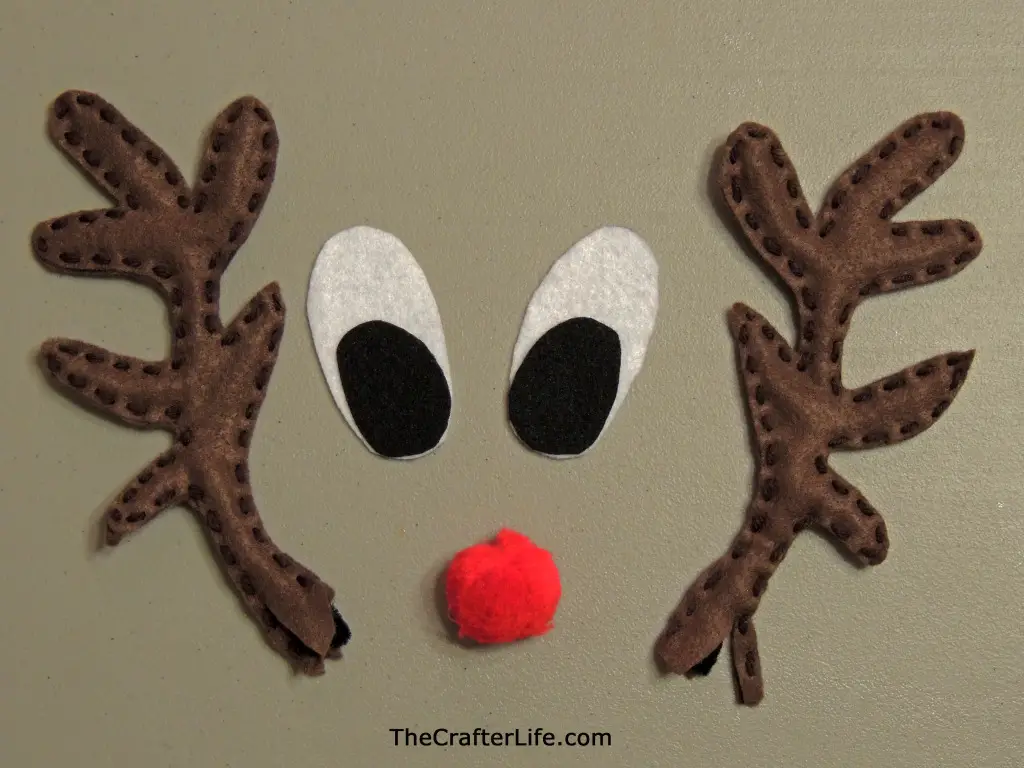
- Cut two eyes out of the white felt. I have a printable with my eyes you can use if you do not want to draw your own.
- Cut two black pupils from the black felt (also included on the printable at the end of the post).
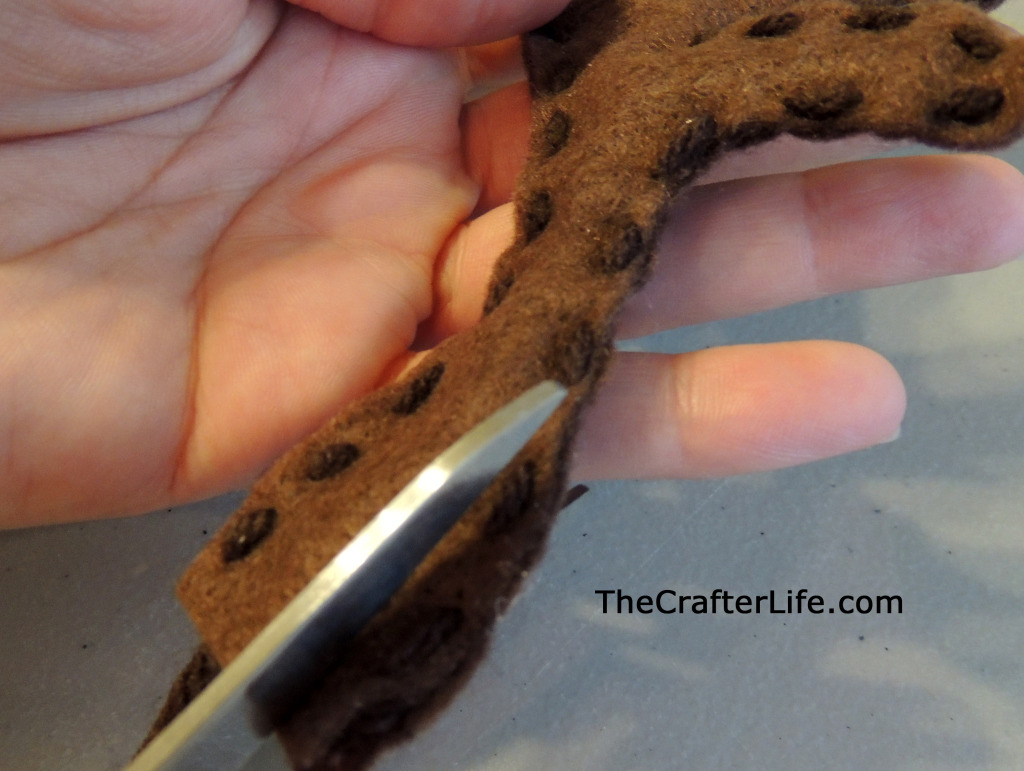
- In order to attach the antlers to the pail, you will need to cut a slit on one side of the base of the antler so that you can straddle the antler over the pail. The pipe cleaner should be on the inside of the pail when you attach it so make sure you cut the slit on the side of the pipe cleaner that will be on the outside of the pail. Do this for both pipe cleaners. See picture below.
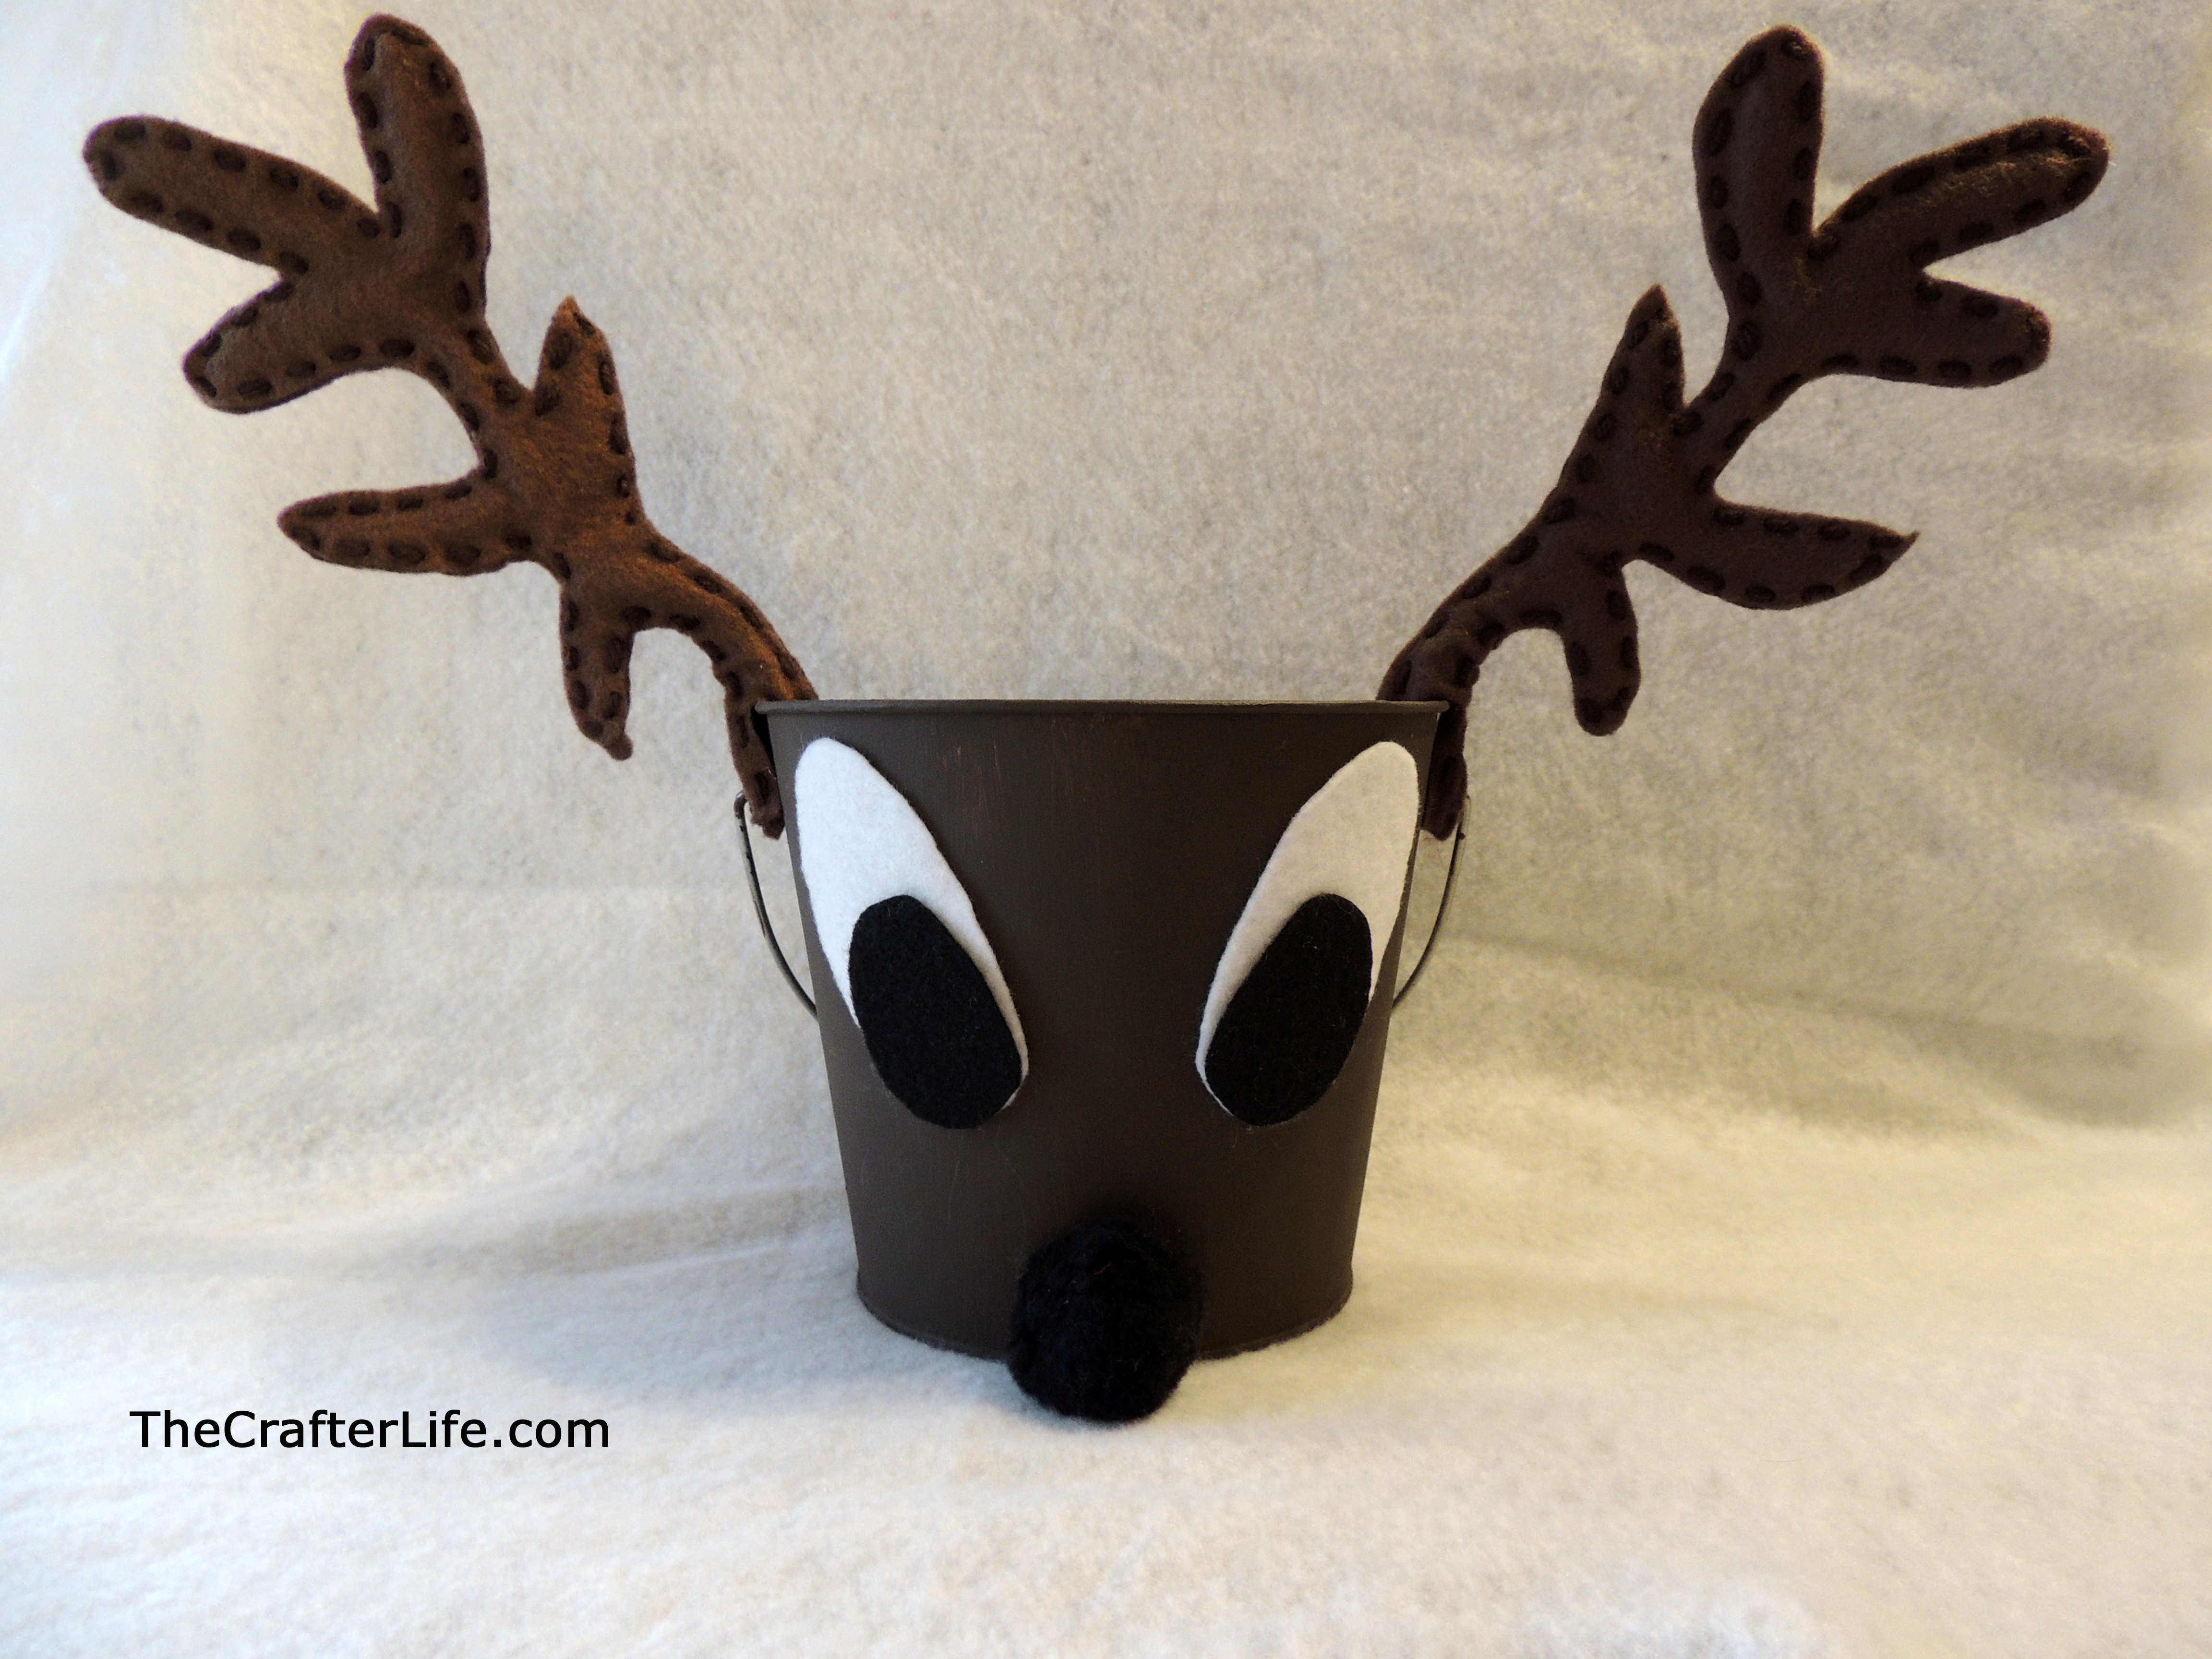
- Position the antlers on the pail and hot glue them in place. Make sure to use hot glue on the outside and inside of the pail. I also placed glue on the front of the round handle piece of the pail for extra support.
- Glue the pompom nose to the bottom of the front of the pail. Center the nose in between the antlers.
- Glue the black felt pupils to the white felt eyes and then glue the eyes to the front of the pail on either side of the nose.
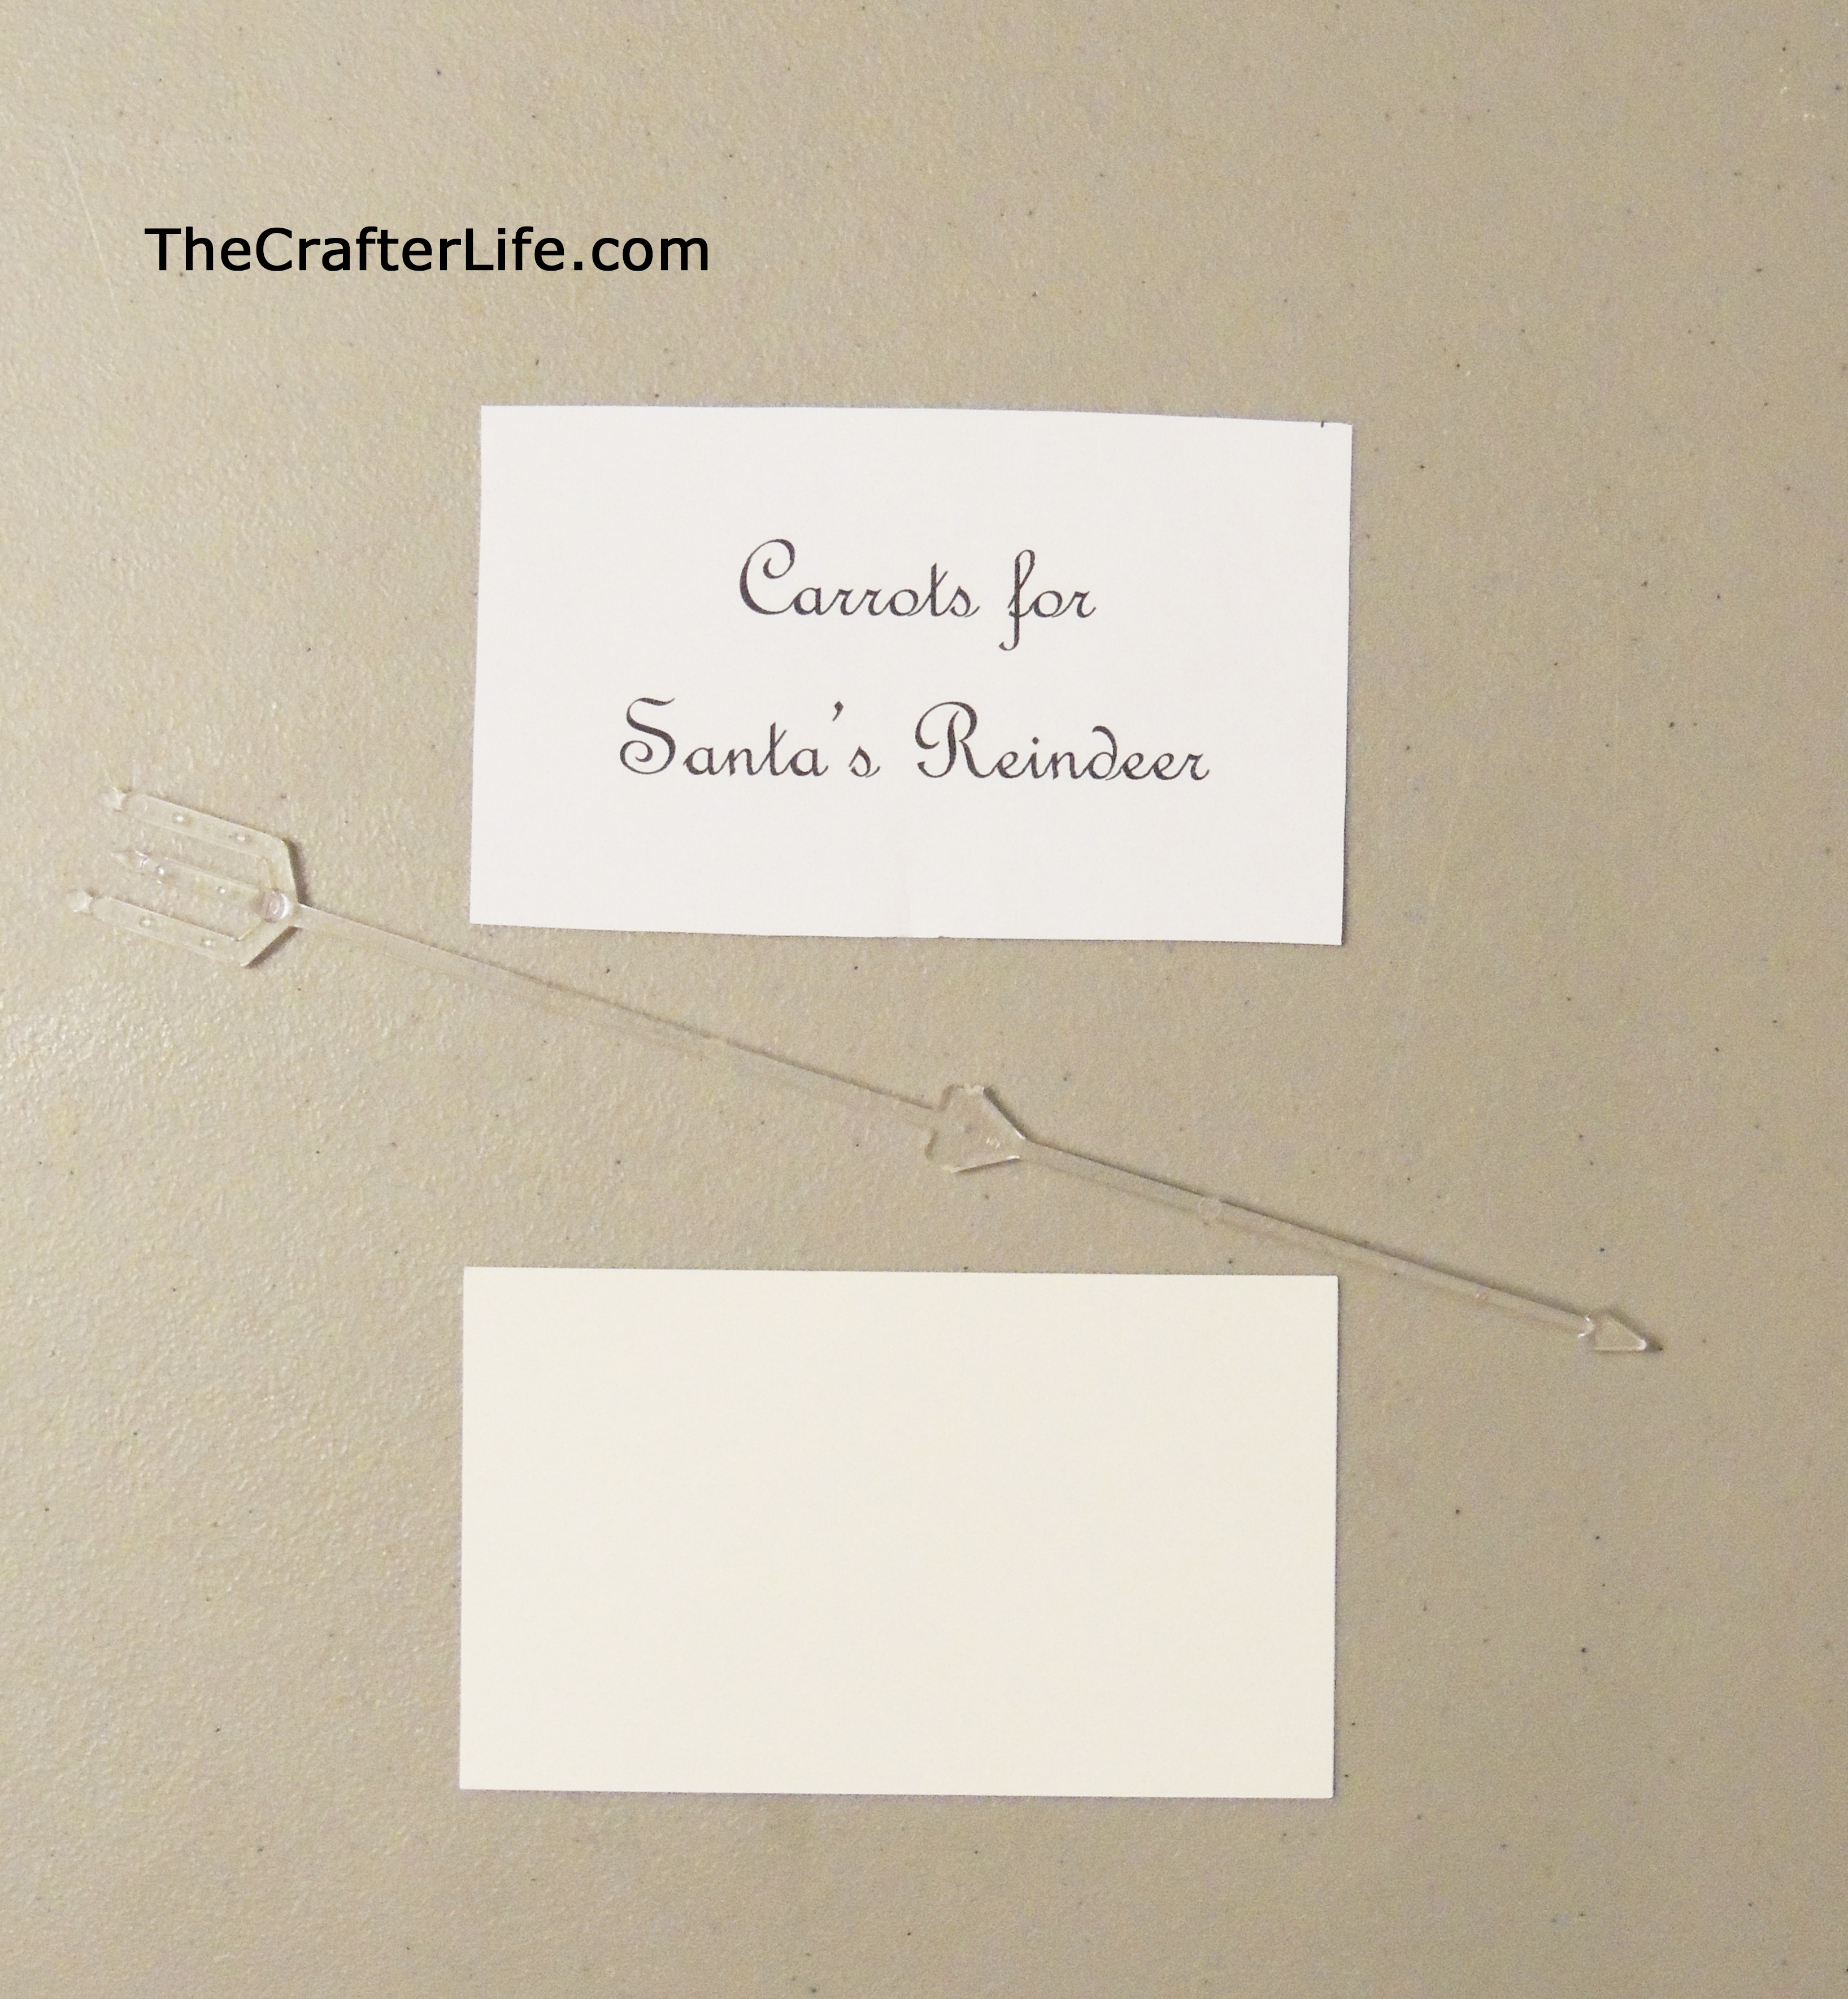
- You can embellish your reindeer pail if you wish – you may want to decorate the antlers with ribbon and jingle bells! I made a sign by using a card holder I saved from a flower pot and an index card. I typed “Carrots for Santa’s Reindeer”, printed it out, cut and pasted it onto an index card, and placed it in the card holder. I added a small bow and jingle bell to embellish it a little.

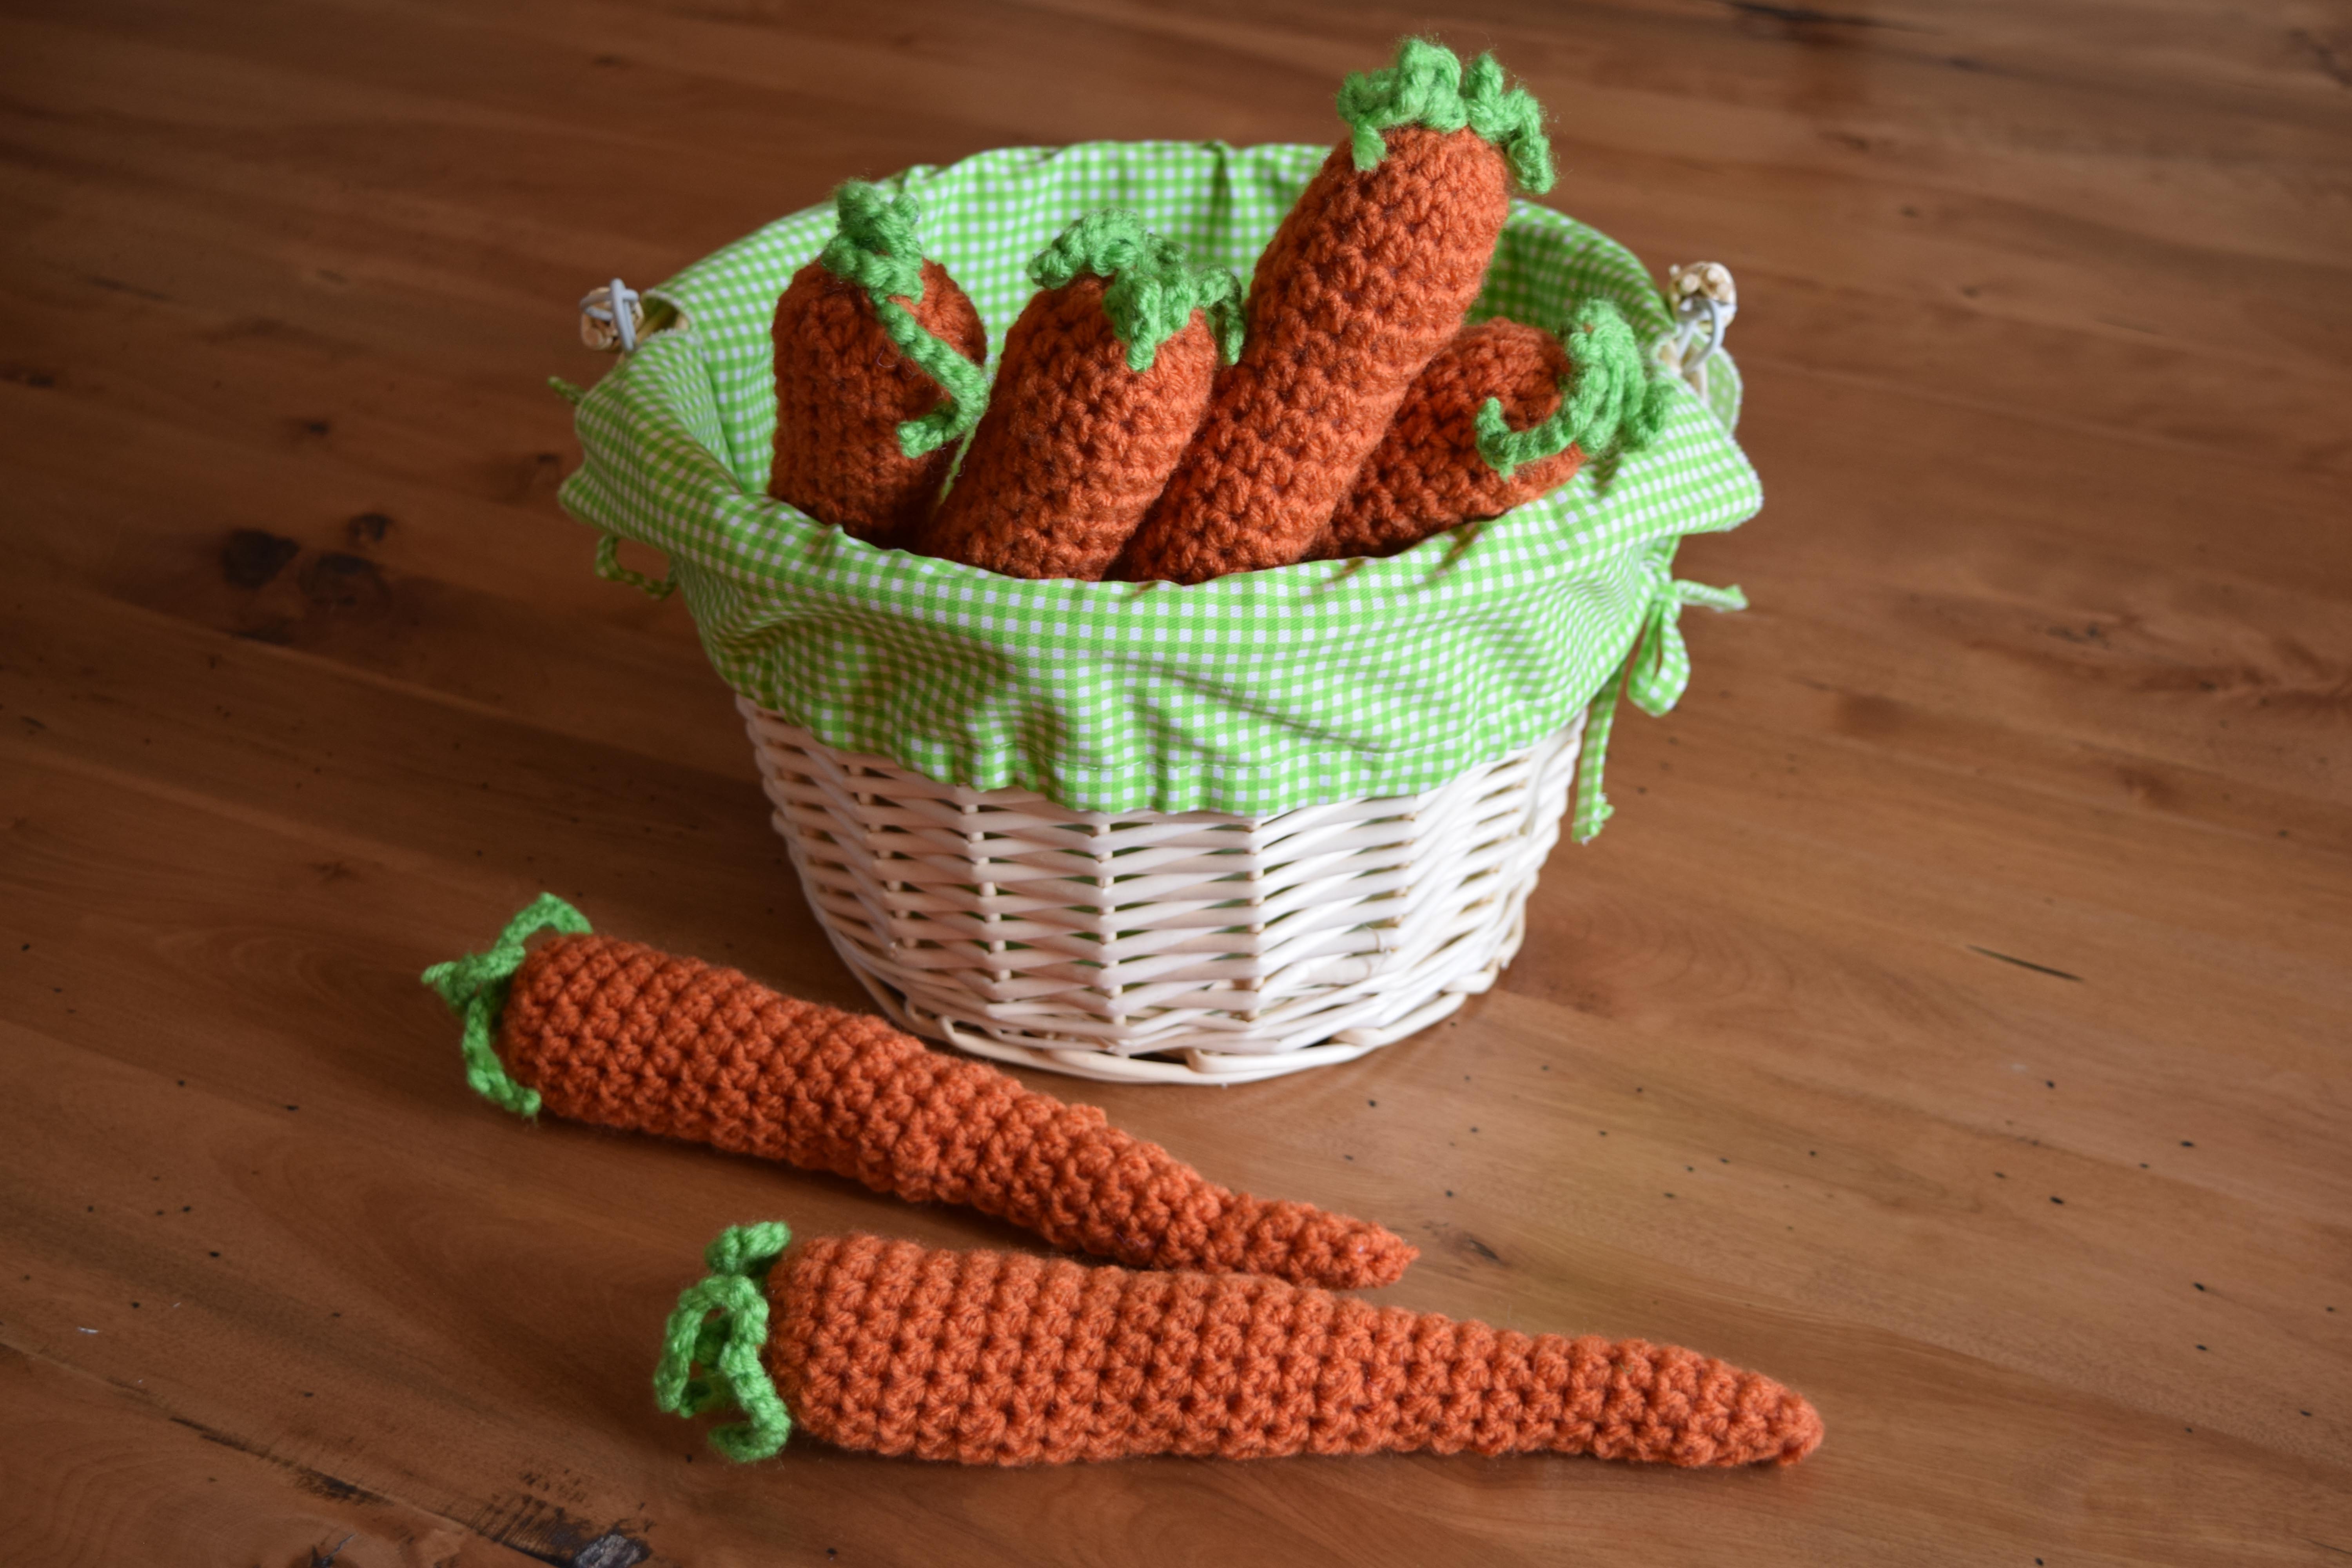
- Now you are ready to place carrots in your reindeer pail on Christmas Eve! You can use your pail as a decoration until then. You may also wish to place fake carrots in the pail that you can make or buy. I crocheted nine carrots for each of the reindeer. One cute idea would be to have your child make tags with the names of each reindeer and attach them to each carrot. Below is my crochet pattern for a carrot.


FINISHED MEASUREMENTS
Length is approximately 11 inches
Diameter of thickest part of carrot is approximately 2 inches
MATERIALS
– 5.00mm (H) hook
– Worsted weight yarn in orange (I used Red Heart Super Saver yarn in Carrot)
– Worsted weight yarn in green (I used Red Heart Super Saver yarn in Spring Green)
– Fiberfill
– Tapestry needle for sewing and weaving in ends
– Scissors
ABBREVIATIONS
– ch = chain
– chs = chains
– dec = decrease
– hdc = half double crochet
– sc = single crochet
– st = stitch
– sts = stitches
SPECIAL NOTES
– The carrot is made using continuous rounds (no joins or chains).
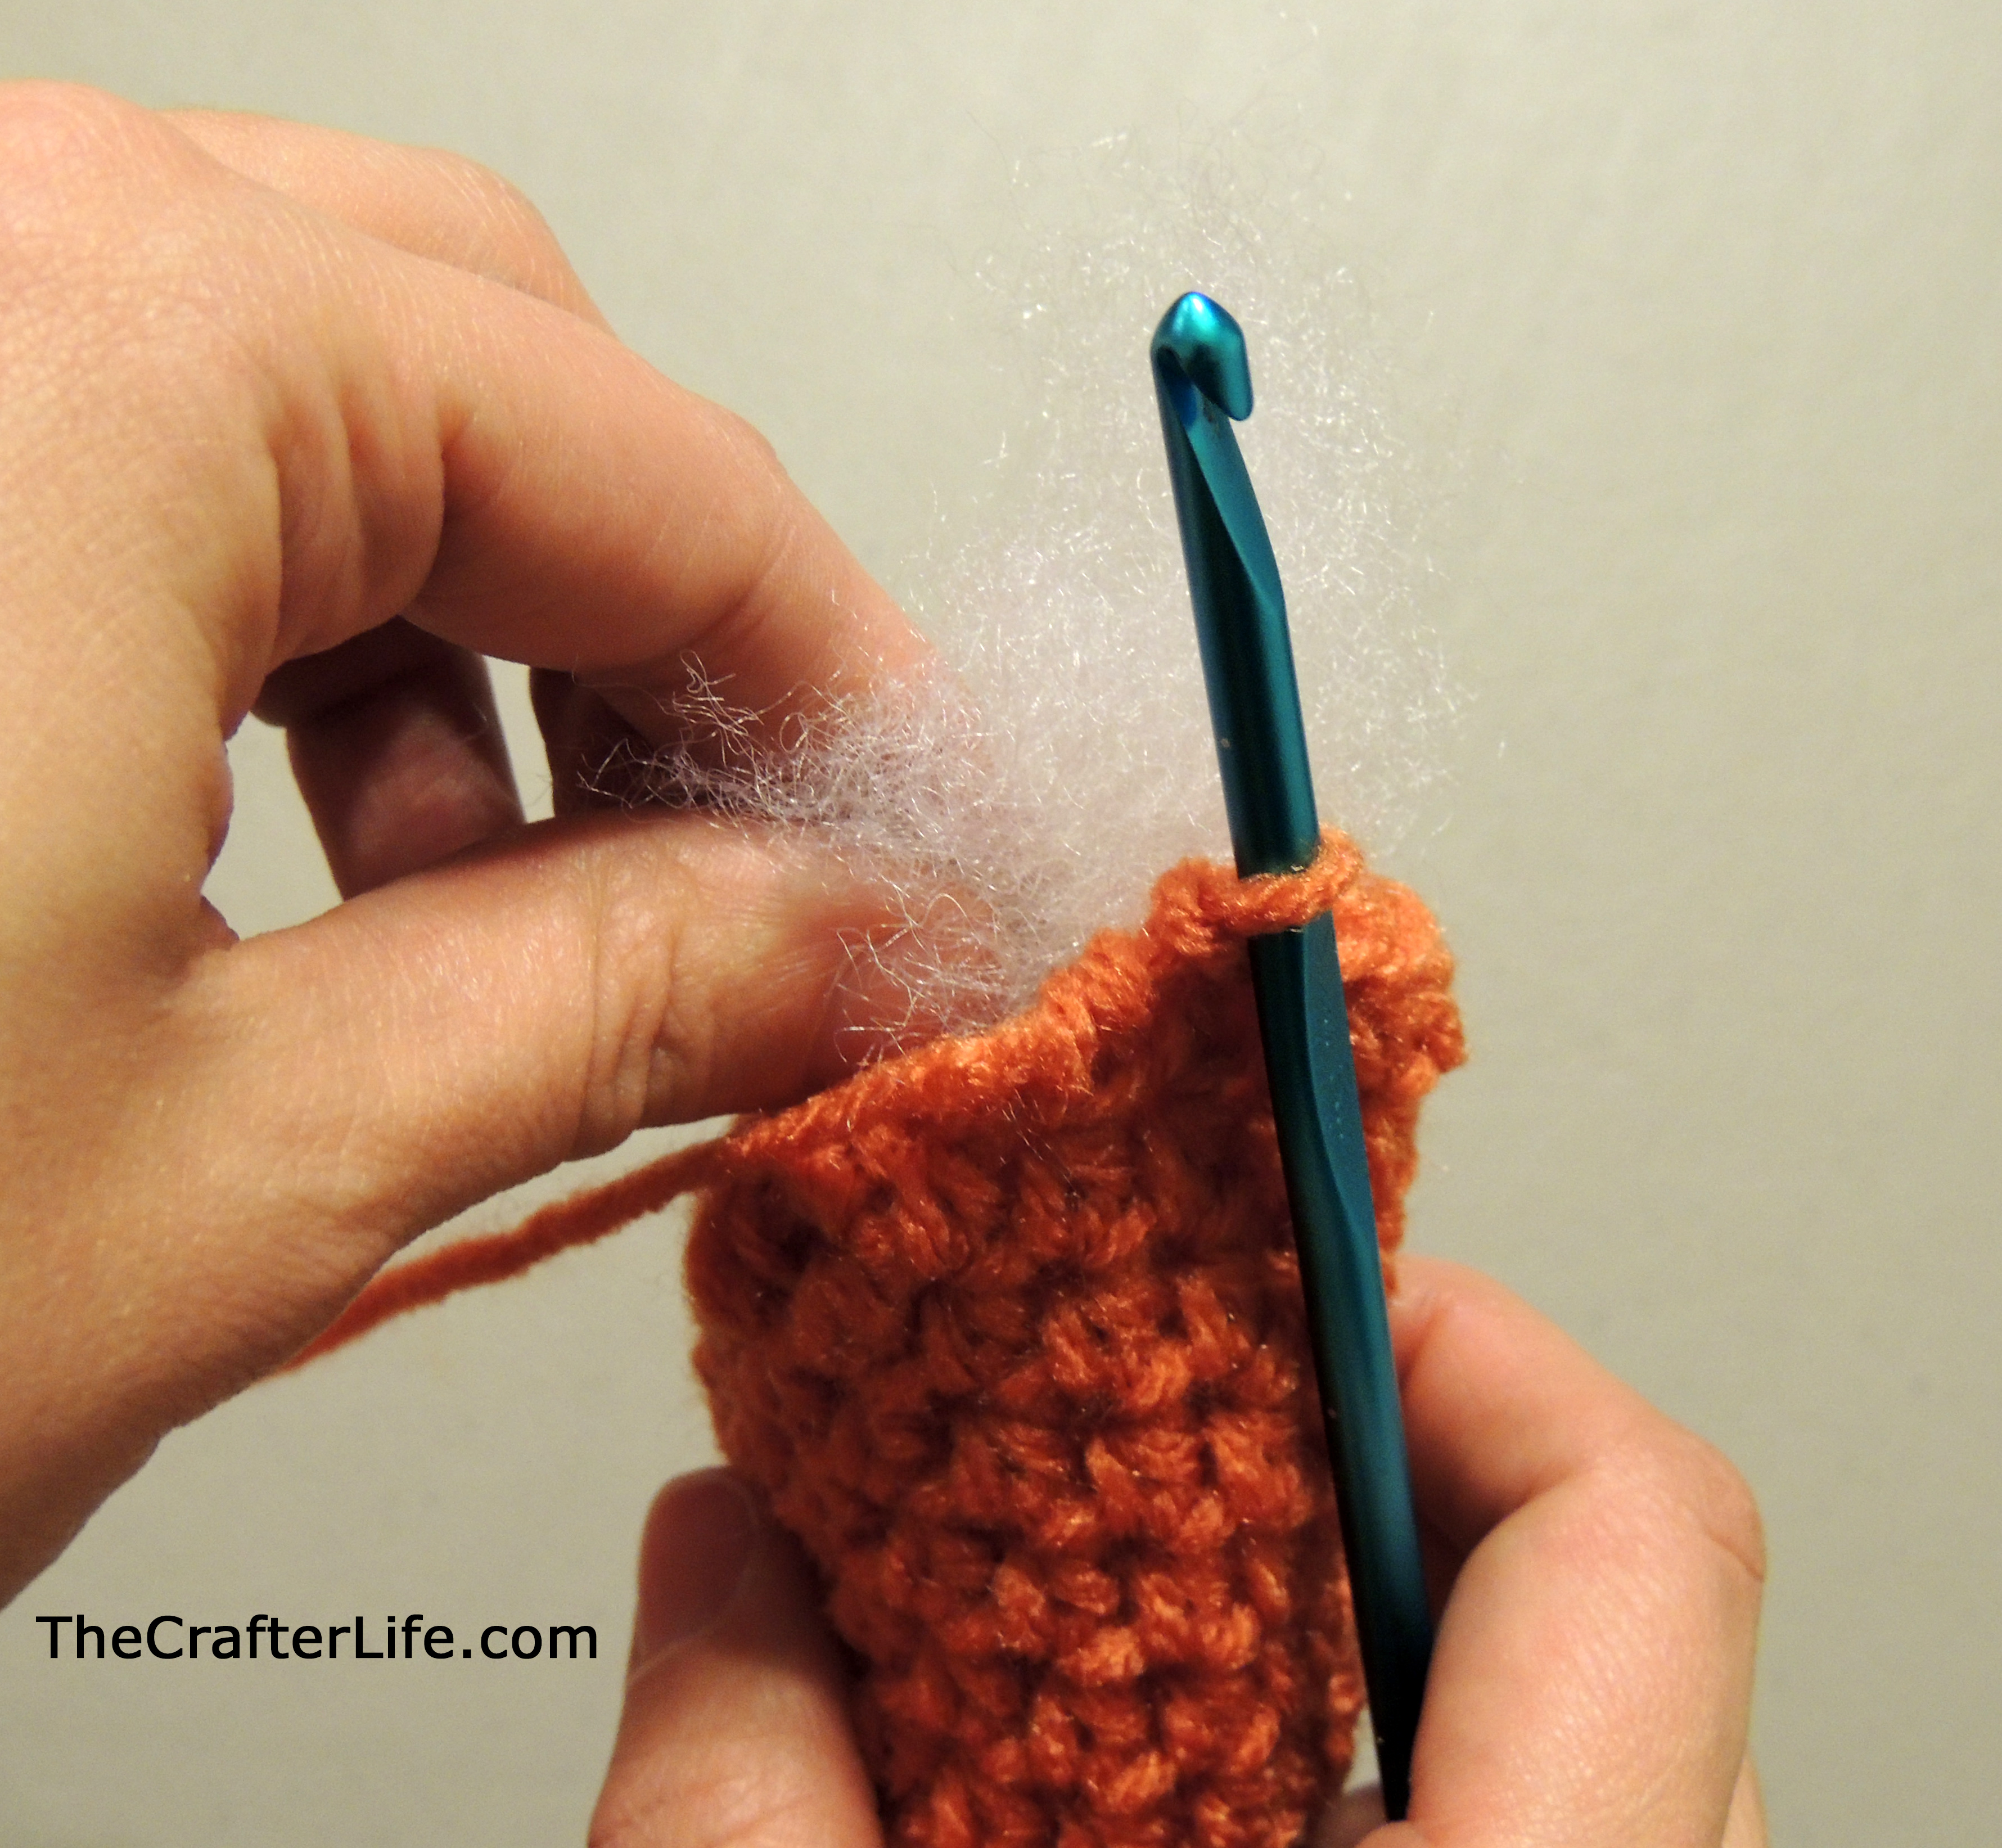
– Make sure to weave in initial loose end and turn the carrot right-side out before starting to stuff with fiberfill.
– Stuff loosely with fiberfill as you go.
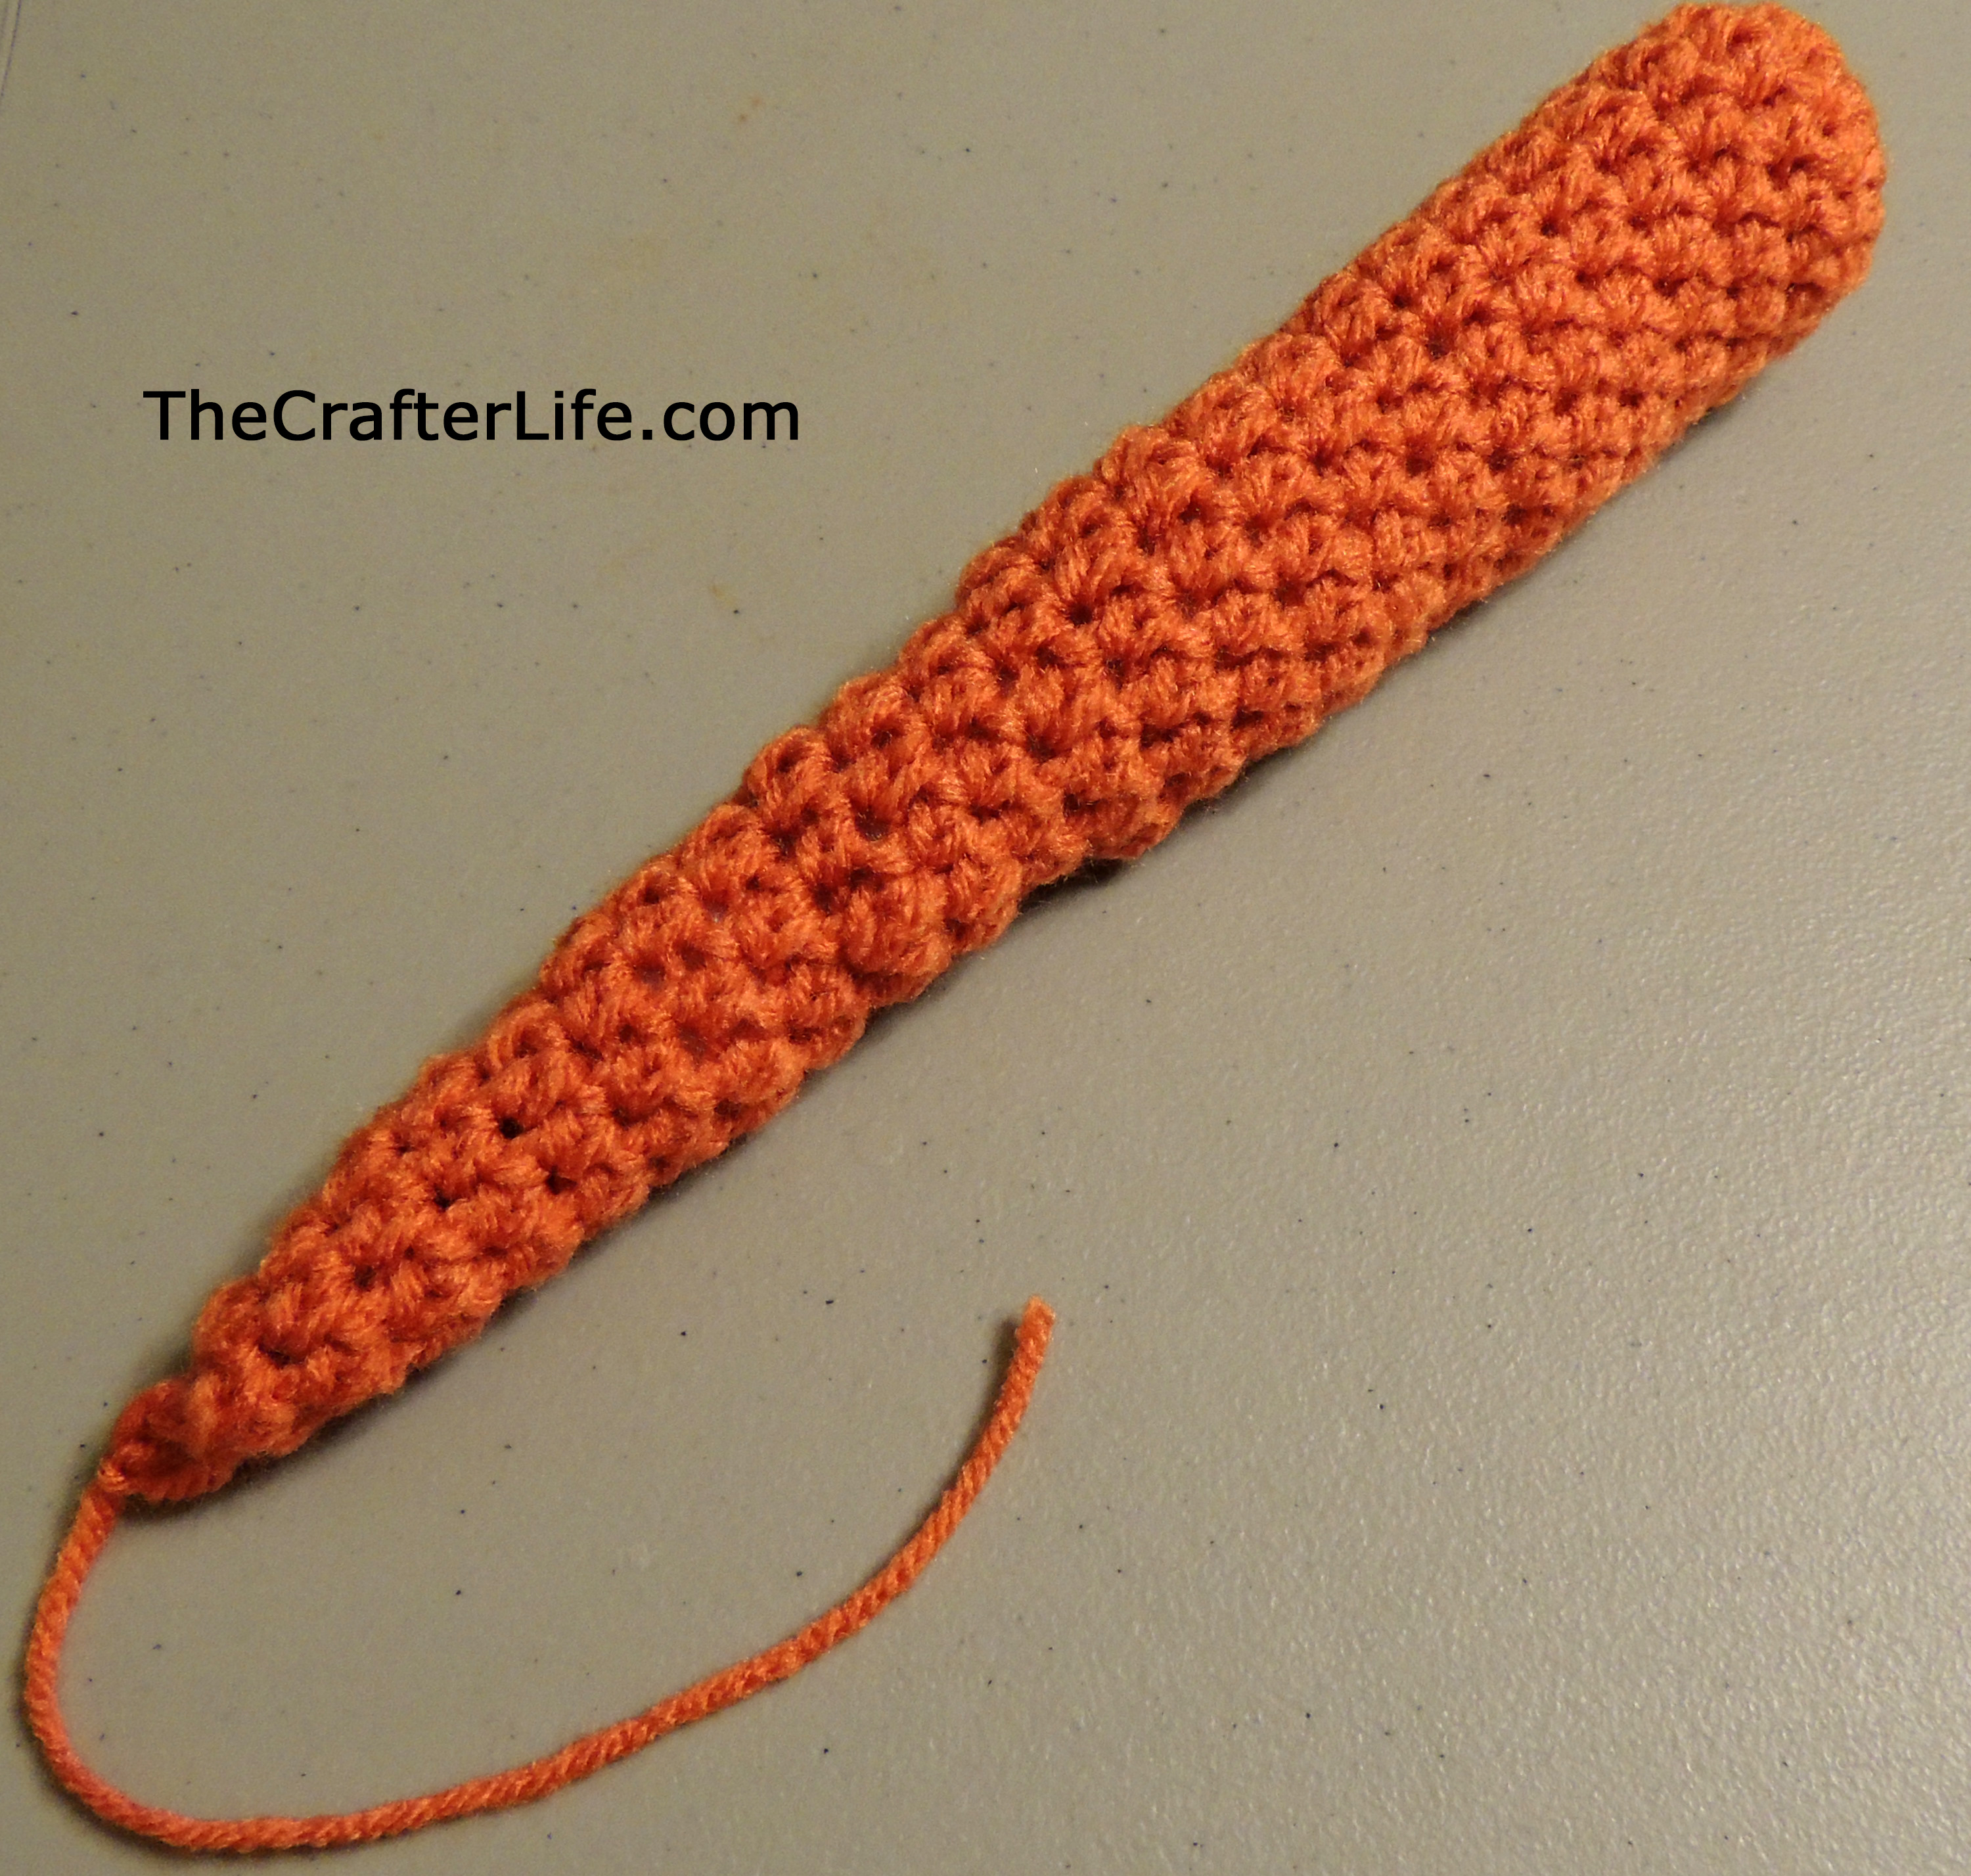
Carrot Pattern
Rnd 1: With orange yarn, magic circle, ch 1, 8 hdc in magic circle. (8 hdc)
Rnd 2: 2 hdc in each st around. (16 hdc)
Rnds 3-6: Hdc in each st around. (16 hdc)
Rnd 7: Hdc dec, hdc in next 14 sts. (15 sts)
Rnds 8-9: Hdc in each st around. (15 hdc)
Rnd 10: Hdc dec, hdc in next 13 sts. (14 sts)
*Make sure to turn your carrot right-side out and fill with fiberfill as you go.
Rnd 12: Hdc dec, hdc in next 12 sts. (13 sts)
Rnd 13: Hdc in each st around. (13 hdc)
Rnd 14: Hdc dec, hdc in next 11 sts. (12 sts)
Rnd 15: Hdc in first 5 sts, hdc dec, hdc in next 5 sts. (11 sts)
Rnd 16: Hdc dec, hdc in next 9 sts. (10 sts)
Rnds 17-18: Hdc in each st around. (10 hdc)
Rnd 19: Hdc dec, hdc in next 3 sts, hdc dec, hdc in next 3 sts. (8 sts)
Rnds 20-24: Hdc in each st around. (8 hdc)
Rnd 25: Hdc dec, hdc in next 6 sts. (7 sts)
Rnd 26: Hdc dec, hdc in next 5 sts. (6 sts)
Rnd 27: Hdc dec, hdc in next 4 sts. (5 sts)
Rnd 28: Hdc dec, hdc in next st, hdc dec. (3 sts)
Rnd 29: Hdc dec, hdc. (2 sts)
Rnd 30: Hdc dec, fasten off and weave in loose ends. (1 st)
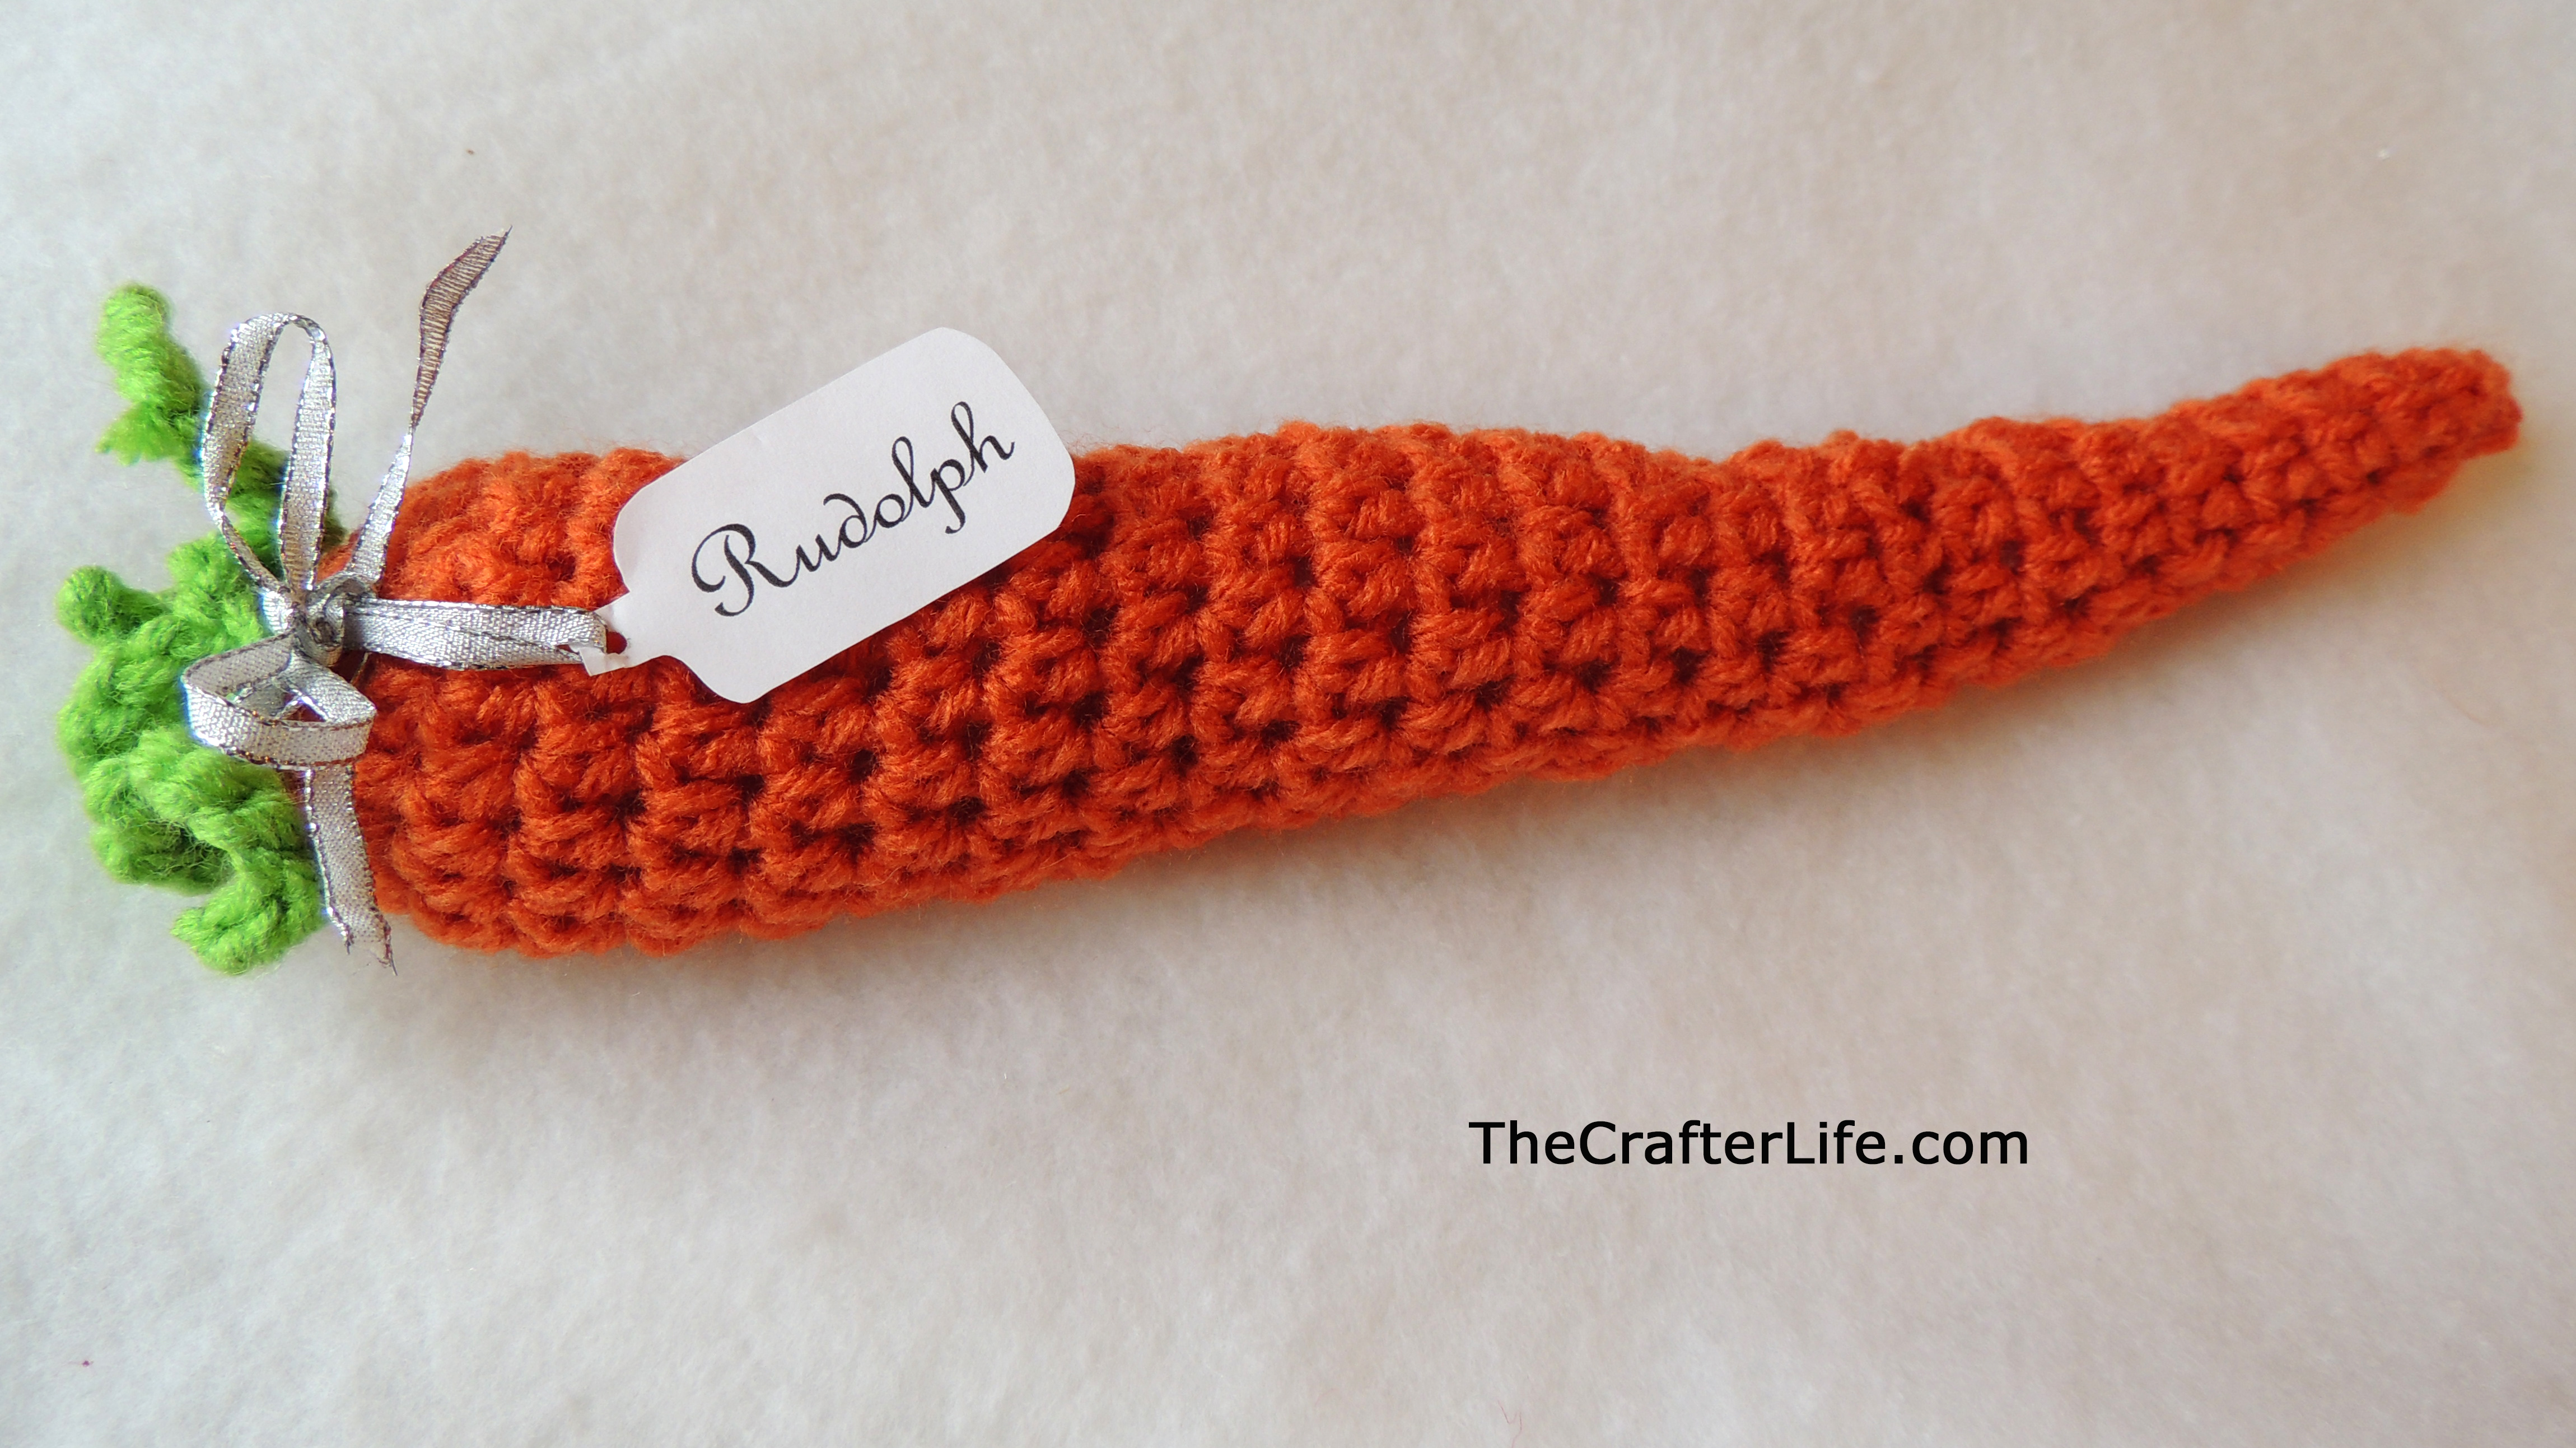
Carrot Top (make 2)
Row 1: Using green yarn, ch 20, fasten off, weave in ends. (20 ch)
ASSEMBLY
Attach the green carrot top to the carrot by taking one of the chains, inserting both ends through a stitch at the top of the carrot (but not all the way through so you have a loop on the other side), and then through the loop created by the chain. Pull the ends up through the loop so the carrot top becomes tightly secured to the carrot. You could also use a latch hook to attach the chain. Do the same process to attach the other chain to the top of the carrot.
*If you don’t like this look, you could always make 10 chains instead of 20 for the top and sew the chains to the top individually for a cleaner look.
Now you can place your carrots in your reindeer pail. Make nine carrots if you want one for each of Santa’s reindeer! Attach a gift tag to each carrot with a reindeer’s name on it so no reindeer gets forgotten!
You could also use this carrot in the spring for the Easter Bunny!
***If you sell products using my patterns or mention my patterns please link back to my site. Please do not sell my patterns or claim them as your own.***
Feel free to post comments here or put a picture of your hat on my Facebook page!
**If you like what you see, feel free to pin, share, and link back to my site. Thank you for visiting!

Advent Calendar Activity