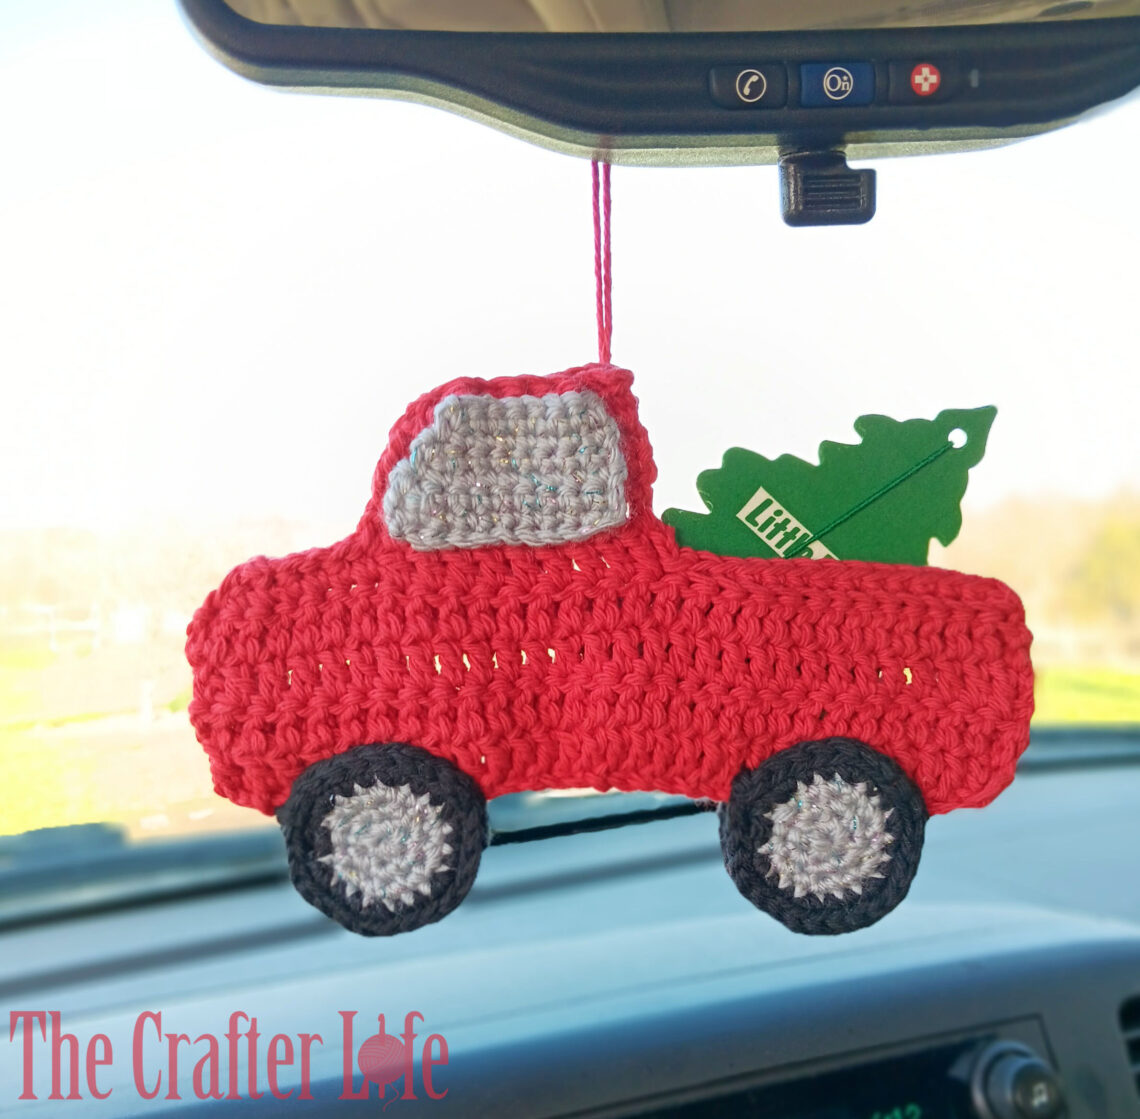
Truck Air Freshener Holder
I wanted to crochet something for my husband for Valentine’s Day this year and as usual, I came up with something at the last minute. I tried to think of something he could use for his truck and I came up with the idea of an air freshener holder. The pine tree car air fresheners popped into my head and I immediately thought of a pickup truck with a pine tree in the bed, like the popular image of a red pickup truck hauling a pine tree for Christmas. I thought it would be cute to make my husband a black pickup truck air freshener holder for Valentine’s Day since his truck is black. I also made a red one because I think it would make a cute gift during the holiday season. If you or someone you know has a pickup truck or likes pickup trucks, follow my pattern below to make a pickup truck air freshener holder in your favorite truck color. If you are looking for something to crochet as a gift for a guy in your life, this is a great option. It can be made with a loop used to hang it in the rearview or without the loop so it can be placed elsewhere in the vehicle. It can also be used to hold other small items. I hope you enjoy my newest crochet pattern!
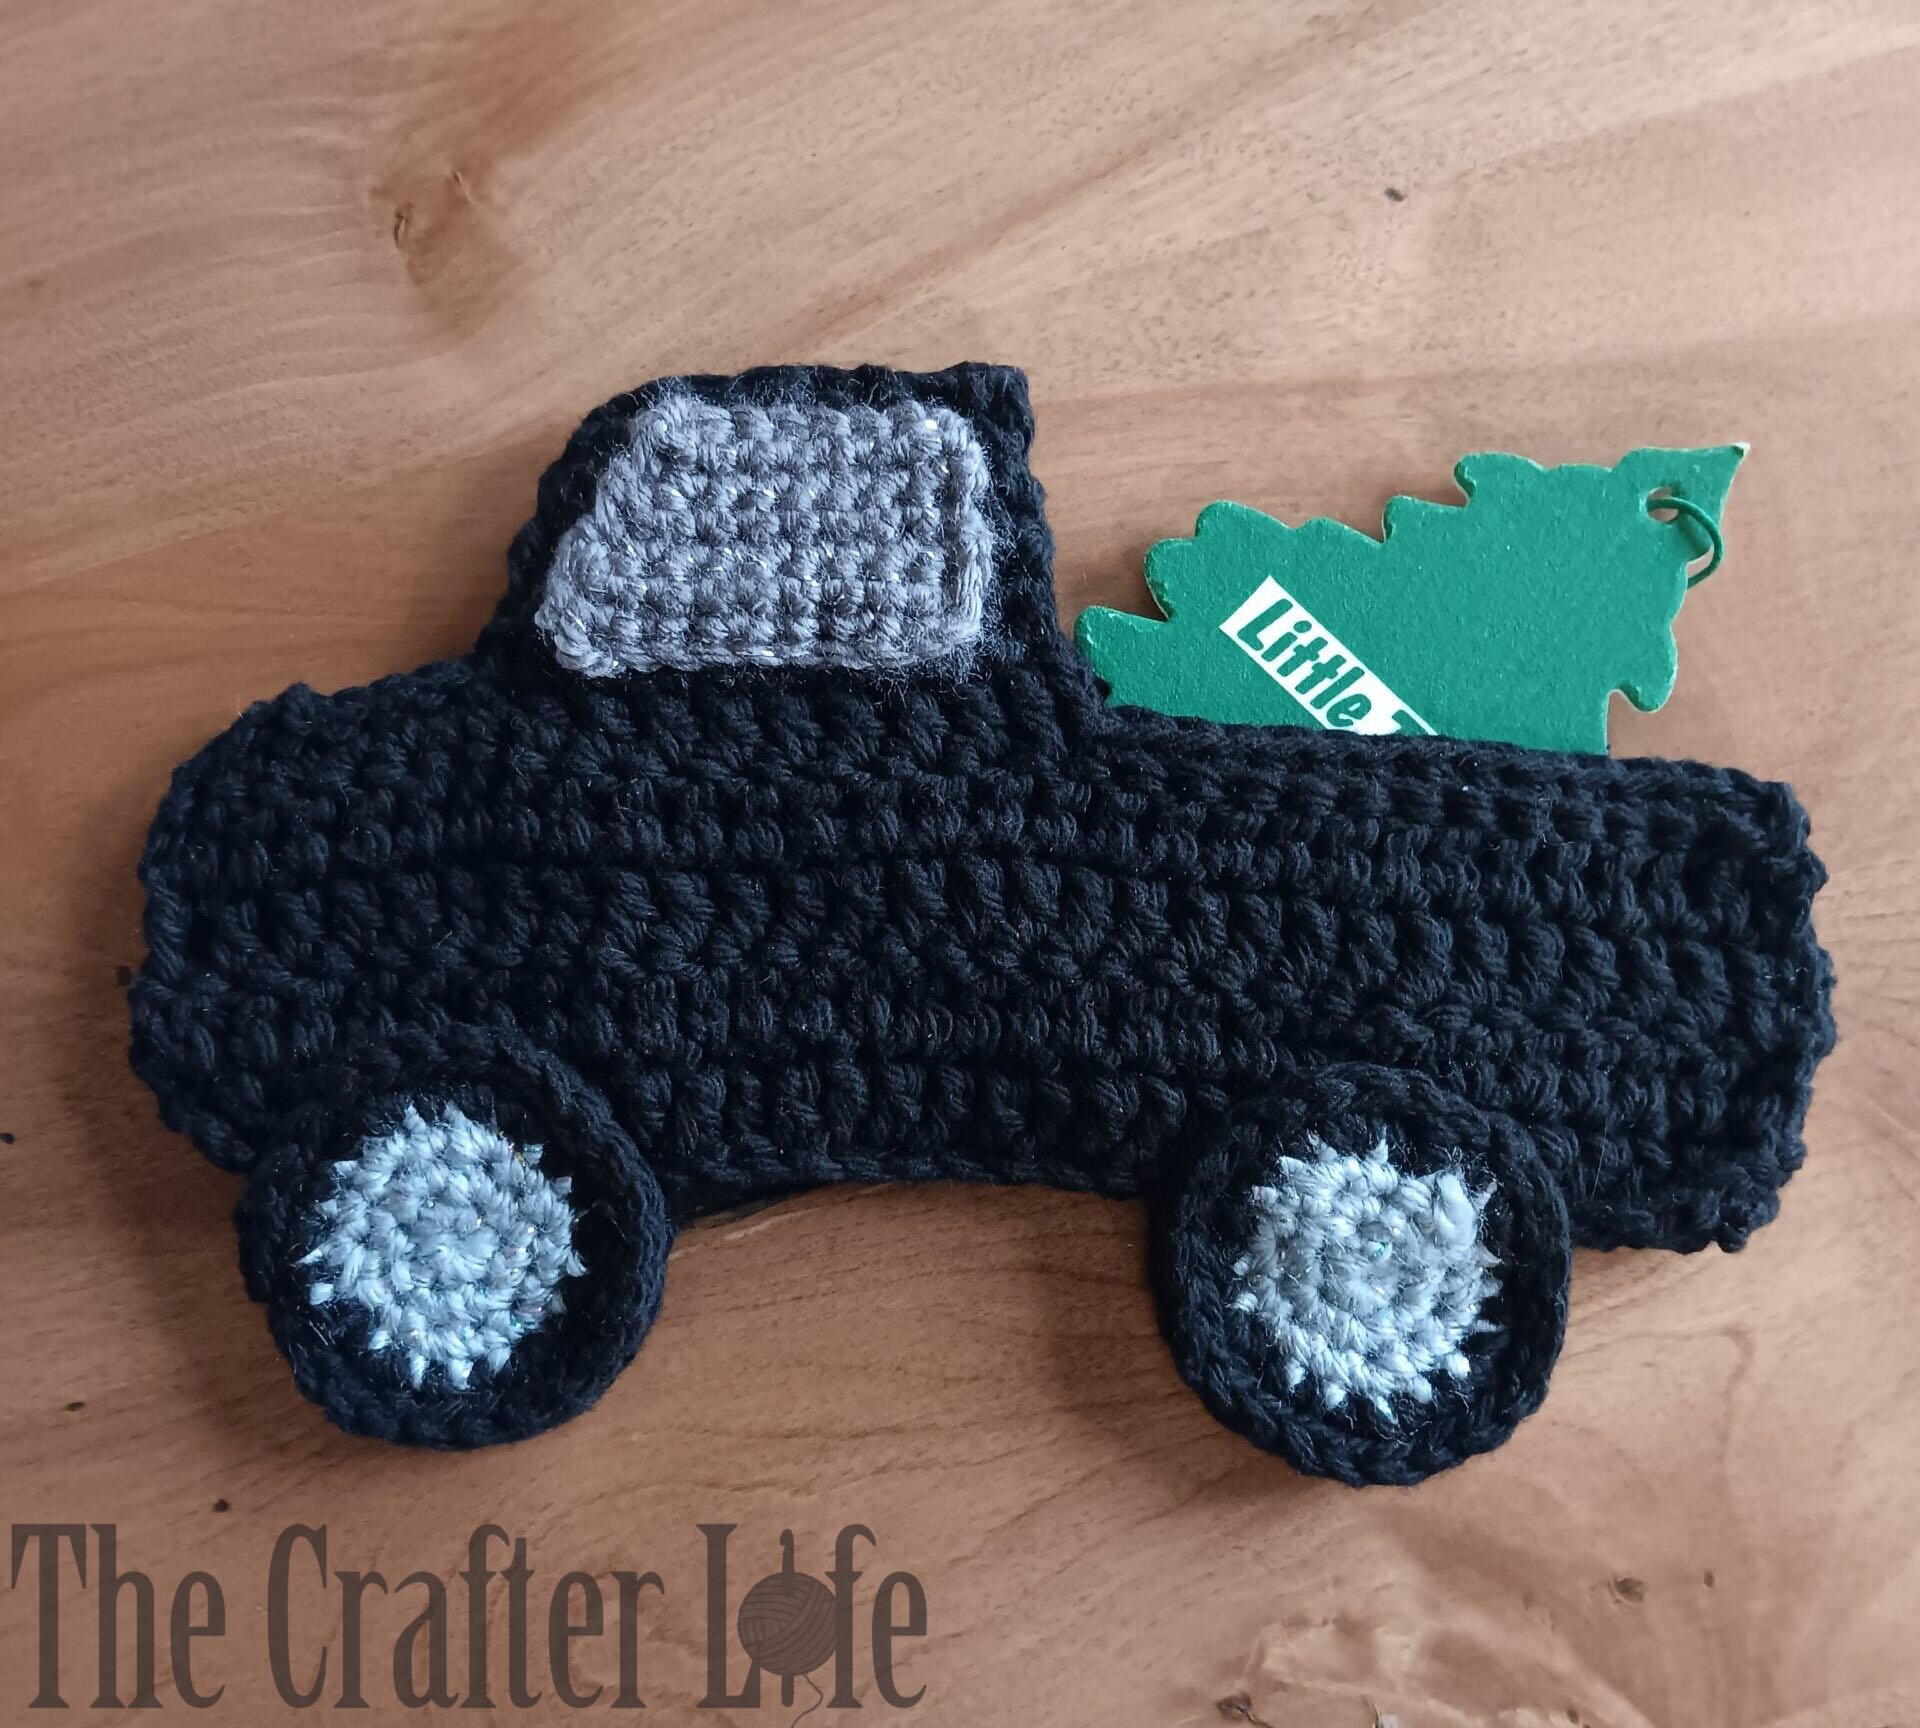
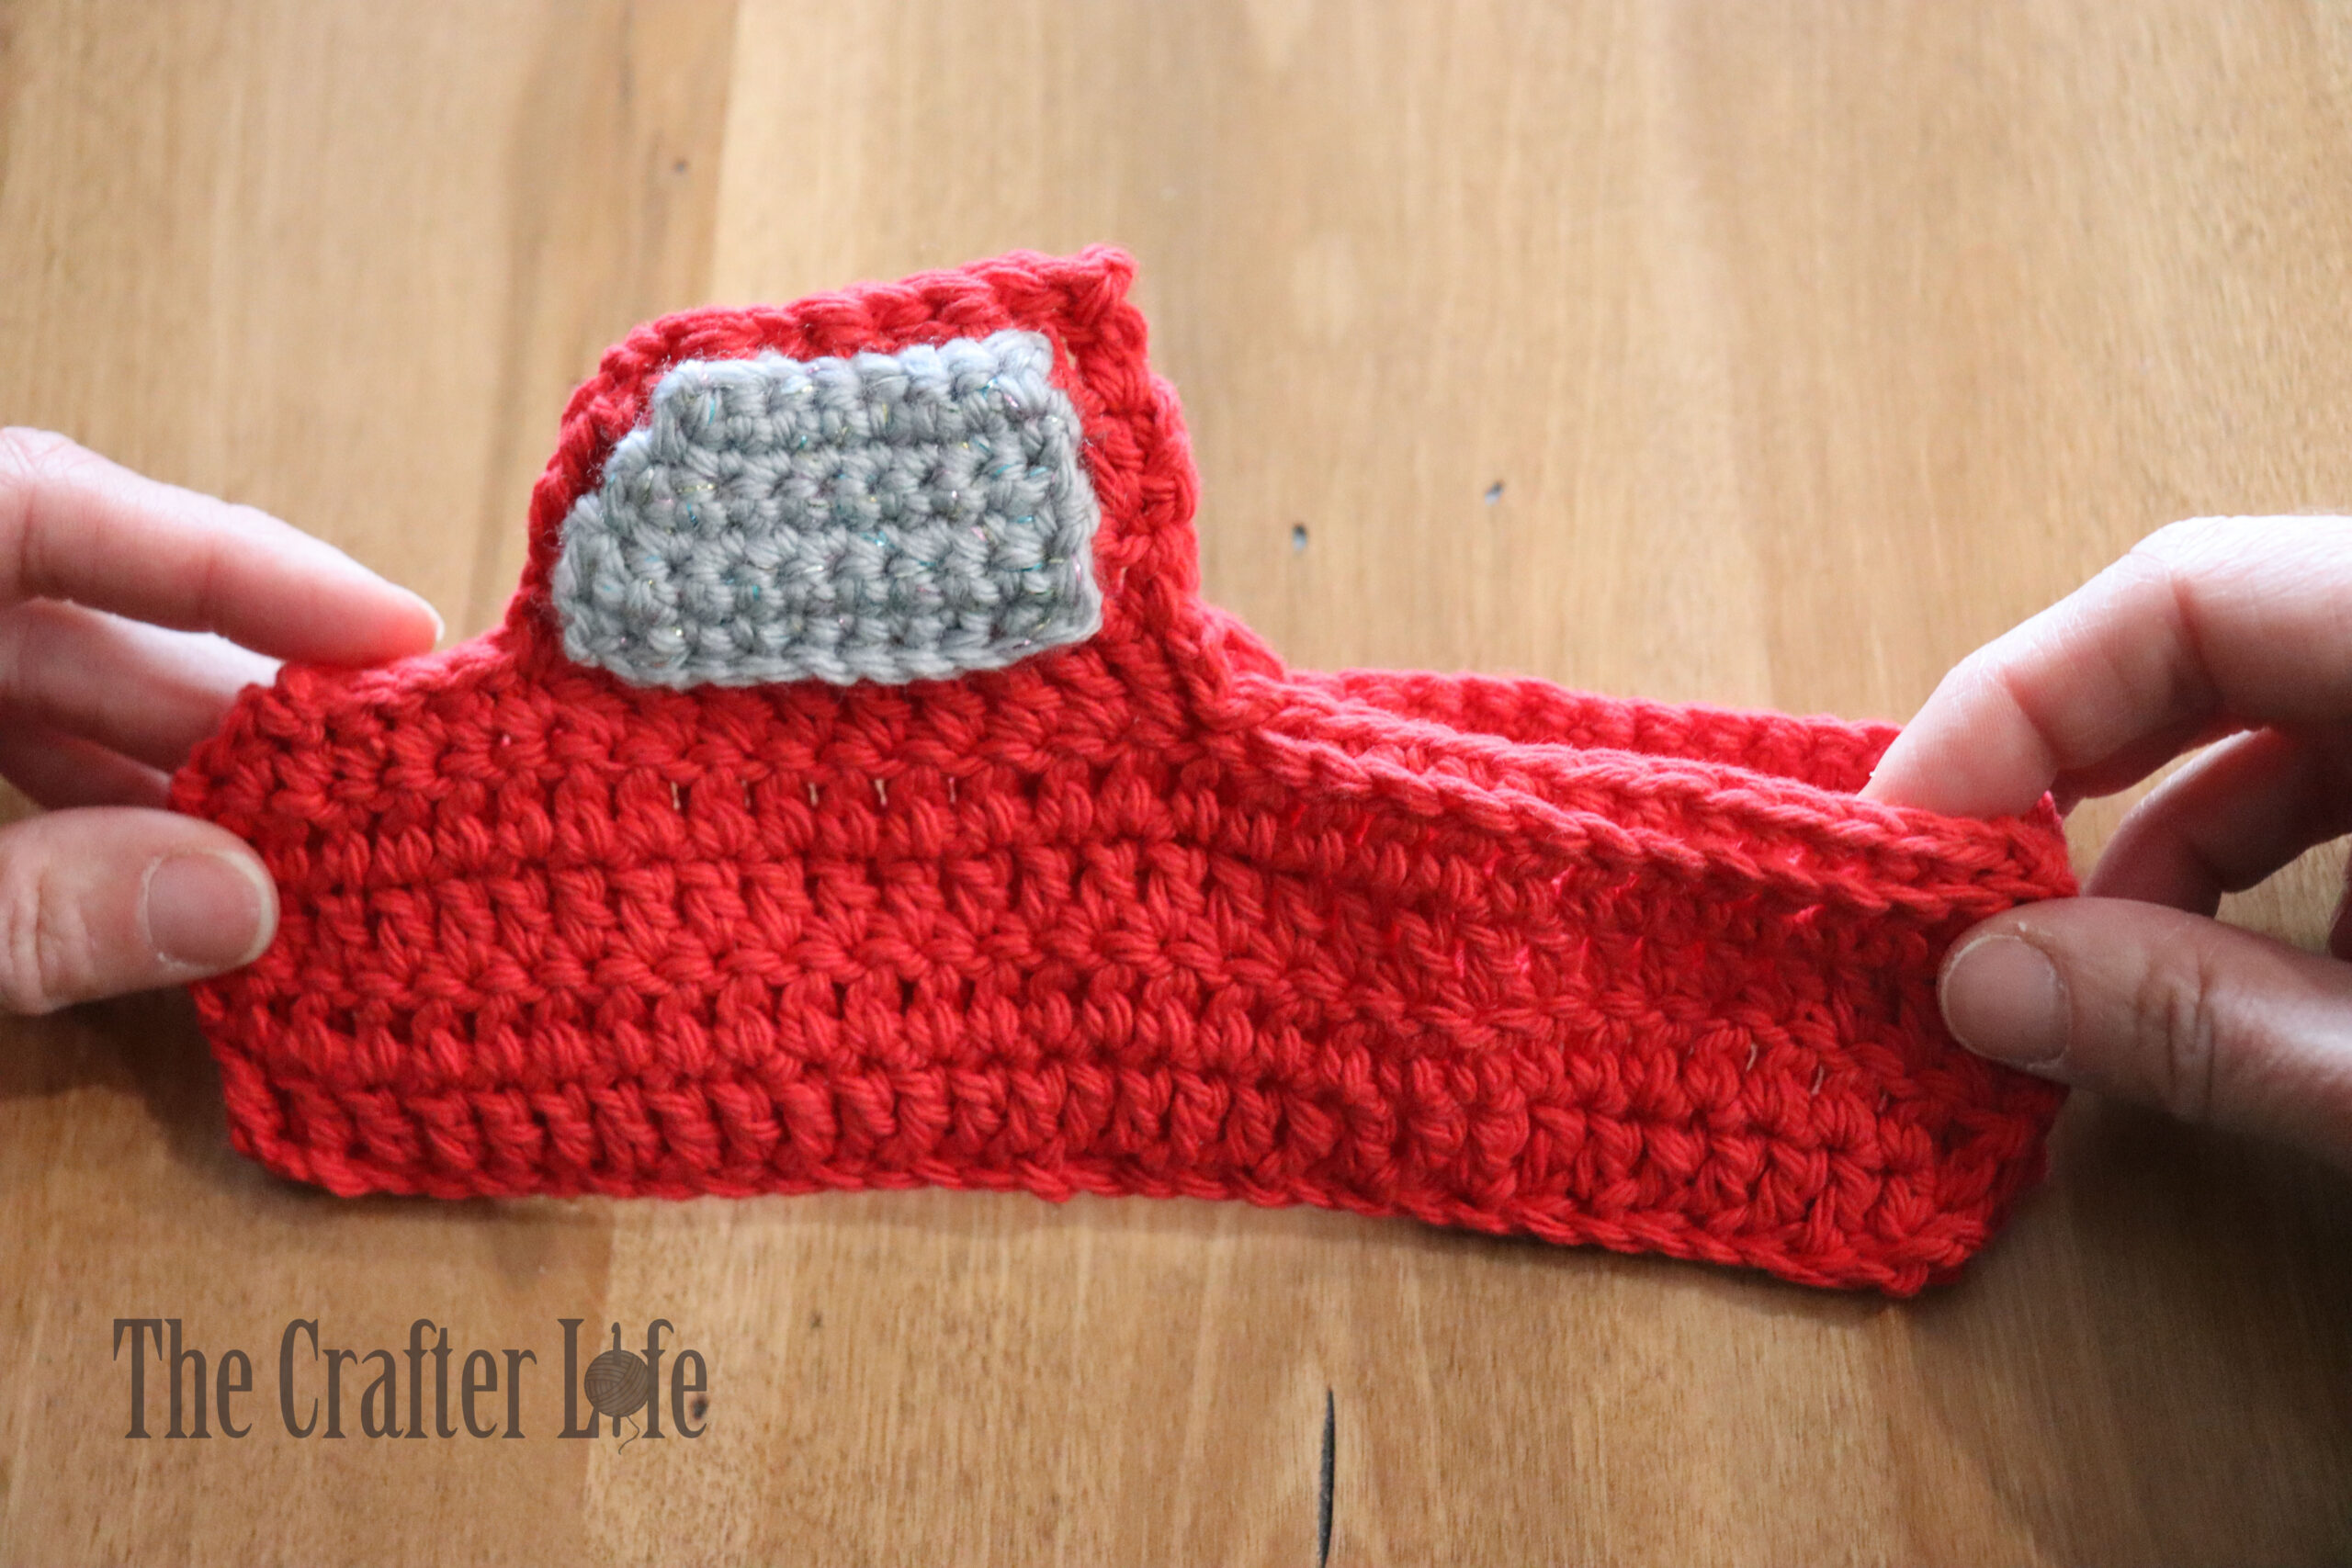
The top of the truck’s bed is not sewn closed to create a pocket
This air freshener holder pattern is meant to be used with most flat or small car air fresheners (specifically the Little Trees pine tree air fresheners). It can be made to hang up or lay flat. It can also be used as a money holder, gift card holder, or holder for other small objects/gifts.
 ETSY PATTERN WITH MULTIPLE PICTURES AVAILABLE
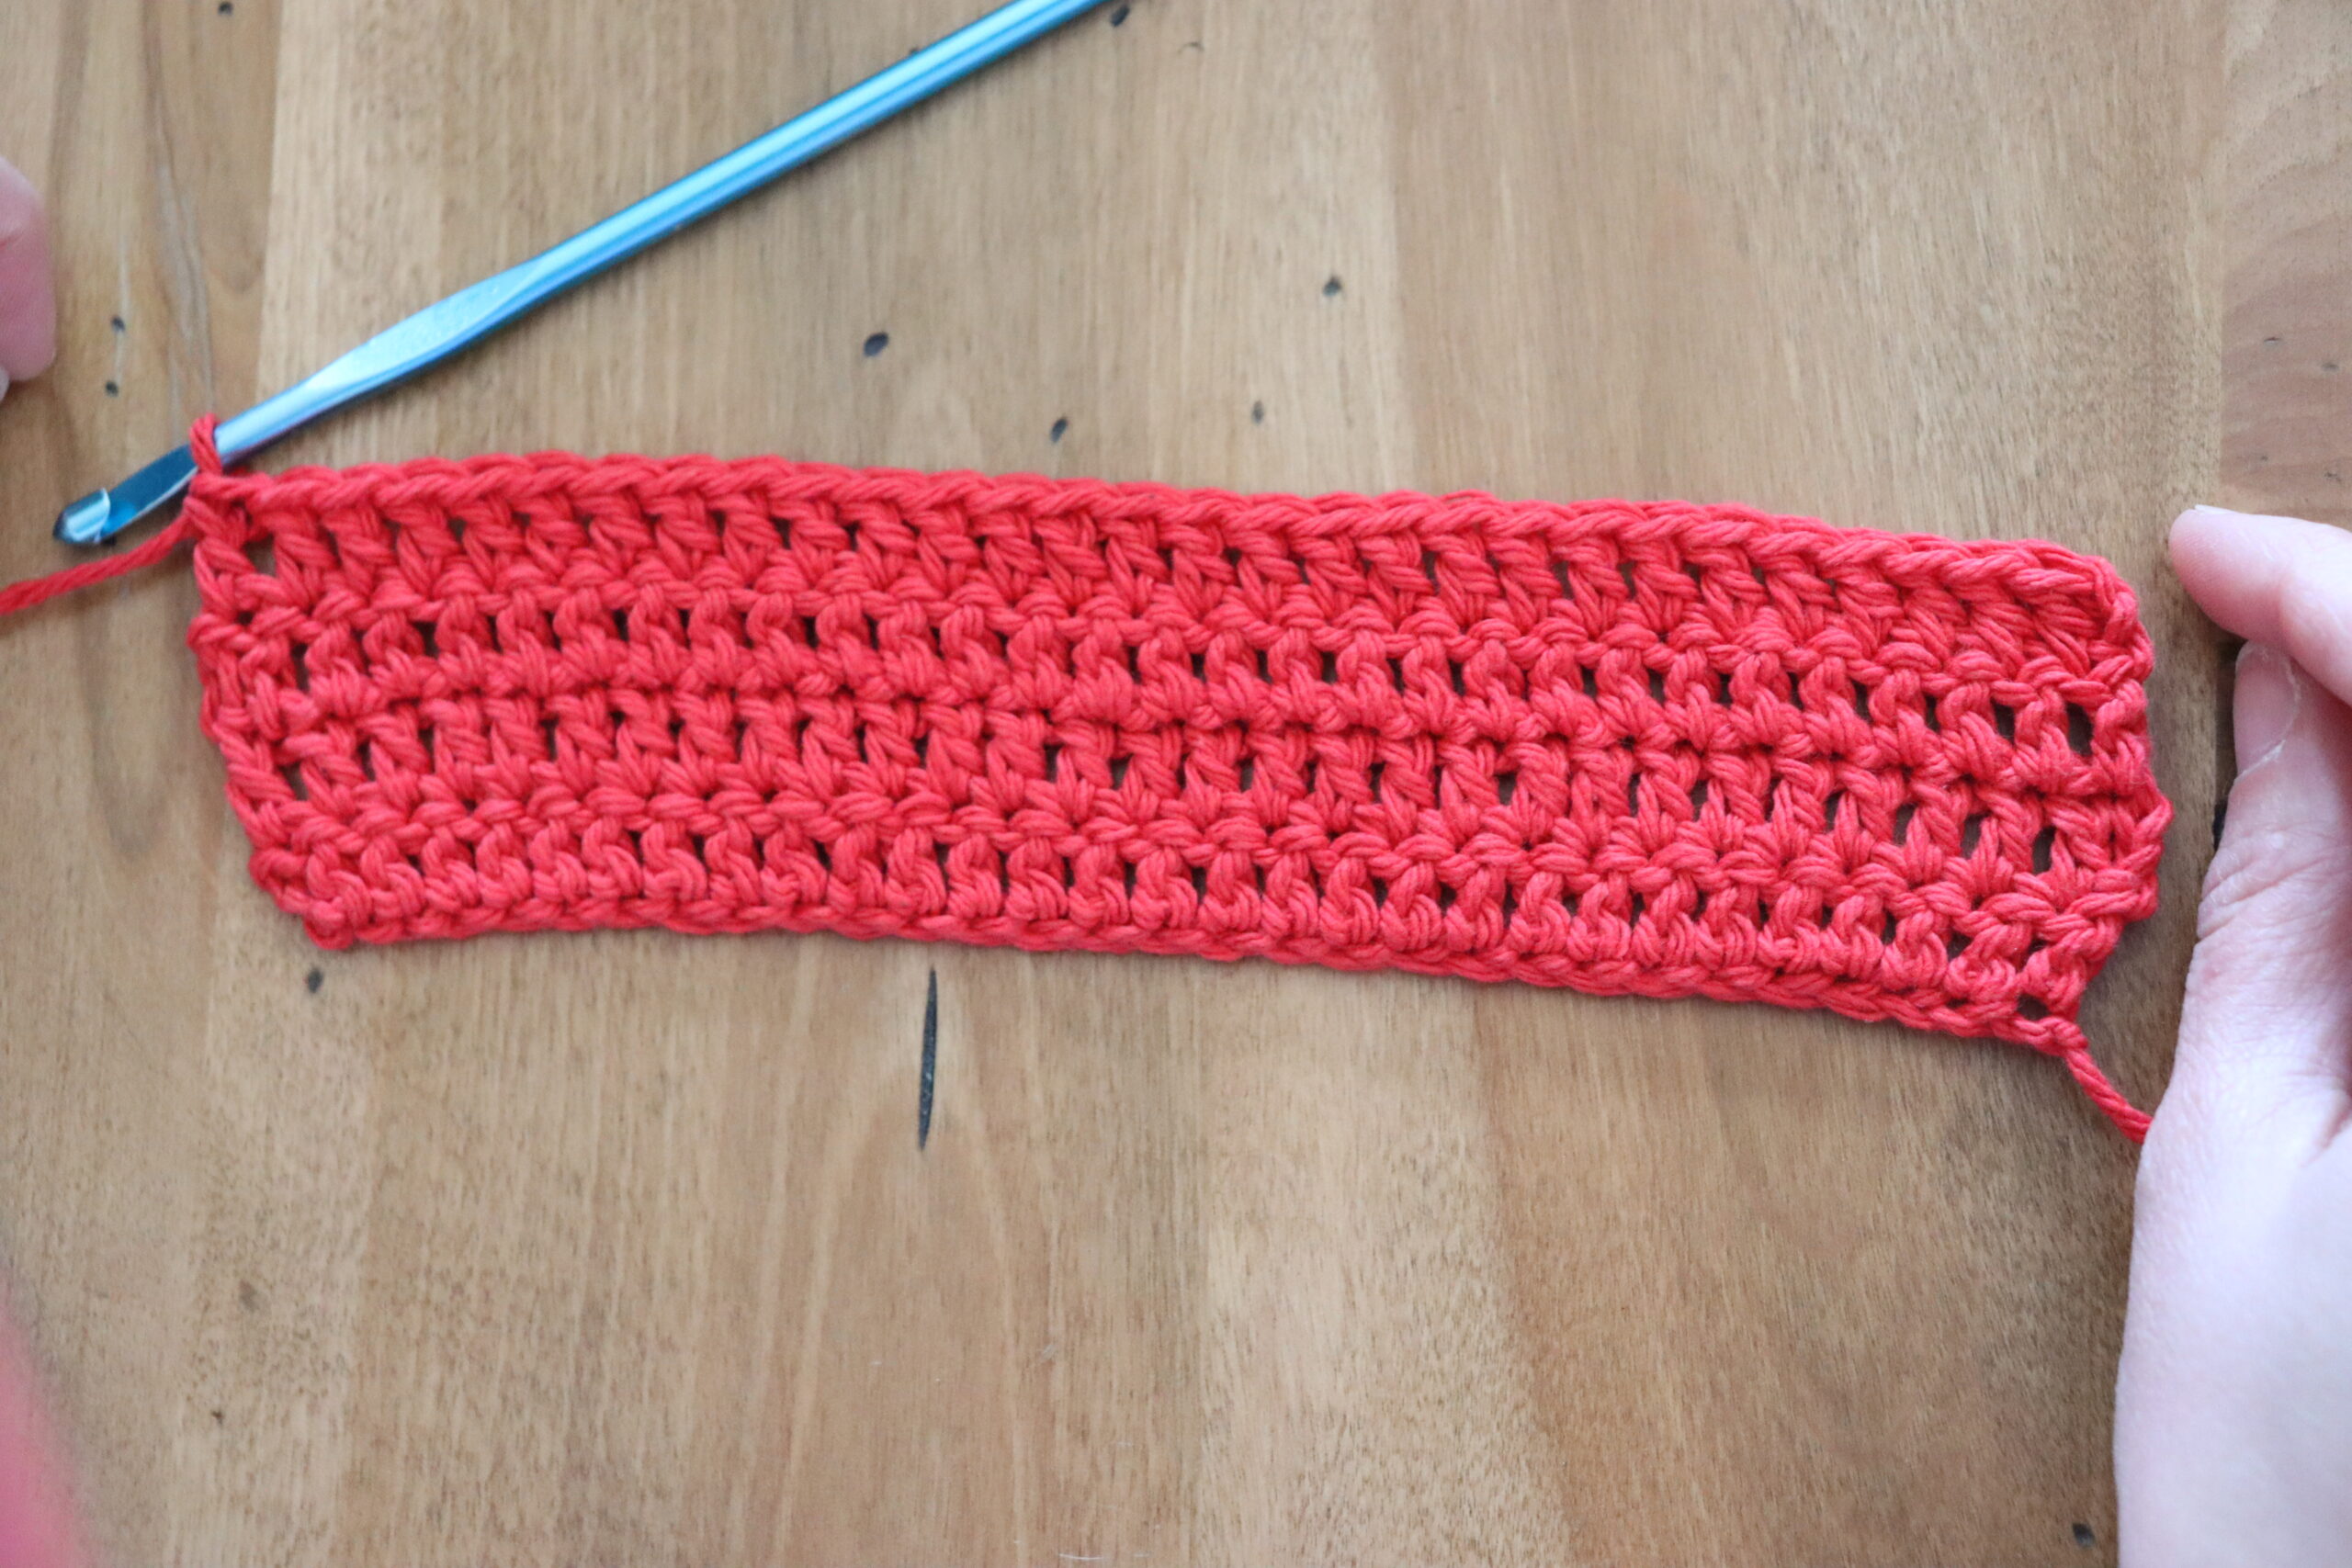
FINISHED MEASUREMENTS
The finished truck air freshener holder is approximately 8 inches wide (from front to back) by 5 inches tall (from the very top to the bottom of the tires). The truck body is about 4 inches tall without the tires. The truck tires are about 2 inches in diameter.
MATERIALS
– Size H/8/5.00mm crochet hook or size needed to obtain gauge
– Cotton worsted weight (4) yarn in your Main Color (MC) choice (I used Lily Sugar ‘n Cream yarn in Black for the black truck and Lily Sugar ’n Cream yarn in Red for the red truck.)
– Worsted weight (4) acrylic sparkle yarn in Silver (I used Caron Simply Soft Party yarn in Silver Sparkle for tires and window of red truck shown in photo.)
– Optional (if you want a darker/tinted window): Worsted weight (4) acrylic sparkle yarn in Gray (I used Caron Simply Soft Party yarn in Platinum Sparkle for window of black truck shown in photo.)
– Scissors
– Tapestry needle for weaving in ends and sewing on parts of truck
– Stitch markers (Optional – if needed for counting/marking stitches)
– Straight Pins (Optional – if needed for holding parts in place when sewing together)
– Measuring tape
ABBREVIATIONS
– ch = chain
– chs = chains
– dc = double crochet
– dc2tog = double crochet decrease
– sc = single crochet
– sc2tog = single crochet decrease
– slst = slip stitch
– st = stitch
– sts = stitches
– MC = Main Color
GAUGE
4 dc = 1 inch
2 rows of dc = 1 inch
PATTERN NOTES
- The body of the truck is made first in rows. The windows are also made in rows. The tires are made in joined rounds of single crochet stitches.
- Brackets [ ] indicate portions of the pattern to be repeated.
- After attaching the windows to the outside of the truck body pieces, the truck body pieces are sewn together around the perimeter except for the top of the truck bed, which is left open for the pocket to hold the air freshener. The tires are attached to the truck last, sewing each pair of tires together and to the bottom of the truck at the same time.
DIRECTIONS
Truck Body (Side 1)
*Use your 5.00 mm hook and Main Color (MC) yarn to work the truck body.
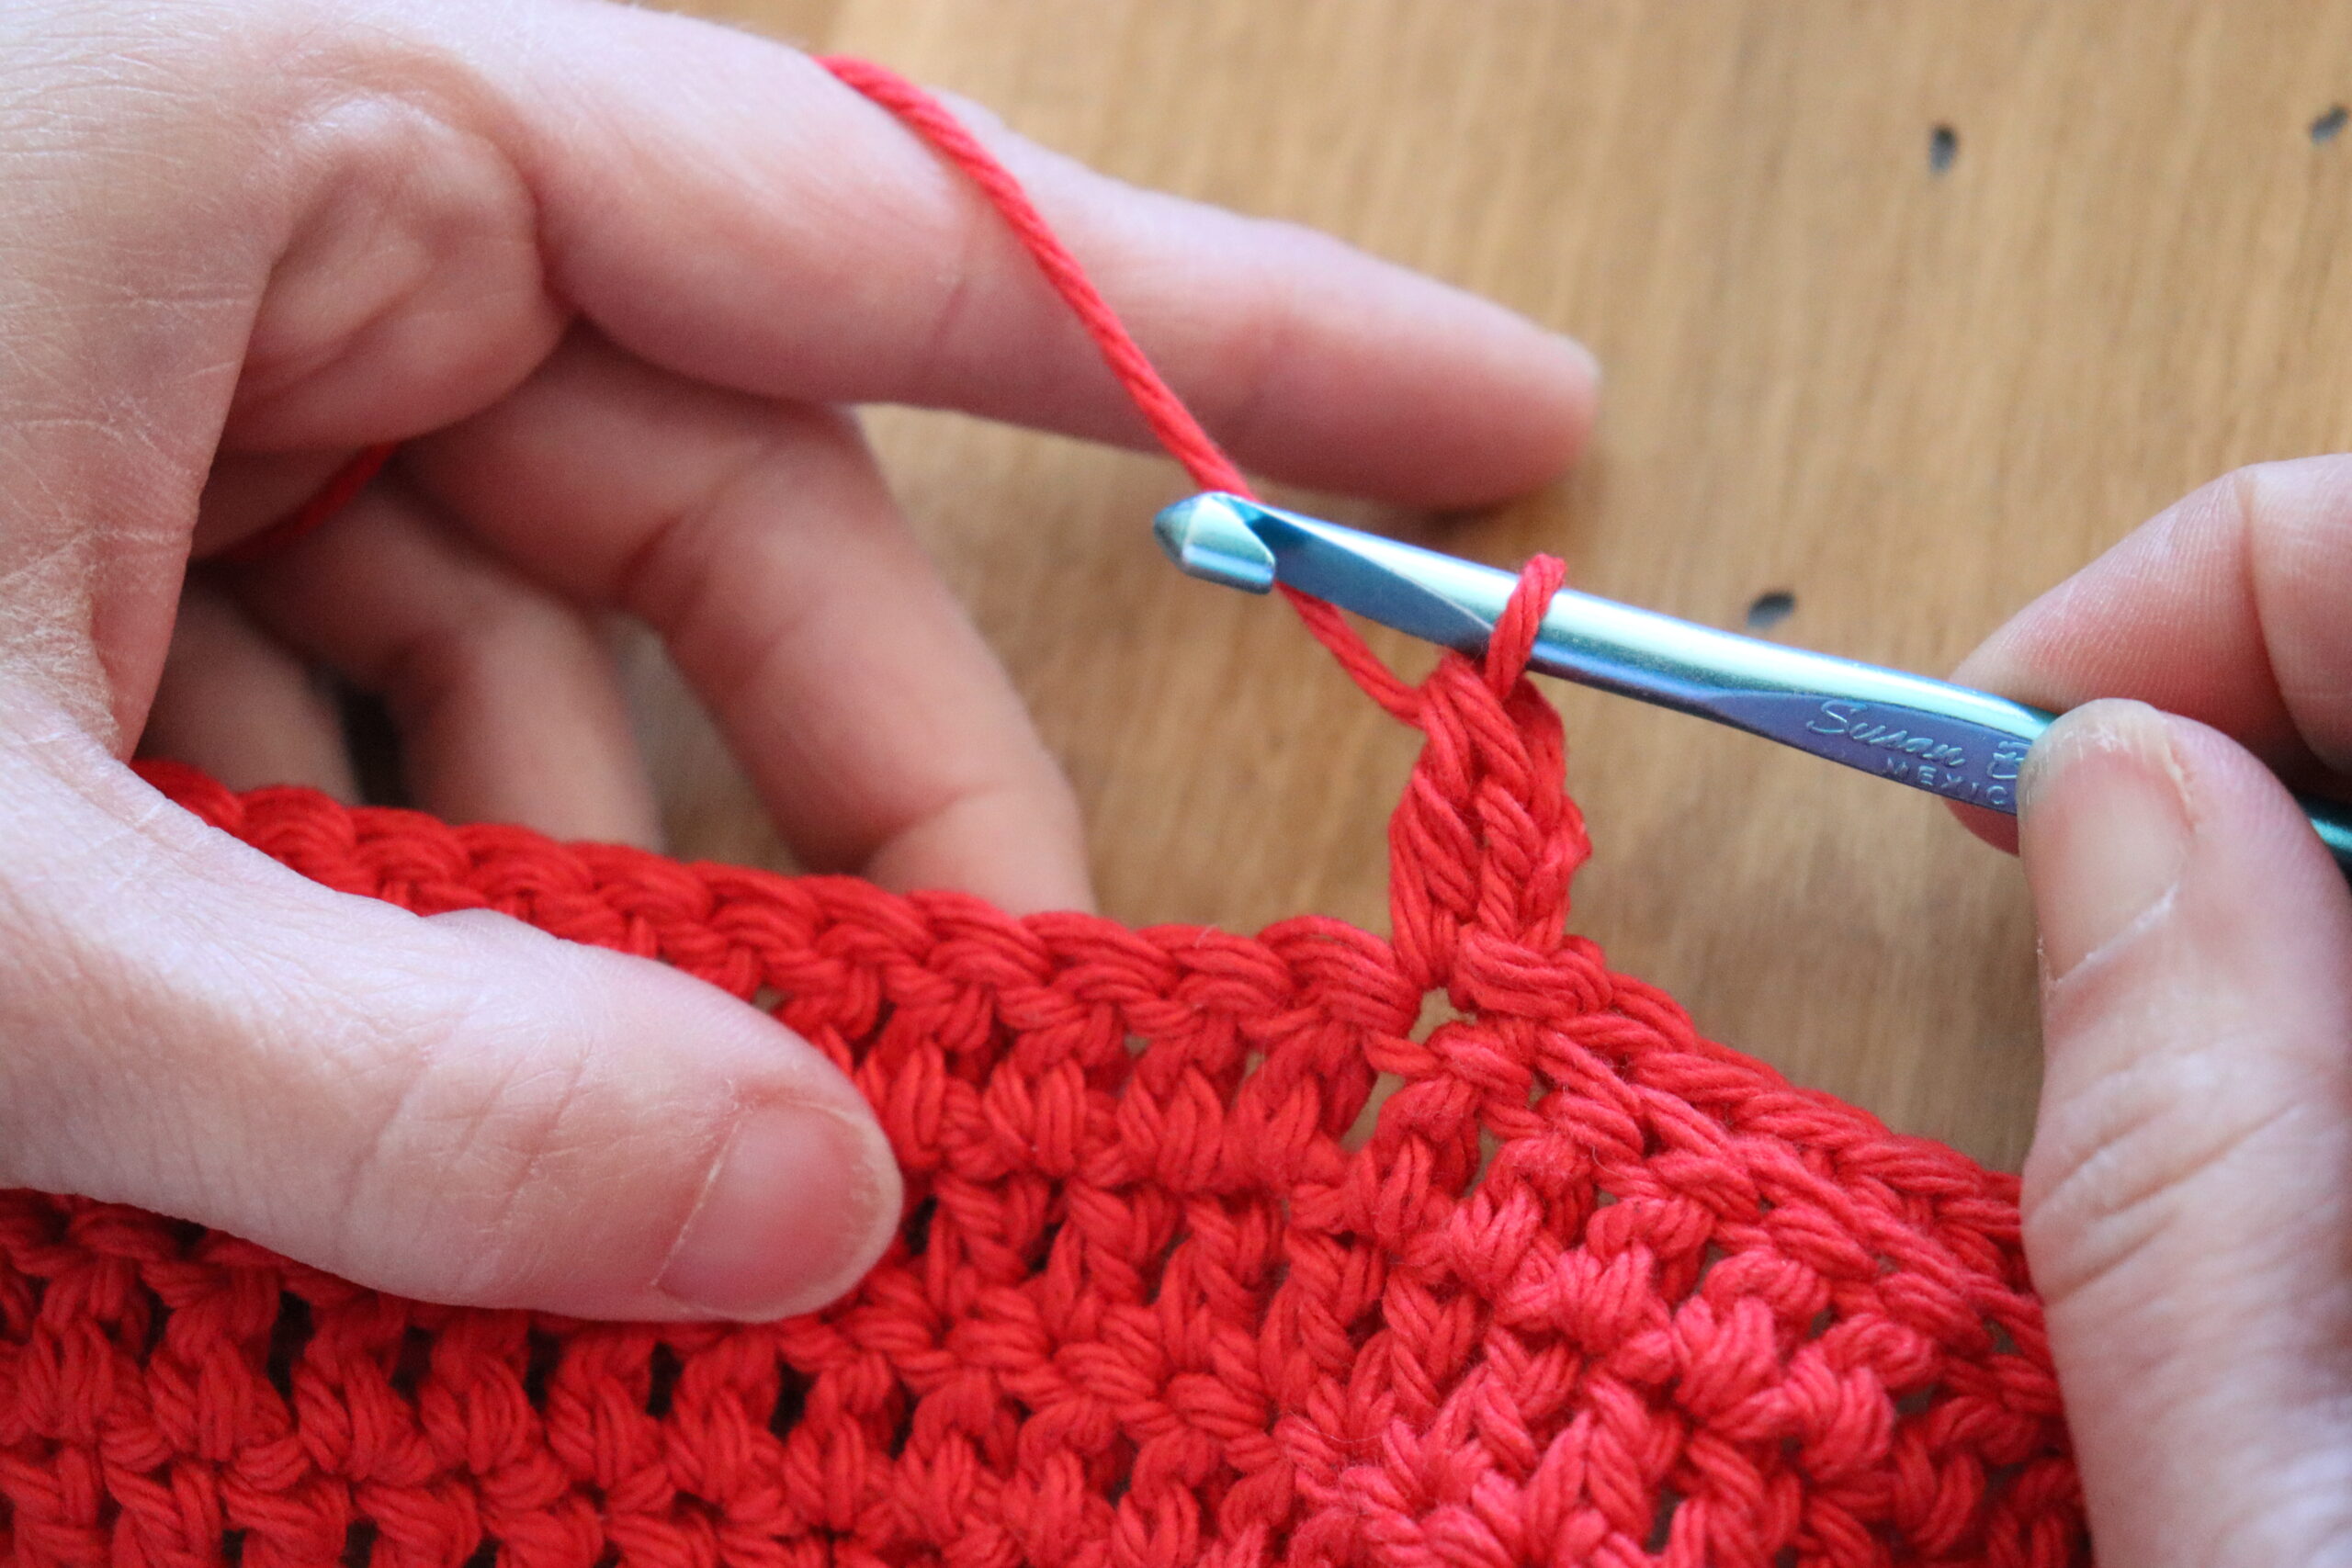
Row 1: Ch 31, dc in 3rd ch from hook, dc in each remaining ch across. (29 dc)
Rows 2-4: Ch 2, turn, dc in each st across. (29 dc)
Row 5: Ch 1, turn, sc in back loop only of next 13 sts, work (slst, ch 2, dc) in next st, dc in next 8 sts, sc in next 5 sts, sc2tog. (18 sc, 9 dc, 1 sc2tog; 28 total sts)
Row 6: Ch 1, turn, skip first st, slst in next 5 sts, ch 1, dc in next 9 sts. (5 slst, 9 dc; 14 total sts)
Row 7: Ch 2, turn, dc in next 7 sts, dc2tog. (7 dc, 1 dc2tog; 8 total sts)
Row 8: Ch 2, turn, dc2tog, dc in next 6 sts, fasten off, leaving long tail for sewing truck bodies together. (1 dc2tog, 6 dc; 7 total sts)
Truck Body (Side 2)
*Use your 5.00 mm hook and Main Color (MC) yarn to work the truck body.
Row 1: Ch 31, dc in 3rd ch from hook, dc in each remaining ch across. (29 dc)
Rows 2-4: Ch 2, turn, dc in each st across. (29 dc)
Row 5: Ch 1, turn, sc2tog, sc in next 5 sts, dc in next 8 sts, work (dc, dc, slst) in next st, sc in back loop only of next 13 sts, fasten off. (18 sc, 10 dc, 1 sc2tog; 29 total sts)
***DO NOT TURN WORK after fastening off at the end of Row 5. Attach Main Color (MC) yarn to 1st stitch of Row 5 (right side of Row 5).***
Row 6: Do not turn work, attach Main Color (MC) yarn to first st of Row 5, ch 1, skip first st, slst in next 5 sts, ch 1, dc in next 9 sts, (do not work in 10th st). (5 slst, 9 dc; 14 total sts)
Row 7: Ch 2, turn, dc in next 7 sts, dc2tog. (7 dc, 1 dc2tog; 8 total sts)
Row 8: Ch 2, turn, dc2tog, dc in next 6 sts, fasten off, leaving long tail for sewing truck bodies together. (1 dc2tog, 6 dc; 7 total sts)
***Once you have completed both truck body pieces, follow the directions below to make the window pieces.
Window (Make 2)
*Use your 5.00 mm hook and Gray or Silver Sparkle yarn (your choice) to work the truck window.
Row 1: Ch 11, sc in 2nd ch from hook, sc in each remaining ch across. (10 sc)
Row 2: Ch 1, turn, sc2tog, sc in next 8 sts. (1 sc2tog, 8 sc; 9 total sts)
Row 3: Ch 1, turn, sc in each st across. (9 sc)
Row 4: Ch 1, turn, sc2tog, sc in next 7 sts. (1 sc2tog, 7 sc; 8 total sts)
Row 5: Ch 1, turn, sc in each st across. (8 sc)
Row 6: Ch 1, turn, sc2tog, sc in next 6 sts, fasten off, leaving long tail for sewing onto the truck body. (1 sc2tog, 6 sc; 7 total sts)
***Once you have completed both window pieces, follow the directions below to make the tires.
ETSY PATTERN WITH MULTIPLE PICTURES AVAILABLE
Tire (Make 4)
*Use your 5.00 mm hook and Silver Sparkle yarn to start the truck tire.
*Make sure to pull the magic ring closed and weave in/secure end at closure at the beginning.
*The tire is worked in joined rounds of single crochet stitches. Join to the first stitch of each round with a slip stitch.
*The first stitch of each round is made in the very first stitch of the previous round (the same stitch in which the join/slip stitch and ch-1 was made).
*When changing color to black at the end of Round 3, join black while completing the last sc (single crochet) of silver (by pulling through black when you have two loops of silver on the hook to complete the final sc).
Round 1: With Silver Sparkle yarn, make a magic ring, ch 1, work 6 sc in the magic ring, slst in first st of round. (6 sc)
Round 2: Ch 1, work 2 sc in each st around, slst in first st of round. (12 sc)
Round 3: Ch 1, repeat [sc in next st, 2 sc in next st] around, pull through black yarn when completing the very last sc of round (see note above), slst in first st of round. (18 sc)
***You should now have black yarn on your hook to complete the rest of the tire.
Round 4: Ch 1, repeat [sc in next st, 2 sc in next st, sc in next st] around. (24 sc)
Round 5: Slst in each st around, fasten off, leaving long tail for sewing tire onto truck body. (24 slst)
***Once you have completed the four tires, follow the directions below to assemble the truck air freshener holder
.
ASSEMBLY
- Using a tapestry needle and the long tail you left on one of the window pieces, sew the window piece in place to the outside of Side 1 of the truck body (the outside is the side of the truck body with the ridge on top of the truck bed). Secure your yarn on the inside of Side 1. Sew the other window piece to the outside of Side 2 of the truck body (make sure the ridge at the top of the bed of the truck body is on the outside). Secure your yarn on the other side of the truck body.
- Place the Truck Body pieces on top of each other so they align and the windows are on the outside. Use a tapestry needle and the long tail you left on one the Truck Body pieces to sew the two Truck Body pieces together along their perimeters, making sure not to sew the top of the truck beds together. Leave the bed open at the top so you have a pocket in which to place the air freshener. Once you reach the corner of the bed of the truck, stop sewing the pieces together and secure your yarn on the inside of the bed. You can use the other long tail left on the opposite Truck Body side to sew the Truck Body pieces together along their perimeters going the opposite way, stopping once you reach the corner of the bed of the truck and securing your yarn on the inside of the truck bed.
- Decide where you want the tires to be positioned on your truck. Starting with the front tires, sandwich the bottom of the front of the truck body between 2 tire pieces, while keeping the tire pieces aligned on top of each other. If you prefer, you may want to use straight pins to help hold them in place on the truck. Use a tapestry needle and the long tail you left on one of the tire pieces to sew the 2 front tire pieces together the entire way around the outside of the tires so they become attached to the truck. Secure your yarn on the inside of the tire pieces be weaving it between the pieces several times and then cutting it close to the outside of the tire so the end tucks inside the 2 tire pieces. Position the back 2 tire pieces so they are at the same height on the truck as the front 2 tire pieces. Once you have them in your desired position, attach the back 2 tire pieces in the same way as the front 2 pieces, by sandwiching the bottom of the back of the truck between the two tire pieces and sewing the tires together the entire way around the outside of the tire pieces. Secure your yarn on the inside of the tire pieces by weaving it between them several times and cutting it close to the outside of the tire pieces so it can tuck inside.
OPTIONAL HANGING LOOP
If you would like to make your truck air freshener holder so it can be hung from a rearview mirror, cut a strand of yarn longer than what you will need. Thread both ends through 2 separate spaces at the back top corner of the truck so they come out on the same side and you have a loop on the other side. Pull the two ends until your loop is the size you need in order to hang the holder. Once you have your loop to your desired size, tie the two ends together to form a knot against the corner of the truck which holds the loop in place. In order to hide the leftover ends on your knot, you can use a tapestry needle to weave them in between the two truck body pieces so they are not visible.
***Once you have completed the assembly and attached a hanging loop (if desired), your truck air freshener holder is now ready to be displayed and used! 🙂
Questions or Concerns?
Please contact me at email CrafterLifeDesigner@gmail.com
This pattern is property of TheCrafterLife.com
You may not sell my patterns or claim them as your own. You may make items to sell (i.e. on Etsy) from my patterns but I ask that you link back to my site (TheCrafterLife.com) and provide credit for the pattern. You are welcome to share my patterns on social media as long as you link back directly to my site by providing the link. No copying and pasting of any patterns will be allowed under any circumstances.

Cute as a Button Flatware Holder