Ghoster
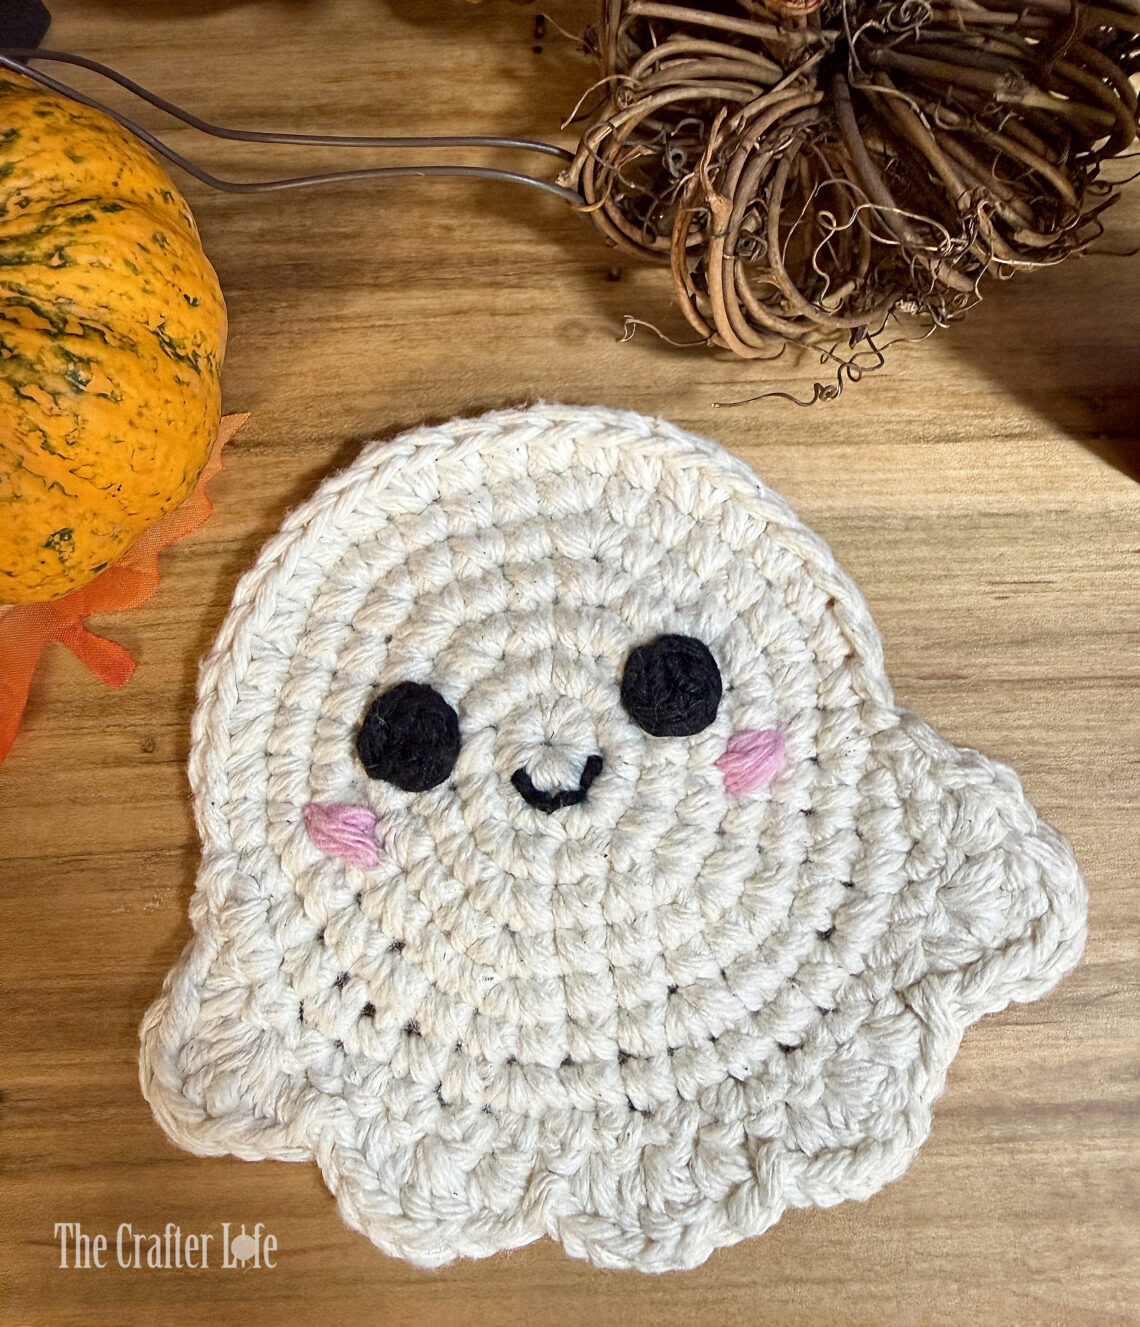
I created a Ghoster to go along with my Crowster from last year! As always, last-minute inspiration struck me right before Halloween and the idea of a ghoster popped into my head just two days ago! And luckily (since there is only about a week left until Halloween) you can whip up my newest pattern – this cute ghost coaster – in no time! It is a simple and fun pattern, so if you are looking for something spooky (or not so spooky) to make in the spirit of Halloween this week, check out my Ghoster pattern below! Make one Ghoster or a whole set to haunt your house this year! 😉
“Ghoster” (Ghost Coaster)
This Ghoster pattern is written to be used as a fun and festive coaster for your table/home. It is meant for most standard-size cups/mugs/bottles.
FINISHED MEASUREMENTS
The main circle body is about 4 inches in diameter.
The height of the coaster (from top of head straight down to the very bottom ruffle is about 4½ inches.
MATERIALS
– Size H/8/5.00mm crochet hook (used for main circle body of coaster)
– Size F/5/3.75mm crochet hook (used for main circle body of coaster)
– Cotton worsted weight (4) yarn in white or cream (I used Lily Sugar ‘n Cream yarn in Ecru)
– Cotton worsted weight (4) yarn in black (I used Lily Sugar ‘n Cream yarn in Black)
– Cotton worsted weight (4) yarn in pink (I used Lily Sugar ‘n Cream yarn in Strawberry)
– Tapestry Needle
– Scissors
– Stitch Markers
ABBREVIATIONS
– ch = chain
– chs = chains
– dc = double crochet
– hdc = half double crochet
– sc = single crochet
– slst = slip stitch
– st = stitch
– sts = stitches
GAUGE
3 sc rounds of main body has a diameter of approximately 1½ inches
PATTERN NOTES
- The main circle is worked in continuous rounds with two strands of yarn held together. Start the first stitch of each round in the first st of the previous round without any joins or chains. You might want to use a stitch marker to mark the beginning of rounds.
- The mouth is made next by stitching it directly onto the Ghoster with your tapestry/sewing needle and a single strand of black yarn. The eyes are made separately with one strand of yarn and then attached. Finally, the cheeks are stitched directly on using your tapestry needle and 2 strands of pink yarn for each cheek.
- Brackets [ ] indicate portions of the pattern to be repeated.
DIRECTIONS
Main Coaster Body
*Work circle in continuous rounds. Work first stitch of round in first stitch of previous round. Use stitch marker if needed.
*Use your 5.00 mm hook and black cotton yarn to complete the circle body.
*Hold 2 strands of yarn together.
*Make sure to pull the magic ring closed and weave in/secure end at closure.
HINT: I used a stitch marker to mark the first stitch of each round.
Round 1: Holding 2 strands of yarn together, form a magic ring, ch 1, work 6 sc in ring, pull ring closed. (6 sc)
Round 2: 2 sc in each st around. (12 sc)
Round 3: Repeat [sc in next st, 2 sc in next st] around. (18 sc)
Round 4: Repeat [sc in next 2 sts, 2 sc in next st] around. (24 sc)
Round 5: Repeat [sc in next 3 sts, 2 sc in next st] around. (30 sc)
Round 6: Repeat [sc in next 4 sts, 2 sc in next st] around. (36 sc)
Round 7: Sc in next 2 sts, 2 sc in next st, repeat [sc in next 5 sts, 2 sc in next st] 5 times, sc in next 3 sts. (42 sc)
***Round 8 starts the bottom section of the ghost. You will no longer be working the entire way around the circle so you will turn your work at the start of Rounds 9 and 10. Round 8 is only worked in the first 18 sts of Round 7 before turning work.
HINT: Use a stitch marker to mark the 18th stitch of Round 7. You will work a slst in this stitch at the end of Round 10.
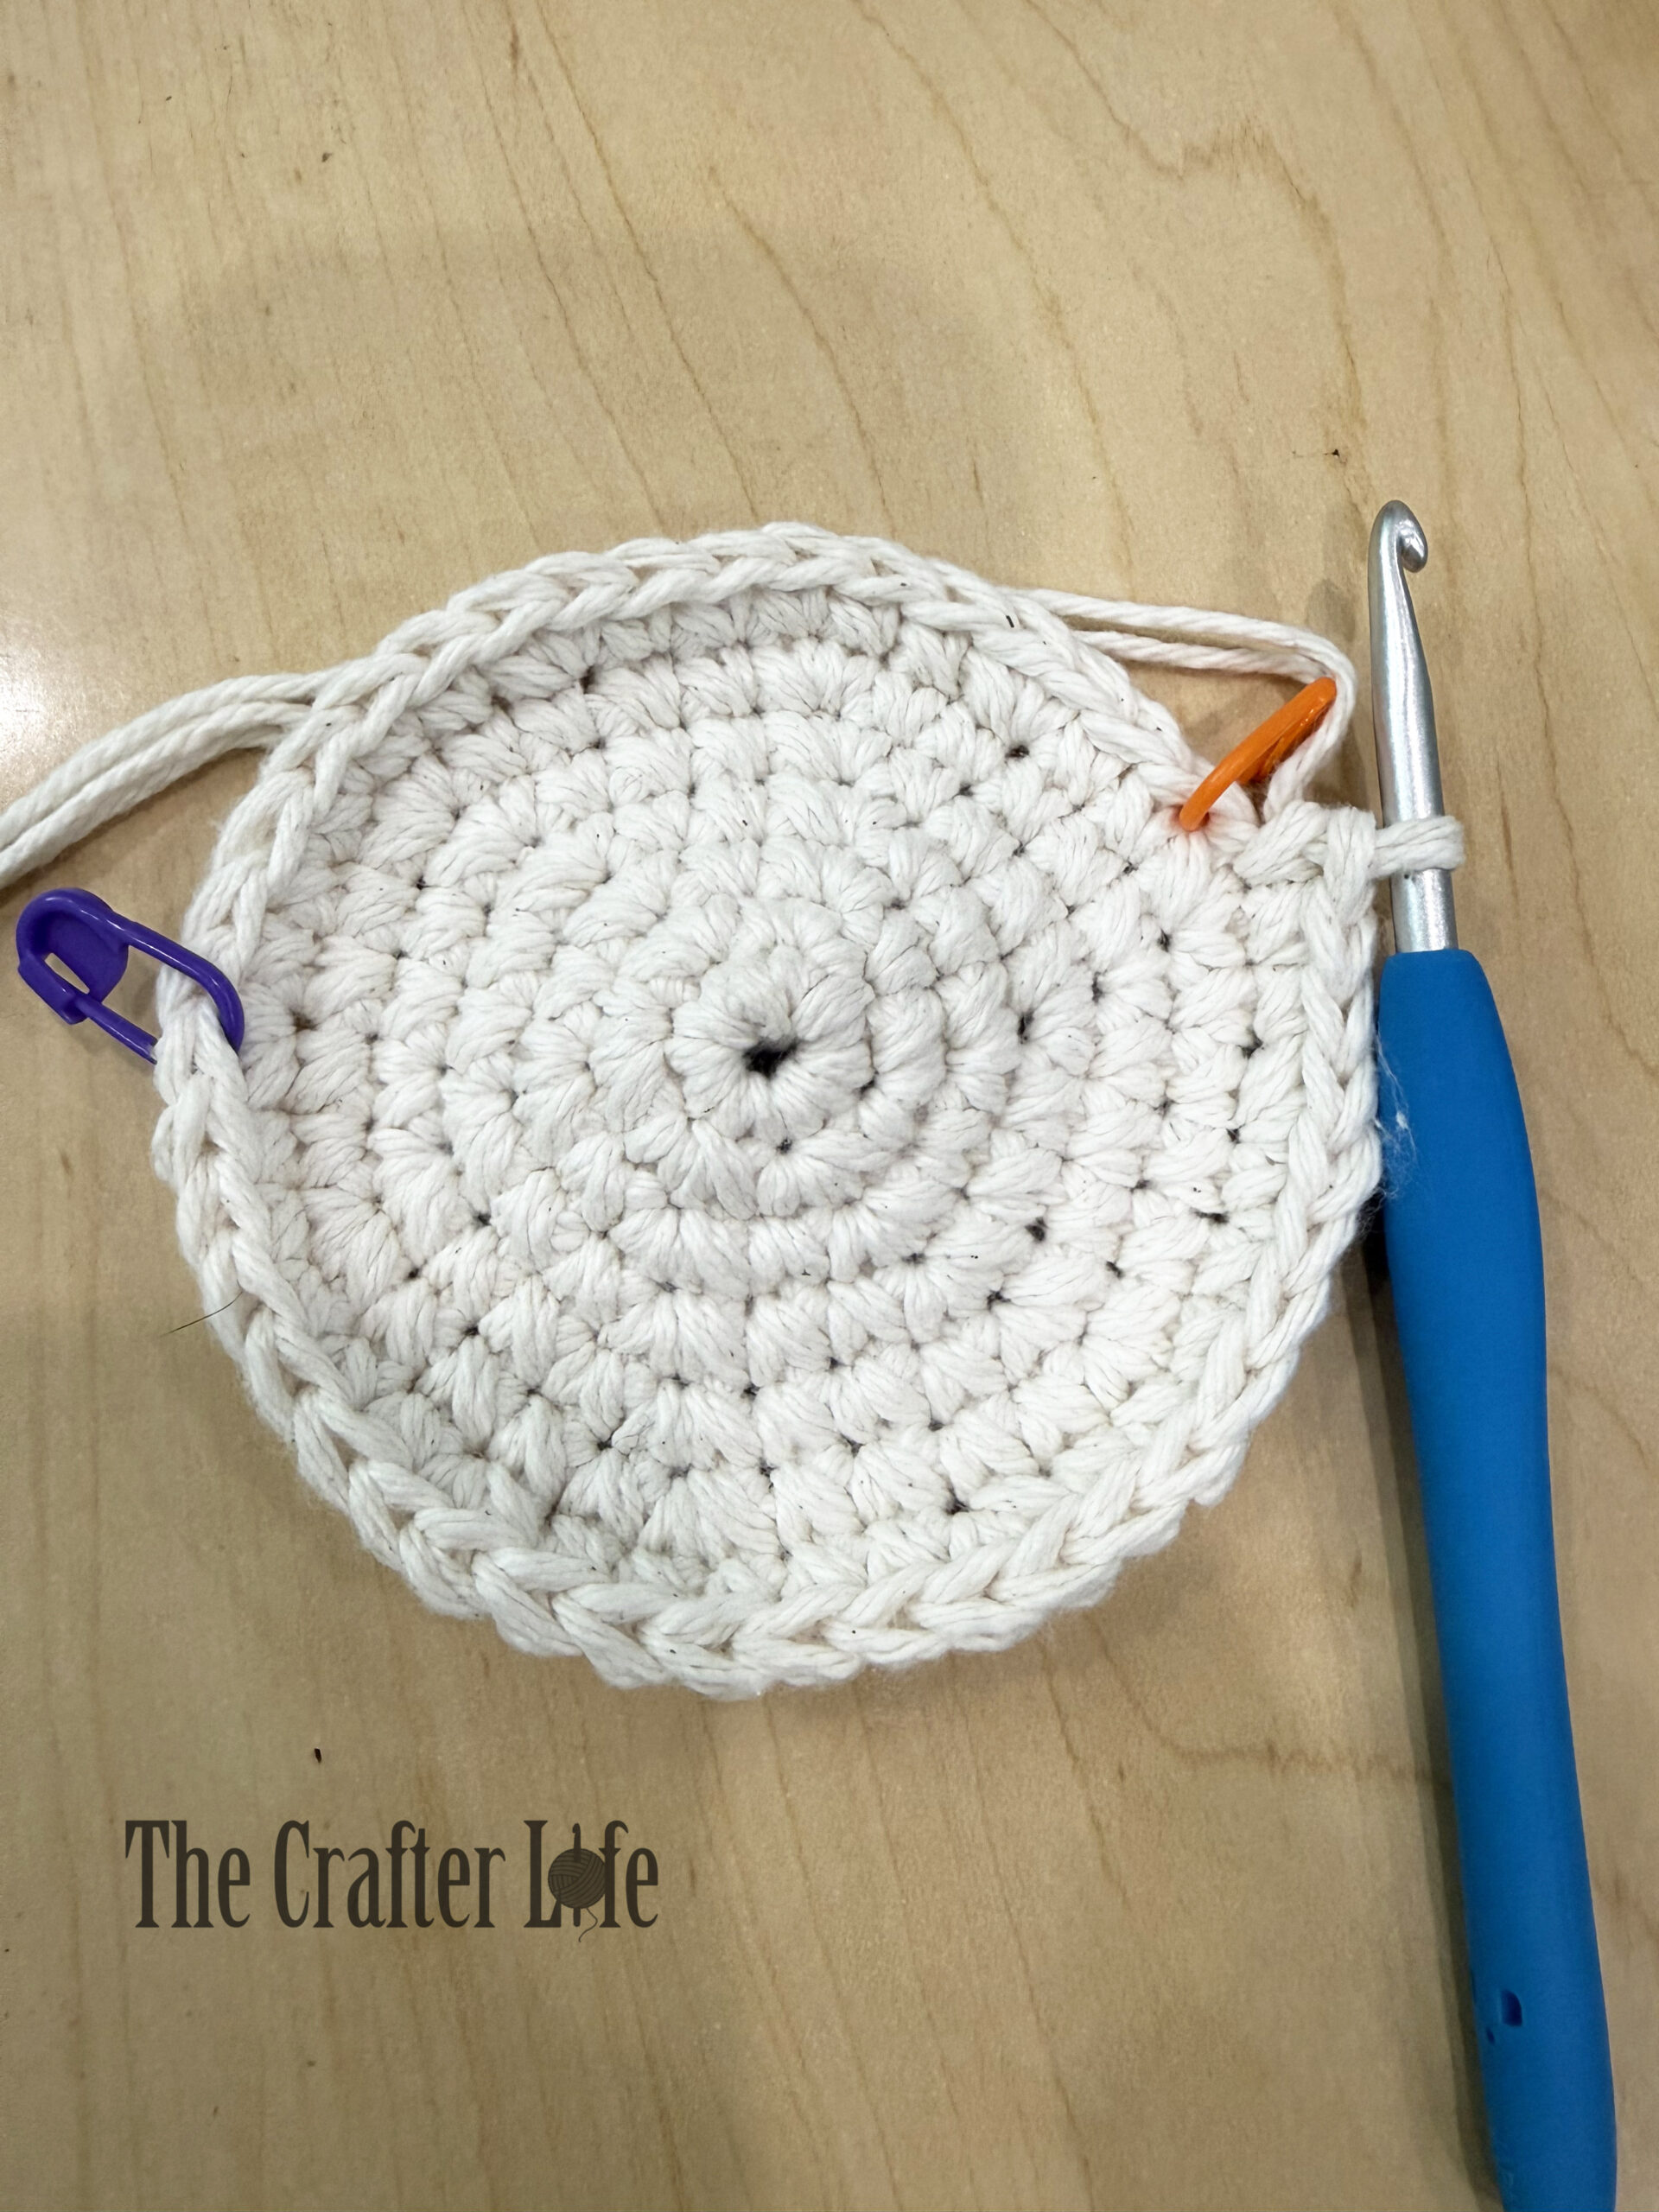
Round 8: Sc in next 6 sts, 2 sc in next st, sc in next 6 sts, 2 sc in next st, sc in next 3 sts, slst in next st (19 sc, 1 slst; 20 total sts)
Round 9: Ch 1, turn, sk first st (the slst at the end of Round 8), sc in next 7 sts, 2 sc in next st, sc in next 7 sts, 2 sc in next st, sc in next 3 sts, slst in next st (this is the last st of Round 7). (21 sc, 1 slst; 22 total sts)
Round 10: Ch 1, turn, sk first st (the slst at the end of Round 9), slst in next st, 2 sc in next st, 4 dc in next st, work (2 sc, slst) in next st, slst in next st, 2 sc in next st, 3 hdc in next st, 2 sc in next st, slst in next st, 2 sc in next st, 3 hdc in next st, 2 sc in next st, slst in next st, 2 sc in next st, 3 hdc in next st, 2 sc in next st, slst in next st, 2 sc in next st, 4 dc in next st, 2 sc in next st, slst in next st, slst in the 18th st of Round 7, fasten off, weave in loose ends on back of work. (44 total sts)
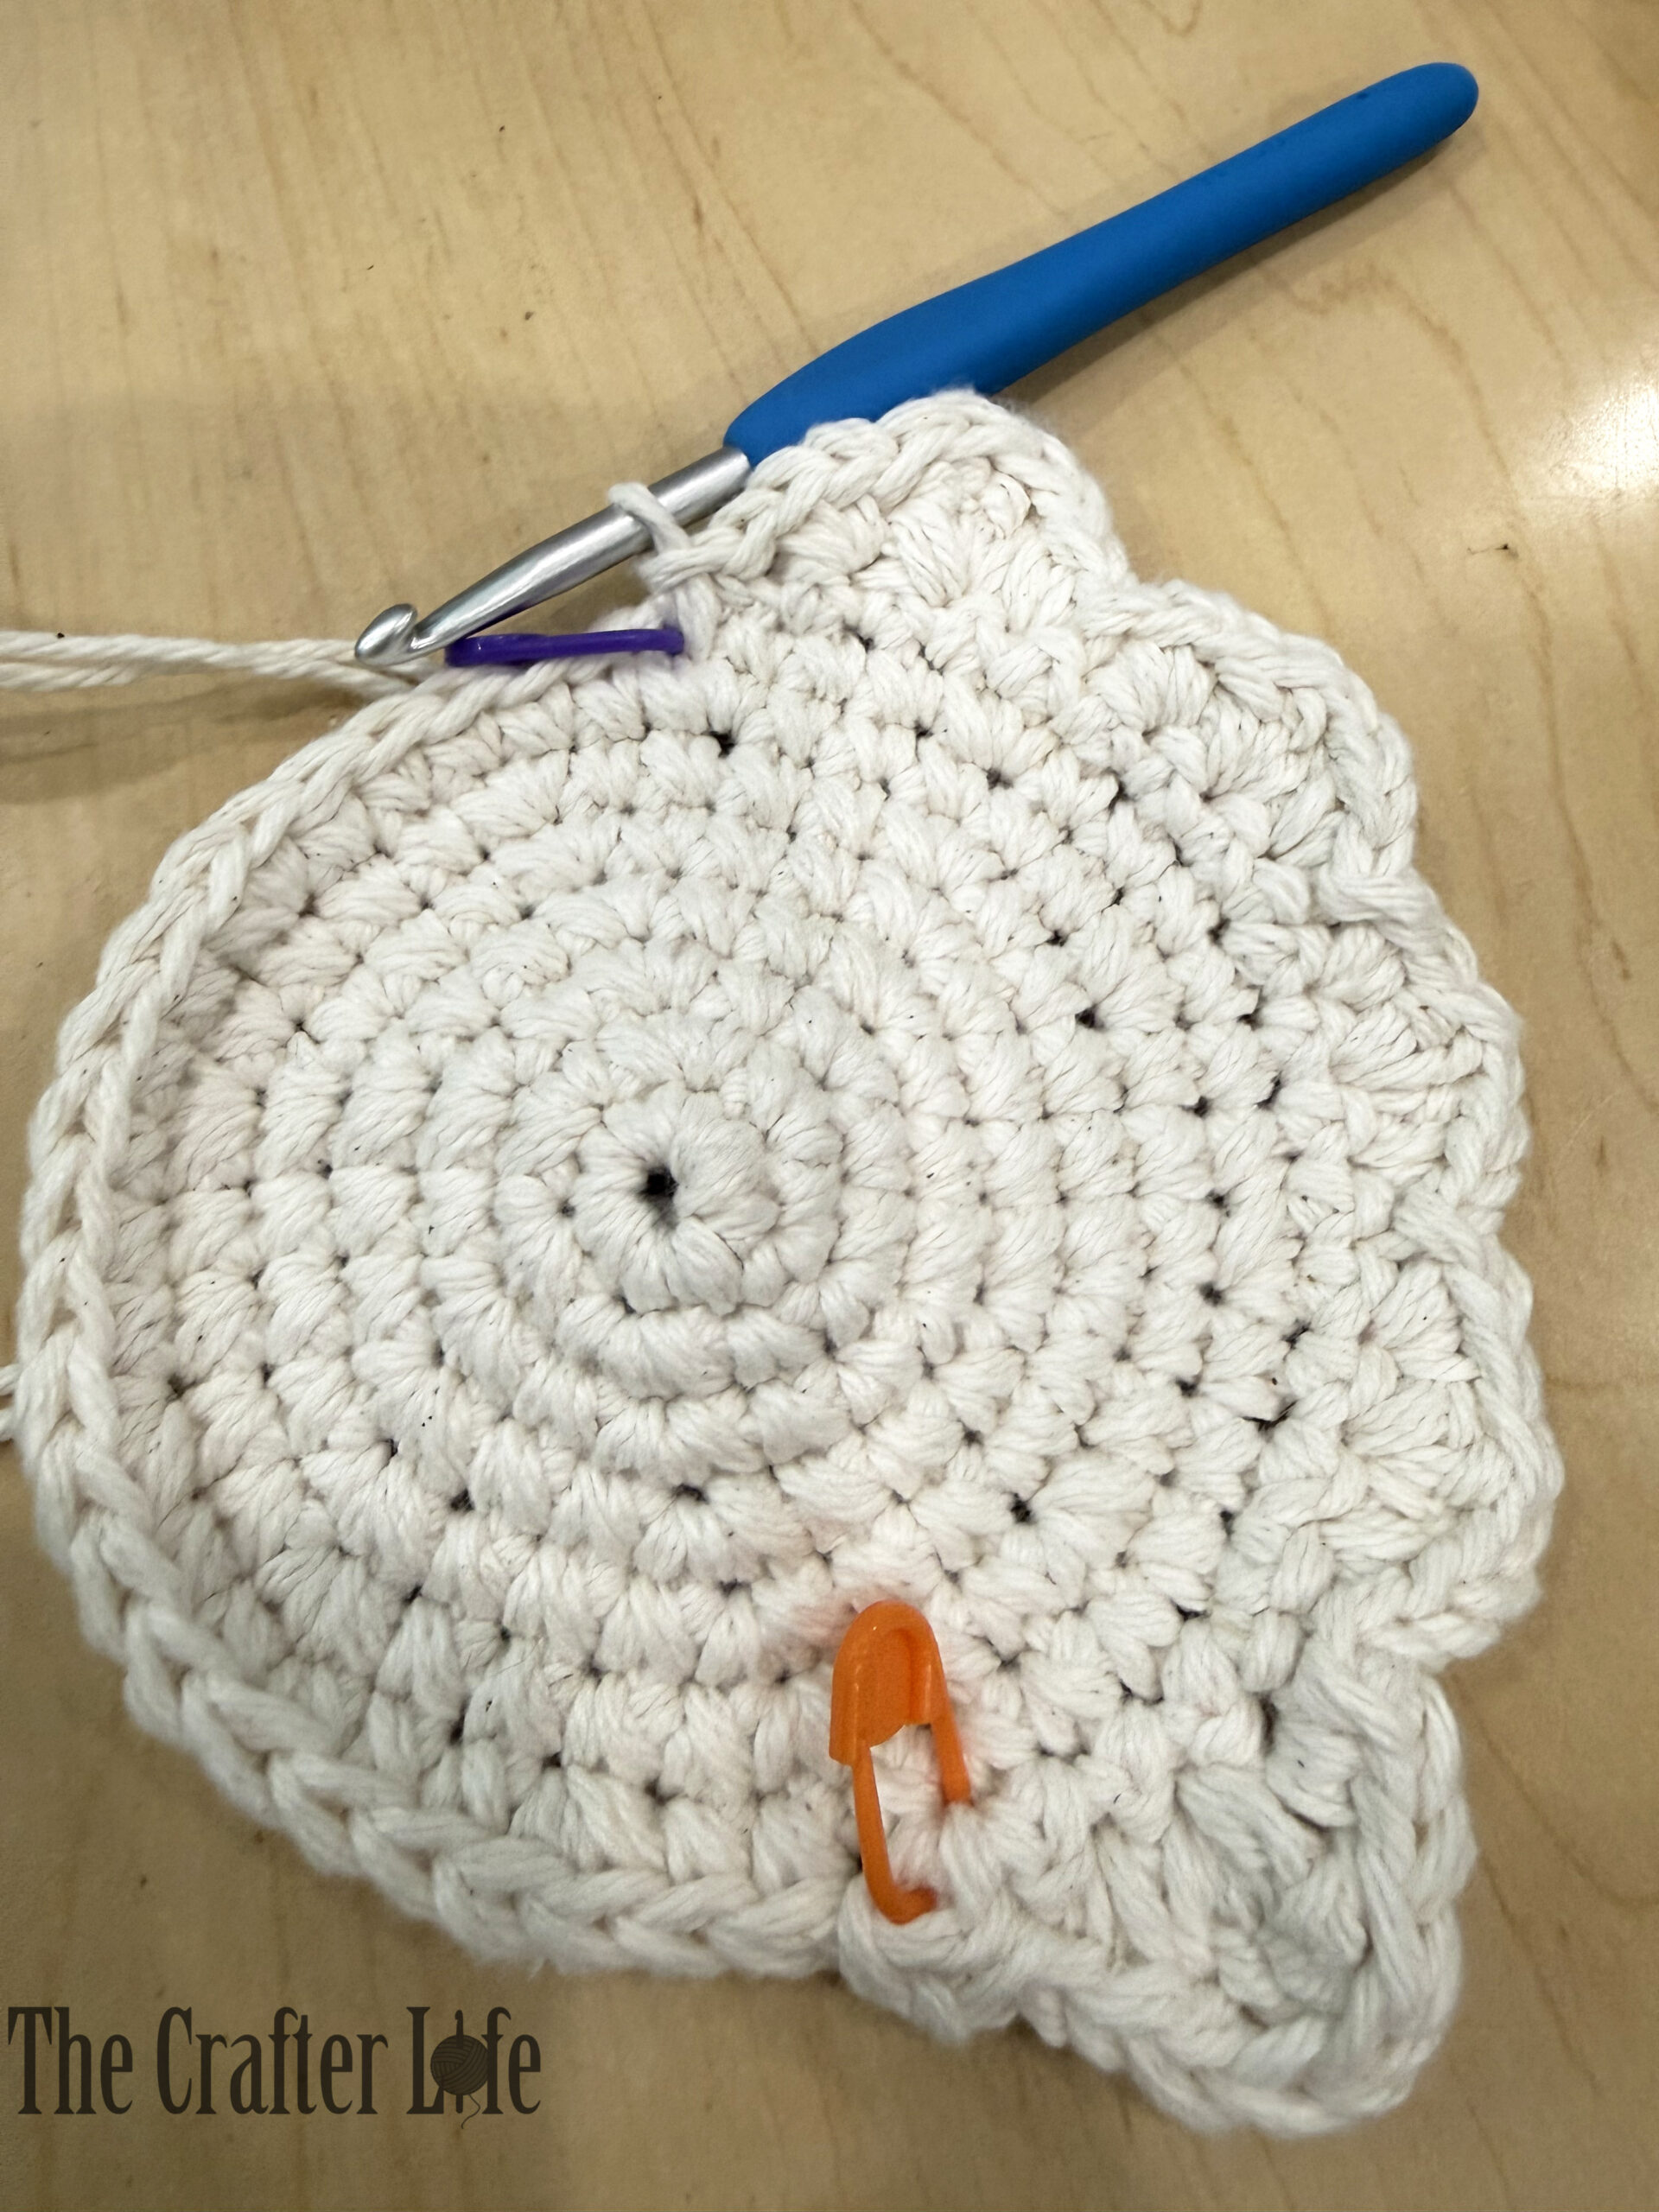
***Remember to close the magic ring and weave in ends on back of work.
***The main circle body may not lay completely flat at first – it will eventually loosen up and lay flat once you start to use it as a coaster.
***Once you weave in/secure your yarn on the back of work, the main coaster body is complete. Follow the directions below to stitch on the mouth.
Mouth
***You will need a small tapestry needle/sewing needle, optional straight pins, and black yarn to stitch on the mouth. I used straight pins because I am not good at “eyeballing” where I want my stitches.
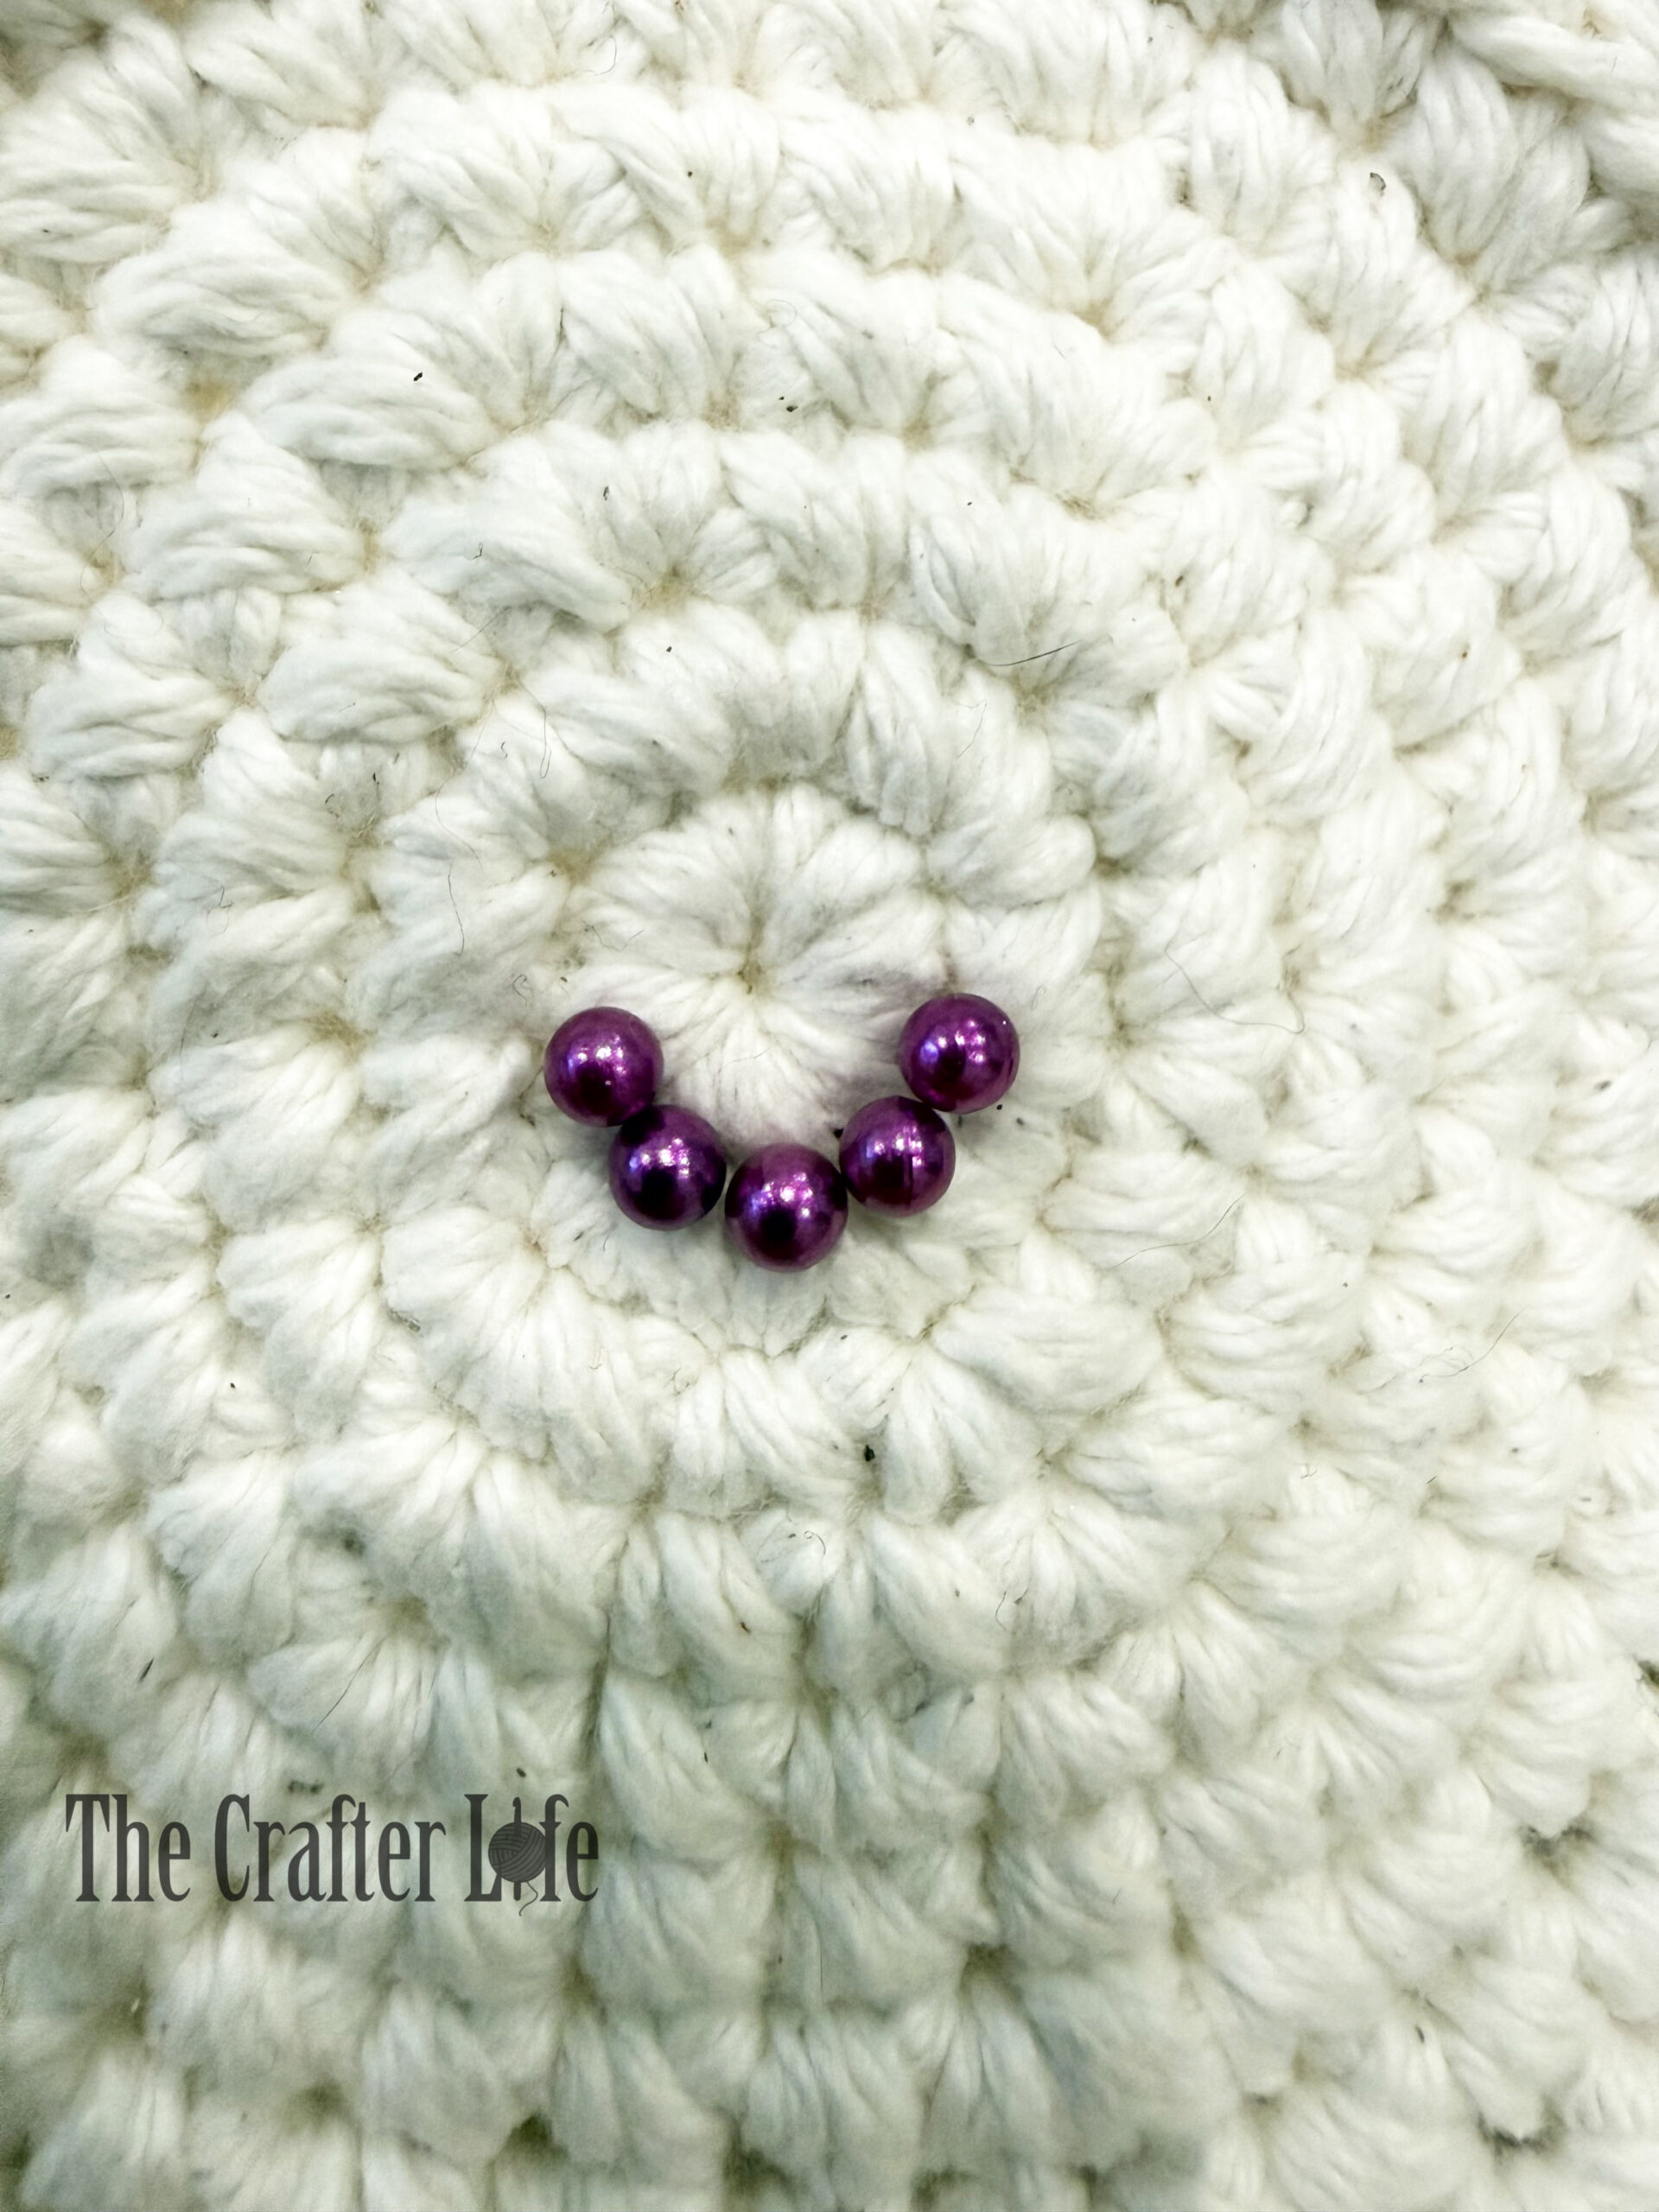
- If you are using straight pins to help you position the mouth, place straight pins side-by-side exactly where you want the stitches of your mouth on the front of the ghost. Once you are satisfied with the positioning of your pins, you can begin stitching on the mouth as explained in Step 2. Be very careful with the pins since they are sticking out the back of your work so you need to take your time with each stitch so you don’t poke yourself or get your yarn stuck when stitching in Step 2. I used 5 straight pins when I used them to position the mouth of my Ghoster. I placed the middle one first, centering it below Round 1 directly under the center of the magic ring. I then placed 2 more pins on each side of the first, to form a smile shape.
- Use a sewing needle or small tapestry needle and a strand of black yarn to begin stitching on the mouth using backstitches. If using straight pins, you will start by drawing your yarn up from the back of the work through to the front where the first straight pin is on one side of the mouth (I started on the right side of the mouth), making sure to remove the first straight pin when you bring it up through that point. Then take your yarn/needle back down the hole where the second straight pin is, through to the back of the ghost (while removing the second straight pin). You have now created one stitch. Next bring your needle/yarn back up from the back to the front through the hole where the third straight pin is, and then back down through the same hole through which you took your yarn down through to end the first stitch made (the same hole the second straight pin was in originally). You have now made a second stitch. Continue stitching on the mouth in this manner, simply taking the straight pins out as you work. Again, be careful not to get poked by the pins or get your yarn tangled/stuck on the back of the work in the pins. The straight pins make stitching placement easy since each pin marks where you need to pull your needle through for the stitches (almost like a connect-the-dot puzzle). If you had 5 straight pins marking the mouth like I did, you should end up with 4 total stitches for the mouth. Once you are finished stitching on the mouth, don’t secure your yarn until you stitch on the eyes/entire face and you are happy with how it looks.
Eye (Make 2)
*Use your 3.75 mm hook and black cotton yarn to complete the eyes (you will make each eye with one strand of yarn).
*Make sure to pull the magic ring closed and weave in/secure end at closure.
Round 1: Form a magic ring, ch 1, work 4 sc in ring, pull ring closed, slst in first sc, fasten off, leaving a long tail for sewing onto Ghoster. (4 sc)
***Once you have made both eyes, follow the directions below to attach them to the front of the Ghoster.
Attaching Eyes
Position the eyes on the Ghoster where you would like them. You may want to use straight pins to hold them in place. I centered my ghost eyes with the mouth and placed each of them over Rounds 3 and 4. The bottom of each of my ghost eyes are even with the top corners of the mouth. Use your tapestry/sewing needle and the tail you left on each eye to sew each of them in place on the face. Sew around the perimeter of each eye to make sure they are as flat as possible on the coaster. You may want to wait to cut and secure your yarn tails on the back of the work until you have the entire face with the cheeks attached so you can make sure you don’t need to make any adjustments.
***Once you have sewn the eyes in place on the face, follow the directions below to stitch on the cheeks.
Stitching on the Cheeks
You will stitch on each cheek with two strands of yarn held together. Cut two long strands of pink yarn to use for each cheek. Hold them as though they were one strand of yarn and thread them through your tapestry needle. Use your tapestry needle and the two strands of yarn to stitch on cheeks on either side of the face under the eyes. You should only need to do about two stitches for each cheek since you are using two strands of yarn. I started my first stitch of the cheek by brining my needle up at a point slightly below the eyes between Rounds 5 and 6 and then taking it over and back down between Rounds 4 and 5. I brought it back up the same spot where I started between Rounds 5 and 6 and then took it over and back down slightly below where I finished the first stitch between Rounds 4 and 5. Feel free to place and stitch your cheeks wherever and however you prefer. You might want to wait to secure your yarn on the back of the work until you are completely finished with the face in case you need to make any changes. Once you have finished stitching on both cheeks and you are satisfied with their positioning and appearance, secure your yarn on the back of the work.
***Once you weave in/secure all the loose ends on the back of the work, your Ghoster is finished and ready to haunt your table!
Questions? Concerns? Please contact me at email CrafterLifeDesigner@gmail.com
This pattern is property of TheCrafterLife.comYou may not sell my patterns or claim them as your own. You may make items to sell (i.e. on Etsy) from my patterns but I ask that you link back to my site (TheCrafterLife.com) and provide credit for the pattern. You are welcome to share my patterns on social media as long as you link back directly to my site by providing the link. No copying and pasting of any patterns will be allowed under any circumstances.