Minnie Mouse Cake and Cupcakes!

My daughter absolutely adores Minnie Mouse, so for her second birthday, I wanted to make her a Minnie Mouse cake. I made her a large Minnie Mouse cake on her actual birthday and Minnie Mouse cupcakes for her birthday party the following week. I am by no means a professional cake decorator, but I thought they turned out pretty cool and my daughter loved what she called her “Mimmy cake”.
Large Minnie Mouse Cake

Materials:
– Ingredients needed for the Hershey’s “Perfectly Chocolate” chocolate cake recipe
– One round 9″ cake pan
– At least one round glass cake pan/baking dish about 5″ in diameter (to be used for the ears and the bow)
– Pink frosting – or – the ingredients needed for white frosting + pink food coloring
– White icing for the polka dots on the bow
Directions:
In order to make the large Minnie Mouse cake, I used a 9″ round cake pan for the head and my two glass Pyrex bowls (that have a diameter of approximately 5″) for the ears. I used the Hershey’s “Perfectly Chocolate” chocolate cake recipe and the Hershey’s “Perfectly Chocolate” chocolate frosting recipe. The recipes for the cake and the frosting can be found here. Simply follow the recipe, but instead of using two 9″ round cake pans like it calls for, use one 9″ round cake pan and two smaller round pans or baking dishes for the ears. Make sure you use enough grease and flour in the bottom of the pans so that you can easily remove the cakes. Once they are cool, arrange the cakes on a large plate or platter so that they resemble Minnie Mouse’s head and ears. Then follow the Hershey’s frosting recipe and frost the cake. Next, I explain how to make the bow.

I ended up with enough leftover batter that I was able to bake a third small cake the same size as the ears. It was slightly thinner, but not much. I figured we would just use it as extra cake. I was trying to figure out how to make a bow so that the cake officially looked like Minnie Mouse instead of Mickey Mouse and my husband suggested using the leftover cake to cut a bow shape from that. I didn’t know how it would turn out, thinking that the cake would probably crumble when I started to cut it, but it actually held together nice and was pretty easy to cut! I simply cut a section out of the top and a section out of the bottom to create a bow shape. The picture below shows the result.

Since I didn’t know ahead of time how I would make a bow, I didn’t have any pink frosting on hand. I made some white frosting and dyed it using pink gel food color that I had leftover from Easter. The white icing recipe I used can be found here. After frosting the “bow” cake with the pink icing, I carefully placed it on top of the large cake between the ears. The next step of putting the white polka dots on the bow is when I got a little sloppy because I was rushing to finish before my daughter was up from her nap. I used a tube of Cake Mate white icing but I didn’t have any decorating tips to use with it, so the polka dots came out a little large and distorted. I would definitely recommend using a decorating tip so they come out neater. Finally, I used a knife to outline the center of the bow to give it some definition. Below is the end result minus the candles! I put one candle in the center of each ear since my daughter was turning two and it looked really cute. Oh yeah, and it tasted pretty great too!

Minnie Mouse Cupcakes

Materials:
– Ingredients needed for the Hershey’s “Perfectly Chocolate” chocolate cake recipe
– Muffin pan
– Ingredients needed for white frosting
– Pink food coloring
– Polka dot cupcake wrappers (I found mine at Michaels)
– Mini Oreo cookies
– Pink candy melts (I found mine at Michaels)
– Bow mold
Directions:
Believe it or not, these Minnie Mouse cupcakes were easier to make than the large Minnie Mouse cake. I followed the same recipe (The Hershey’s “Perfectly Chocolate” chocolate cake recipe) since everyone that tried the large Minnie Mouse cake said it tasted delicious. I made the same white icing from before (recipe found here) and dyed it pink using pink gel food coloring. After frosting the cupcakes with the pink frosting, I used Mini Oreo cookies and pushed them into the icing just far enough to get them to stand up on their own and resemble Minnie Mouse ears.
Finally, for the bows, I used Wilton’s pink candy melts and this bow mold ( Bite Size Bows). I simply melted the pink candy melts and used an icing decorating tool to fill each bow mold with the melted candy. I slightly tapped the mold to remove air bubbles as the directions from the mold recommended to do and placed it in the freezer for about 10 minutes. Then I removed the bows from the molds and continued making batches of them until there were enough for all of the cupcakes. I actually made the bows a few days before making the cupcakes and they held up just fine. If you are going to make these cupcakes for a party, I would suggest making the bows a day or two ahead of time just so it’s one less thing you would have to do on the day of the party. I placed a bow on each cupcake between the Oreo ears and they were finished. Can you spot the cupcake with the missing bow in the picture!? I know I caught it before the party but took my pictures ahead of time!


Feel free to post comments here or on my Facebook page!
**If you like what you see, feel free to pin, share, and link back to my site. Thank you for visiting!

You May Also Like

Wrapping LOL Surprise Dolls
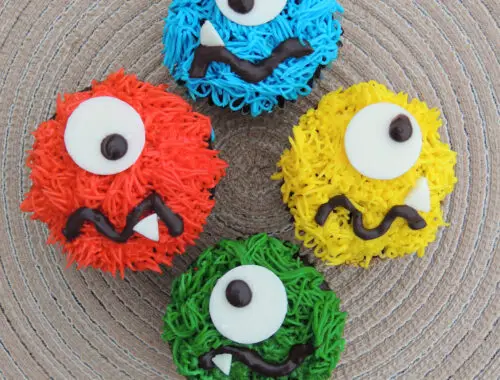
Monster Cupcakes