Crochet Monster Hat

My son has a cute shirt with monsters on it so I decided to crochet him a monster hat to match. His first birthday is coming up so I also had him wear the hat in his birthday invitation picture (his party will have a monster theme). It’s really cute and helps to keep him warm in this cold weather we have been having lately! I have written my pattern below if you are interested in making your own monster hat.
MONSTER HAT PATTERN
SIZE
*Fits most from 12 months to 3 years
This pattern is for a hat that fits a head circumference of approximately 19-19.5 inches. The length of the hat from crown to bottom (not including earflaps) is approximately 6.5 inches (9.5 inches with earflaps). *You may need to add rows if it is for a child older than 2 years.
MATERIALS
– 5.00mm (H) hook
– Worsted weight yarn in navy blue (I used Loops & Threads Impeccable yarn in Navy Blue)
– Worsted weight yarn in gold (I used Red Heart Soft yarn in Turquoise)
– Worsted weight yarn in white (I used Loops & Threads Impeccable yarn in White)
– Worsted weight yarn in black (I used Red Heart Super Saver yarn in Black)
– Fiberfill
– Tapestry needle for sewing and weaving in ends
– Scissors
ABBREVIATIONS
– ch = chain
– chs = chains
– dc = double crochet
– hdc = half double crochet
– hdc dec = half double crochet decrease
– sc = single crochet
– sc dec = single crochet decrease
– slst = slip stitch
– st = stitch
– sts = stitches
– tc = triple crochet
GUAGE
7 hdc = 2 inches
8 hdc rounds = 3 inches
SPECIAL NOTES
– The hat is done in continuous rounds (no joins or chains at the end/beginning of the rounds unless specifically stated).
PATTERN
Pattern for Base of Hat
Rnd 1: Magic circle, ch 1, 8 hdc in magic circle. (8 hdc)
Rnd 2: 2 hdc in each st around. (16 hdc)
Rnd 3: Hdc in first st, 2 hdc in next st, repeat [hdc in next st, 2 hdc in next st] around. (24 hdc)
Rnd 4: Hdc in first two sts, 2 hdc in next st, repeat [hdc in next two sts, 2 hdc in next st] around. (32 hdc)
Rnd 5: Hdc in first three sts, 2 hdc in next st, repeat [hdc in next three sts, 2 hdc in next st] around. (40 hdc)
Rnd 6: Hdc in first four sts, 2 hdc in next st, repeat [hdc in next four sts, 2 hdc in next st] around. (48 hdc)
Rnd 7: Hdc in first five sts, 2 hdc in next st, repeat [hdc in next five sts, 2 hdc in next st] around. (56 hdc)
Rnd 8: Hdc in first six sts, 2hdc in next st, repeat [hdc in next six sts, 2 hdc in next st] around. (64 hdc)
Rnds 9-19: Hdc in each st around. At the end of last row, DO NOT fasten off, go on to directions for first earflap. (64 hdc)
First Earflap
Row 1: Continuing where you left off at the end of Row 19, hdc in the next 14 sts.
Row 2: Ch 1, turn, hdc dec, hdc in next 10 sts, hdc dec. (12 hdc)
Row 3: Ch 1, turn, hdc in each st across. (12 hdc)
Row 4: Ch 1, turn, hdc dec, hdc in next 8 sts, hdc dec. (10 hdc)
Row 5: Ch 1, turn, hdc dec, hdc in next 6 sts, hdc dec. (8 hdc)
Row 6: Ch 1, turn, hdc dec, hdc in next 4 sts, hdc dec. (6 hdc)
Row 7: Ch 1, turn, hdc dec, hdc in next 2 sts, hdc dec. (4 hdc)
Row 8: Ch 1, turn, 2 hdc dec. (2 hdc)
Row 9: Ch 1, turn, hdc dec, fasten off, weave in loose end. (1 hdc)
Second Earflap
Row 1: Attach yarn 20 sts across the front of the hat from the corner of the first earflap. Ch 1, hdc in next 14 sts (towards the back of the hat). (14 hdc)
Row 2: Ch 1, turn, hdc dec, hdc in next 10 sts, hdc dec. (12 hdc)
Row 3: Ch 1, turn, hdc in each st across. (12 hdc)
Row 4: Ch 1, turn, hdc dec, hdc in next 8 sts, hdc dec. (10 hdc)
Row 5: Ch 1, turn, hdc dec, hdc in next 6 sts, hdc dec. (8 hdc)
Row 6: Ch 1, turn, hdc dec, hdc in next 4 sts, hdc dec. (6 hdc)
Row 7: Ch 1, turn, hdc dec, hdc in next 2 sts, hdc dec. (4 hdc)
Row 8: Ch 1, turn, 2 hdc dec. (2 hdc)
Row 9: Ch 1, turn, hdc dec, fasten off, weave in loose ends. (1 hdc)
Trim
Attach the accent color yarn that you want to use for your trim (mine was turquoise) to any stitch on the bottom of the hat. Then chain 1 and sc evenly around the entire hat (including around the earflaps). Slst to the first st and fasten off, weaving in loose ends.

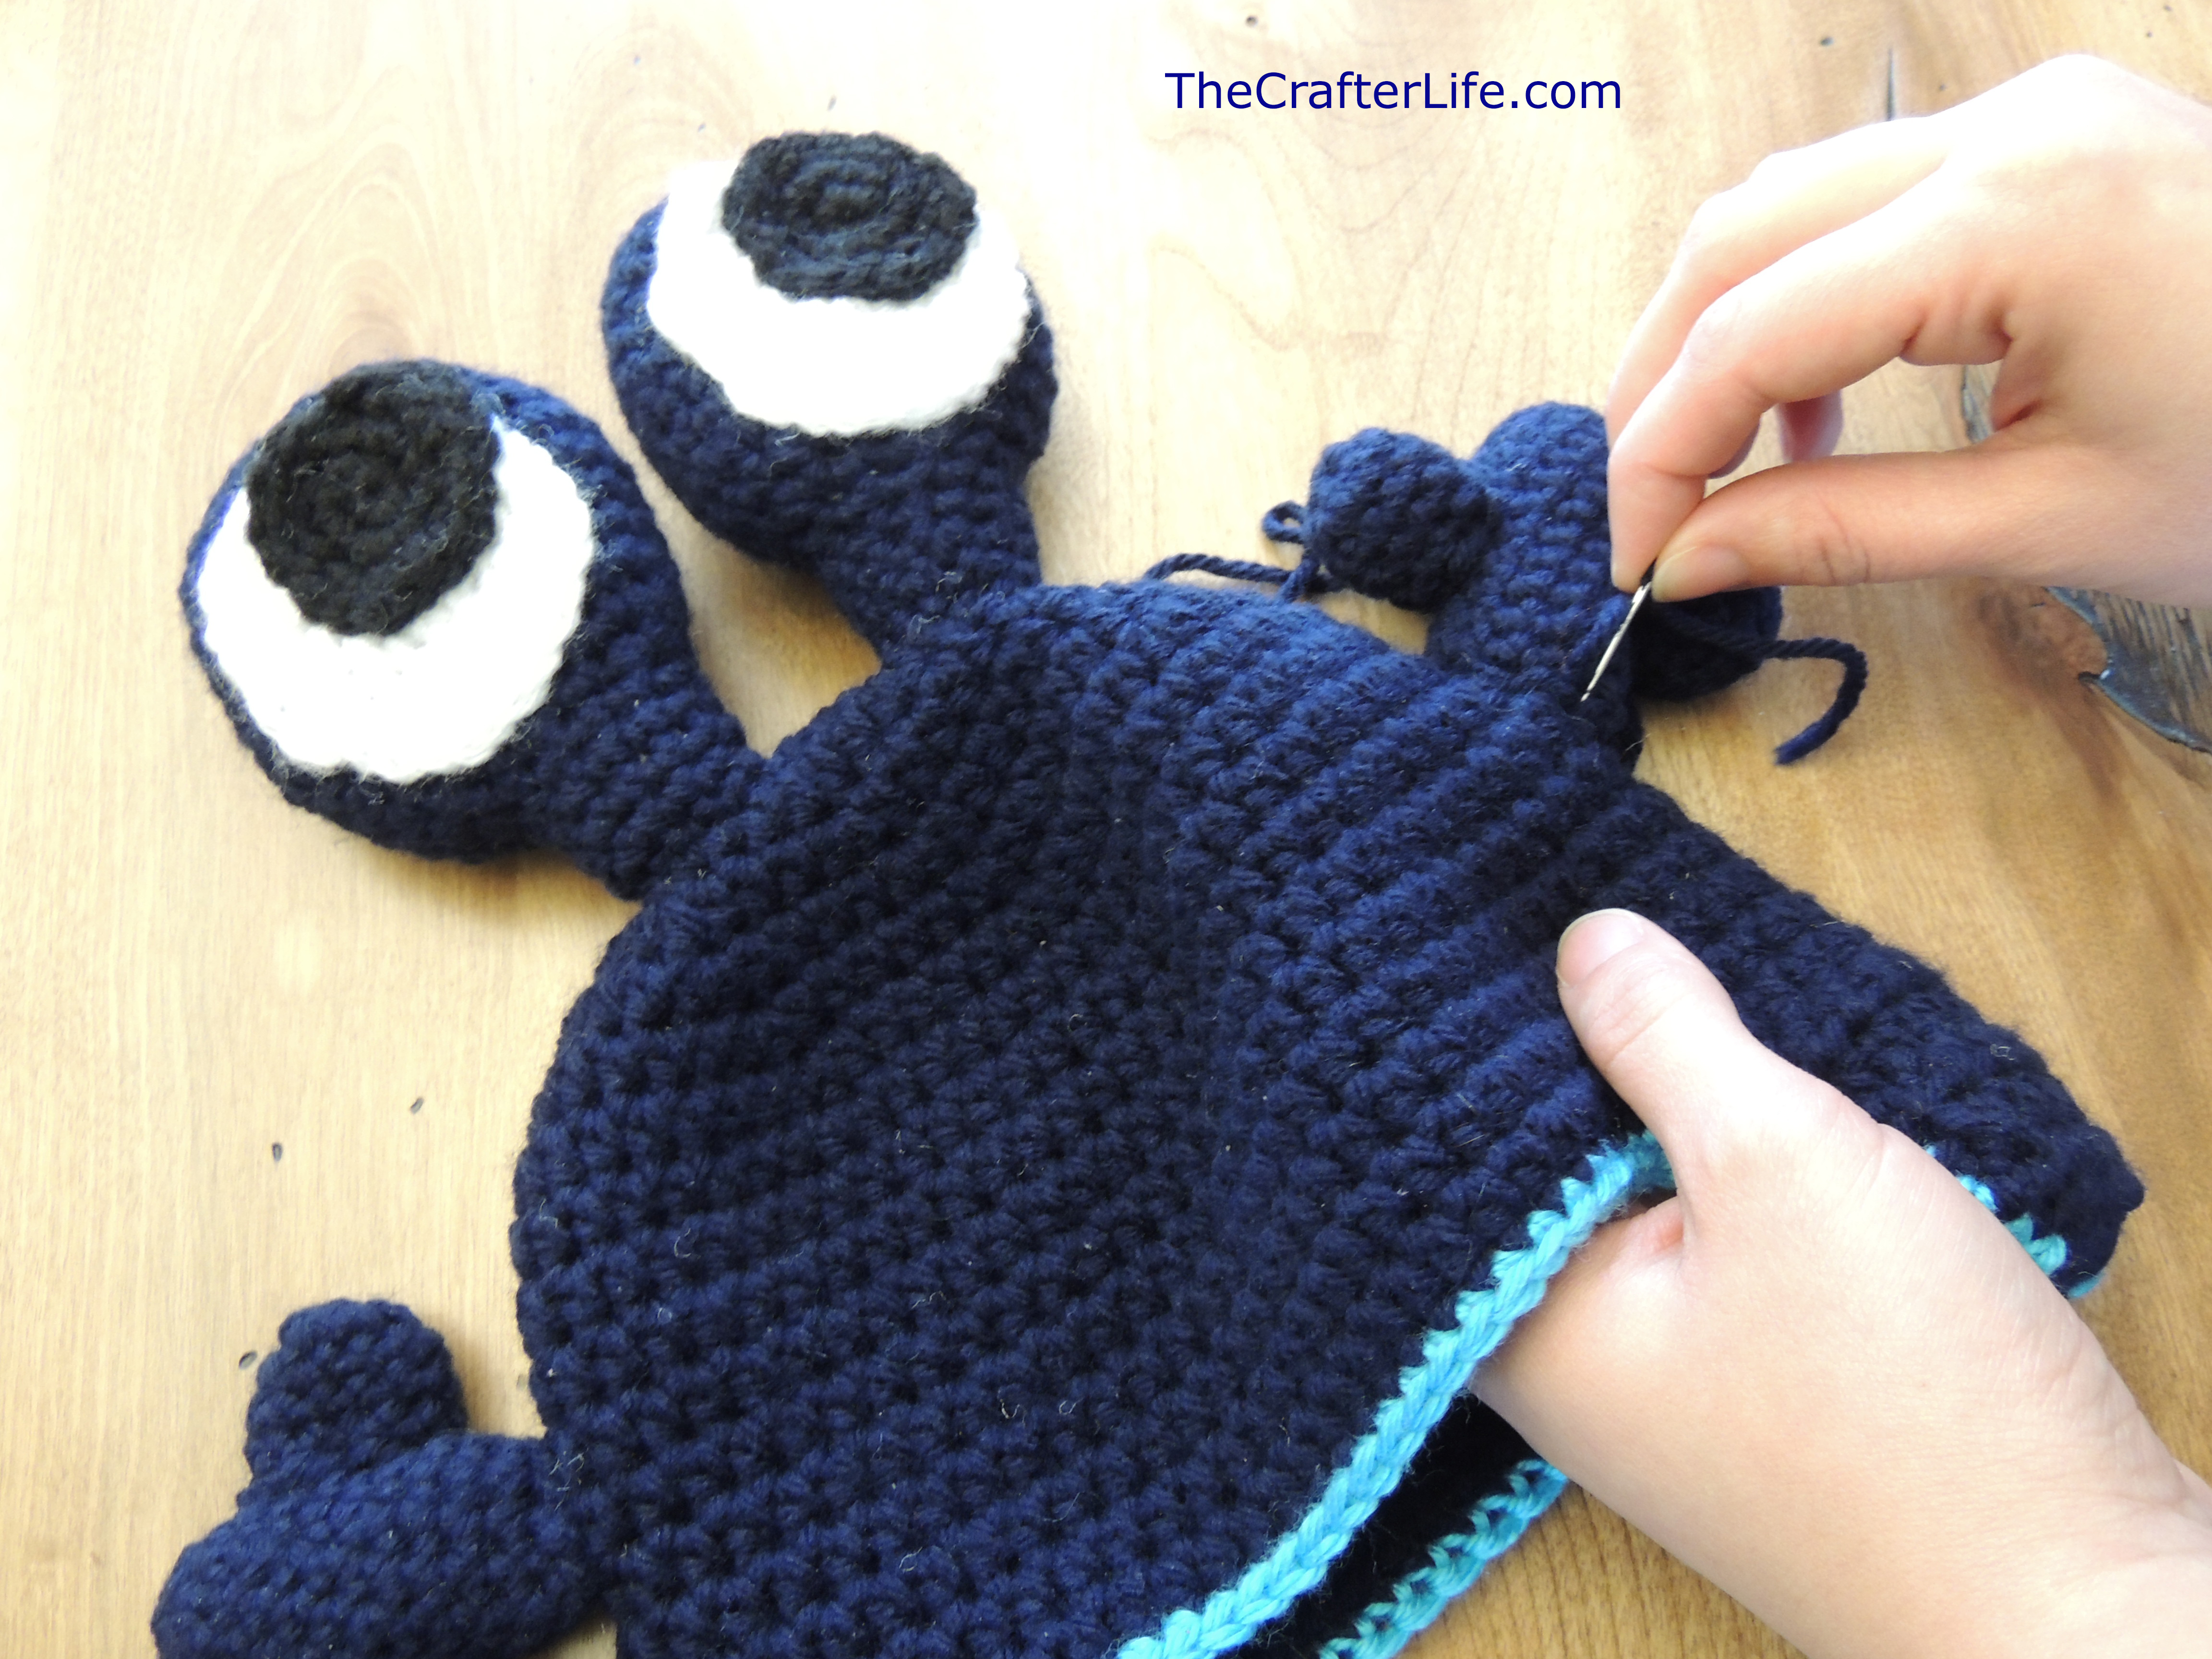
Monster Eyes
There are three parts to the eyes: the black pupils, the white eyeball, and the blue antennae eyelids.
Pupils (Make 2)
Rnd 1: With black yarn, magic circle, ch 1, 6 sc in magic circle. (6 sc)
Rnd 2: 2 sc in each st around. (12 sc)
Rnd 3: Sc in first st, 2 sc in next st, repeat [sc in next st, 2 sc in next st] around, slst to first st of round, fasten off, leaving long tail for sewing. (18 sc)
White Eyeball (Make 2)
Rnd 1: With white yarn, magic circle, ch 1, 4 sc in magic circle. (4 sc)
Rnd 2: 2 sc in first st, sc in next st, 2 sc in next st, sc in last st. (6 sc)
Rnd 3: 3 sc in first st, 2 sc in next st, 3 sc in next st, 2 sc in next st, sc in next st, 3 sc in last st. (14 sc)
Rnd 4: 2 sc in first st, 2 sc in next st, sc, 2 sc, sc, 2 sc, sc, 2 sc, sc, sc, 2 sc, 2 sc, sc, 2 sc. (22 sc)
Rnd 5: 2 sc in first 3 sts, sc in next 6 sts, 2 sc in next 2 sts, sc in next st, hdc in next 2 sts, 2 dc in next 4 sts, hdc in next 2 sts, sc in last two sts, slst to first st of round, fasten off, leaving long tail for sewing. (31 sts)
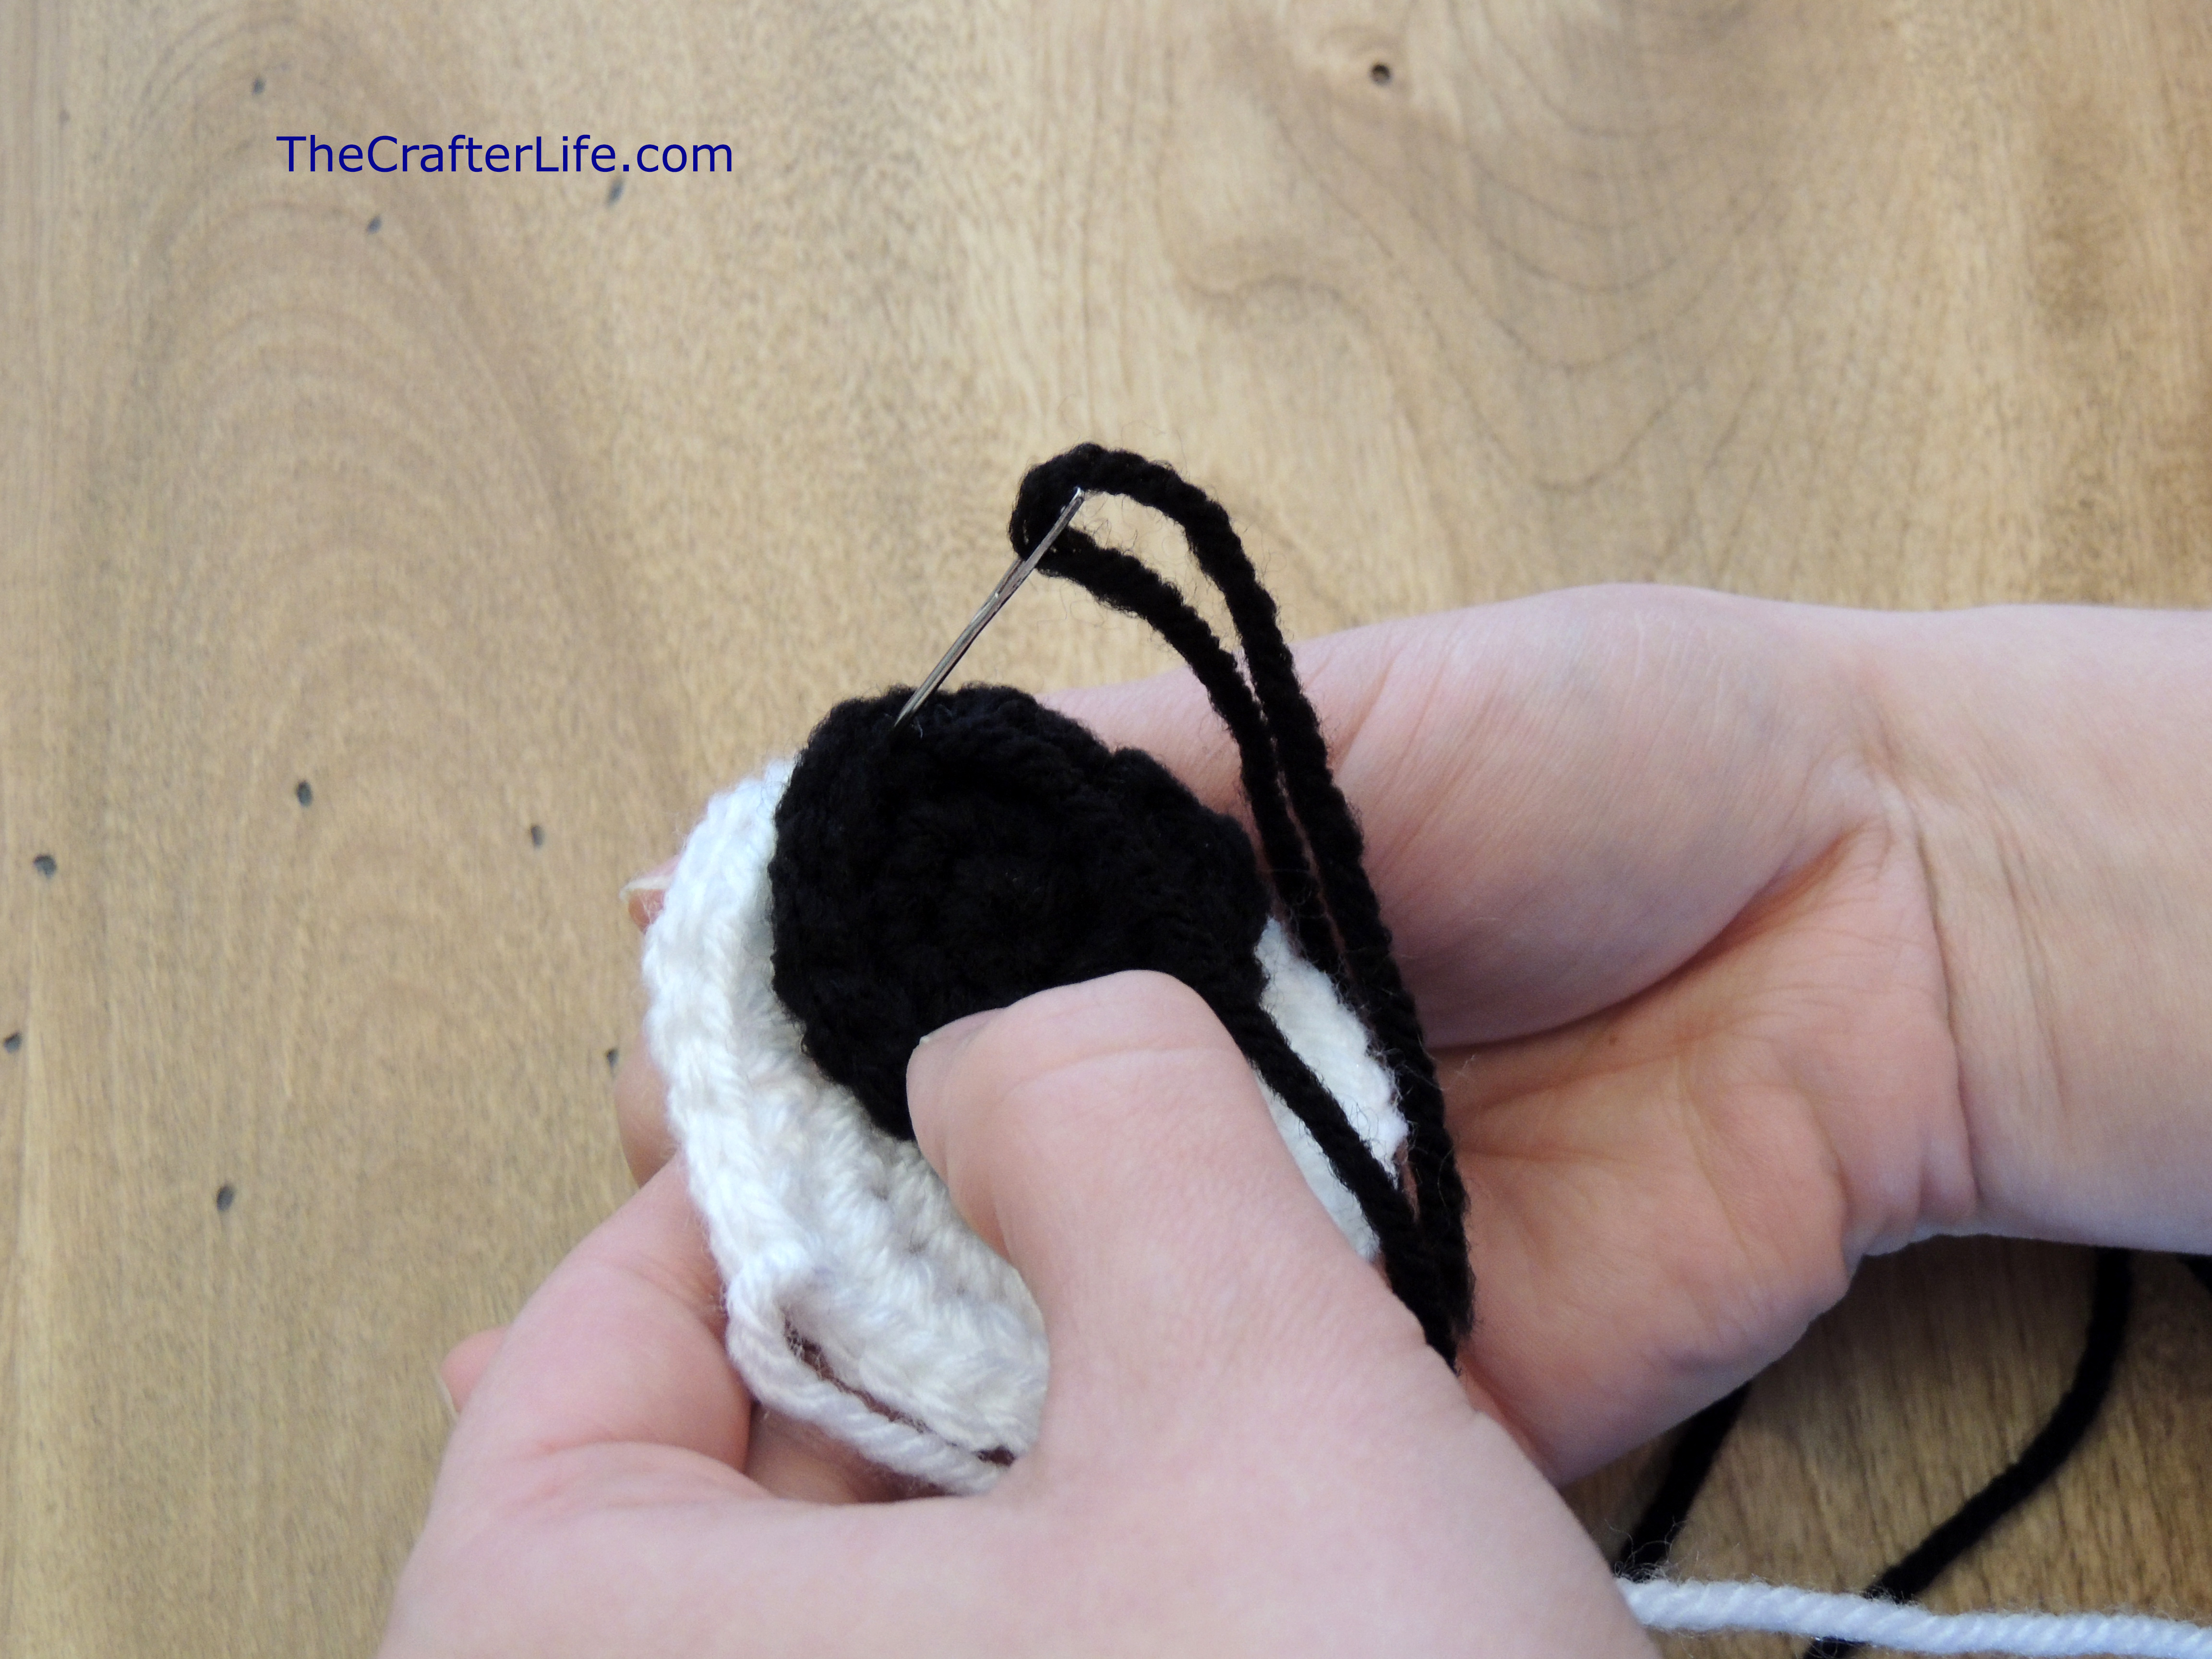
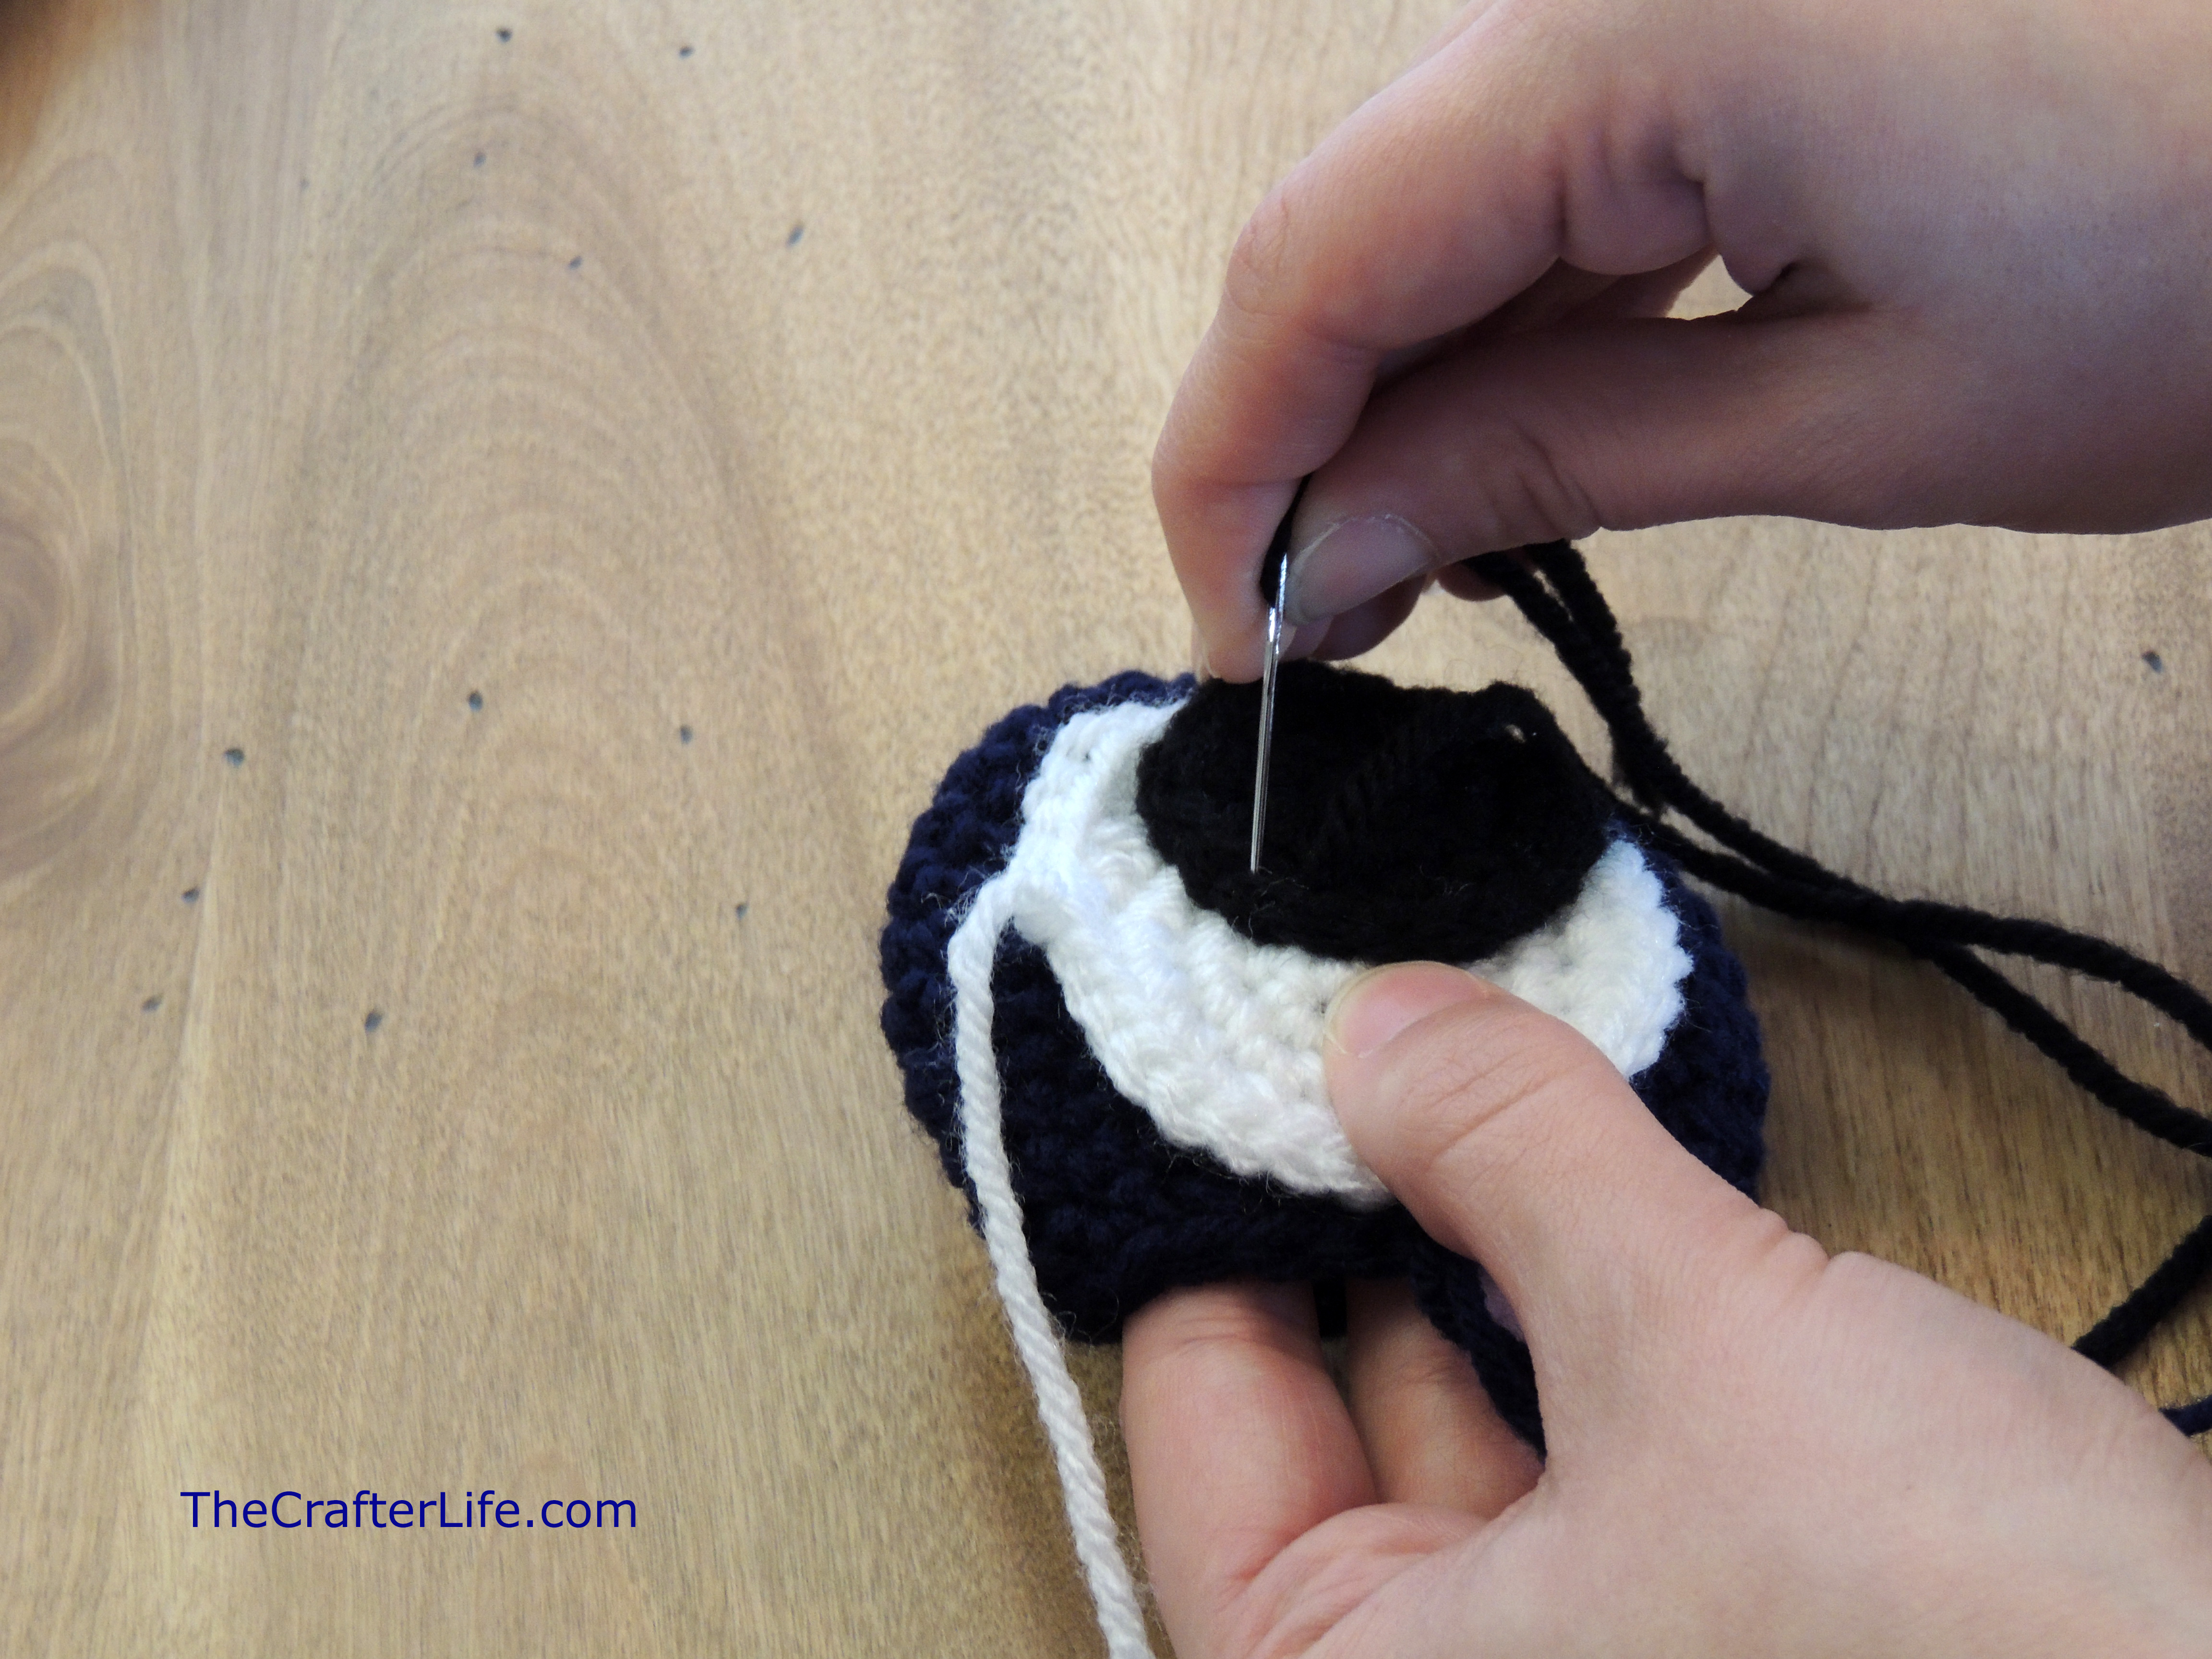
***Using a tapestry needle, sew the black pupils onto the white eyeballs. As you make the antennae eyelids below, you will sew the white eyeballs (with the pupils) to the eyelids.
Antennae Eyelids (Make 2)
The antennae eyelids are made in continuous rounds like the base of the hat. After you finish the first 14 rounds, sew the eyeballs to the center of the eyelids. Do not close the bottom of the antennae since you will be sewing it to the hat. Stuff the antennae eyelids with fiberfill before sewing onto the hat.
Rnd 1: Magic circle, 6 sc in magic circle. (6 sc)
Rnd 2: 2 sc in each st around. (12 sc)
Rnd 3: Repeat [sc in first st, 2 sc in next st] around. (18 sc)
Rnd 4: Repeat [sc in first 2 sts, 2 sc in next st] around. (24 sc)
Rnds 5-7: Sc in each st around. (24 sc)
Rnd 8: Repeat [sc in first 3 sts, 2 sc in next st] around. (30 sc)
Rnd 9: Sc in each st around. (30 sc)
Rnd 10: Repeat [sc in first 3 sts, sc dec] around. (24 sc)
Rnds 11-13: Sc in each st around. (24 sc)
Rnd 14: Repeat [sc in first 2 sts, sc dec] around. (18 sc)
***Sew the eyeball (with pupil) to the center of the eyelid before completing the rest of the rounds. Make sure to secure your yarn so that the eyeball doesn’t come loose.
Rnd 15: Repeat [sc in first st, sc dec] around. (12 sc)
Rnds 16-19: Sc in each st around, slst to first st of round, fasten off, leaving long tail for sewing onto hat. (12 sc)
***Stuff the antennae eyes with fiberfill (make sure to tightly stuff the base of the antennae to keep it from flopping over on top the hat).
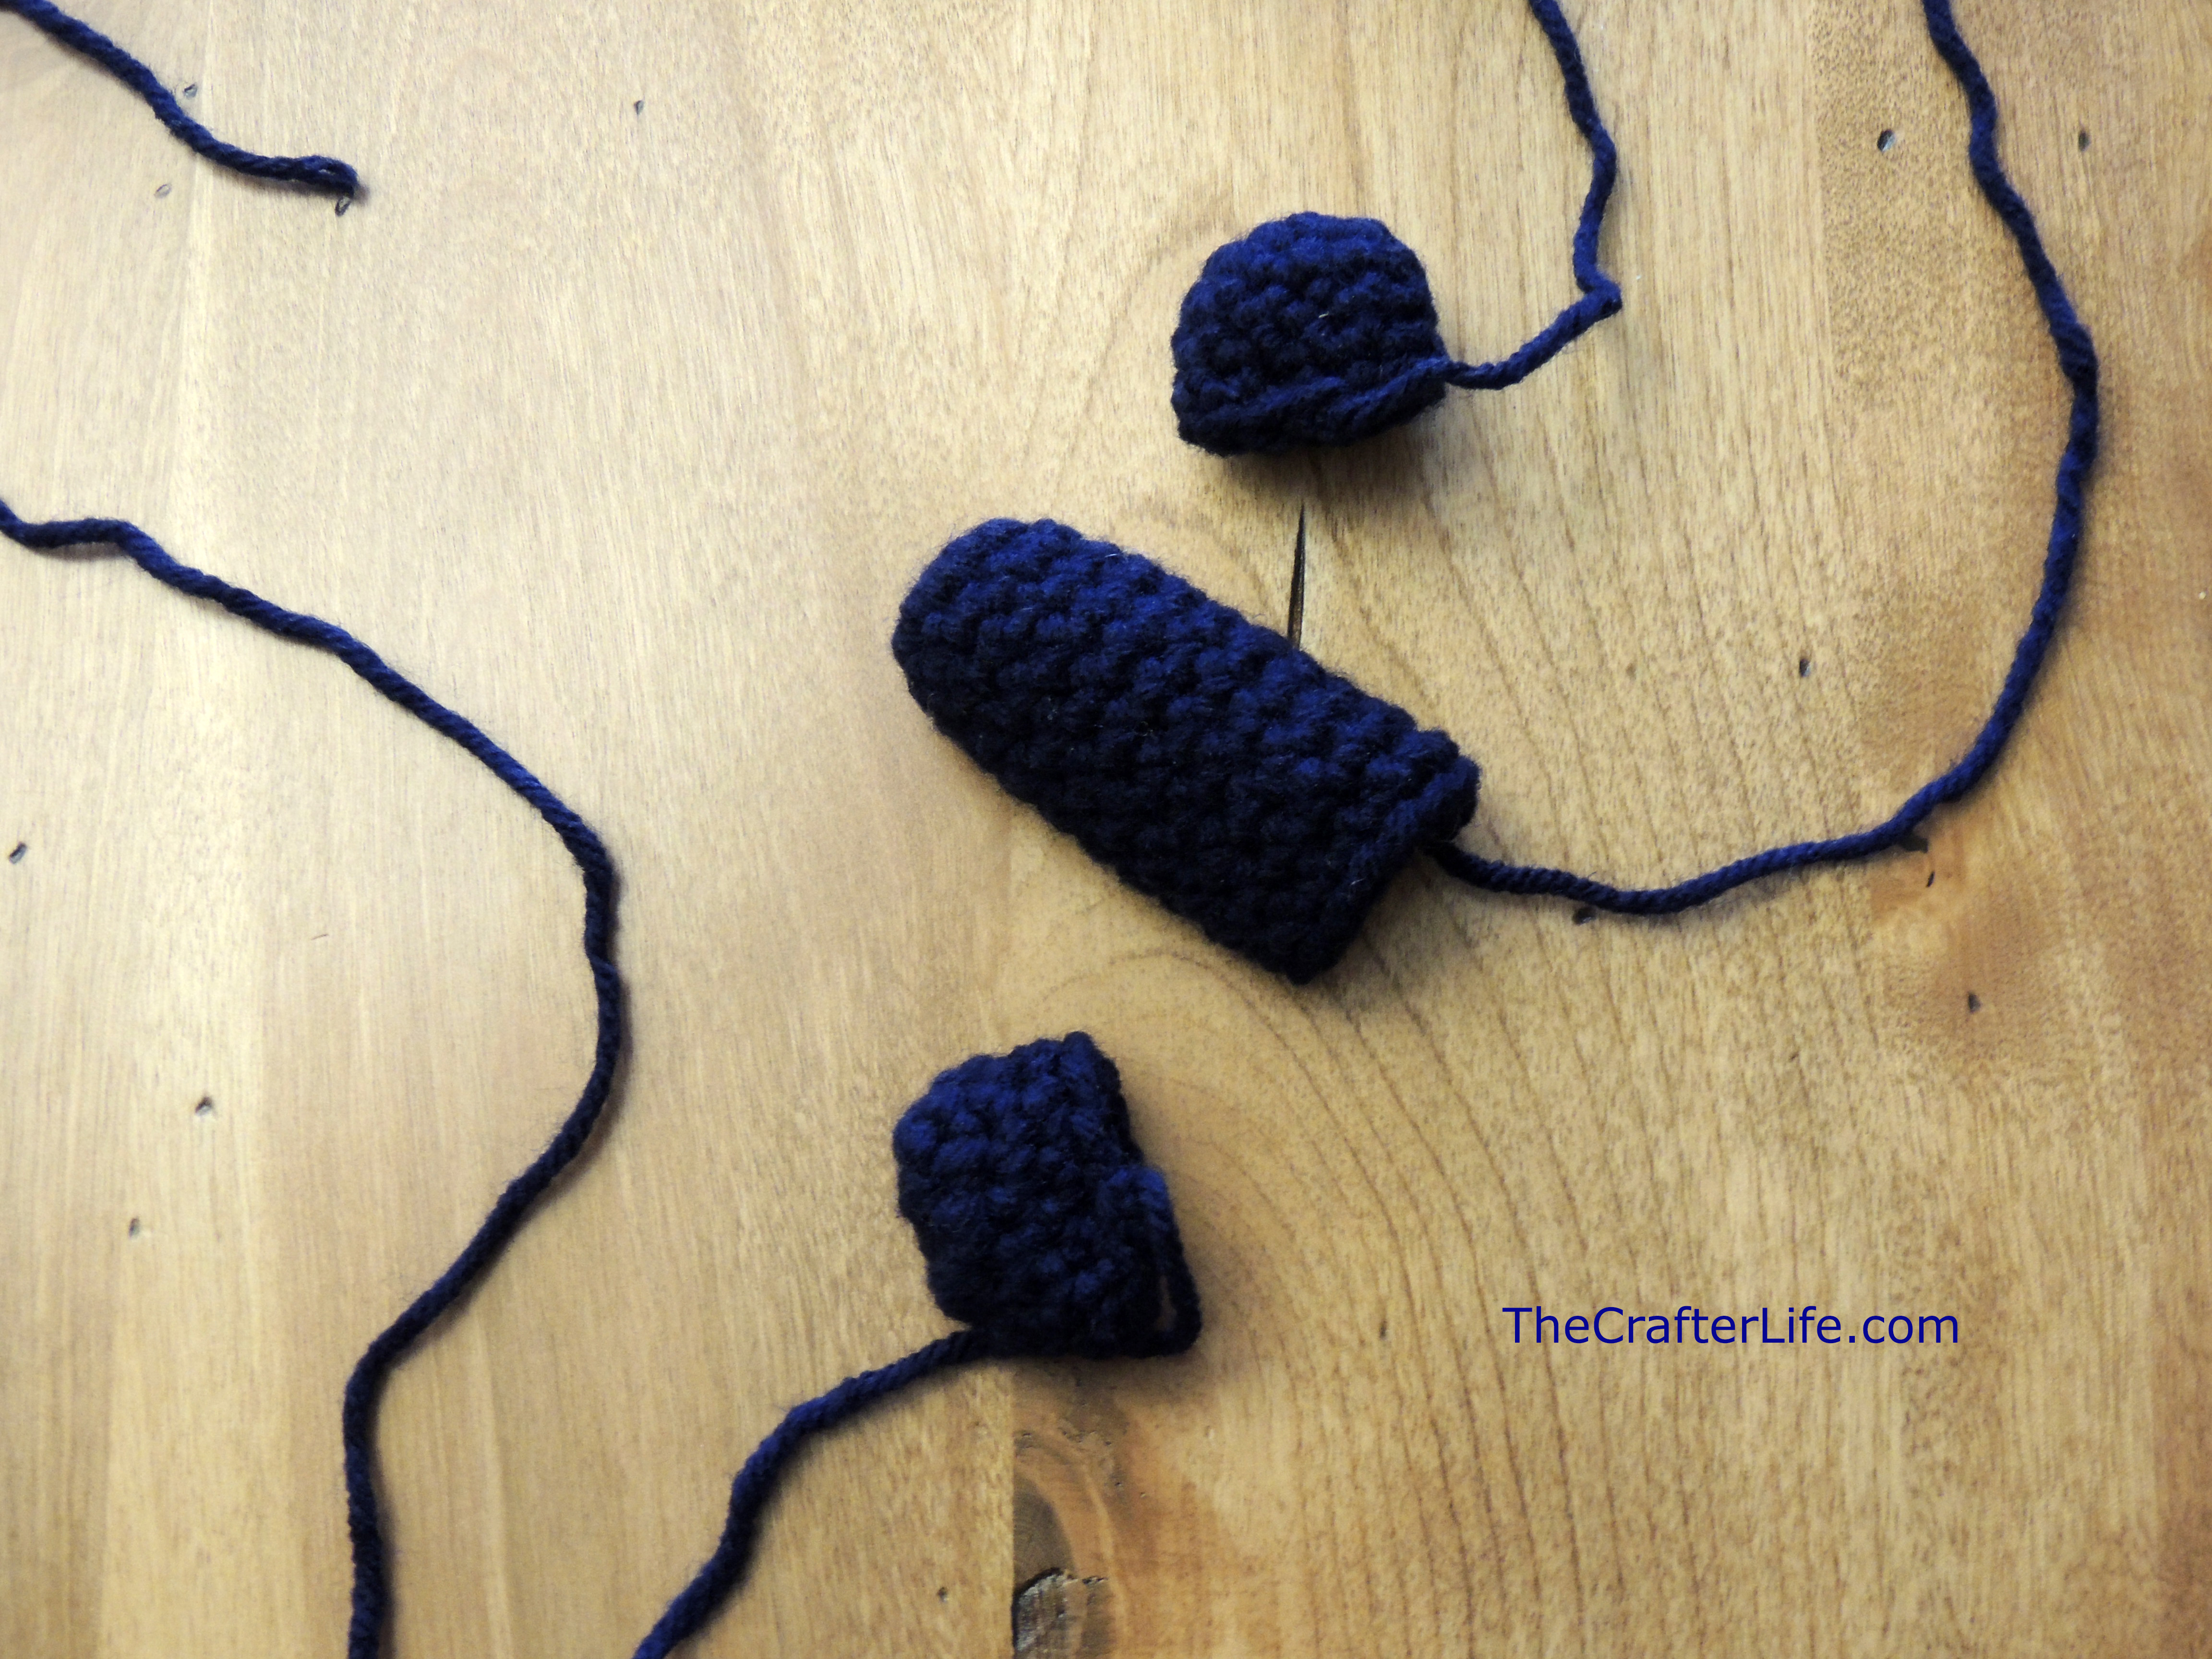
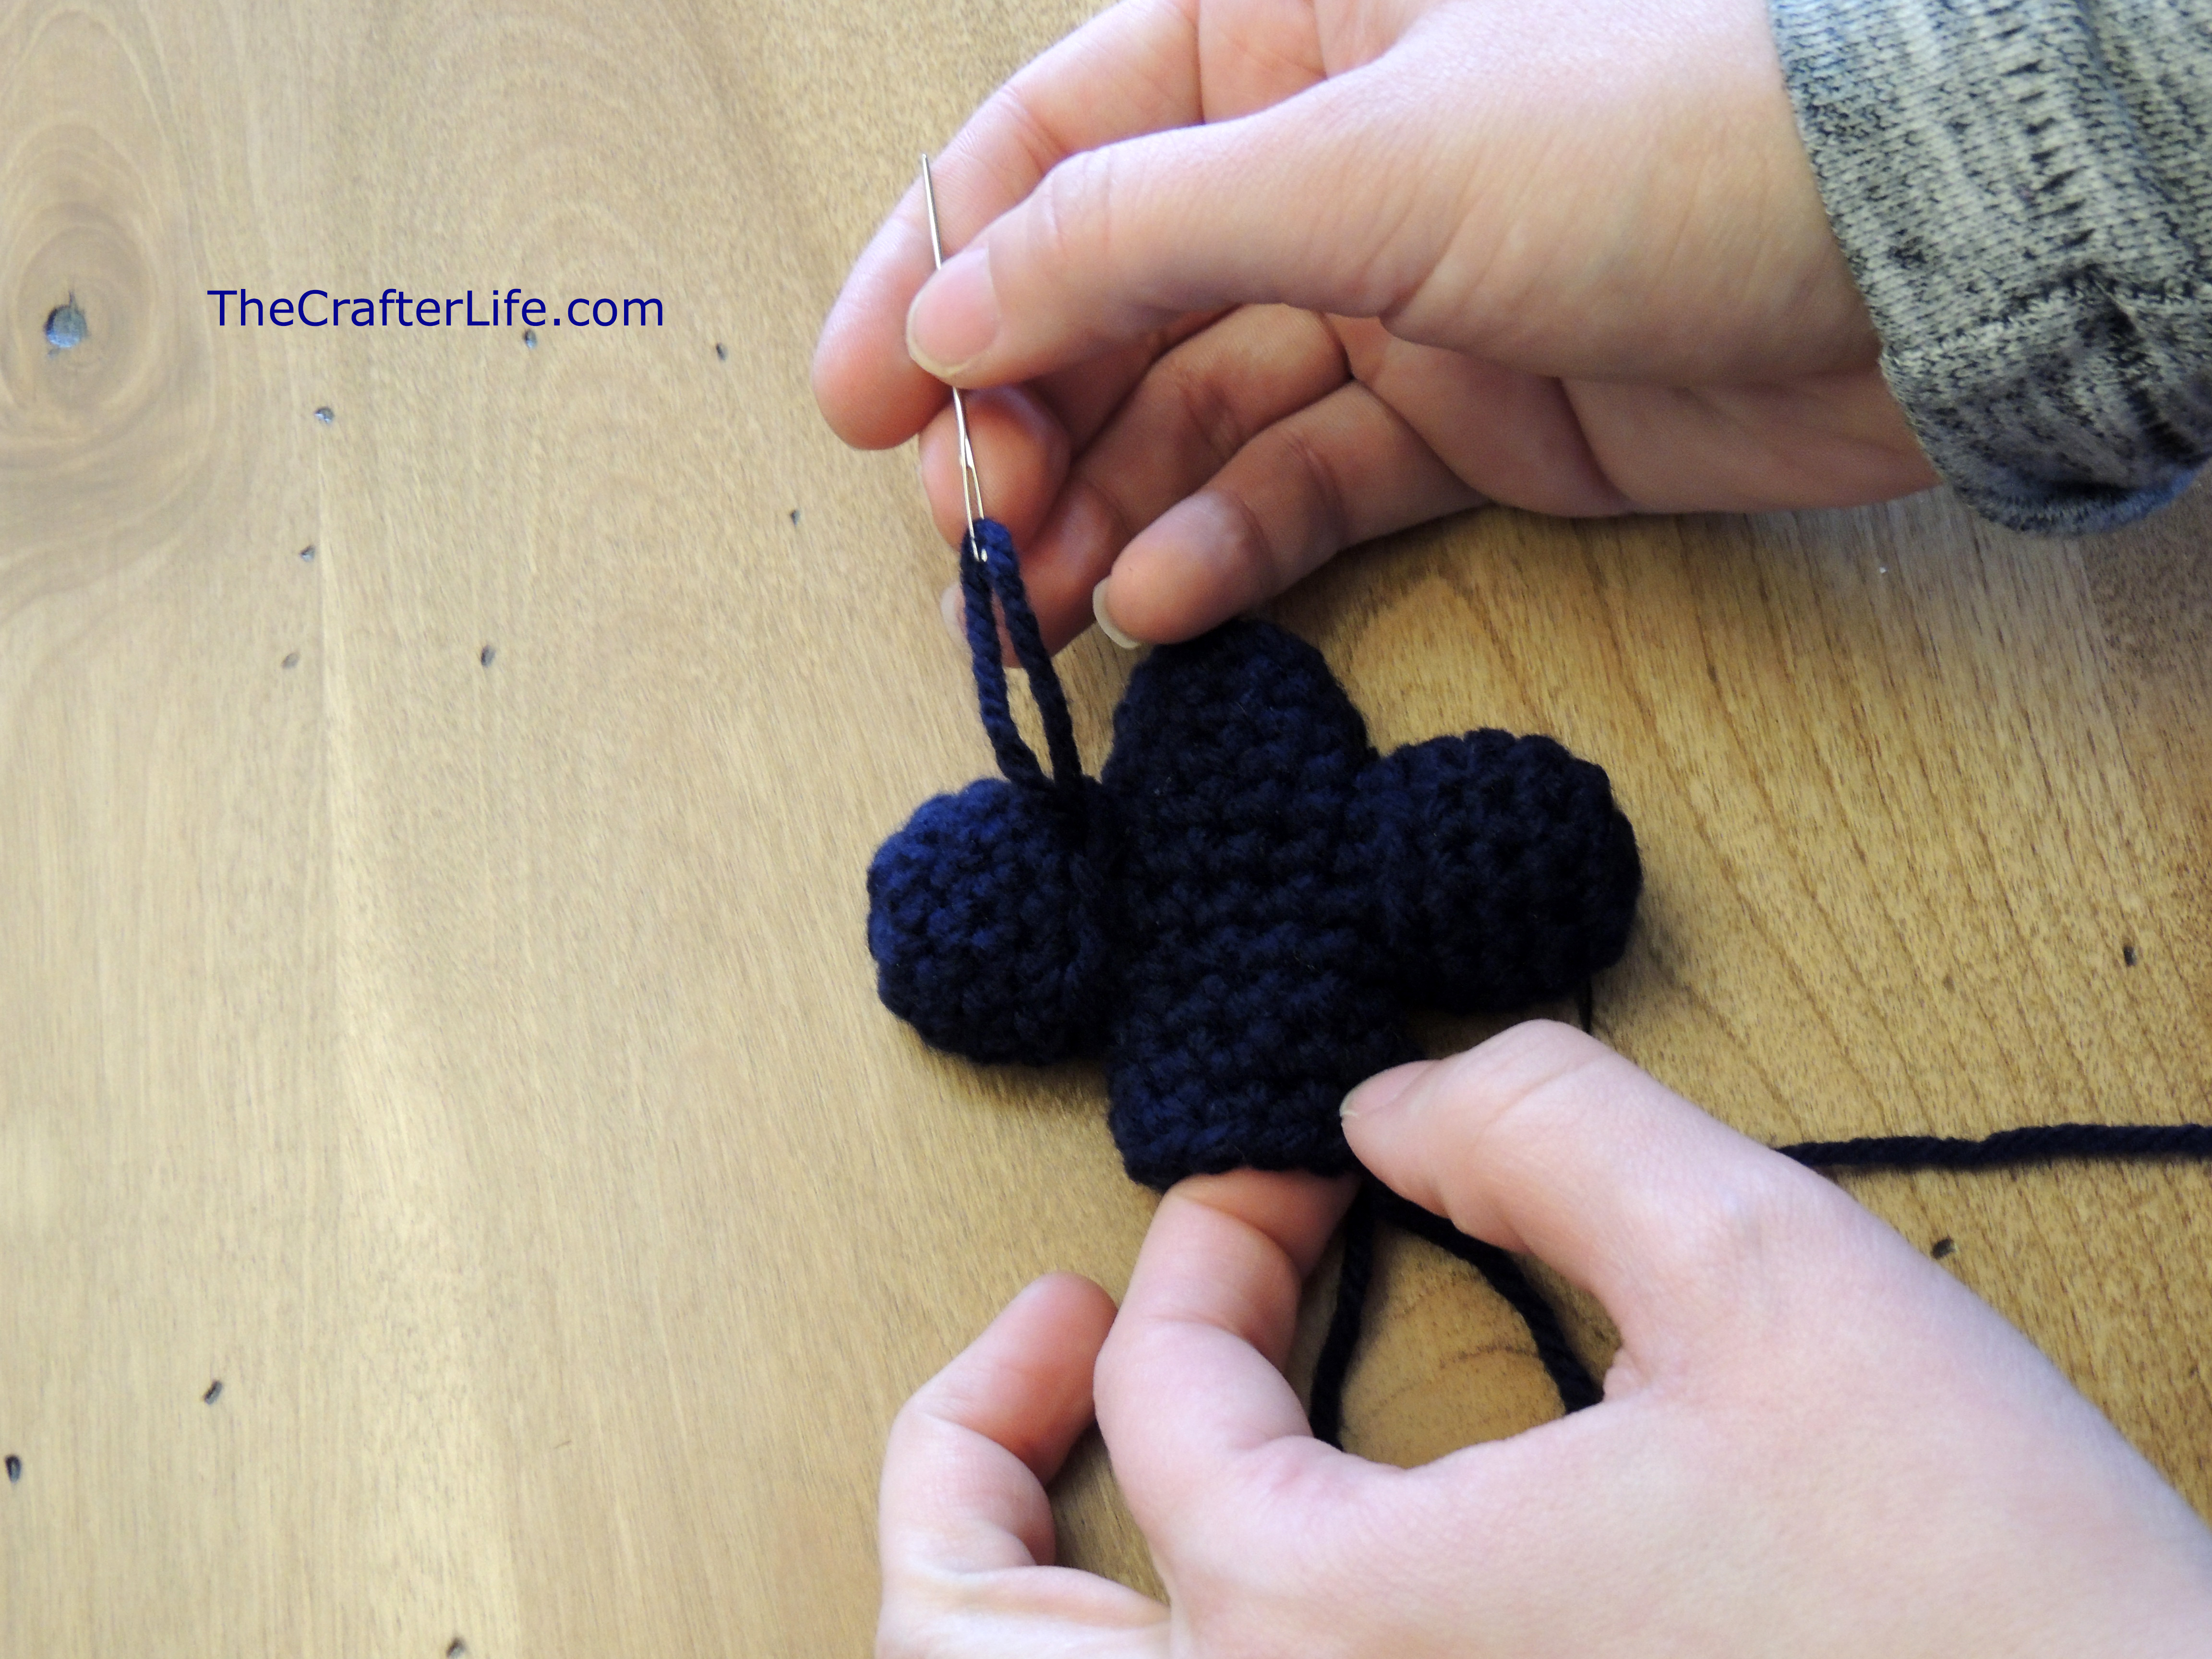
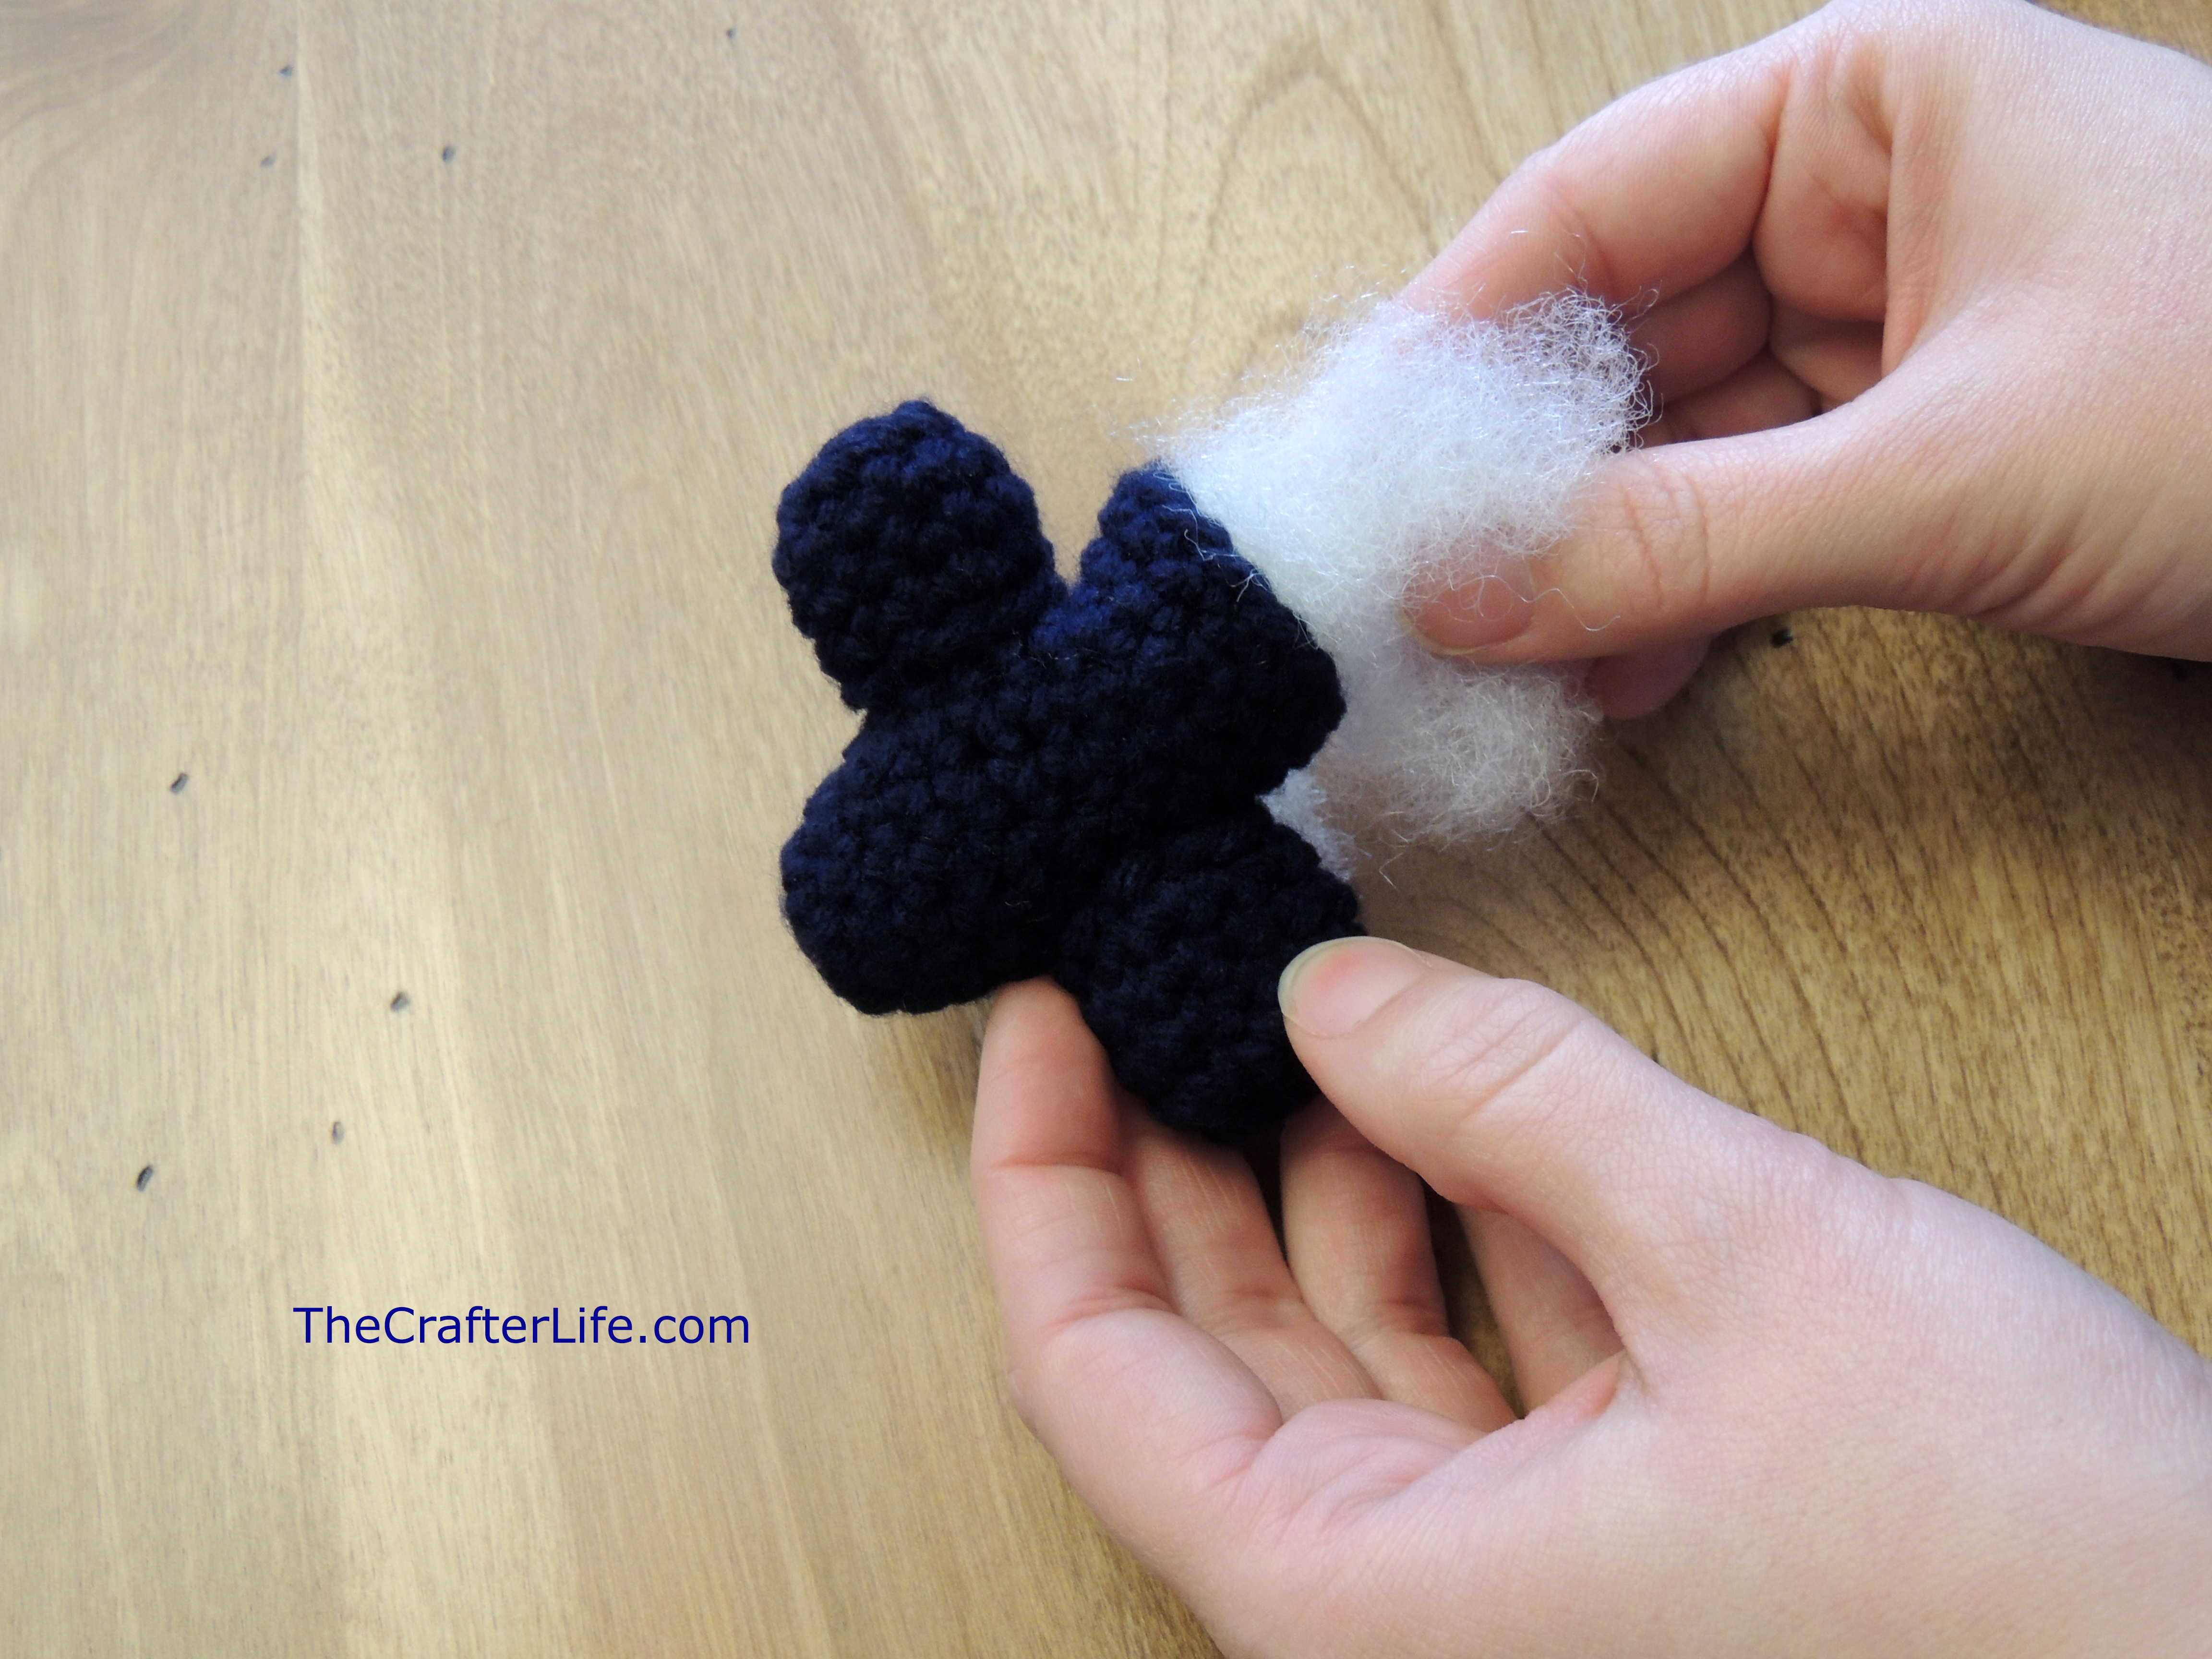
Arms (Make 2)
Rnd 1: Magic circle, ch 1, 6 sc in magic circle. (6 sc)
Rnd 2: 2 sc in each st around. (12 sc)
Rnds 3-10: Sc in each st around, slst to first st of round, fasten off, leaving long tail for sewing onto hat. (12 sc)
Fingers (Make 4)
Rnd 1: Magic circle, ch 1, 6 sc in magic circle. (6 sc)
Rnd 2: 2 sc in each st around. (12 sc)
Rnds 3-5: Sc in each st around, slst to first st of round, fasten off, leaving long tail for sewing onto arm. (12 sc)
***Sew the fingers to each side of the arm. You may wish to stuff the fingers with fiberfill prior to sewing.
Mouth
To make the mouth, simply chain 35 and fasten off, leaving long tail for sewing onto the hat. Of course, you can always make it as long or as short as you want depending on the expression you want for your monster!
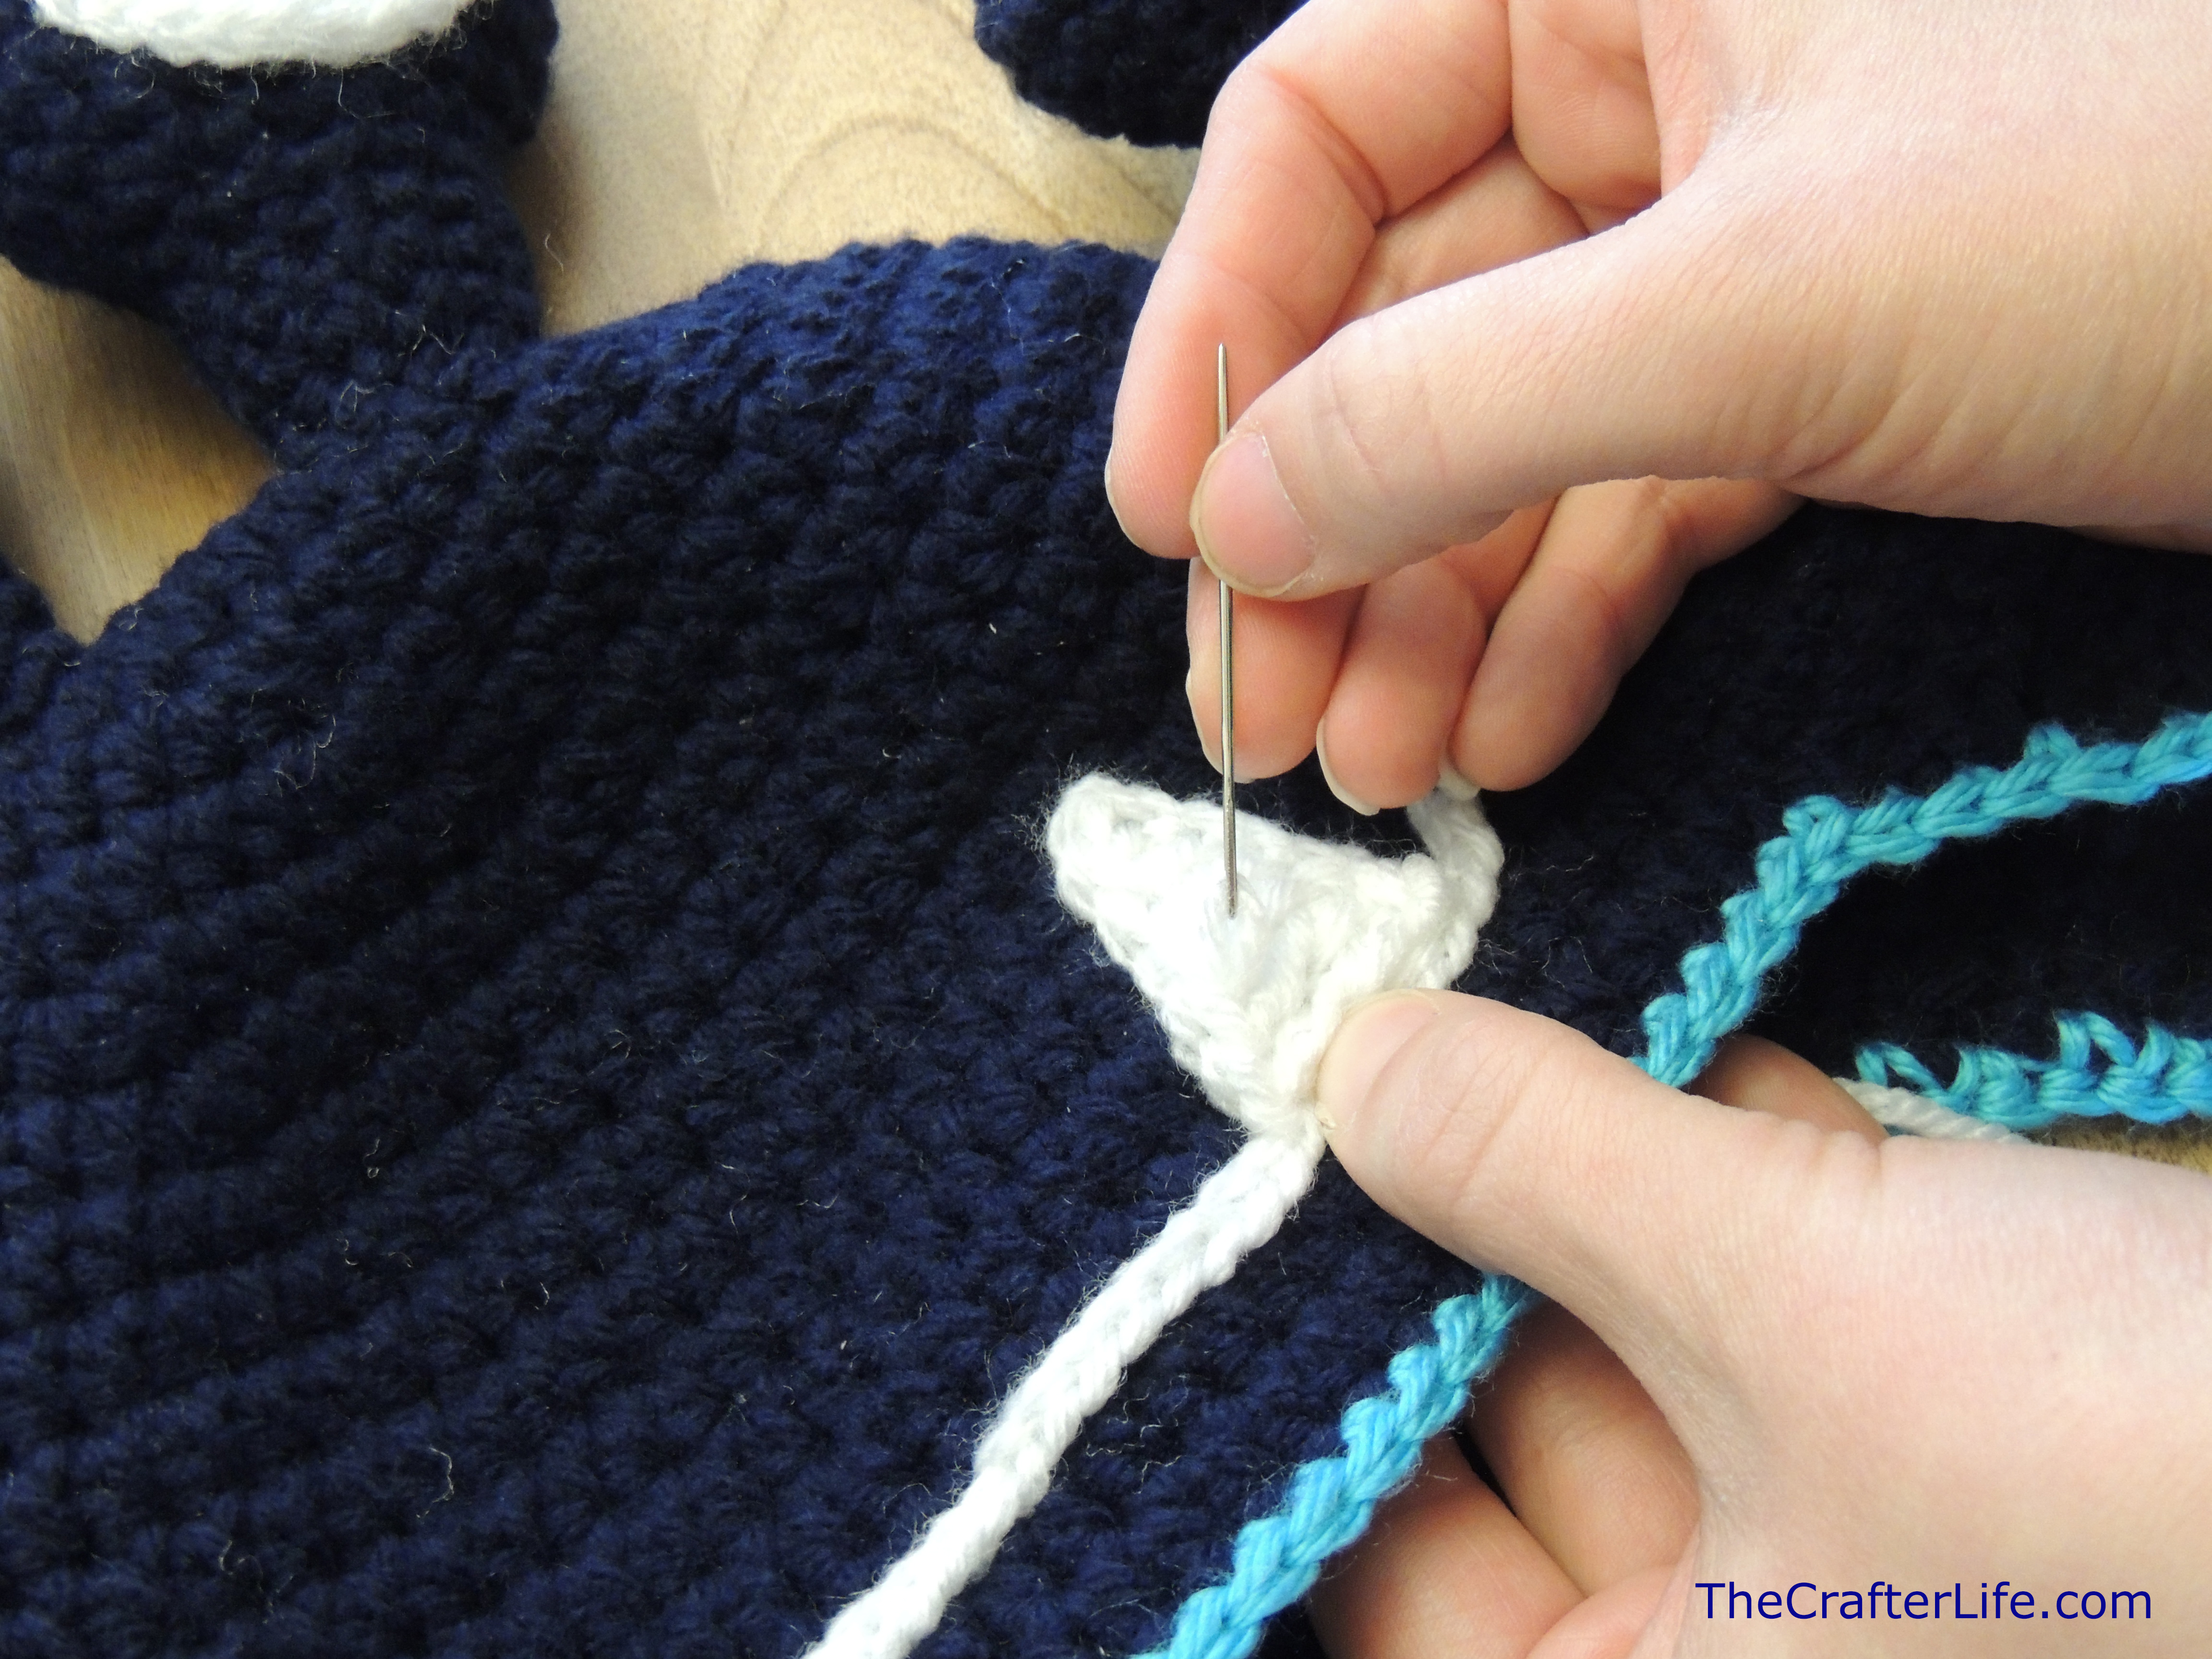
Tooth
Ch 7, sc in 2nd ch from hook, hdc in next ch, dc in next 2 chs, tc in last two chs, fasten off, leaving long tail for sewing onto hat.
ASSEMBLY
- Sew both of the eyes on either side of the top of the hat. I sewed mine on the third and fourth rounds of the hat.
- Stuff the arms tightly with fiberfill. Then sew both arms on either side of the hat. I sewed mine on the twelfth and thirteenth rows of the hat.


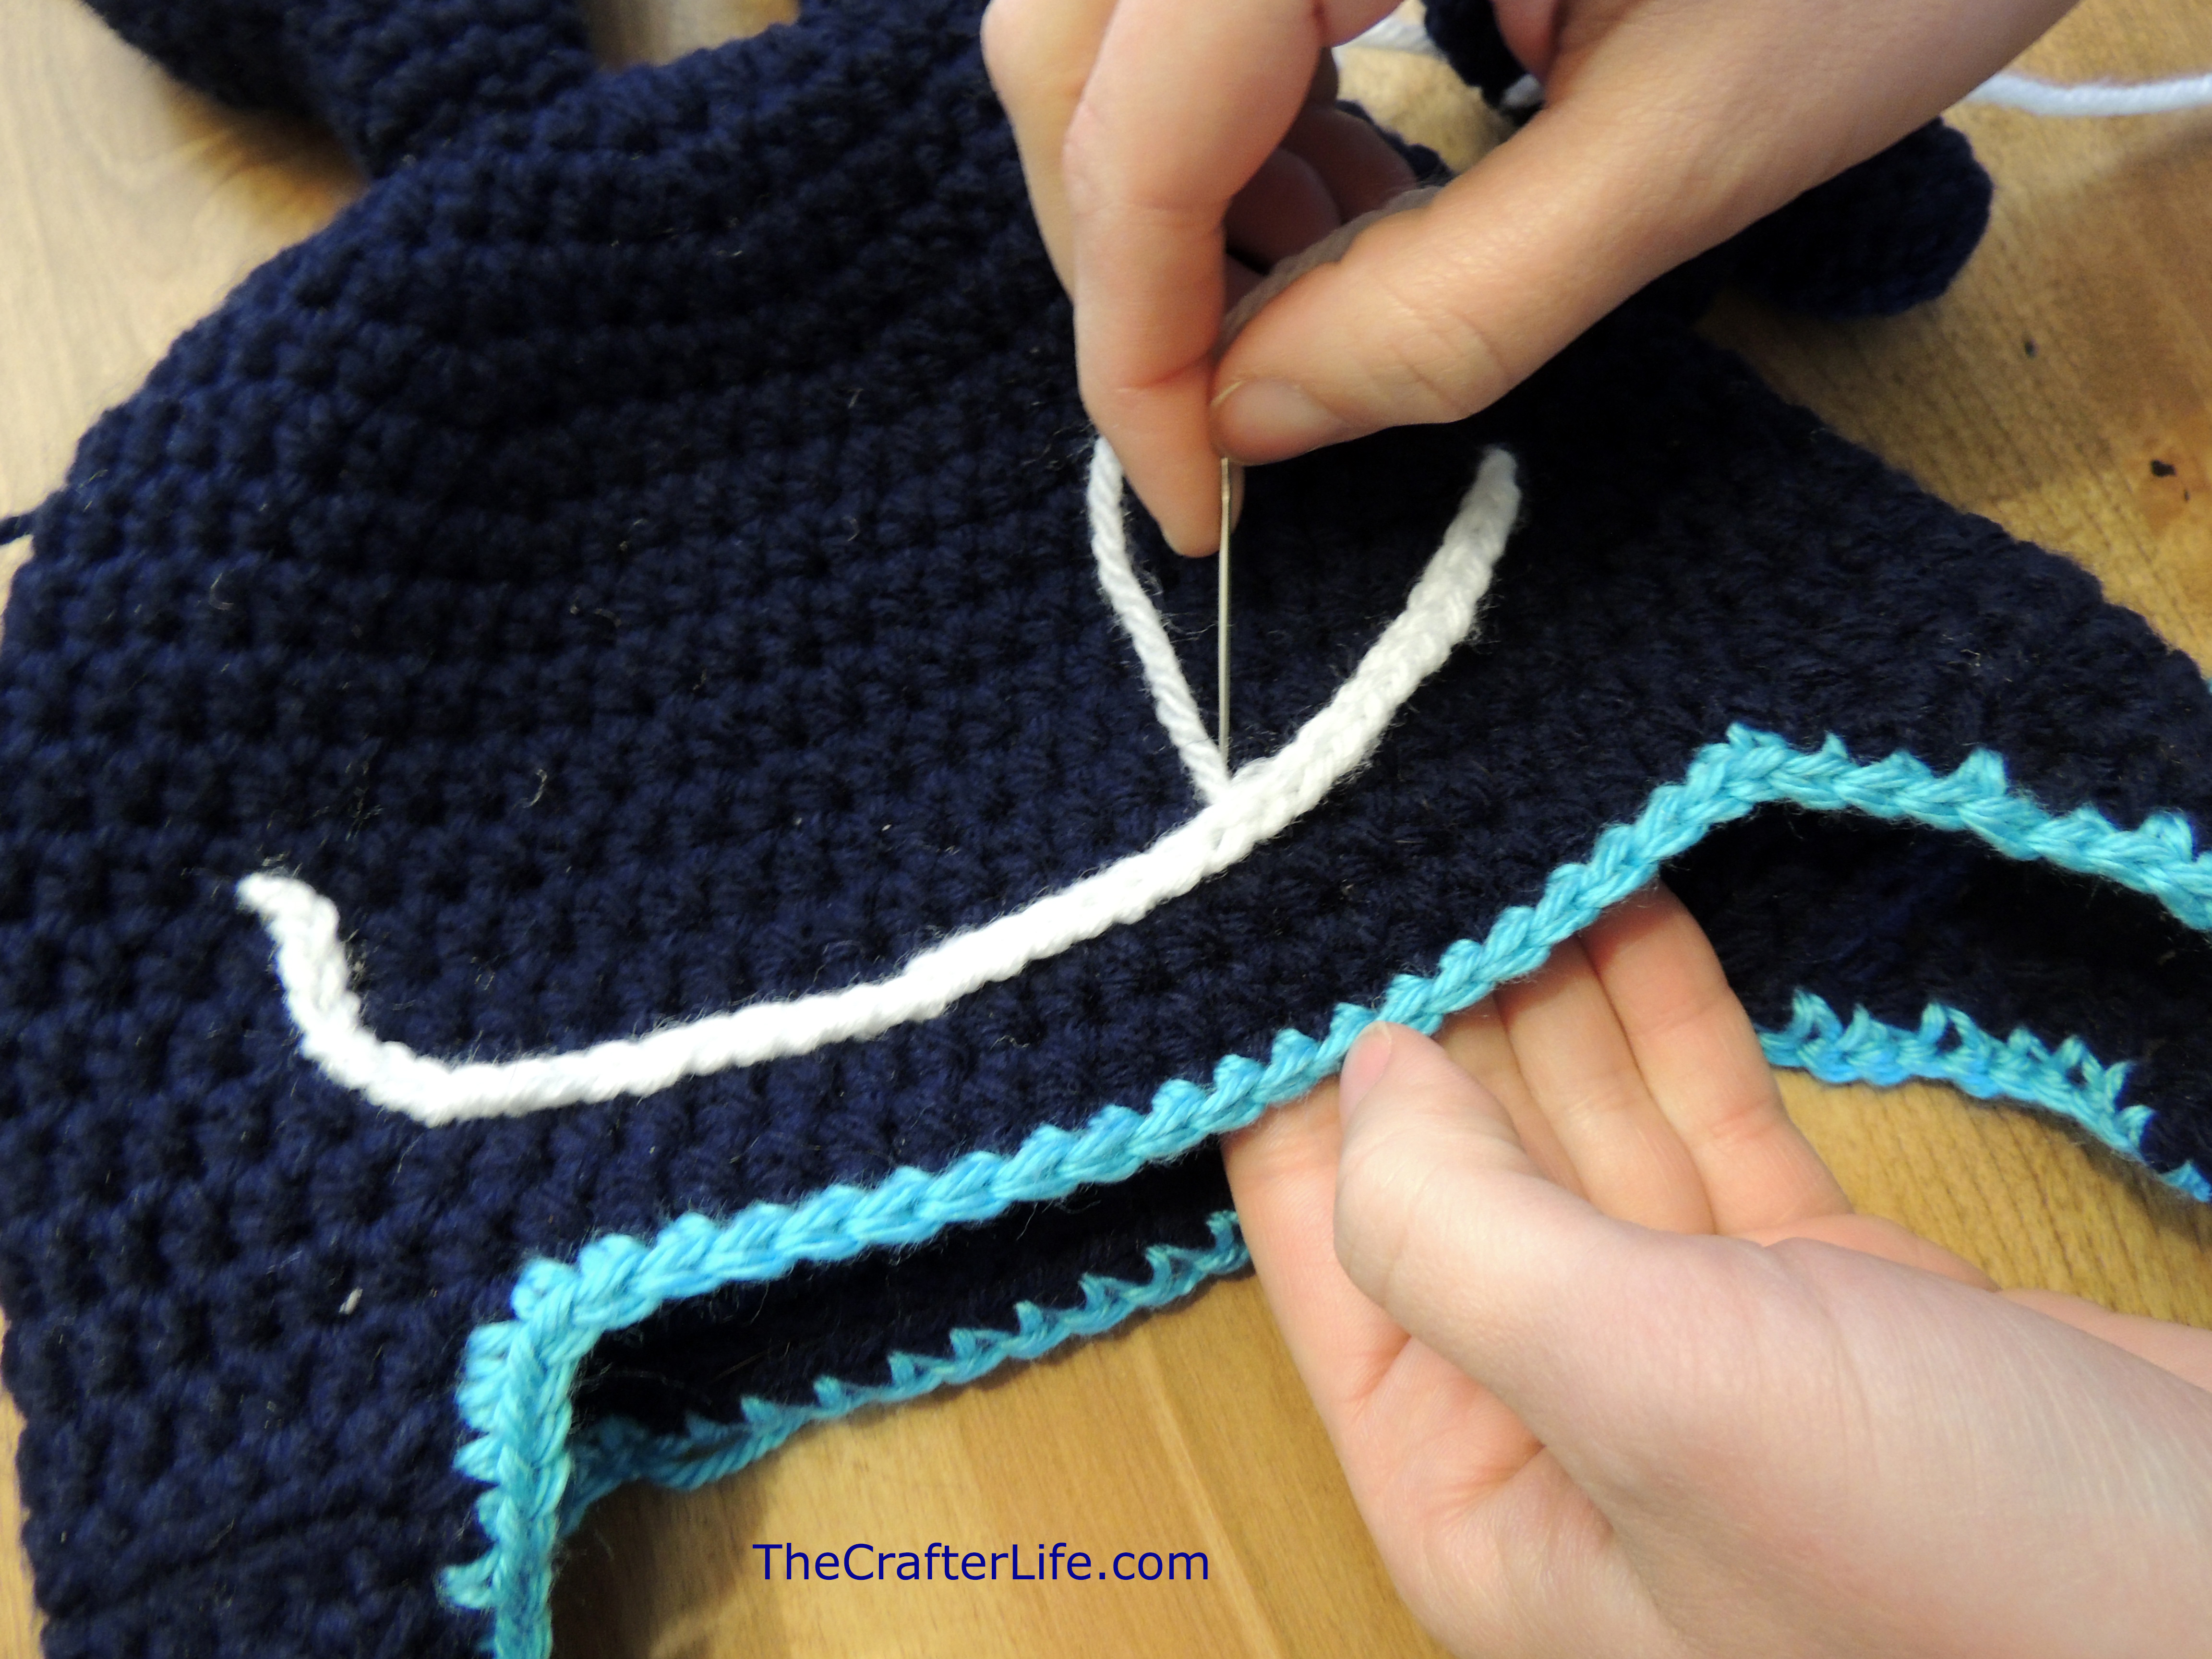
- Sew the mouth onto the front of the hat to form whatever expression you would like for your monster. I used the back ridge of each of the chain stitches to sew the mouth onto the hat.

- Sew the tooth to the hat so that it is attached to the mouth. I had to sew the stitches of the tooth closed from the back of the hat to keep the tooth from having gaps in between the stitches when stretched.

- In order to add the braids onto the earflaps, cut three 30-inch strings of white yarn, three 30-inch pieces of navy blue yarn (or your main hat color), and three 30-inch pieces of turquoise yarn (or your trim color). Then floss them through the middle hole at the bottom of an earflap so that you have two tails of equal length. Make a knot with all the pieces of yarn at the bottom of the earflap. Then braid the tail (I used two strands of each color for each of the three main braid strands) and place a knot at the bottom to hold the braid in place. Trim the ends so they are even. Do this for the other earflap braid. *You can always make your braids longer or shorter by starting with longer or shorter pieces of yarn. You will probably want to make them about 6-10 inches longer if this is for an older child or adult. The hat is even cute without the braids if you aren’t into that look.
- Make sure to weave in and cut off any loose ends you may have left on your hat. Your hat should now be ready to wear and scare!
Here is my son modeling his monster hat.

***If you sell products using my patterns or mention my patterns please link back to my site. Please do not sell my patterns or claim them as your own.***
Feel free to post comments here or on my Facebook page!
**If you like what you see, feel free to pin, share, and link back to my site. Thank you for visiting!