Adult Camo Crochet Hat with Pattern

I made this camouflage hat for my husband since he has wanted one for awhile. I did something a little different and crocheted this hat in rows rather than in rounds. My husband says it’s really warm so this would make a nice hat for someone who spends time outside in the cold weather. See below for my pattern if you are interested in making one.
MONSTER HAT PATTERN
SIZE
*Fits most adults
*If you are making this for an adult with a larger head (or you want a wider brim), you may want to start with 45-50 chains instead of 40. The length of your starting chain should be the length from the top center of the person’s head to the bottom of their ear, plus about two inches for the brim (depending on how wide you want the brim to be).
MATERIALS
– 5.50mm (I) hook
– Worsted weight yarn (I used Red Heart Super Saver yarn in Camo)
– Tapestry needle
– Scissors
ABBREVIATIONS
– ch = chain
– sc = single crochet
– slst = slip stitch
– st = stitch
SPECIAL NOTES
– The hat is done in rows and single crochet stitches are worked in the back loops only.
– My brim turned out thinner than I expected so if you want a wider brim, start with about 5 additional chains (so a starting chain of 45). If you don’t want a brim, start with about 3-5 less chains. The length of your starting chain should be the length from the top center of the person’s head to the bottom of their ear, plus about two inches for the brim (depending on how wide you want the brim to be).
– The head circumference determines the number of rows so if you are making this for someone who does not have an average adult-sized head, simply continue adding rows until the hat is about an inch or two short of reaching entirely around the person’s head. It doesn’t need to reach completely around since you want it to fit snuggly (it will stretch).
PATTERN
Row 1: Ch 40, sc in 2nd ch from hook and in each ch across. (39 sc)
Rows 2-70: Ch 1, turn, sc in the back loop only of each st across. DO NOT fasten off at the end of the last row. Follow the directions below to complete the hat. (39 sc)
SEAMS/ASSEMBLY
1. In order to make the side seam of the heat, match the stitches of the last row up with the stitches of the first row and slip stitch the respective stitches together. One you have stitched completely across, fasten off, but leave an extra long tail for sewing the top of the hat together.
2. Use a tapestry needle to sew the top of the hat together by weaving it in and out of every few stitches around and pulling the yarn taut as you go around the top of the hat. Once you have reached the point where you started, sew the leftover hole shut by weaving your yarn back and forth across the hole. Pull the yarn taut and tightly secure it by weaving it under stitches before cutting off the tail.
3. Turn the hat right-side-out and fold up the brim. The hat is now ready to be worn!
***If you sell products using my patterns or mention my patterns please link back to my site. Please do not sell my patterns or claim them as your own.***
Feel free to post comments here or on my Facebook page!
**If you like what you see, feel free to pin, share, and link back to my site. Thank you for visiting!

You May Also Like
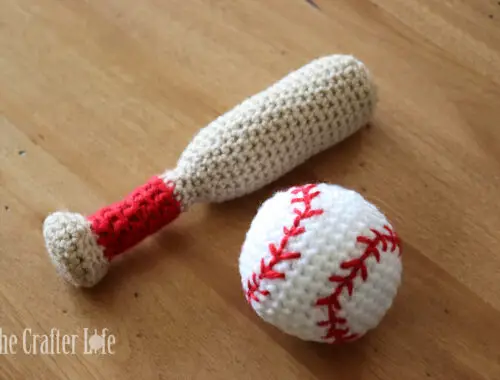
Crochet Baseball Bat
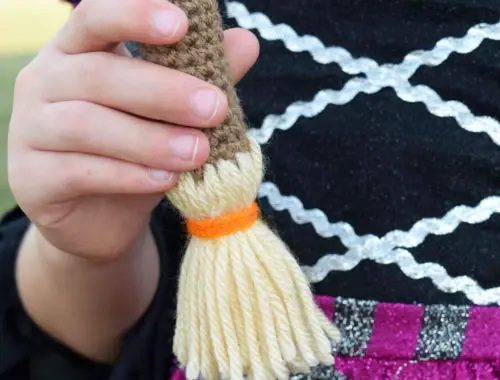
Broomstick Lip Balm Holder