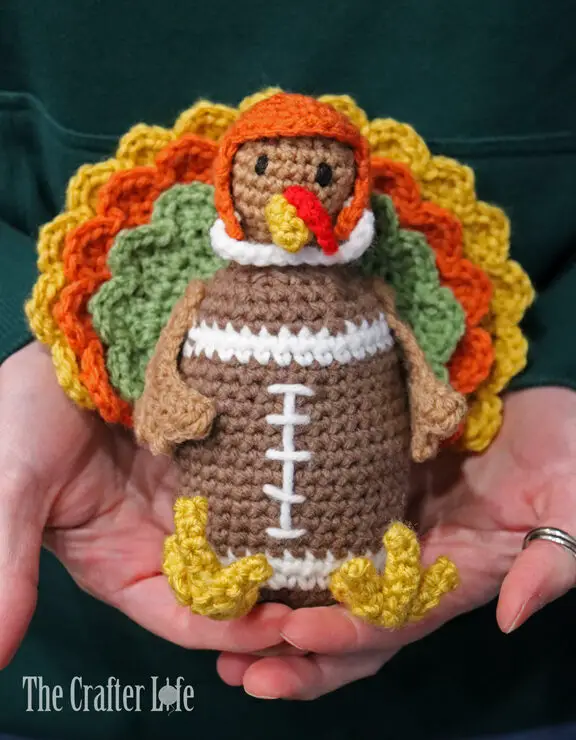
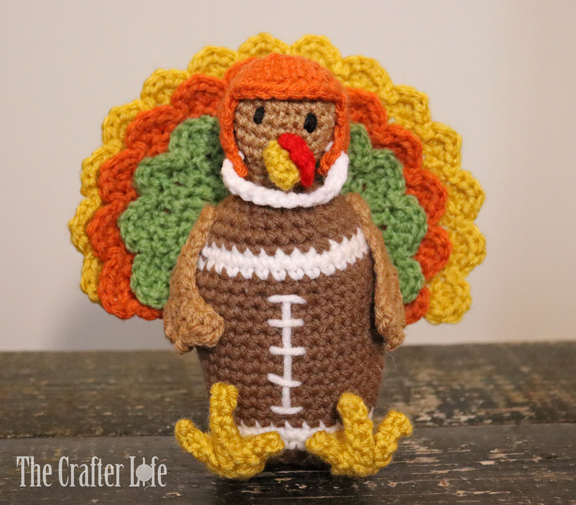
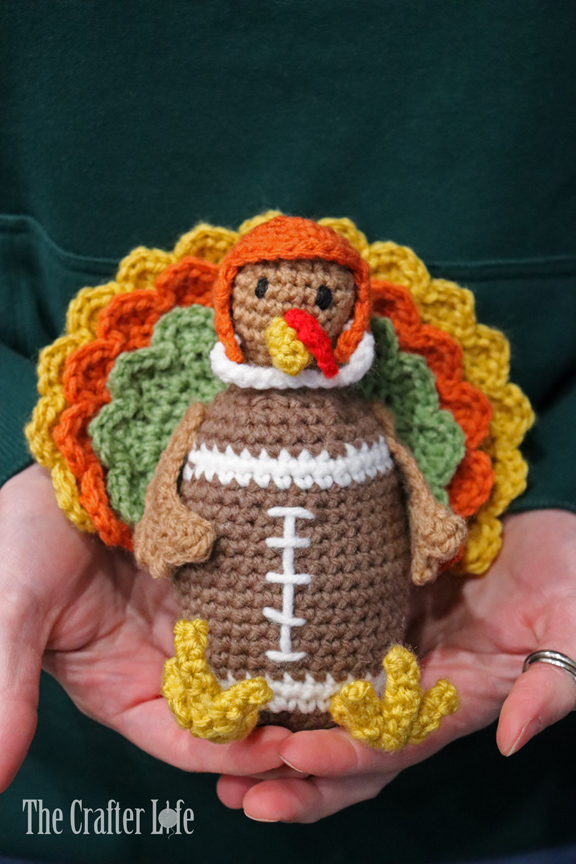
Turkey Football
I wanted to make a turkey shelf sitter for a fall decoration and thought I would make the body of the turkey a football to truly capture the essence of the season. Of course, I had to add a cute little helmet for an extra touch! I think my football turkey is the epitome of fall. You could always change the colors to match your favorite team! It would make a great gift for anyone who loves football! See below for my pattern if you are interested in making one for yourself.
FINISHED MEASUREMENTS
The leg warmer is about 6½ inches tall and about 6½ inches wide at the widest section (from bottom left to bottom right of largest back feather). The football body is about 9½ inches around in the middle when stuffed.
MATERIALS
– Size 5.00 mm crochet hook or size needed to obtain gauge
– Worsted weight (4) yarn in Brown (I used Red Heart Super Saver in Cafe Latte.)
– Worsted weight (4) yarn in Light Brown/Tan (I used Red Heart With Love in Tan.)
– Worsted weight (4) yarn in White (I used Red Heart Super Saver in White.)
– Worsted weight (4) yarn in Dark Yellow/Gold (I used Loops & Threads Impeccable in Gold.)
– Worsted weight (4) yarn in Burnt Orange (I used Loops & Threads Impeccable in Pumpkin.)
– Worsted weight (4) yarn in Green (I used Red Heart Super Saver in Tea Leaf.)
– Worsted weight (4) yarn in Red (I used Red Heart Super Saver in Cherry Red.)
– Worsted weight (4) yarn in Black (I used Red Heart Super Saver in Black.)
– Fiberfill
– Tapestry needle
– Scissors
– Measuring tape
– Stitch markers
– Straight pins (optional for holding pieces in place for sewing)
ABBREVIATIONS
– ch = chain
– chs = chains
– dc = double crochet
– hdc = half double crochet
– sc = single crochet
– sc2tog = single crochet 2 together (single crochet decrease)
– slst = slip stitch
– st = stitch
– sts = stitches
GAUGE
Football Body
5 sc = 1 inch
5 rounds of sc = 1 inch
Back Wing Pieces
2 rows of dc = 1 inch in height
PATTERN NOTES
The appendages/accessories are made first so that you can attach them as you work the main body of the football turkey.
The main body of the football turkey is made with continuous rounds of single crochet stitches. Do not join continuous rounds unless otherwise stated. Simply work the first stitch of each round in the first stitch of the previous round. Attach a stitch marker to mark rounds and move marker as you complete each round.
When changing color on the stripes of the football, join the new color while completing the last sc of the previous color (by pulling through the new color when you have two loops on the hook in the previous color to complete the sc).
The yarn is cut after each color change.
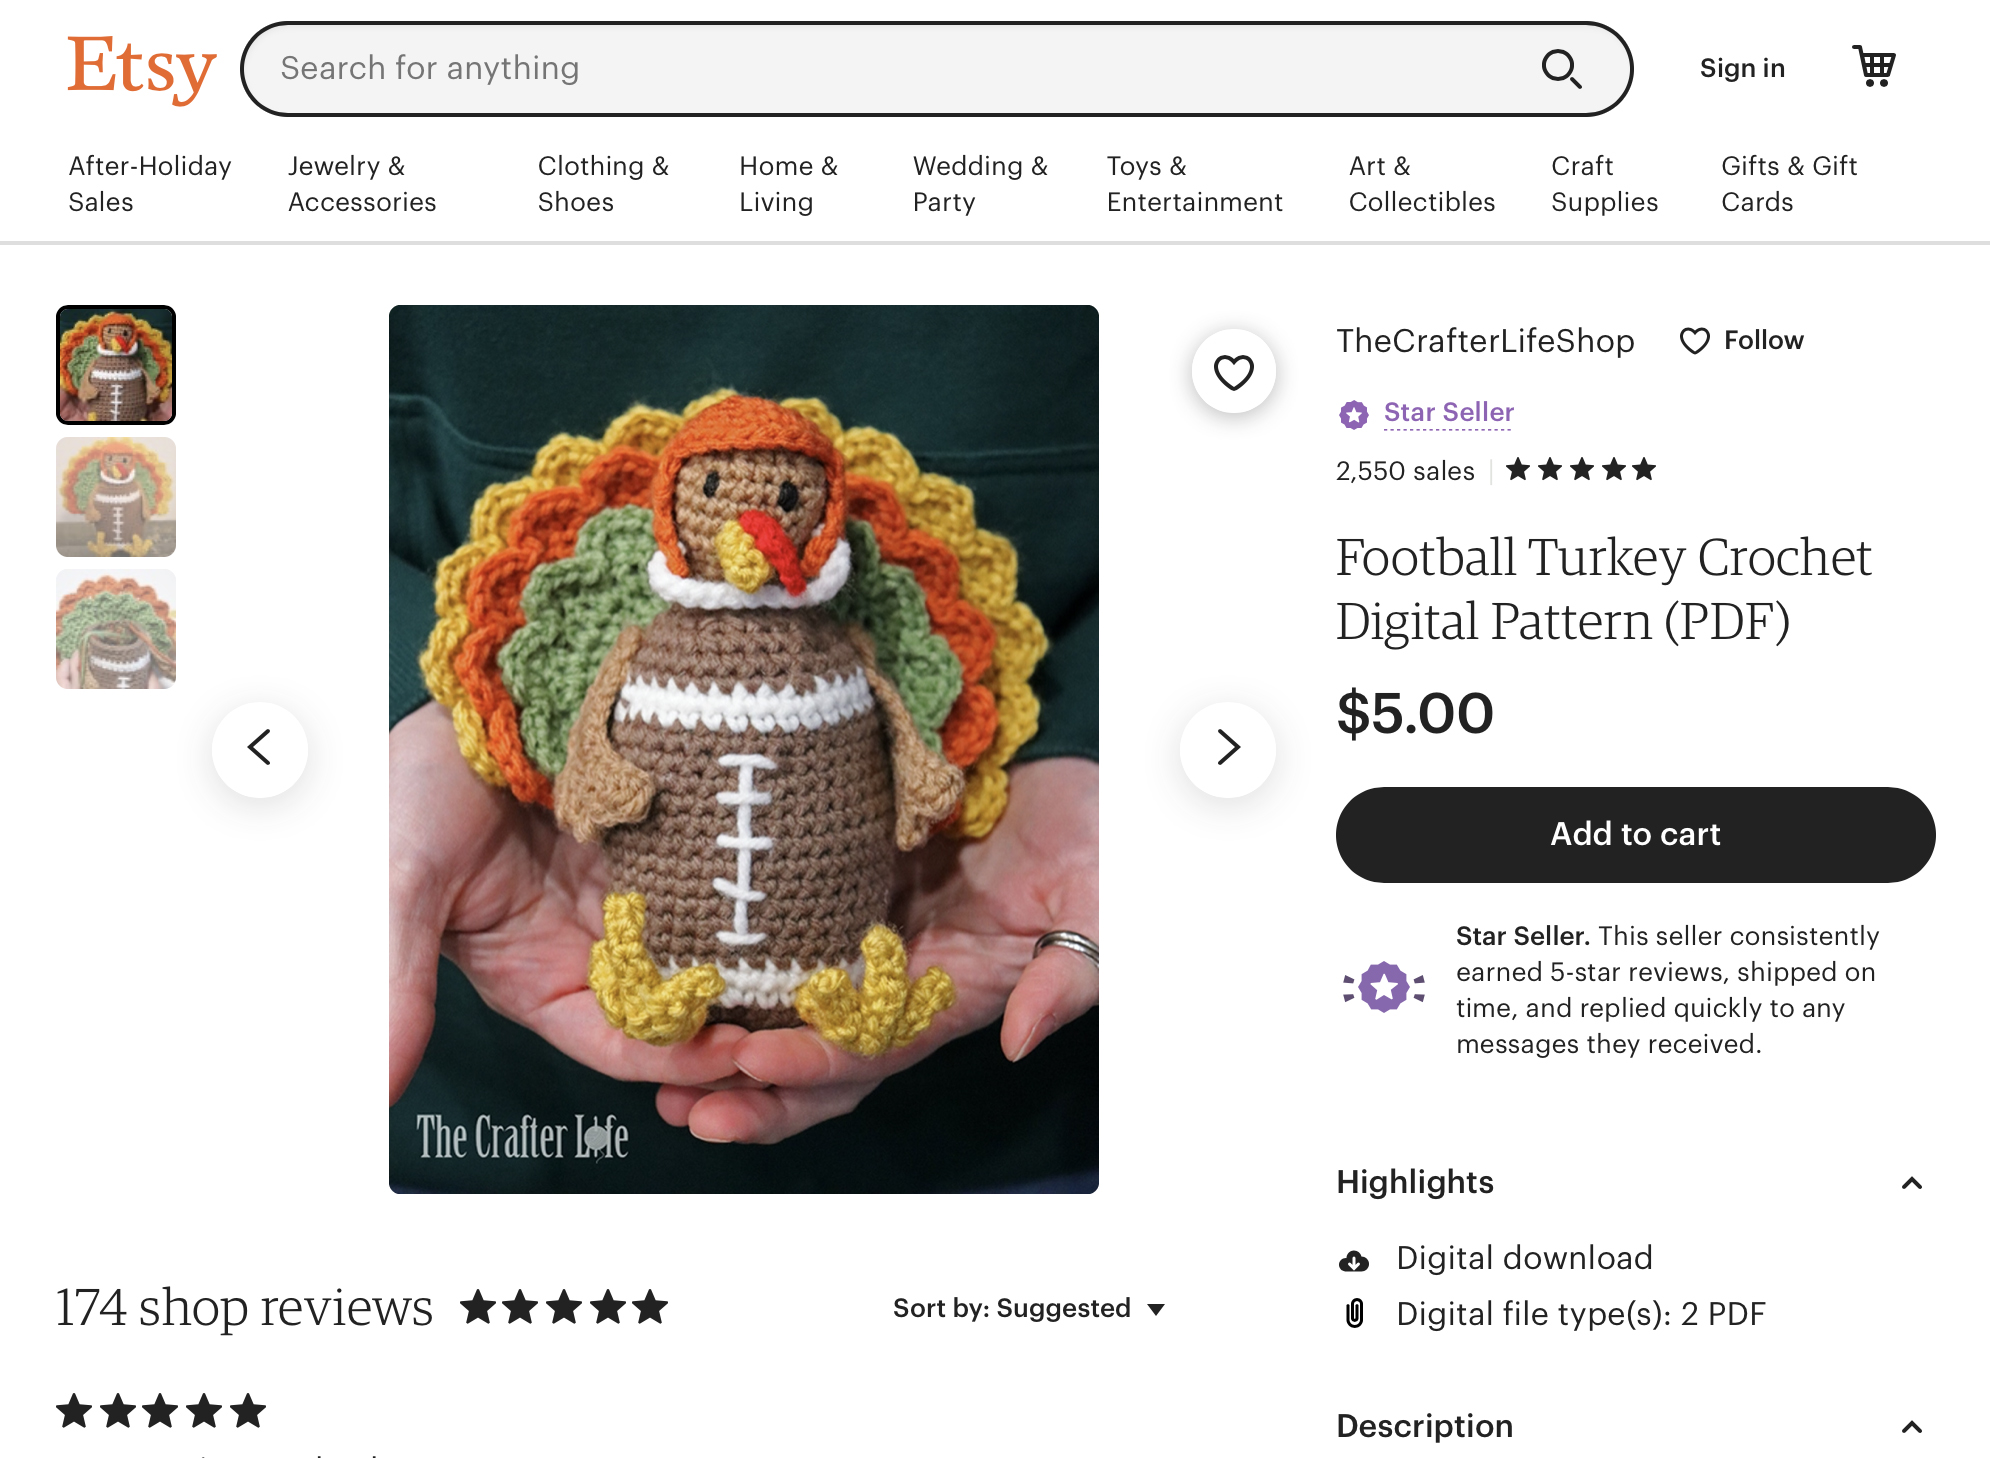
*** I offer a 56 page PDF pattern WITH over 140 helpful Pictures in my Etsy Shop!! ***
DIRECTIONS
Leg (Make 2)
*Use your 5.00 mm hook and yellow worsted weight yarn to make the legs.
*Leave a long tail on your beginning slip knot to help with sewing the leg on the inside of the body.
Row 1: Ch 5, sc in 2nd ch from the hook and in next 3 chs across. (4 sc)
Rows 2-3: Ch 1, turn, sc in each st across. (4 sc)
Row 4: Ch 1, turn, sc in each st across, fasten off and leave a long tail. (4 sc)
Fold the leg piece in half so that the corresponding chains from Row 1 and the stitches from Row 4 meet. Use a tapestry needle and the long tail you left at the end of Row 4 to whipstitch the corresponding stitches together, making it one leg piece. Once you have all the corresponding stitches sewn together, leave the tails (the tail from your starting slipknot and the tail left after whipstitching) loose so you can use them later to sew the leg piece on the turkey body.
***Once you have completed both legs, follow the directions below to make the short toe pieces.
Short Toe (Make 4)
*Use your 5.00 mm hook and yellow worsted weight yarn to make the toes.
Row 1: Ch 4, sc in 2nd ch from the hook and in each ch across. (3 sc)
Row 2: Ch 1, turn, sc in each st across, fasten off and leave a long tail. (3 sc)
Fold the toe piece in half so that the corresponding chains from Row 1 and the stitches from Row 2 meet. Use a tapestry needle and the long tail you left at the end of Row 2 to whipstitch the corresponding stitches together, making it one toe piece. Leave the tail loose so you can use it to sew the toe to the leg piece.
***Once you have completed the 4 short toes, follow the directions below to make the long toe pieces.
Long Toe (Make 2)
*Use your 5.00 mm hook and yellow worsted weight yarn to make the toes.
Row 1: Ch 6, sc in 2nd ch from the hook and in each ch across. (5 sc)
Row 2: Ch 1, turn, sc in each st across, fasten off and leave a long tail. (5 sc)
Fold the toe piece in half so that the corresponding chains from Row 1 and the stitches from Row 2 meet. Use a tapestry needle and the long tail you left at the end of Row 2 to whipstitch the corresponding stitches together, making it one toe piece. Leave the tail loose so you can use it to sew the toe to the leg piece.
***Once you have completed both long toes, follow the directions below to assemble the legs (attach the toe pieces to the leg pieces).
LEG ASSEMBLY
Follow the directions below to attach the toes to the leg. First, you will sew the long toe to the leg piece in the middle and then you will sew the two short toes on either side of the long toe. Make sure to follow the directions twice to assemble both legs.
Using a tapestry needle and the long tail you left on the long toe, sew it to the end of the leg without the yarn tails (the end of the leg with the yarn tails will be the end you sew to the body of the turkey). See picture below. Make sure to sew the toe centered on the end of the leg and make the bottom end of the toe even with the bottom of the leg while the rest of the toe sticks straight up. It should be attached securely so that it looks like one piece. Once the toe is attached, weave your yarn through the leg piece so that it comes out on the other end of the leg (the end with the yarn tails). Leave the yarn hang loose on the other end of the leg so you can later secure it on the inside of the turkey body. You can also simply weave it in and cut it now, but it would be more secure (and without risk of seeing cut ends sticking out of the leg) if you secure it inside the turkey body later.
Use the tapestry needle and the long tail you left on one of the short toe pieces to sew the short toe beside the long toe on the same end of the leg. When it is securely attached and you are satisfied with its positioning, weave in your yarn end through the leg piece so that it comes out on the other end of the leg as you did with the tail of the long toe. You can secure it inside the turkey body when you attach it later.
Use the tapestry needle and the long tail you left on the other short toe piece to sew the short toe to the same end of the leg, on the other side of the long toe so that the long toe is in the middle of both short toes. When it is securely attached and you are satisfied with its positioning, weave in the yarn end through the leg piece and out the other end as you did with the previous two toe pieces. When attaching the leg to the body later, you can secure the yarn tail inside the body so it isn’t visible.
***The leg assembly is now complete. Once you have assembled both legs, follow the directions below to make the wings.
Wing (Make 2)
*Use your 5.00 mm hook and light brown worsted weight yarn to make the wing.
*Leave a long tail when starting Row 1 at the beginning of your slip knot to use later when sewing wing onto body.
*When you make the second wing, weave in the loose ends (except for the long tail you leave at the beginning slip knot) on the opposite side of the wing as you did on the first wing since it will be flipped on the opposite side when attached to the body of the turkey.
Row 1: Ch 9, hdc in 2nd ch from hook, hdc in next ch, dc in next ch, 2 dc in next ch, dc in next 3 chs, work (3 hdc, 1 sc) in last ch. (5 hdc, 6 dc, 1 sc; 12 total sts)
* Row 2 is not worked the entire way across Row 1. You will only work in the first 9 stitches of Row 1 after turning work and then you will fasten off without working any stitches in the last 3 stitches from Row 1.
Row 2: Ch 1, turn, repeat [hdc in next st, 2 hdc in next st] two times, hdc in next st, repeat [hdc in next st, 2 hdc in next st] two times, fasten off and weave in ends (except for the long tail on the beginning slip knot of Row 1). (13 hdc)
Row 3: Turn work, attach yarn to 3rd st (11th st of Row 2), ch 1, 2 hdc in same st, hdc in next st, slst in next 2 sts, fasten off and weave in loose ends (except for the long tail on the beginning slip knot of Row 1).(3 hdc, 2 slst; 5 total sts)
***Once you have completed both wings, follow the directions below to make the back feather pieces.
Back Feather Piece #1 (Smallest Piece)
*Use your 5.00 mm hook and green worsted weight yarn to make Back Feather Piece #1.
*The feather piece begins with a magic circle but is completed in rows of double crochet stitches.The turning ch-2 does not count as a stitch.
Row 1: Make a magic ring, ch 2, work 6 dc in magic ring, pull ring closed. (6 dc)
Row 2: Ch 2, turn, work 2 dc in each st across. (12 dc)
Row 3: Ch 2, turn, repeat [dc in next st, 2 dc in next st] across. (18 dc)
Row 4: Ch 2, turn, repeat [dc in next 2 sts, 2 dc in next st] across. (24 dc)
Row 5: Ch 2, turn, repeat [dc in next 3 sts, 2 dc in next st] across. (30 dc)
Row 6: Turn work, repeat [ch 1, work (1 hdc, 1 dc) in next st, work (1 dc, 1 hdc, 1 slst) in next st, work (1 slst) in next st] across (10 times total), fasten off, leaving long tail for sewing. (10 chs, 20 hdc, 20 dc, 20 slst; 70 total sts)
Back Feather Piece #2 (Middle Piece)
*Use your 5.00 mm hook and orange worsted weight yarn to make Back Feather Piece #2.
*The feather piece begins with a magic circle but is completed in rows of double crochet stitches. The turning ch-2 does not count as a stitch.
Row 1: Make a magic ring, ch 2, work 6 dc in magic ring, pull ring closed. (6 dc)
Row 2: Ch 2, turn, work 2 dc in each st across. (12 dc)
Row 3: Ch 2, turn, repeat [dc in next st, 2 dc in next st] across. (18 dc)
Row 4: Ch 2, turn, repeat [dc in next 2 sts, 2 dc in next st] across. (24 dc)
Row 5: Ch 2, turn, repeat [dc in next 3 sts, 2 dc in next st] across. (30 dc)
Row 6: Ch 2, turn, repeat [dc in next 4 sts, 2 dc in next st] across. (36 dc)
Row 7: Turn work, repeat [ch 1, work (1 hdc, 1 dc) in next st, work (1 dc, 1 hdc, 1 slst) in next st, work (1 slst) in next st] across (12 times total), fasten off, leaving long tail for sewing. (12 chs, 24 hdc, 24 dc, 24 slst; 84 total sts)
Back Feather Piece #3 (Largest Piece)
*Use your 5.00 mm hook and yellow worsted weight yarn to make Back Feather Piece #3.
*The feather piece begins with a magic circle but is completed in rows of double crochet stitches.The turning ch-2 does not count as a stitch.
Row 1: Make a magic ring, ch 2, work 6 dc in magic ring, pull ring closed. (6 dc)
Row 2: Ch 2, turn, work 2 dc in each st across. (12 dc)
Row 3: Ch 2, turn, repeat [dc in next st, 2 dc in next st] across. (18 dc)
Row 4: Ch 2, turn, repeat [dc in next 2 sts, 2 dc in next st] across. (24 dc)
Row 5: Ch 2, turn, repeat [dc in next 3 sts, 2 dc in next st] across. (30 dc)
Row 6: Ch 2, turn, repeat [dc in next 4 sts, 2 dc in next st] across. (36 dc)
Row 7: Ch 2, turn, repeat [dc in next 5 sts, 2 dc in next st] across. (42 dc)
Row 8: Turn work, repeat [ch 1, work (1 hdc, 1 dc) in next st, work (1 dc, 1 hdc, 1 slst) in next st, work (1 slst) in next st] across (14 times total), fasten off, leaving long tail for sewing. (14 chs, 28 hdc, 28 dc, 28 slst; 98 total sts)
***Once you have completed the three back feather pieces, follow the directions below to make the beak.
Beak (Make 2)
*Use your 5.00 mm hook and yellow worsted weight yarn to make the beak.
*You will sew the two beak pieces together to form the entire beak.
Row 1: Ch 3, sc in 2nd ch from hook and in next ch, fasten off, leaving a long tail for sewing. (2 sc)
Beak Assembly
Using a tapestry needle and the long tail you left, sew (whipstitch) the two beak pieces together along their perimeters to form one beak piece. You can leave the tails hang loose so you can secure and weave them in on the inside of the turkey head later.
***The beak is now complete. Follow the directions below to make the red piece of the beak (called the snood).
Snood (Red Piece of Beak)
*Use your 5.00 mm hook and red worsted weight yarn to make the snood.
Row 1: Ch 6, fasten off, leaving a long tail. (6 chs)
Use a tapestry needle to weave the long tail up through the back ridges of the chains until you reach the other end of the snood. You should have two tails on the same end of the snood when you are finished weaving the long tail in and out of each back ridge.
***The snood is now complete. Follow the directions below to make the helmet.
Helmet
*Use your 5.00 mm hook and orange worsted weight yarn to begin the helmet.
*Rounds 1-5 of the helmet are worked in continuous rounds. Work first stitch of round in first stitch of previous round. Use a stitch marker if needed to mark the beginning of each round.
Round 1: Make a magic ring, ch 1, work 6 sc in magic ring, pull ring closed. (6 sc)
Round 2: Work 2 sc in each st around. (12 sc)
Round 3: Repeat [sc in next st, 2 sc in next st] around. (18 sc)
Round 4: Repeat [sc in next 2 sts, 2 sc in next st] around. (24 sc)
Round 5: Sc in each st around. (24 sc)
*Rounds 6-10 are not worked the entire way around the helmet. You will turn work and work as though they are rows.
Round 6: Ch 1, turn, sc in last st of Round 4, sc in next 15 sts. (16 sc)
Round 7: Ch 1, turn, sc in next 16 sts. (16 sc)
Round 8: Ch 1, turn, 2 sc in next st, sc in next 14 sts, 2 sc in next st. (18 sc)
Rounds 9: Ch 1, turn, 2 sc in next st, sc in next 4 sts, sc2tog, sc in next 4 sts, sc2tog, sc in next 4 sts, 2 sc in next st. (16 sc, 2 sc2tog; 18 total sts)
Round 10: Repeat Round 9, fasten off, weave in loose ends. (18 sc)
***The helmet is now complete. Follow the directions below to make the chin strap for the helmet.
Helmet Chin Strap
*Use your 5.00 mm hook and white worsted weight yarn to make the chin strap.
*Leave a long tail at the beginning slip knot to help you sew that side of the strap to the helmet.
Row 1: Ch 12, fasten off, leaving long tails on both ends of ch. (12 ch)
***The chin strap is now complete. Follow the directions below to attach it to the helmet.
Attaching the Chin Strap
Use your tapestry needle and long tail you left on one side of the helmet to draw the tail through from the outside of the helmet to the inside at the bottom of the helmet between the first stitches of Rounds 9 and 10 of the helmet. Then use your tapestry needle to draw the tail on the other side of the chin strap through from the outside to the inside of the helmet at the same location on the other side of the helmet so that it goes straight across the front of the helmet. Knot both tails on the inside of the helmet to secure the chin strap in place, making sure to weave in and cut any extra tail when you are finished.
***The helmet is now complete. Follow the directions below to make the main body of the turkey football.
Main Body of Turkey Football
*Use your 5.00 mm hook and brown worsted weight yarn to begin the main body of the football.
*The turkey football is worked in continuous rounds. Work first stitch of round in first stitch of previous round. Use a stitch marker if needed to mark the beginning of each round.
*Make sure to pull the magic ring closed and weave in/secure end at closure at the beginning. Weave in other loose ends as you work. This is because it will be harder to do later once the body gets larger/narrower.
Round 1: Make a magic ring, ch 1, work 6 sc in magic ring, pull ring closed. (6 sc)
Round 2: Work 2 sc in each st around. (12 sc)
Round 3: Repeat [sc in next st, 2 sc in next st] around, slst in front loop only of first st of round, fasten off and weave in loose ends. (18 sc)
*Round 4 is worked with brown yarn in the back loops only of the stitches from Round 3. To begin Round 4, attach brown yarn to the back loop only of the first stitch of Round 3.
Round 4: With brown, attach yarn to the back loop only of the first st of Round 3 (same st in which you worked slst in front loop only), ch 1, sc in back loop only of the same st (st you attached yarn), sc in back loop only of next st, 2 sc in back loop only of next st, repeat [sc in back loop only of next 2 sts, 2 sc in back loop only of next st] 5 times. (24 sc)
Round 5: Repeat [sc in next 3 sts, 2 sc in next st] around. (30 sc)
Round 6: Sc in each st around. (30 sc)
*Rounds 7 and 8 are color-changing rounds. You will begin those rounds with brown yarn, change to white yarn in the middle of the rounds, and then change back to brown yarn to complete the rounds. Yarn is cut after each color change.
HINT: Rounds 7 and 8 begin with 8 brown sc stitches which are followed by 16 white sc stitches in the middle of the round. Both rounds then end with 8 brown sc stitches.
Round 7: Sc in next 7 sts, begin sc in next st, pulling through white yarn once you have 2 loops of brown on the hook to complete the sc (see pattern notes), with white yarn now on hook, sc in next 6 sts, 2 sc in next st, sc in next 7 sts, begin sc in next st, pulling through brown yarn once you have 2 loops of white on the hook to complete the sc, with brown yarn now on hook, sc in next 6 sts, 2 sc in next st. (32 sc)
Round 8: Sc in next 7 sts, begin sc in next st, pulling through white yarn once you have 2 loops of brown on the hook to complete the sc (see pattern notes), with white yarn now on hook, sc in next 15 sts, begin sc in next st, pulling through brown yarn once you have 2 loops of white on the hook to complete the sc, with brown yarn now on hook, sc in next 8 sts. (32 sc)
Round 9: Sc in next 7 sts, 2 sc in next st, sc in next 15 sts, 2 sc in next st, sc in next 8 sts. (34 sc)
Round 10: Sc in each st around. (34 sc)
Round 11: Repeat [sc in next 16 sts, 2 sc in next st] around. (36 sc)
Rounds 12-13: Sc in each st around. (36 sc)
Round 14: Repeat [sc in next 8 sts, 2 sc in next st] around. (40 sc)
Round 15: Sc in each st around. (40 sc)
Round 16: Repeat [sc in next 8 sts, sc2tog] around. (36 sc)
Rounds 17-18: Sc in each st around. (36 sc)
Round 19: Repeat [sc in next 16 sts, sc2tog] around. (34 sc)
Round 20: Sc in each st around. (34 sc)
*Rounds 21 and 22 are color-changing rounds. You will begin those rounds with brown yarn, change to white yarn in the middle of the rounds, and then change back to brown yarn to complete the rounds. Yarn is cut after each color change.
HINT: Rounds 21 and 22 begin with 8 brown sc stitches which are followed by 16 white sc stitches in the middle of the round. Both rounds then end with 8 brown sc stitches.
Round 21: Sc in next 7 sts, begin sc2tog, pulling through white yarn when you have 3 loops of brown on hook to complete the sc2tog, with white yarn now on hook, sc in next 15 sts, begin sc2tog, pulling through brown yarn when you have 3 loops of white on the hook to complete the sc2tog, with brown yarn now on hook, sc in next 8 sts. (32 sc)
Round 22: Sc in next 7 sts, begin sc in next st, pulling through white yarn once you have 2 loops of brown on the hook to complete the sc (see pattern notes), with white yarn now on hook, sc in next 15 sts, begin sc in next st, pulling through brown yarn once you have 2 loops of white on the hook to complete the sc, with brown yarn now on hook, sc in next 8 sts. (32 sc)
***STOP/PAUSE HERE (LEAVING YARN ON HOOK) before moving on to Round 23 to weave in loose ends, stitch on the middle laces of the football, and attach the legs as explained below. Once you are finished, pick back up at Round 23. ***
Middle Laces
Use your tapestry needle and a long strand of white yarn to stitch on the middle laces so they are centered in the brown section between the 2 white stripes of the football. Make the long vertical lace first by drawing your yarn from the inside of the football to the outside above Round 10 of the body (centered between the white stripes) and then taking it straight up and back down through to the inside of the football right above Round 19 of the body. Next, make the 5 shorter horizontal laces so they are each about 2 stitches wide and all lie centered over top the long vertical lace. Make your first short lace at the very top of the long vertical lace by drawing the yarn up from the inside of the football to the outside about a stitch over on the right of the very top of the long vertical white lace (at the top of Round 19 of the body). Then take the yarn back down about a stitch over to the left of the top of the long lace (above Round 19). Make each of the next 3 shorter laces the same way, making sure to evenlyspace them apart. It might be easier to make the middle lace first since it should be 4½ rounds down from the top lace (in the center of Round 15 of the body). Then you can center the next lace between the middle lace and the top lace and the following lace between the middle lace and the bottom of the long vertical lace. Make the 5th and final short lace at the very bottom of the long vertical lace (above Round 10 of the body). When you are satisfied with the appearance/positioning of the laces, make sure to secure your yarn on the inside of the football (since it is on the inside and won’t be seen, feel free to knot it).
Attaching the Legs
Using a tapestry needle and the long tails you left on both legs, sew the legs to the body of the football at about Round 7 of the body (the bottom white round) so that the middle laces are centered between the legs with about 5 stitches in between them. You may want to use straight pins or stitch markers to help you decide on the positioning of the legs before sewing them on the body. The long tails you left on the legs should be drawn with your needle to the inside of the football to help support the legs and keep them in place. Once you are satisfied with the positioning of the legs and have made sure they are attached well to the body of the football, knot/secure your yarn tails on the inside of the football so that they will stay in place. Once all the tails/loose ends are secured on the inside of the football, cut off any excess length and the continue to Round 23 of the body.
Round 23: Repeat [sc in next 14 sts, sc2tog] around. (30 sc)
Round 24: Sc in each st around. (30 sc)
Round 25: Repeat [sc in next 3 sts, sc2tog] around. (24 sc)
***STOP/PAUSE HERE (LEAVING YARN ON HOOK) before moving on to Round 26 to attach the wings and attach the back feathers of the football turkey. Follow the below directions to sew the wings to the turkey body. Once you are finished, pick back up at Round 26. ***
Attach the Wings
Use straight pins to help you position the wings on the football turkey before sewing them to the body. The wings should be placed on each side of the top white stripe of the football, with the topmost “shoulder” section of the wing reaching up to Round 25. Use your tapestry needle and long tails you left on the wings to sew them in place on the football body, only placing stitches around the top “shoulder” portion of the wing, so the rest of the wing can “flap” loose.
Attach the Back Feathers
Attach the smallest (green) back feather piece (Back Feather Piece #1) first. Use the long green tail you left on the feather piece to sew the first 3 rows of the feather piece to the back of the football body. Use the front laces, wings, and feet to ensure it’s centered with them on the back of the body. The bottom of the feather piece should run straight across the back of the football body, over Round 18. When finished sewing Back Feather Piece #1 to the football, make sure the yarn tail ends up on the inside of the football so when you secure/knot it, it won’t be seen. You may want to wait until all three feather pieces are sewn to the body to secure your yarn tail in case you need to adjust one of them.
After Back Feather Piece #1 is attached, sew the first 3 rows of orange Back Feather Piece #2 (using the long orange tail left on Back Feather Piece #2) to the football body directly behind Back Feather Piece #1 so that their bottoms align directly on top of each other. Make sure to go through all layers when sewing (going all the way through the two feather pieces and through to the inside of the body of the football). When finished sewing Back Feather Piece #2 to the football, make sure the yarn tail ends up on the inside of the football so when you secure/knot it, it won’t be seen. You may want to wait until all three feather pieces are sewn to the body to secure your yarn tail in case you need to adjust one of them.
After Back Feather Piece #2 is attached to the football body, sew the first 3 rows of yellow Back Feather Piece #3 (using the long yellow tail left on Back Feather Piece #3) to the football body directly behind Back Feather Piece #2 so that their bottoms align directly on top of each other. Make sure to go through all layers when sewing (going all the way through the three feather pieces and through to the inside of the body of the football). To keep the tops/sides of the 2 larger feather pieces from bending too much, place a few stitches that run from Rounds 4 and 5 of (yellow) Back Feather Piece #3 straight through (orange) Back Feather Piece # 2 and to the back only of (green) Back Feather Piece #1 (do not go all the way through to the front of Back Feather Piece #1 so you don’t see the yellow yarn). I did not do this, but if you desire to hold the larger 2 feather pieces in place even more, you could add some stitches running from Round 6 of (yellow) Back Feather Piece #3 to the back only of (orange) Back Feather Piece #2 (do not go all the way through to the front of Back Feather Piece #2 so you don’t see the yellow yarn). When finished, make sure to weave your yellow yarn tail down through Back Feather Piece #3 to one of its lower 3 rounds so you can take it straight through all the feather pieces to the inside of the football body before cutting/securing it.
Once you have all three feather pieces sewn in place to the body of the football, make sure to secure all yarn tails on the inside of the football. You can knot the yarn tails for extra enforcement since you won’t see the knots on the inside of the football.
Round 26: Repeat [sc in next 2 sts, sc2tog] around. (18 sc)
Round 27: Repeat [sc in next st, sc2tog] around, slst in back loop only of first st of round, fasten off and weave in ends. (12 sc)
***The main body of the football turkey is now complete. Before making the neck and head, stuff the body with fiberfill.
Neck and Head
*Use your 5.00 mm hook and light brown worsted weight yarn to make the neck and head of the football turkey.
*The neck and head continue from the last round (Round 27) of the body and are still worked in continuous rounds. Work first stitch of round in first stitch of previous round. Use a stitch marker if needed to mark the beginning of each round.
*Before closing the head, you will attach the beak and snood, and stitch on the eyes of the turkey.
***To begin Round 28, attach light brown yarn to back loop only of first st of Round 27 of body (the same stitch in which you already worked the final slst in the dark brown yarn). Round 28 is worked in the back loop only of all the stitches.***
Round 28: Attach yarn to back loop only of first st of Round 27,ch 1,sc in back loop only of same stitch (first st of Round 27) and in back loop only of each st around. (12 sc)
Rounds 29-30: Sc in each st around. (12 sc)
Round 31: Repeat [sc in next st, 2 sc in next st] around. (18 sc)
Round 32: Repeat [sc in next 2 sts, 2 sc in next st] around. (24 sc)
Rounds 33-35: Sc in each st around. (24 sc)
Round 36: Repeat [sc in next 2 sts, sc2tog] around. (18 sc)
***STOP/PAUSE HERE (LEAVING YARN ON HOOK) before moving on to Round 37 to attach the beak, attach the snood, and stitch on the eyes of the football turkey. Follow the below directions to sew the beak to the head.
Attach the Beak
Use your tapestry needle and long tails you left on the beak to sew it to Round 33 of the head so that it is centered (it should be directly above the laces on the body and between the wings and legs). You can draw all the loose tails you left on the beak through to the inside of the head to help hold the beak in place. You may need to use one of the tails to add some extra stitches to sew the beak in place on the front of the head. When you are satisfied with the placement of the beak, make sure to secure all your yarn tails on the inside of the head. Follow the directions below to add the snood to the beak.
Attach the Snood
Use your tapestry needle to draw the long tails you left on one end of your snood through the head of the turkey directly on top of the beak so that the snood dangles to the right side of the beak. Once you feel the snood is securely attached in the position you desire, knot the two tails on the inside of the head to secure your yarn. Follow the directions below to stitch on the eyes.
Eyes
Use your tapestry needle and two long strands of black yarn to stitch two eyes onto the front of the head, centered on either side of the beak and sewn on top of Round 35. Each eye is made with 3 vertical stitches made on top of one another over Round 35 (from the top of Round 34 to the bottom of Round 36). Make sure to secure your yarn on the inside of the head (you should be able to knot both ends of your yarn to secure it). Once you are done stitching on the eyes and have secured your yarn on the inside of the head, pick back up at Round 37 of the head.
***Once you are finished, pick back up at Round 37. ***
Round 37: Repeat [sc in next st, sc2tog] around. (12 sc)
***STOP/PAUSE HERE (LEAVING YARN ON HOOK) before moving on to Round 38 stuff the neck and head with fiberfill. It will be harder to do after the next round since the opening will be so small. Once you are finished stuffing the neck and head, pick back up at Round 38.
Round 38: Repeat [sc2tog] around, slst in first st of round, fasten off, leaving long tail for closing top opening. (6 sc)
***Before closing the opening to the head, you may want to add a little more fiberfill in the top of the head. Once you are satisfied with the amount of stuffing in the head, follow the directions below to close the opening.
Close Head Opening
Use your tapestry needle and the long tail you left at the end of Round 38 to weave the tail through the front loops of each consecutive stitch from Round 38, making sure to take the needle in the direction from the inside of the opening to the the outside. Once you have woven the thread through the front loop of each stitch, pull the thread (but not extremely tight) so that the top opening of the head closes. Next, take your needle and thread through the middle of the closed opening and bring it out somewhere else on the head. Pull the thread so that the top bulge at the closed opening disappears. Then take the needle and thread back inside the head one stitch from where you came out and bring it back out at a different place on the head. Continue this a few times until you feel the yarn is secure and then cut the yarn as close to the head as possible and push any remaining tail on the outside of the head to the inside so it isn’t visible.
ASSEMBLY
Place the helmet over top the head so the white chin strap resides below the beak. Position the wings and feet how you desire. You might have to manipulate the body/fold the back feather pieces inward so that it sits on its own without falling on a hard surface.
***Once you have placed the helmet on the turkey and it is positioned and sitting the way you desire, it is finished and ready to be enjoyed for fall!
This pattern is property of TheCrafterLife.com
CrafterLifeDesigner@gmail.com
You may not sell my patterns or claim them as your own. You may make items to sell (i.e. on Etsy) from my patterns but I ask that you link back to my site (TheCrafterLife.com) and provide credit for the pattern. You are welcome to share my patterns on social media as long as you link back directly to my site by providing the link. No copying and pasting of any patterns will be allowed under any circumstances