Shooting Star Lovey
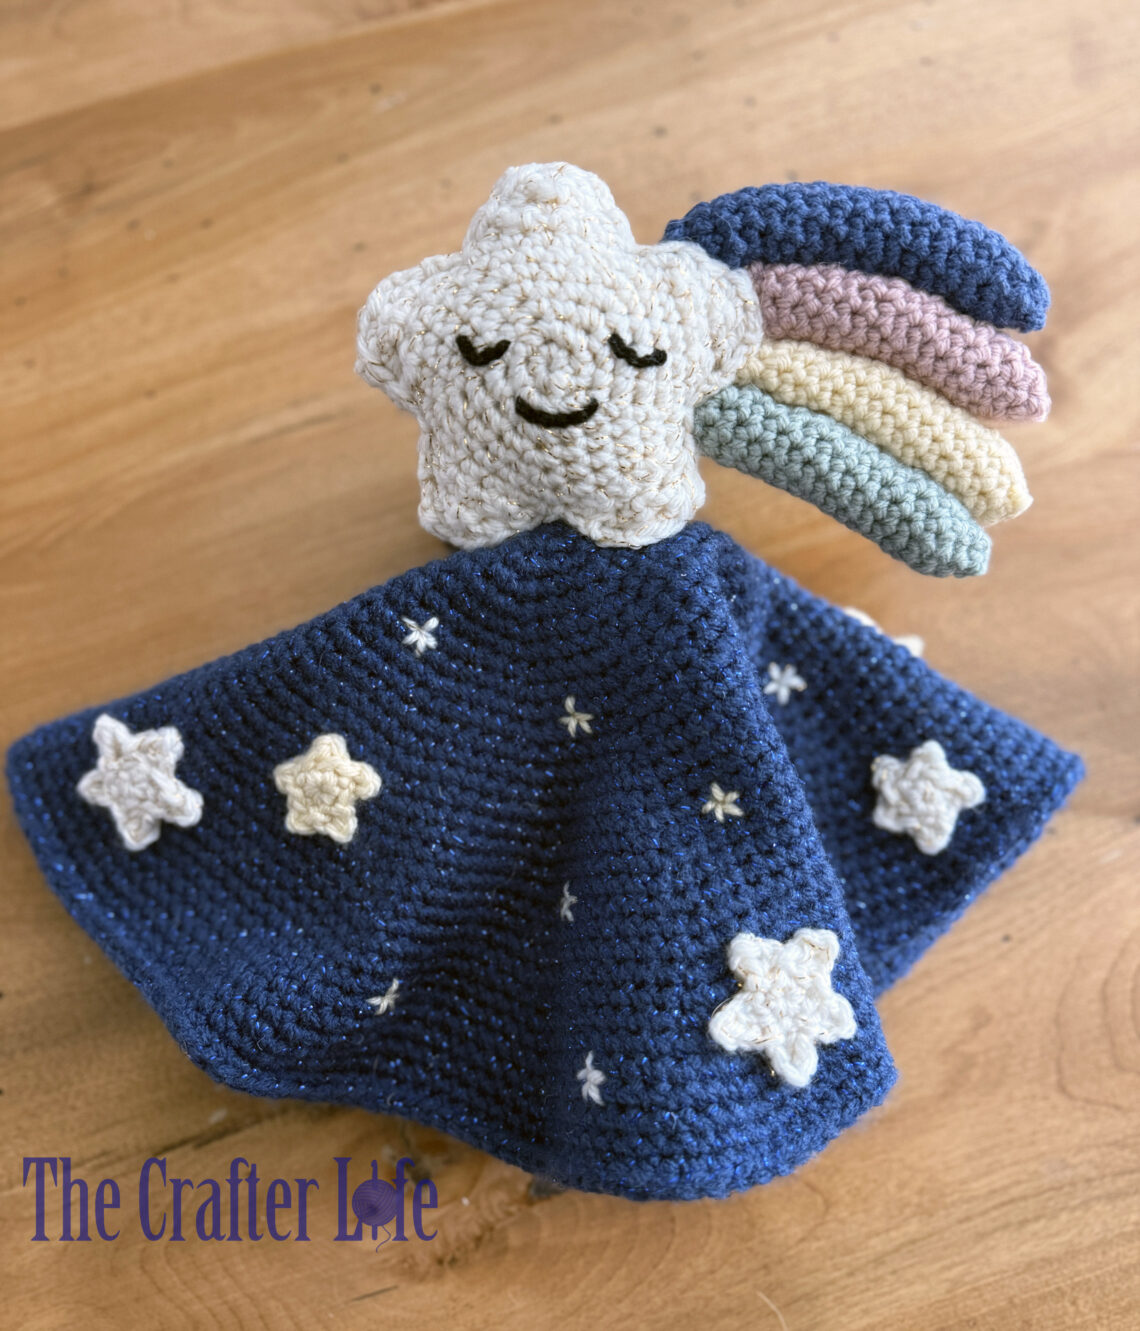
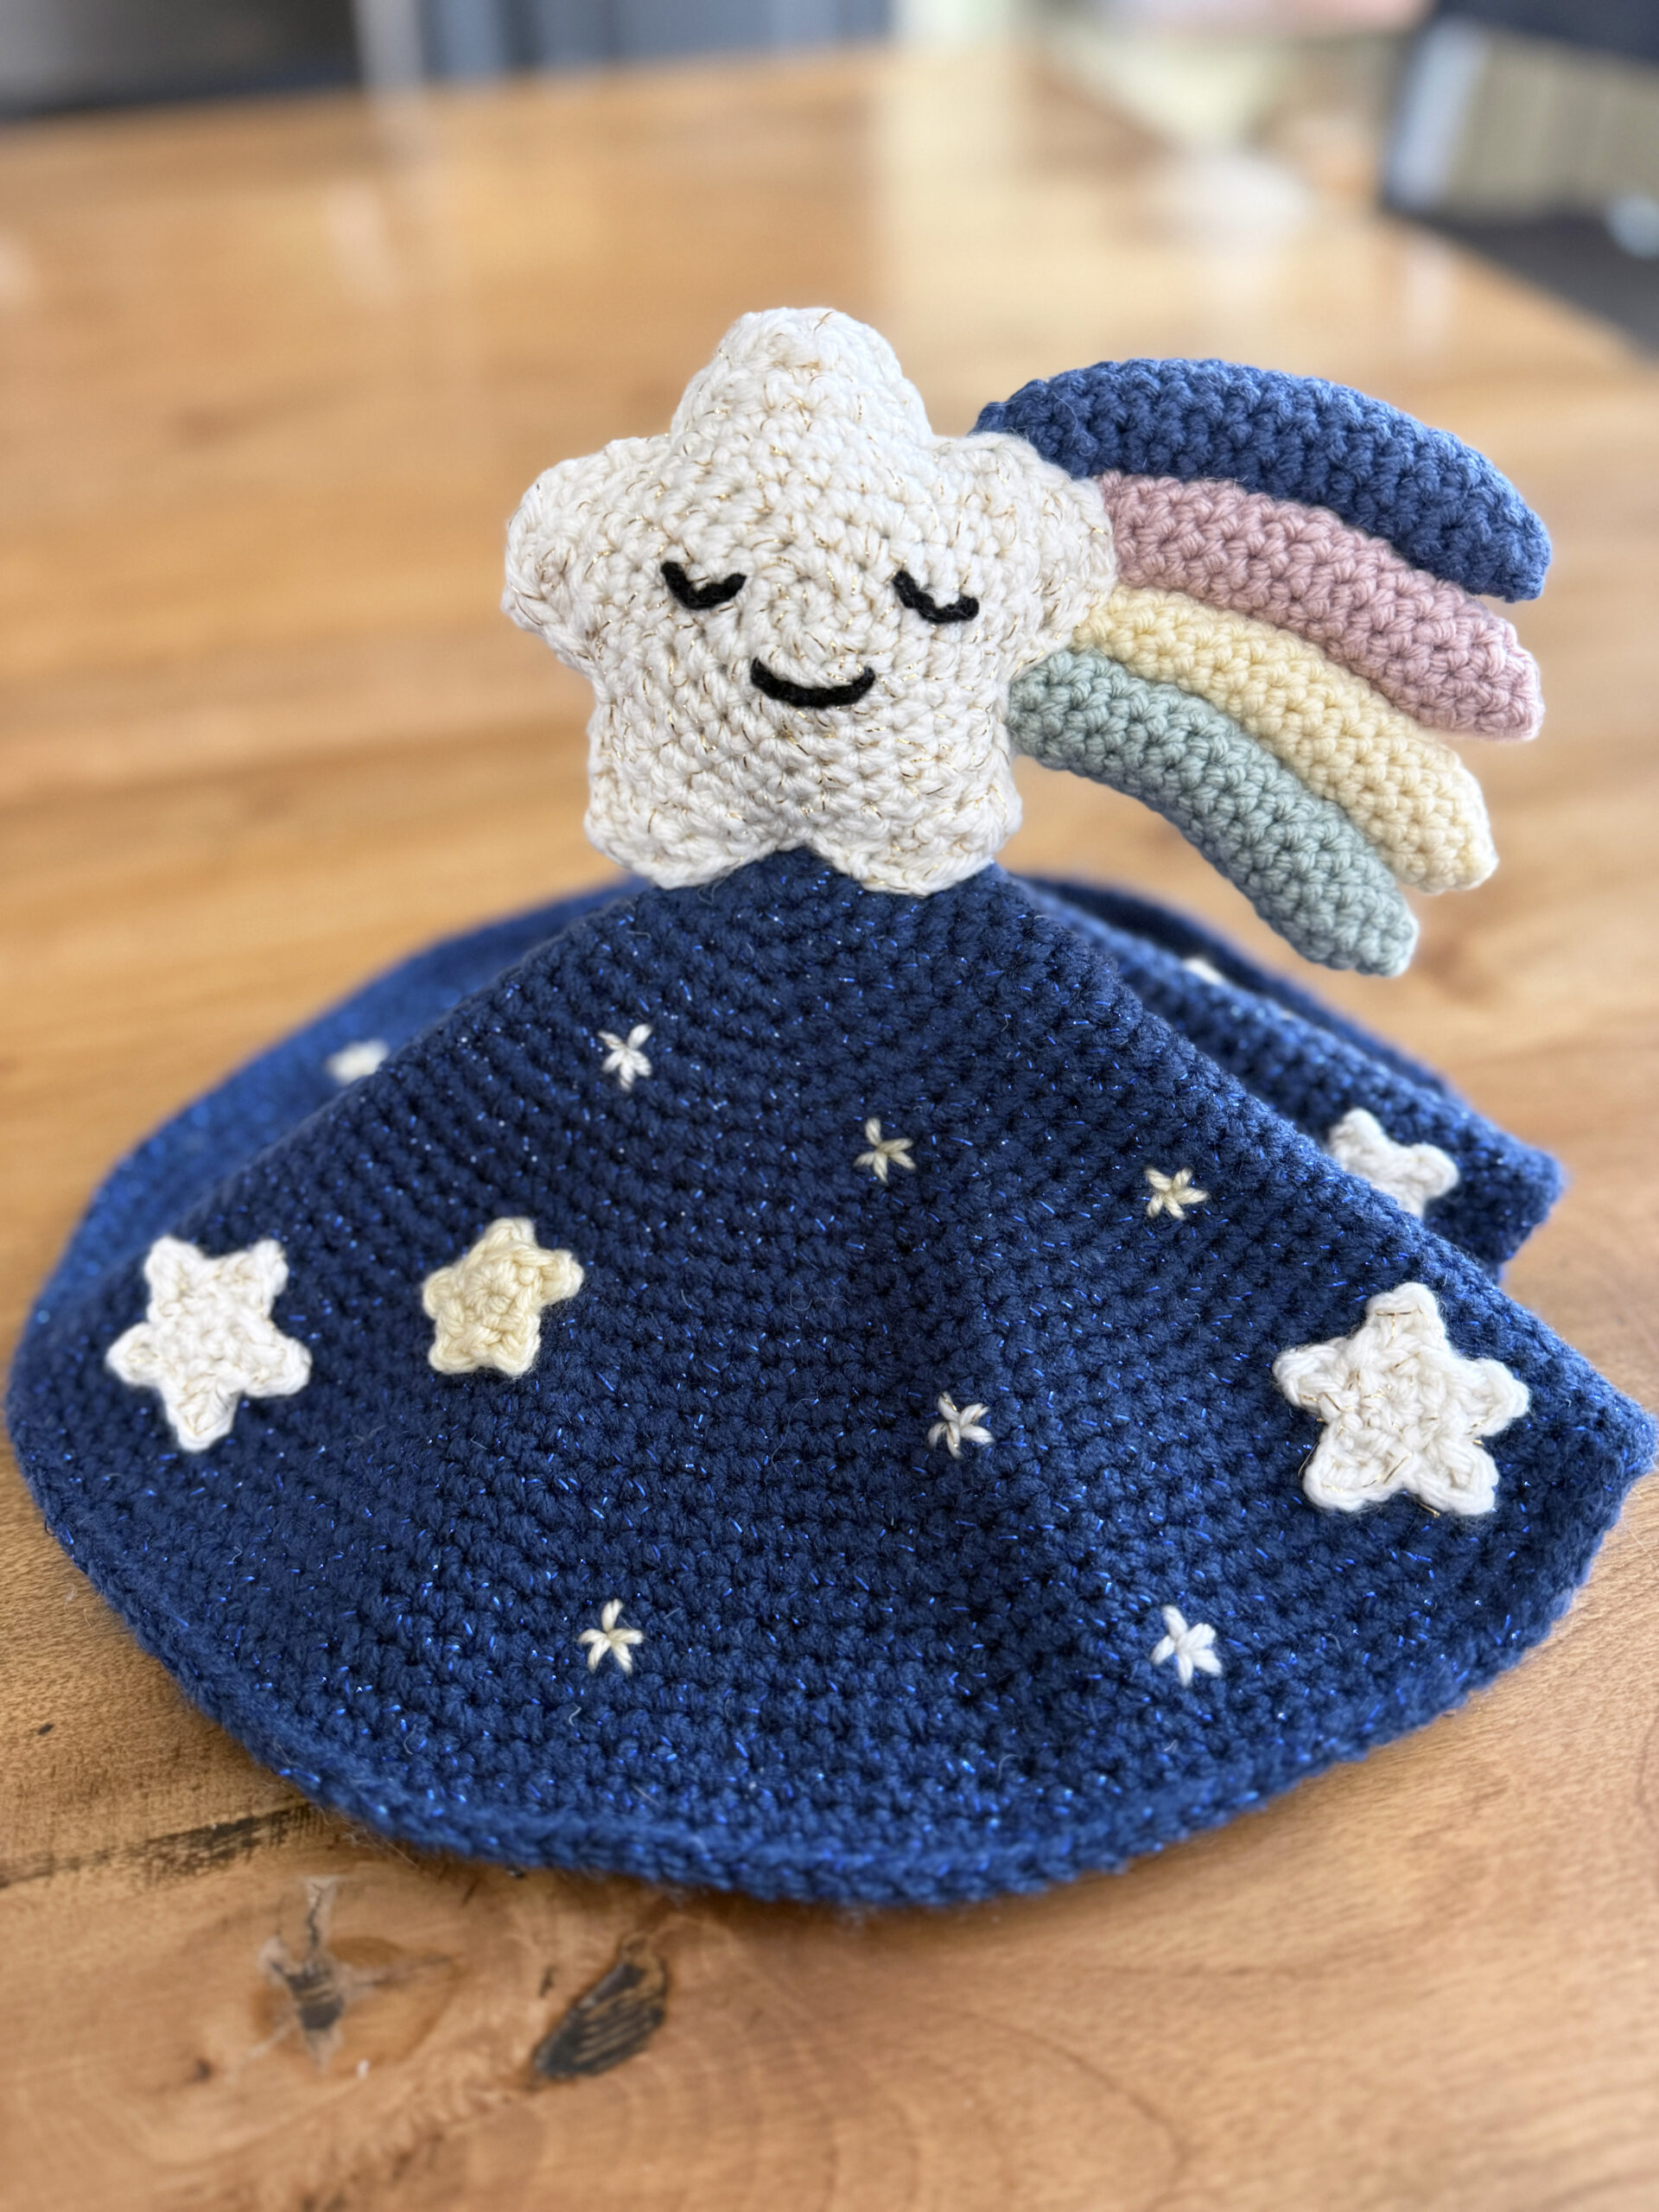
I decided to make a shooting star lovey blanket for my cousin’s baby shower since the baby’s nursery is decorated with a night sky theme. I made the main blanket in a circle shape to emulate the sky. I wanted to stitch some stars onto the main body of the blanket, so I made the main circle using single crochet stitches. This made the blanket more stiff and less soft. If I didn’t plan to stitch on the stars, I probably would have used either half double crochet stitches or double crochet stitches to make it less stiff. As with any loose bedding, never leave a baby alone or asleep with it. Since I used sparkle yarn to make the main circle representing the sky, it already had a “starry night” vibe before I added the extra stars. So it would be cute either way – with the other stars added or without them! If adding the stars, it might be fun to stitch on a constellation. I even contemplated stitching on a zodiac sign for the baby. Get as creative as you wish! The shooting star in the middle of the blanket is made separately before attaching it, so you might only choose to make the shooting star instead of the blanket since it can be used as a toy or decoration on its own. Simply follow my pattern for the shooting star and weave in/secure the loose tails when finished (instead of using them to attach it to the blanket) if you are choosing to make it on its own. You can choose to give the star a face of your choice or make it without a face. I wanted my shooting star to look like it was sleeping peacefully. I hope you enjoy my newest pattern and have fun with this project!
FINISHED MEASUREMENTS
The finished lovey circular blanket is approximately 12 inches in diameter.
The shooting star is approximately 6 inches wide (across from left most star point to the end of the tail) and 3½ inches tall.
The star itself is approximately 4 inches wide and 3½ inches tall.
The tail itself is approximately 3½ inches wide and 2½ inches tall.
MATERIALS
– Size H/8/5.00mm crochet hook or size needed to obtain gauge
– Worsted weight (4) acrylic yarn in Navy Blue Sparkle (I used Big Twist Twinkle yarn in Sapphire.)
– Worsted weight (4) acrylic yarn in Cream Sparkle (I used Metallic I Love This Yarn in Ivory.)
– Worsted weight (4) yarn in your four chosen shooting star tail colors (I used I Love This Yarn in Dark Country, Rosy Cheeks, Cream, & Spa.)
OPTIONAL (if adding face on shooting star): Worsted weight (4) yarn in Black (I used Red Heart Super Saver in Black.)
– Fiberfill
– Scissors
– Tapestry needle for sewing pieces together & weaving in ends
– Stitch markers
– Straight Pins (Optional – if needed for holding parts in place when sewing together/stitching on face of star)
– Measuring tape
ABBREVIATIONS
– ch = chain
– chs = chains
– sc = single crochet
– sc2tog = single crochet 2 together (single crochet decrease)
– slst = slip stitch
– st = stitch
– sts = stitches
GAUGE
5 sc = 1 inch
5 rounds of sc = 1 inch (about 2 inches diameter)
PATTERN NOTES
- The main circle is worked in continuous rounds. Start the first stitch of each round in the first st of the previous round without any joins or chains. You might want to use stitch markers to mark the beginning/end of rounds.
- Brackets [ ] indicate portions of the pattern to be repeated.
- The shooting star is made and assembled separately. The star and its tail pieces are worked in continuous rounds of single crochet stitches. The assembled shooting star is then attached to the top of the lovey.
- There is an option to make and attach star appliqués to the lovey. The patterns for the appliqués are included. There is also an option to stitch stars directly onto the lovey. The directions for stitching the stars directly on the lovey are also included.
I also sell a PDF Version of this pattern on ETSY with over 100 helpful pictures
DIRECTIONS
Circle Body of Lovey
*Use your 5.00 mm hook and blue sparkle yarn to begin the circle.
*Work circle in continuous rounds. See pattern notes.
*Make sure to pull the magic ring closed and weave in/secure end at closure at the beginning.
HINT: I used a stitch marker to mark the first stitch of each round.
Round 1: Make a magic ring, ch 1, work 6 sc in the ring, pull ring closed. (6 sc)
Round 2: Work 2 sc in each st around. (12 sc)
Round 3: Repeat [sc in next st, 2 sc in next st] around. (18 sc)
Round 4: Repeat [sc in next 2 sts, 2 sc in next st] around. (24 sc)
*If you haven’t already, close the beginning magic ring and weave in the tail from the start of the magic ring underneath the stitches of Round 1 on the back of the work. After securing the tail, cut it off as close to the work as possible.
Round 5: Repeat [sc in next 3 sts, 2 sc in next st] around. (30 sc)
Round 6: Repeat [sc in next 4 sts, 2 sc in next st] around. (36 sc)
Round 7: Repeat [sc in next 5 sts, 2 sc in next st] around. (42 sc)
Round 8: Sc in next 2 sts, 2 sc in next st, repeat [sc in next 6 sts, 2 sc in next st] 5 times, sc in next 4 sts. (48 sc)
Round 9: Repeat [sc in next 7 sts, 2 sc in next st] around. (54 sc)
Round 10: Sc in next 3 sts, 2 sc in next st, repeat [sc in next 8 sts, 2 sc in next st] 5 times, sc in next 5 sts. (60 sc)
Round 11: Repeat [sc in next 9 sts, 2 sc in next st] around. (66 sc)
Round 12: Sc in next 4 sts, 2 sc in next st, repeat [sc in next 10 sts, 2 sc in next st] 5 times, sc in next 6 sts. (72 sc)
Round 13: Repeat [sc in next 11 sts, 2 sc in next st] around. (78 sc)
Round 14: Sc in next 5 sts, 2 sc in next st, repeat [sc in next 12 sts, 2 sc in next st] 5 times, sc in next 7 sts. (84 sc)
Round 15: Repeat [sc in next 13 sts, 2 sc in next st] around. (90 sc)
Round 16: Sc in next 6 sts, 2 sc in next st, repeat [sc in next 14 sts, 2 sc in next st] 5 times, sc in next 8 sts. (96 sc)
Round 17: Repeat [sc in next 15 sts, 2 sc in next st] around. (102 sc)
Round 18: Sc in next 7 sts, 2 sc in next st, repeat [sc in next 16 sts, 2 sc in next st] 5 times, sc in next 9 sts. (108 sc)
Round 19: Repeat [sc in next 17 sts, 2 sc in next st] around. (114 sc)
Round 20: Sc in next 8 sts, 2 sc in next st, repeat [sc in next 18 sts, 2 sc in next st] 5 times, sc in next 10 sts. (120 sc)
Round 21: Repeat [sc in next 19 sts, 2 sc in next st] around. (126 sc)
Round 22: Sc in next 9 sts, 2 sc in next st, repeat [sc in next 20 sts, 2 sc in next st] 5 times, sc in next 11 sts. (132 sc)
Round 23: Repeat [sc in next 21 sts, 2 sc in next st] around. (138 sc)
Round 24: Sc in next 10 sts, 2 sc in next st, repeat [sc in next 22 sts, 2 sc in next st] 5 times, sc in next 12 sts. (144 sc)
Round 25: Repeat [sc in next 23 sts, 2 sc in next st] around. (150 sc)
Round 26: Sc in next 11 sts, 2 sc in next st, repeat [sc in next 24 sts, 2 sc in next st] 5 times, sc in next 13 sts. (156 sc)
Round 27: Repeat [sc in next 25 sts, 2 sc in next st] around. (162 sc)
Round 28: Sc in next 12 sts, 2 sc in next st, repeat [sc in next 26 sts, 2 sc in next st] 5 times, sc in next 14 sts. (168 sc)
Round 29: Repeat [sc in next 27 sts, 2 sc in next st] around. (174 sc)
Round 30: Sc in next 13 sts, 2 sc in next st, repeat [sc in next 28 sts, 2 sc in next st] 5 times, sc in next 15 sts. (180 sc)
Round 31: Sc in each st around. (180 sc)
Round 32: Slst in next 2 sts, fasten off, weave in loose end on back of work. (2 slst)
***After weaving in loose ends, the body of the lovey is complete. Follow the directions below to make the star.
Star (Make 2)
*Use your 5.00 mm hook and cream sparkle yarn to make the star.
*Work star in continuous rounds.
*Make sure to pull the magic ring closed and weave in/secure end at closure at the beginning.
Round 1: Make a magic ring, ch 1, work 5 sc in the ring, pull ring closed. (5 sc)
Round 2: Work 2 sc in each st around. (10 sc)
Round 3: Repeat [sc in next st, 2 sc in next st] around. (15 sc)
Round 4: Repeat [sc in next 2 sts, 2 sc in next st] around. (20 sc)
Round 5: Repeat [sc in next 3 sts, 2 sc in next st] around. (25 sc)
Round 6: Repeat [sc in next 4 sts, 2 sc in next st] around. (30 sc)
***Round 7 begins the points of the star. The repeated bracket section is worked in rows and forms a star point.
Round 7: Repeat [Sc in next 6 sts, ch 1, turn, sc2tog, sc in next 4 sts, ch 1 turn, sc2tog, sc in next 3 sts, ch 1, turn, sc2tog, sc in next 2, ch 1 turn, sc2tog, sc in next st, work 4 sc stitches evenly down the side of the star point, work 1 sc in the same st of Round 6 in which you worked your 6th sc in the first row of the star point (this would be worked in the 6th st of Round 6 for the first star point, the 12th st of Round 6 for the 2nd star point, the 18th st of Round 6 for the 3rd star point, the 24th st of Round 6 for the 4th star point, and the 30th st of Round 6 for the 5th star point)] around, fasten off, leaving a long tail for sewing the star together. (Each star point should have 6 sts in first row, 5 sts in second row, 4 sts in third row, 3 sts in fourth row, and 2 sts in fifth row, with 5 total sts worked evenly down the side and back into Round 6 of star body)
Star Tail Piece (Make 4 in different colors)
*Use your 5.00 mm hook and your choice tail piece color yarn to make the star tail piece. I made my tail pieces in blue, pink, cream, and green (the tail pieces shown in the main picture).
*Work tail piece in continuous rounds.
*Make sure to pull the magic ring closed and weave in/secure end at closure at the beginning.
Round 1: Make a magic ring, ch 1, work 4 sc in the ring, pull ring closed. (5 sc)
Round 2: Repeat [sc in next st, sc in next st] around. (6 sc)
Round 3: Repeat [sc in next 2 sts, 2 sc in next st] around. (8 sc)
***At this point, if you haven’t already, weave in and fasten off the yarn tail made after pulling ring closed because work will narrow as you work.
Rounds 4 – 17: Sc in each st around. (8 sc)
***Before moving to Round 18, slightly fill the star tail piece with stuffing. Do not overstuff the tail since it shouldn’t be completely round. Stuff it just enough to give it a little structure, but make sure it can still be manipulated. You may need to use your finger or the opposite side of your crochet hook to help you get the stuffing into the tail piece.
Round 18: Repeat [sc in next 2 sts, sc2tog] around. (6 sc)
Round 19: Repeat [sc in next st, sc2tog] around. (4 sc)
*At the end of Round 19, cut your yarn so that you have a long tail for closing the opening and pull it up through the last stitch you made. Follow the directions below for closing the opening.
Close the opening: Use your tapestry needle and the long tail you left at the end of Round 19 to weave the tail through the front loops only of each consecutive stitch from Round 19, making sure to take the needle in the direction from the outside of the opening to the the inside (just as you would with your crochet hook when working stitches into Round 19). Once you have woven the thread through the front loop of each stitch, pull the thread (but not extremely tight) so that the opening of the star tail piece closes. Do not fasten off the long tail.
***Once you have made four tail pieces in different colors, follow the directions below to assemble the entire tail of the shooting star.
I also sell a PDF Version of this pattern on ETSY with over 100 helpful pictures
Shooting Star Tail Assembly
**You will need your tapestry needle, straight pins (optional), and the long tails you left on each tail piece to assemble the entire shooting star tail. The optional straight pins will help to hold the tail in the shape/position you prefer while you stitch it together.
- Place the four tail pieces together in the order you want them from top to bottom on your star. The order I followed from top to bottom was blue, pink, cream, and green. Hold one of the star pieces over your ordered tail pieces so you can position and shape them how you prefer them to look on the star. Depending on how you want them to look, the most likely will not be evenly lined up with one another. I manipulated mine so they followed a curve shape.
***Step 2 is optional – it is only for if you are going to use straight pins like I did to help you hold the tail together and in the shape/position you desire while you attach the pieces to each other. If you are experienced at sewing and don’t want/need to use straight pins to help hold the tail pieces in the shape you desire, you can skip Step 2.
- I had to use straight pins to help me keep the tail pieces in position while sewing them together. If you choose to do this step, please be very careful as the pins will easily poke you. Place several straight pins in each of the tail pieces so each one holds two adjacent pieces together in your desired tail form. For my tail, I made sure to have a few pins holding the blue and pink tail pieces together, a few holding the pink and cream pieces together, and a few holding the green and cream pieces together. Once you have the pieces pinned together, hold them in position under the star piece to make sure you are satisfied with the form.
- Use your tapestry needle and the long tail you left on your top tail piece to begin stitching the top tail piece to the second tail piece adjacent to it. You should first use your needle to draw the tail through the center hole from Round 19 of the top tail piece and bringing it through the inside of the tail piece to the outside right where it begins to touch the second tail piece. Stitch the two pieces together along the “line” where they touch each other (working toward the outer side of the tail), by sewing the bottom of the top tail piece to the top of the second tail piece (running your needle down through the bottom of the top tail piece and through the top of the second tail piece and then back up through the top of the second tail piece and up through the bottom of the top piece across the entire length of the tail where the two pieces touch). Remove the straight pins holding these two pieces together (if you used straight pins) as you work across, since your stitches should now be holding them in place together. Once you have sewn the top two tail pieces together across the length of the tail where the two pieces touch, then go back in the opposite direction (from the outer side of the tail to the inside/star side of the tail), sewing them together in the same way, towards the side of the tail from which you began sewing. Once you are finished sewing back to the point where you started, leave your yarn tail hang loose for now. You will use it later to help attached the assembled tail to the star. By sewing them together across and back again, this will keep them more securely attached together. I used the long tail left on my blue tail piece to sew the bottom of the blue piece to the top of the pink piece exactly along the “line” where they touched, first working toward the outside of the tail and then working back toward the star side of the tail, making sure my blue yarn I was using to sew with wasn’t showing through on the pink tail piece where anyone could see it.
- Repeat Step 3 to sew the second tail piece to the third tail piece, but using your tapestry needle and the long tail originally left on the second tail piece. Once you have sewn the pieces together across and back again, leave the tail hang loose so you can use it later. I used the long tail left on the pink tail piece to sew the bottom of the pink tail piece to the top of the cream tail piece, making sure the pink yarn couldn’t be seen through the cream tail piece.
- Repeat Step 3 to sew the third tail piece to the bottom tail piece, but using your tapestry needle and the long tail originally left on the third tail piece. Once you have sewn the pieces together across and back again, leave the tail hang loose so you can use it later. I used the long tail left on the cream tail piece to sew the bottom of the cream tail piece to the top of the green tail piece, making sure the cream yarn couldn’t be seen through the green tail piece.
***Once you have sewn/attached the four tail pieces together, you are finished assembling the entire star tail. Before attaching the tail to the star and assembling the shooting star, you need to decide if you are going to add an optional face on your star. If so, follow the directions below to stitch on your star face. If not, skip the directions for the star face and go to the directions for the star assembly.
Optional Star Face
***You will need a small tapestry needle/sewing needle, optional straight pins, and your color choice of yarn (I used black) to stitch on your star face. I used straight pins because I am not good at “eyeballing” where I want my stitches. I find straight pins to be very helpful in positioning the face and showing exactly where to place each stitch.
***You only need to stitch a face on one of the star pieces (not both).
***The bottom of the star should be where you left the long yarn tail after fastening it off. Also, remember to position your face how you would like to be in relation to the star tail you assembled.
***PATIENCE IS KEY. The straight pins (if you choose to use them) can be very frustrating. Be careful not to get poked or get your yarn caught on them on the back of the work. Place each stitch carefully when using the straight pins.
- Before stitching or pinning (if you are choosing to pin first like I did), decide where you want to place your eyes and mouth on the front of the star. You can do any facial expression you wish. If you are following the main picture of my star, I would recommend placing the mouth first since it should be centered, and then placing the eyes evenly apart on each side above the mouth. I placed my mouth first (using straight pins), centered between the sides of the star and in between Rounds 2 and 3 of the Star (below the center of the star). The width of my mouth, from corner to corner is about as wide as Round 2 of the star. Iused 7 straight pins (which means 6 stitches) for my mouth. I wanted my star to have a slight smile to look like it’s peacefully sleeping. I then placed my eyes so that the inner corners of the eyes are directly above the corners of the mouth (they start on Round 3 of the star about one stitch up from the very center of the star). Since the star was made in continuous rounds, my right eye runs on top of Rounds 4, 5, and 6 while my left eye runs on top of Rounds 3, 4, and 5. The eyes should form a wide U shape if you want them to appear like the star is asleep. Mine are slightly less than 3 rounds wide and the very bottom point of each eye is pretty much straight across from the very center of the star. I used 5 straight pins (which means 4 stitches for each of my eyes). Once you have decided on your star face and its placement, you can either use straight pins like I did in order to outline the mouth and eyes before stitching (if you place the straight pins side-by-side, they show you exactly where to place your stitches), or skip the the next step and go straight to Step 3 to begin stitching on your face.
- Place straight pins side-by-side exactly where you want the stitches of your mouth and eyes to be on the front of your star. If you want your star face to look like the one in the main pattern picture, read Step 1 for a description of the placement and refer to the pictures to see where to place your pins. Once you are satisfied with the positioning of your pins, you can begin stitching on your face as explained in Step 3. Be very careful with the pins since they are sticking out the back of your work so you need to take your time with each stitch so you don’t poke yourself or get your yarn stuck when stitching in Step 3.
- Use a sewing needle or small tapestry needle and a strand of your color choice of yarn (I used black) to begin stitching on the star face using backstitches. Start with the mouth, since that should be centered and then you can make sure your eyes are centered on either side of that when finished. If using straight pins, you will start by drawing your yarn up from the back of the star through to the front where the first straight pin is on one side of the mouth (I started on the right side of the mouth), making sure to remove the first straight pin when you bring it up through that point. Then take your yarn/needle back down the hole where the second straight pin is, through to the back of the star (while removing the second straight pin). You have now created one stitch. Next bring your needle/yarn back up from the back to the front through the hole where the third straight pin is, and then back down through the same hole through which you took your yarn down through to end the first stitch made (the same hole the second straight pin was in originally). You have now made a second stitch. Continue stitching on the mouth in this manner, simply taking the straight pins out as you work. Again, be careful not to get poked by the pins or get your yarn tangled/stuck on the back of the work in the pins. The straight pins make stitching placement easy since each pin marks where you need to pull your needle through for the stitches (almost like connect the dots). If you had 7 straight pins marking the mouth like I did, you should end up with 6 total stitches for the mouth. Once you are finished stitching on the mouth, don’t secure your yarn until you stitch on the eyes/entire face and you are happy with how they look.
- Once the mouth is stitched on and you are satisfied with it, check your placement for the eyes before starting to stitch those. Use a separate strand of yarn to stitch on each eye. Stitch each eye on the star using the same technique as you did for the mouth. Do not secure your yarn on the back until you are finished stitching on the entire face and you are happy with the appearance. You can always pull stitches out if you are not satisfied and restart.
- Once you have stitched on the entire face and you are happy with it, secure your yarn on the back of the star. Since you used a separate strand of yarn for each facial feature, there should be two yarn tails hanging loose on the back of the work for each feature. I tied the two tails of the strand of yarn I used for the mouth in a strong knot on the back and did the same thing for each eye. I then cut the tails left on each knot shorter, but not so short that the knots could come loose. These knots will not be visible since they will be on the inside of the assembled star.
***Once you have stitched on a star face on one of the star pieces and secured the yarn on the back of the star, follow the directions below to assemble the entire shooting star.
Shooting Star Assembly
***You will need your 2 star pieces, tail piece, tapestry needle, and fiberfill for the shooting star assembly.
- Position the star how you would like it to look once it’s put together. Sandwich the assembled shooting star tail between the two star pieces so that the wrong sides of the star pieces are inside and the right sides of the star pieces are facing the outside. Make sure the star pieces are aligned so they are directly on top of one another with the long yarn tails that were left on the stars at the bottom. I positioned my shooting star tail so it grows out of the right side of the star piece with the face. Once you know how you want your star to look when it is assembled, move on to Step 2.
- Remove the top star piece (the piece with the face) so you can see where the assembled shooting star tail needs to lay on the inside of the bottom star piece.
- Before we can attach the assembled shooting star tail to the bottom star piece, we need to tie the loose/long yarn tails left on the assembled shooting star tail together to create the final shape of the shooting star tail and to make it easier to attach. Hold the top two yarn tails (blue and pink tails) of the assembled shooting star tail together as if they were one strand of yarn and also hold the bottom two yarn tails (cream and green tails) of the assembled shooting star tail together as if they were one strand of yarn. While still holding the pairs of tails in each hand as if they were each one strand of yarn, tie them together so that it pulls the end of the assembled shooting star tail inward at the middle, helping to create a more “curved” appearance. Make sure to knot it so it stays tightly pulled together. Do not cut off the yarn tails. You will use them to attach the assembled shooting star tail to the bottom star piece.
Position the assembled shooting star tail exactly how and where you want it to lay on the bottom star piece. You may need to put the top/face star piece on top in order to adjust it properly. Once you have decided where you want it to be on the bottom piece, remove the top piece if it is still on so you can begin to attach the shooting star tail to the bottom star piece.
- Use your tapestry needle to weave the four yarn tails of the assembled shooting star tail into the stitches on the inside of the bottom star piece so they help hold/secure the shooting star tail in the correct position on the star. Make sure not to take the needle through to the other side of the star because you don’t want them to be visible on the outside of the star. Knot each pair of tails together so they can’t come out of the stitches. Once knotted, cut the ends of the tails shorter so they can be hidden inside the star pieces once sewn together, but make sure the knots can’t come loose. This step is just to somewhat help keep/hold the assembled shooting star tail in the main position and attached to the star piece. Later, you will be stitching through the assembled shooting star tail when you stitch the star pieces together to officially hold it in place permanently. I first wove my bottom (green) tail and then my third (cream) tail into the stitches and knotted those two tails together. Next, I wove my second (pink) tail and then my top (blue) tail into the stitches and knotted those two tails together.
- Use your tapestry needle and the long tail you left on the top star piece (piece with optional face) to begin sewing the aligned star pieces together around their perimeters, working clockwise (toward the left side of the top/face star piece), by sewing each pair of coordinating (aligned) outer stitches of the star pieces together. NOTE: Leave the long tail you left on the bottom star piece hang loose for now. You will use it later to help attach the star to the blanket. As you sew the star pieces together, take your needle down through each pair of aligned outer stitches (the two outer stitches of each star piece that sit directly on top of each other) and then back up through the next pair of aligned outer stitches directly beside the pair you just took your needle down through, working clockwise around the star (you are simply working down through a pair of stitches on top of one another with your needle and then back up through the next pair of stitches that sit on top of each other with your needle). Make sure to draw the yarn completely through tightly each time you take your needle through a pair of stitches in order to close the star well so it can hold stuffing. Don’t leave any holes/openings for stuffing to slip out. Once you have sewn/reached around the star perimeter to the assembled shooting star tail (when you have sewn three star points together), stop and follow the directions in Step 7.
- Once you have sewn around to the point where you have reached the assembled shooting star tail, you need to begin adding fiberfill to the closed part of the star before continuing your sewing, because it will get harder to stuff once the star closes even more. You should be able to stuff the three points of the star you have sewn together and most of the middle of the star. Add enough fiberfill so that the star becomes pretty firm and 3-dimensional. Once you are satisfied with the amount of stuffing you have added and the shape of the star, follow the directions in Step 8 to sew the assembled shooting star piece in place.
- After stuffing the enclosed portion of the star, continue sewing the star together, including the assembled shooting star tail by sewing through all three layers (the top star, the assembled shooting star tail, and the bottom star). Make sure to continue keeping the coordinating star stitches aligned on top of each other as you sew through all three layers. Also make sure to keep the assembled shooting star tail in the correct position as you sew through it. Pull the yarn taught with each stitch in order to ensure the shooting star tail stays in position and the star stays closed (you don’t want stuffing to come out of the star or the tail to become loose). Once you have completely sewn/attached the assembled shooting star tail in the star, you should have one remaining star point to sew closed. Before doing that, follow the directions in Step 9.
- Add fiberfill into the star once you have finished sewing the entire assembled shooting star tail in the star and have one open star point remaining. Make sure to fill out the star so each point is stuffed evenly. When you are finished adding your stuffing, continue on to Step 10 to complete sewing the star together.
- Continue sewing the star together by stitching the remaining pairs of aligned outer stitches together on both star pieces. Once you are almost finished closing the last star point, ensure the star is tightly sewn together and that there are no open gaps in the perimeter for baby fingers to fit inside or for stuffing to slip through. Add any additional fiberfill you may need before completely closing the star when sewing the last few pairs of stitches together. Once you have finished sewing around the star pieces so the star is now one whole unit, leave both yarn tails (the tail from the top star piece you just used to sew the star together and the tail that is still hanging loose on the bottom star piece) hang at the bottom because you will use them to attach the complete shooting star to the circle body of the lovey.
***Your shooting star is now complete! Follow the next set of directions to attach it to the center of the circle body of the lovey.
I also sell a PDF Version of this pattern on ETSY with over 100 helpful pictures
Attaching the Shooting Star to Circle Body of Lovey
***You will use your tapestry needle and the 2 yarn tails you left on the bottom of the shooting star to attach the assembled shooting star to the blanket.
- Position the assembled shooting star on the top of the circle body of the lovey where you want it in the center. I tried to position mine so the star itself (not the shooting star tail) was in the direct center of the circle lovey and so the last stitches of the last round (Round 32) of the circle body of the lovey were centered on the back side of the star (this is because I wanted to hide the slight bump on the outside of the circle where Round 32 ended on the back side of the circle/finished lovey).
- Once you have decided on your positioning of the assembled shooting star, you will now sew the bottom of the star to the circle body of the lovey. You only need to sew along the upside down V shape at the bottom of the star. Use your tapestry needle and the left yarn tail on the bottom of the star to begin sewing the bottom left side of the star to the top of the blanket tightly. Do this by taking your needle down through the circle body of the lovey, bringing it over and back up through the circle body and through the bottom of the star. Run your stitches horizontally along the bottom of the star instead of from front to back so you are less likely to see the yarn on the circle lovey body. Then bring your needle back down through the circle body of the lovey and repeat. As you sew, check to make sure the star is in the correct position and your star-colored yarn tail isn’t showing on the top of the blanket. Similar to how you sewed the shooting star tail pieces together, once you have sewn across the entire left side of the bottom of the star (almost to the very left point of the star), sew back across in the directions from which you came, towards the center of the circle blanket/star to make sure it is extra secure and tightly attached to the circle body of the lovey. Leave the tail hang on the bottom side of the lovey once you have sewn back towards the center. Use your tapestry needle and the right yarn tail on the bottom of the star to sew the bottom right side of the star to the top of the blanket in the same manner you did for the left. When you are finished and have worked back to the center of the circle blanket/star, leave the tail hang on the bottom side of the lovey. You should now have both tails hanging on the bottom side of the lovey.
- If you are satisfied with the attachment of your shooting star and have verified that it is securely/tightly sewn to the blanket and stands up on its own when the lovey is laid flat, secure it to the back of the work using the two tails. You can tie them in a secure knot and weave them in on the underside of the lovey. Make sure to cut off any excess yarn. If you don’t want the two yarn tails hanging loose on the underside of the lovey, run your tails up through the inside of the main star and cut them so their ends stay inside the star and you can’t see them. I wasn’t concerned with the appearance of the underside of my lovey, so I left the tail ends hang out loose after knotting and weaving them under the stitches. Babies should be closely watched to make sure they don’t get the yarn tails in their mouths.
***Once you have attached and secured your shooting star onto the circle body of the lovey, you are finished with the main shooting star lovey! If you prefer the blanket without the extra stars added around the shooting star (the blue sparkle yarn already adds a starry night effect), you are completely finished! If you want to add the optional stars to the lovey as shown in the main images, follow the directions below. The directions give both patterns for the two different-sized stars that are attached to the lovey as well as directions on how to stitch/embroider the tiny stars shown in the main images. You can use all three types of stars on your blanket, just one type of star, or your own combination. You can also place them wherever you prefer on your blanket. You can get as creative as you wish for this part – maybe even stitch on a constellation/zodiac sign!
OPTIONAL ADD-ON STARS
Larger Star Appliqué Pattern (Make as many as you desire for your lovey)
*Use your 5.00 mm hook and your star color choice yarn to begin the circle. (I made 3 of these stars in the cream sparkle yarn I used for my main star, and 1 of these stars in the cream color I used in the shooting star tail.
*Leave a slightly longer tail at the beginning of the magic ring so it can be used to help you attach the finished star to the lovey.
Round 1: Leaving a long tail at the beginning, make a magic ring, ch 1, work 5 sc in the ring, slst in first st of round, pull ring closed. (6 sc)
Round 2: Repeat [ch 3, slst in 2nd ch from hook, sc in next ch, slst in next st of Round 1 (one point of star is made)] five times, after your final slst in the first st of Round 1, fasten off, leaving a long tail for sewing onto the lovey.
*Weave in the beginning tail from the beginning of the magic ring with your tapestry needle to securely close the magic ring, but do not cut off the tail. You can use this to help you attach the finished star to the lovey.
HINT: You should have 2 long tails on your finished star (one from the beginning of the magic ring and one after finishing off Round 2. These tails will make attaching the star to the blanket easier.
Smaller Star Appliqué Pattern (Make as many as you desire for your lovey)
*Use your 5.00 mm hook and your star color choice yarn to begin the circle. (I made 1 of these stars in the cream sparkle yarn I used for my main star, and 1 of these stars in the cream color I used in the shooting star tail.
*Leave a slightly longer tail at the beginning of the magic ring so it can be used to help you attach the finished star to the lovey
Round 1: Leaving a long tail at the beginning, make a magic ring, ch 1, work 5 sc in the ring, slst in first st of round, pull ring closed. (6 sc)
Round 2: Repeat [ch 2, slst in 2nd ch from hook, slst in next st of Round 1 (one point of star is made)] five times, after your final slst in the first st of Round 1, fasten off, leaving a long tail for sewing onto the lovey.
*Weave in the beginning tail from the beginning of the magic ring with your tapestry needle to securely close the magic ring, but do notcut off the tail. You can use this to help you attach the finished star to the lovey.
HINT: You should have 2 long tails on your finished star (one from the beginning of the magic ring and one after fastening off Round 2. These tails will make attaching the star to the blanket easier.
***Once you are finished with your star appliqué(s), follow the directions below for attaching the star(s) to your blanket.
Attaching Star Appliqué to Lovey
You can always sew/attach your star(s) to the lovey using your own method. Below are the directions for how I sewed/attached my stars. You can’t see the stars or their yarn tails from underneath the lovey because I did not sew them all the way through when attaching them.
***You will use your tapestry needle and the 2 yarn tails you left on the star appliqué to attach the star to the lovey.
- If you have more than one appliqué, decide where you want to position each of them on your lovey before beginning to sew/attach any of them to it. You may want to pin them in place.
- To begin attaching a star appliqué to the lovey, thread your tapestry needle with the tail you left at the beginning magic ring of the star and take the needle through a stitch or two on the top side of the lovey (where you want the center of the star to be placed), making sure not to go the entire way through the lovey if you don’t want to see it on the opposite (bottom) side of the lovey. Then bring the needle back up through a stitch on the bottom side of the star, pull tight and leave the tail hang loose between the star and the top of the lovey.
- Thread your tapestry needle with the tail you left after fastening off Round 2 of the star. Bring the tail up through the closest stitch on the outer perimeter of the star. You will sew the star down to the top of the lovey along its perimeter. Bring the tail back down through the next stitch over on the outer perimeter of the star and then through a stitch on the top side of the lovey in the spot that lines up with where you want that outer stitch of the star to be positioned on top the lovey (make sure not to take your needle the entire way through the lovey if you don’t want the yarn to be seen on the bottom side). Next, bring the tail up through the next stitch over on the outer perimeter of the star. Continue sewing the star to the top of the lovey in this fashion along its perimeter. As you sew, check to make sure your stitches aren’t showing on the bottom of the blanket if you don’t want them to be seen on that side. Once you sew completely around the perimeter of the star so that it is tightly attached to the top of the blanket, take your needle down through an outer stitch on the star and then under a stitch on top the lovey. Tie the two tails together in a knot making sure the knot lies between the bottom of the star and top of the lovey so it cannot be seen. Use your tapestry needle to weave both tails in under the star and cut off any excess close to the star so the end is hidden underneath.
- Attach the rest of your star appliqués where you want them on top the lovey in the same way, by repeating Steps 2 – 4.
***Once you have all your star appliqués sewn onto the top of the lovey, follow the directions below to stitch little stars directly on the lovey if you are choosing to add those. Note that you will be able to see these little stitched-on stars on the bottom side of the lovey, so if you are looking for a more “clean” look where you can’t see stitches under the blanket, you may not want to add these (unless you know a different way of stitching them so they don’t show through). If you are not choosing to add the stitched-on stars, you are finished with your lovey!
Stitched-On Stars
***You will use your tapestry needle and your star color choice yarn to embroider the little stars on the lovey. (I stitched several of these stars in the cream sparkle yarn I used for my main star, and several in the cream color I used in the shooting star tail.
***Feel free to use your own method to stitch on the stars and secure the yarn. I wasn’t too concerned about knots showing on the bottom of my lovey, so that’s what I did to secure it on the back. You may want to use a neater technique if you don’t want knots/loose ends showing.
- Thread your tapestry needle with a strand of yarn in your color choice for the star.
- Find a place on top your lovey where you want to stitch on a star. Decide the hole in the top of the lovey that will be the star’s exact center.
- Use your needle to bring the yarn straight up through the lovey from the bottom/back to the top/front, in a hole that is right next to the hole that will be the star’s center. Make sure you don’t pull your strand of yarn all the way through. Leave a tail underneath to help secure the yarn on the back of the work at the end.
- Use your needle to bring the yarn straight down through the star’s center hole. You now have one “point” of your star made.
- Use your needle to bring the yarn back up through to the front of the lovey, going through another hole that is right next to the star’s center hole. Then use your needle to take the yarn back down through the star’s center hole again. You now have another “point” of your star made.
- Repeat Step 5 three more times. You should now have a complete star with 5 “points” made. Use your own method to knot/secure your yarn on the back of the work. I simply tied the two ends of the strand of yarn in a knot and then wove them under stitches on the bottom side of the lovey. You may know/find a neater way to secure your yarn.
- Repeat Steps 1 – 6 to stitch on as many stars as you want to the top of your lovey.
***Once you are finished stitching all of your stars on the lovey, your shooting star lovey is finished!
Questions? Concerns? Please contact me at email TheCrafterLifeBlog@gmail.com
This pattern belongs to The Crafter Life. You may not sell my patterns or claim them as your own. You may make items to sell (i.e. on Etsy) from my patterns but I ask that you link back to my site (TheCrafterLife.com) and provide credit for the pattern. You are welcome to share my patterns on social media as long as you link back directly to my site by providing the link. No copying and pasting of any patterns will be allowed under any circumstances.