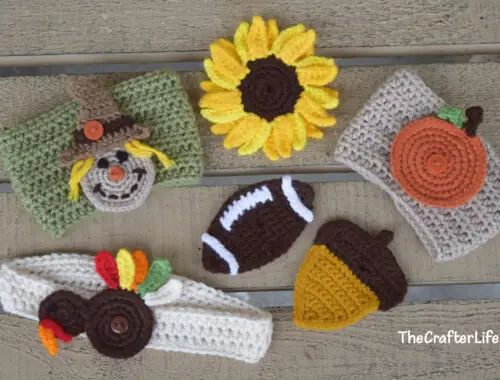
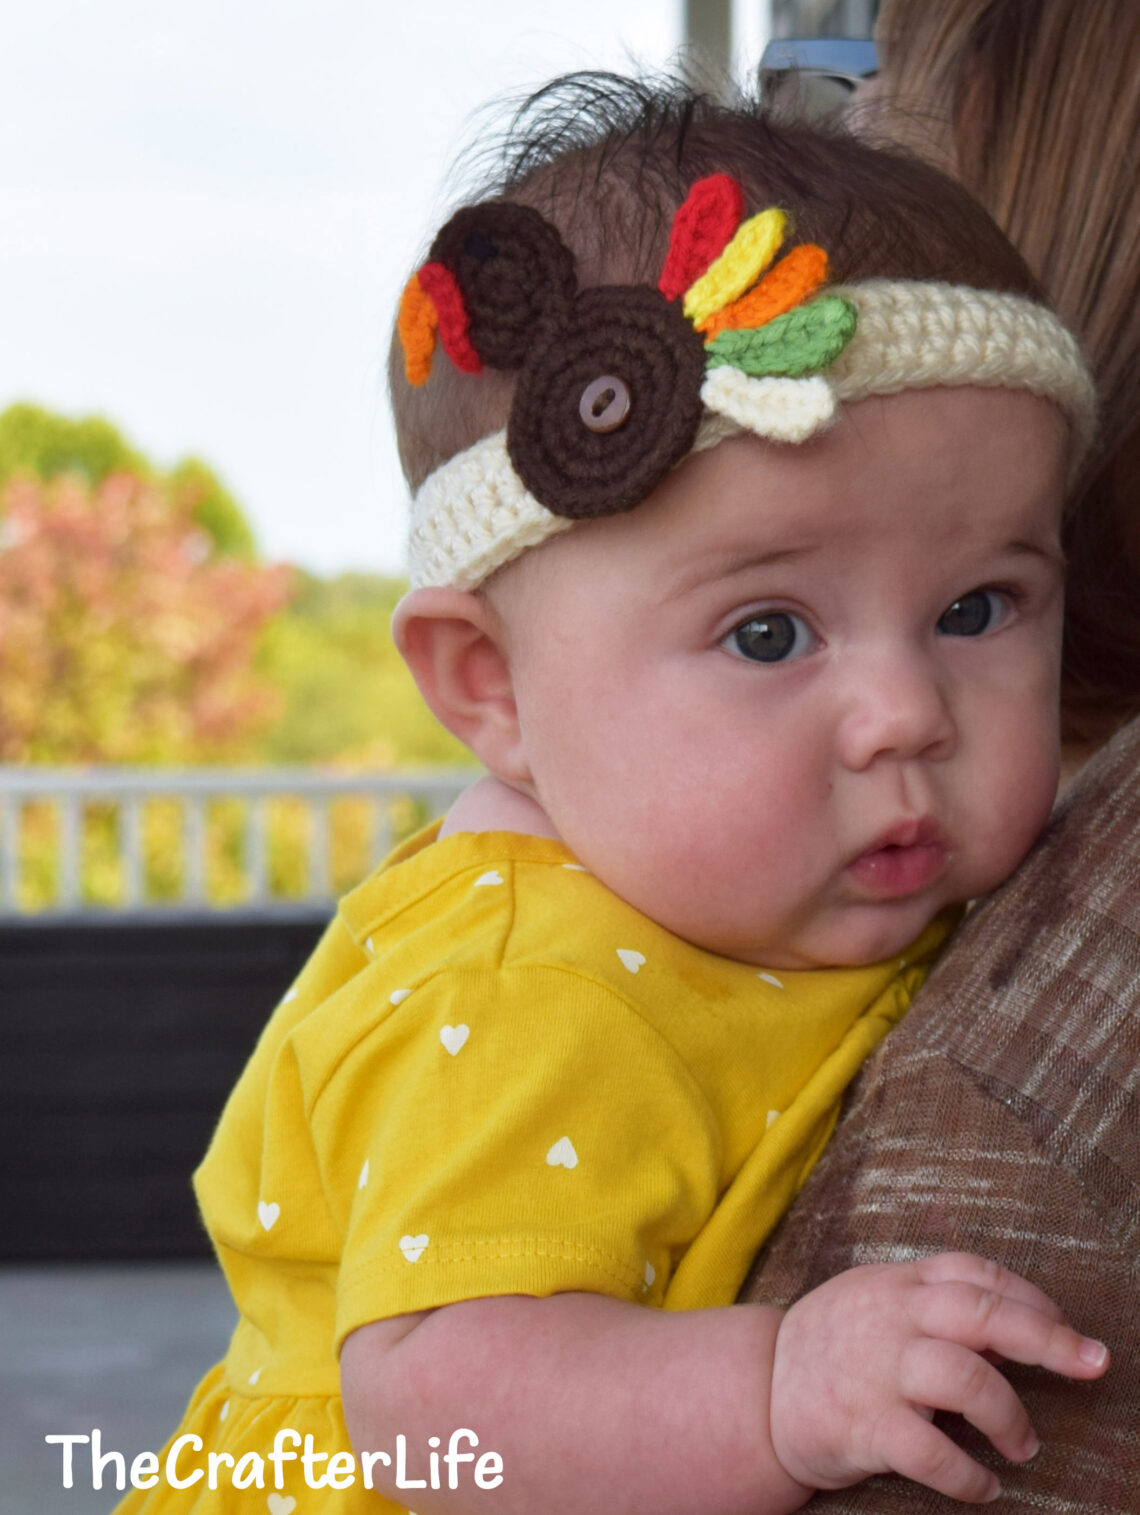
Turkey Button-On Appliqué
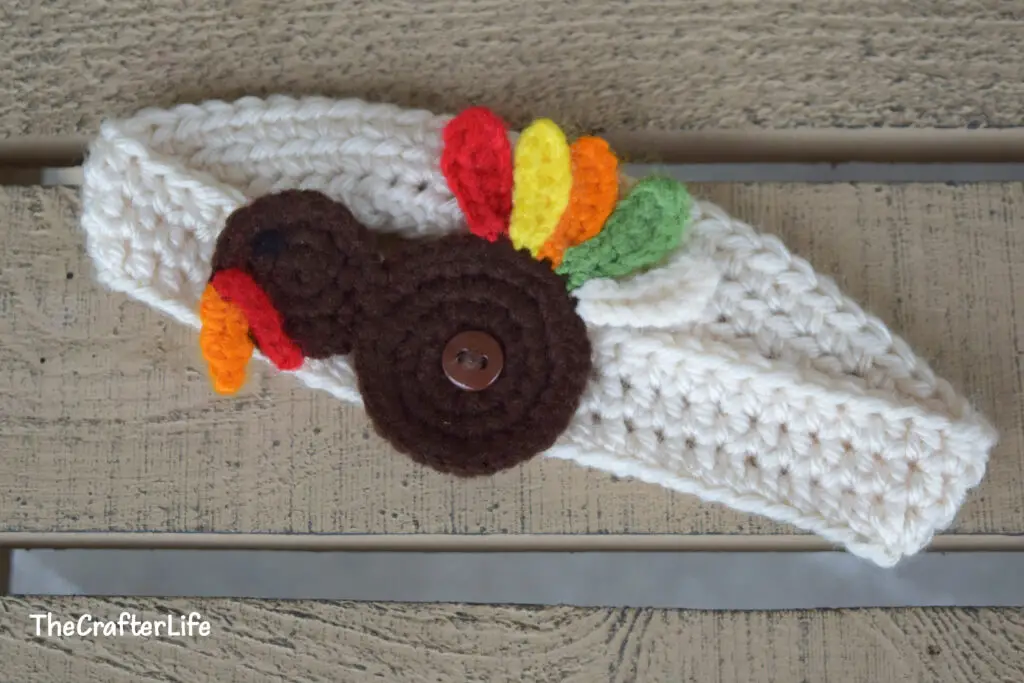
So cute that you will want to gobble him up, meet my Turkey Button-On Appliqué! Use him on a ½-inch brown button to complement your fall-inspired projects.
 Turkey Button-On

This turkey button-on appliqué pattern is written fit a standard ½-inch brown button.
FINISHED MEASUREMENTS
The turkey button-on appliqué is about 2½ inches tall and about 3½ inches wide across the widest part (from the outside of the head to the tip of the cream tail feather).
MATERIALS
– Size 3.00 mm crochet hook or size needed to obtain gauge
– Worsted weight (4) acrylic yarn in Brown (I used Loops & Threads Impeccable yarn in Chocolate.)
– Worsted weight (4) acrylic yarn in Red (I used Red Heart Super Saver yarn in Cherry Red.)
– Worsted weight (4) acrylic yarn in Bright Yellow (I used Red Heart Super Saver yarn in Bright Yellow.)
– Worsted weight (4) acrylic yarn in Orange (I used Red Heart Super Saver yarn in Pumpkin.)
– Worsted weight (4) acrylic yarn in Green (I used Lion Brand Vanna’s Choice yarn in Fern.)
– Worsted weight (4) acrylic yarn in Cream (I used Loops & Threads Impeccable yarn in Aran.)
– Worsted weight (4) acrylic yarn in Black (I used Red Heart Super Saver yarn in Black.)
– Scissors
– Tapestry needle for weaving in ends
– Stitch markers
– Measuring tape
ABBREVIATIONS
– ch = chain
– chs = chains
– dc = double crochet
– hdc = half double crochet
– sc = single crochet
– slst = slip stitch
– st = stitch
– sts = stitches
GAUGE
3 rounds wide of sc = ½ inch
PATTERN NOTES
- Brackets [ ] indicate portions of the pattern to be repeated.
DIRECTIONS
Body of Turkey
*Use your 3.00 mm hook and brown worsted weight yarn.
*The turkey’s body center is worked in continuous rounds (Rounds 1-3). Work first stitch of round in first stitch of previous round. Use a stitch marker to mark the beginning/end of each round, if needed.
*In Round 1, make sure to work your single crochet stitches in the chain stitches and not in the ring.
Round 1: Ch 8, slst to first ch to form a ring, 2 sc in each ch around. (16 sc)
Round 2: Repeat [sc in next st, 2 sc in next st] around. (24 sc)
Round 3: Repeat [sc in next 2 sts, 2 sc in next st] around, slst in first st of round, fasten off and weave in ends. (32 sc)
*The body of the turkey is now finished. Follow the directions below to make the head of the turkey.
Head of Turkey
*Use your 3.00 mm hook and brown worsted weight yarn.
*The turkey’s body center is worked in continuous rounds (Rounds 1-3). Work first stitch of round in first stitch of previous round. Use a stitch marker to mark the beginning/end of each round, if needed.
Round 1: Make a magic ring, ch 1, work 6 sc in the ring, pull ring closed. (6 sc)
Round 2: 2 sc in each st around. (12 sc)
Round 3: Repeat [sc in next st, 2 sc in next st] around, slst in first st of round, fasten off, leaving a long tail for sewing onto the body. (18 sc)
*The head of the turkey is now finished. Follow the directions below to make the beak of the turkey.
Beak
*Use your 3.00 mm hook and orange worsted weight yarn.
Row 1: Ch 2, sc in 2nd ch from hook. (1 sc)
Row 2: Ch 1, turn, sc in first st. (1 sc)
Row 3: Ch 1, turn, sc in first st, fasten off, leaving a long tail for sewing onto the head of the turkey. (1 sc)
Red Snood (Red Trim on Side of Beak)
*Use your 3.00 mm hook and red worsted weight yarn.
*Leave a longer tail at the beginning when you first make your slip knot to help when sewing snood onto the head. That end will be the bottom of the snood.
Row 1: Ch 4, fasten off and leave a long tail for sewing onto the head.
*The snood is now complete. The tail left from your beginning slip knot will be the bottom end of the snood and the tail left at the end of the chain will be the top when you go to sew it onto the head of the turkey. Follow the directions below to make each turkey feather.
Red Turkey Feather
*Use your 3.00 mm hook and red worsted weight yarn.
*Leave a longer tail at the beginning when you first make your slip knot to help when sewing the feather onto the body of the turkey.
Row 1: Ch 6, hdc in 2nd ch from hook, dc in next ch, hdc in next ch, sc in next 2 chs, fasten off, leaving a long tail for sewing onto the body of the turkey. (2 hdc, 1 dc, 2 sc; 5 total sts)
Yellow Turkey Feather
*Use your 3.00 mm hook and yellow worsted weight yarn.
*Leave a longer tail at the beginning when you first make your slip knot to help when sewing the feather onto the body of the turkey.
Row 1: Ch 6, sc in 2nd ch from hook, hdc in next 2 chs, sc in next 2 chs, fasten off, leaving a long tail for sewing onto the body of the turkey. (3 sc, 2 hdc; 5 total sts)
Orange Turkey Feather
*Use your 3.00 mm hook and orange worsted weight yarn.
*Leave a longer tail at the beginning when you first make your slip knot to help when sewing the feather onto the body of the turkey.
Row 1: Ch 7, hdc in 2nd ch from hook, dc in next ch, hdc in next 2 chs, sc in next 2 chs, fasten off, leaving a long tail for sewing onto the body of the turkey. (3 hdc, 1 dc, 2 sc; 6 total sts)
Green Turkey Feather
*Use your 3.00 mm hook and green worsted weight yarn.
*Leave a longer tail at the beginning when you first make your slip knot to help when sewing the feather onto the body of the turkey.
Row 1: Ch 7, hdc in 2nd ch from hook, dc in next 2 chs, hdc in next ch, sc in next 2 chs, fasten off, leaving a long tail for sewing onto the body of the turkey. (2 hdc, 2 dc, 2 sc; 6 total sts)
Cream Turkey Feather
*Use your 3.00 mm hook and cream worsted weight yarn.
*Leave a longer tail at the beginning when you first make your slip knot to help when sewing the feather onto the body of the turkey.
Row 1: Ch 7, hdc in 2nd ch from hook, dc in next 2 chs, hdc in next ch, sc in next 2 chs, fasten off, leaving a long tail for sewing onto the body of the turkey. (2 hdc, 2 dc, 2 sc; 6 total sts)
*You should now have all the turkey feathers complete. Follow the directions below to assemble the turkey and stitch on its eye.
ASSEMBLY
1. Attach the turkey head to the body of the turkey first using your tapestry needle and the long tail you left on the head of the turkey. Sew the last 3 stitches of Round 3 of the head to the first 3 stitches of Round 3 of the body. Secure your yarn and weave in the loose ends.
2. Attach the beak to the head of the turkey using your tapestry needle and the long tail you left on the beak. Count about 10 stitches over staring from the back of the neck around the top of the head and sew the top of the beak to that stitch and the next 2 stitches (this should be about 5 stitches away from the bottom of the neck on the other side of the head). Secure and weave in your yarn on the back of the work.
3. Attach the red snood to the head of the turkey over top the beak using your tapestry needle and the tails you left on each end of the snood. Secure your yarn on the back of the work when finished. I took the tail left at the end of the snood under the back loop only of the same stitch to which I attached the beak. Then I took the tail from the slip knot end and ran it under the back loop only of the third stitch up from the neck on the left side of the head. I did not sew the chains of the snood down to the head (I only ran the two tails under the back loops of those two stitches on the last round of the head).
4. Attach the red feather to the body of the turkey using your tapestry needle and the tails you left on the feather. Take the tail you left at the end of the feather and run it under the back loop only of the 6th stitch over from head. Then take the other tail (the tail you left at the beginning of the slipknot) and run it under the back loop only of the 7th stitch over from the head.
5. Attach the yellow feather to the body of the turkey using your tapestry needle and the tails you left on the feather. Take the tail you left at the end of the feather and run it under the back loop only of the 7th stitch over from head. Then take the other tail (the tail you left at the beginning of the slip knot) and run it under the back loop only of the 8th stitch over from the head.
6. Attach the orange feather to the body of the turkey using your tapestry needle and the tails you left on the feather. Take the tail you left at the end of the feather and run it under the back loop only of the 8th stitch over from head. Then take the other tail (the tail you left at the beginning of the slip knot) and run it under the back loop only of the 9th stitch over from the head.
7. Attach the green feather to the body of the turkey using your tapestry needle and the tails you left on the feather. Take the tail you left at the end of the feather and run it under the back loop only of the 9th stitch over from head. Then take the other tail (the tail you left at the beginning of the slip knot) and run it under the back loop only of the 10th stitch over from the head.
8. Attach the cream feather to the body of the turkey using your tapestry needle and the tails you left on the feather. Take the tail you left at the end of the feather and run it under the back loop only of the 10th stitch over from head. Then take the other tail (the tail you left at the beginning of the slip knot) and run it under the back loop only of the 11th stitch over from the head.
9. Stitch on the eye of the turkey using a strand of black yarn and your tapestry needle. Count 3 stitches up around the head from the beak. Place the eye under that stitch over Round 2 of the head by making two small black vertical stitches over top of each other (bring the needle up at the bottom of Round 2 of the head, under the 3rd stitch over from the beak, and take it back down at the top of Round 2 of the head, two times).
10. Once you are satisfied with the appearance and positioning of the feathers and eye of the turkey, secure your yarn and weave in the loose ends on the back of the work.
***Once you finish weaving in all loose ends, your turkey button-on appliqué is ready to be placed on a ½-inch brown button!
TIP: Press the appliqué with an iron using a press cloth for protection to help it lay flat and keep its shape.

The pattern and photos of this item are the property of TheCrafterLife. This pattern and design are subject to copyright, and are for personal, non-commercial use only. You may not distribute, sell this pattern, or claim it as your own under any circumstances.
You may not sell my patterns or claim them as your own. You may make items to sell (i.e. on Etsy) from my patterns but I ask that you link back to my site and provide credit for the pattern. You are welcome to share my patterns on social media as long as you link back directly to my site by providing the link. No copying and pasting of any patterns will be allowed under any circumstances.