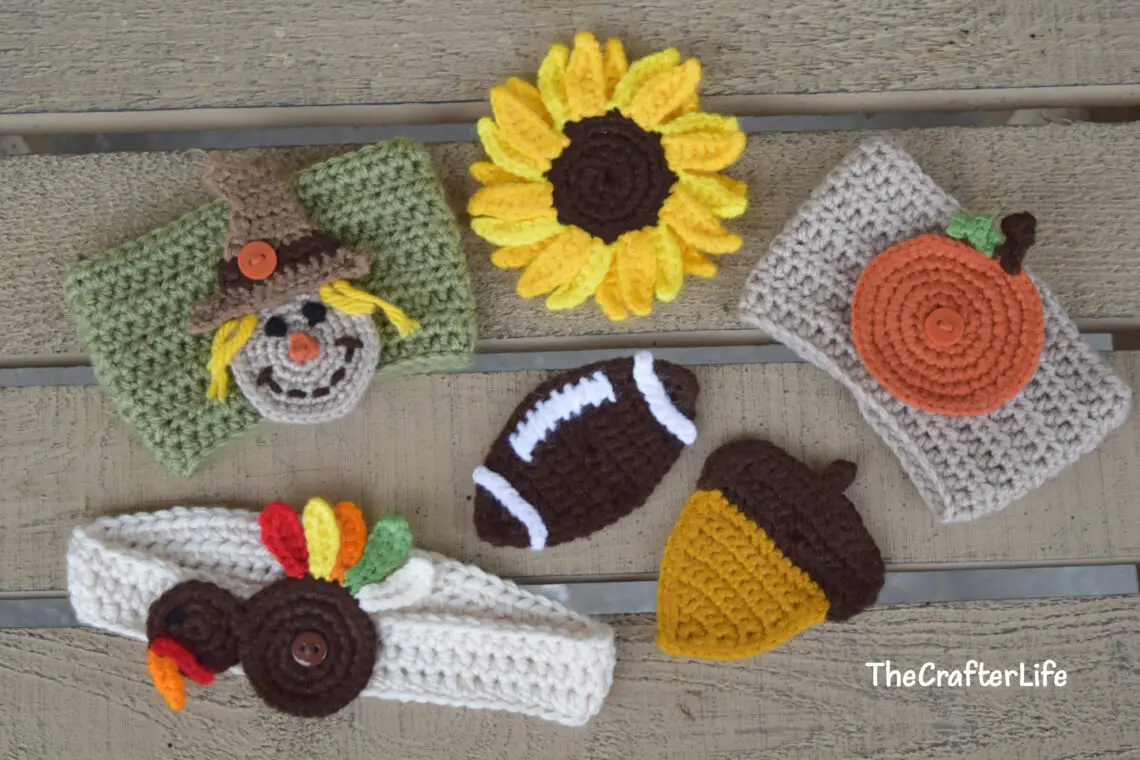
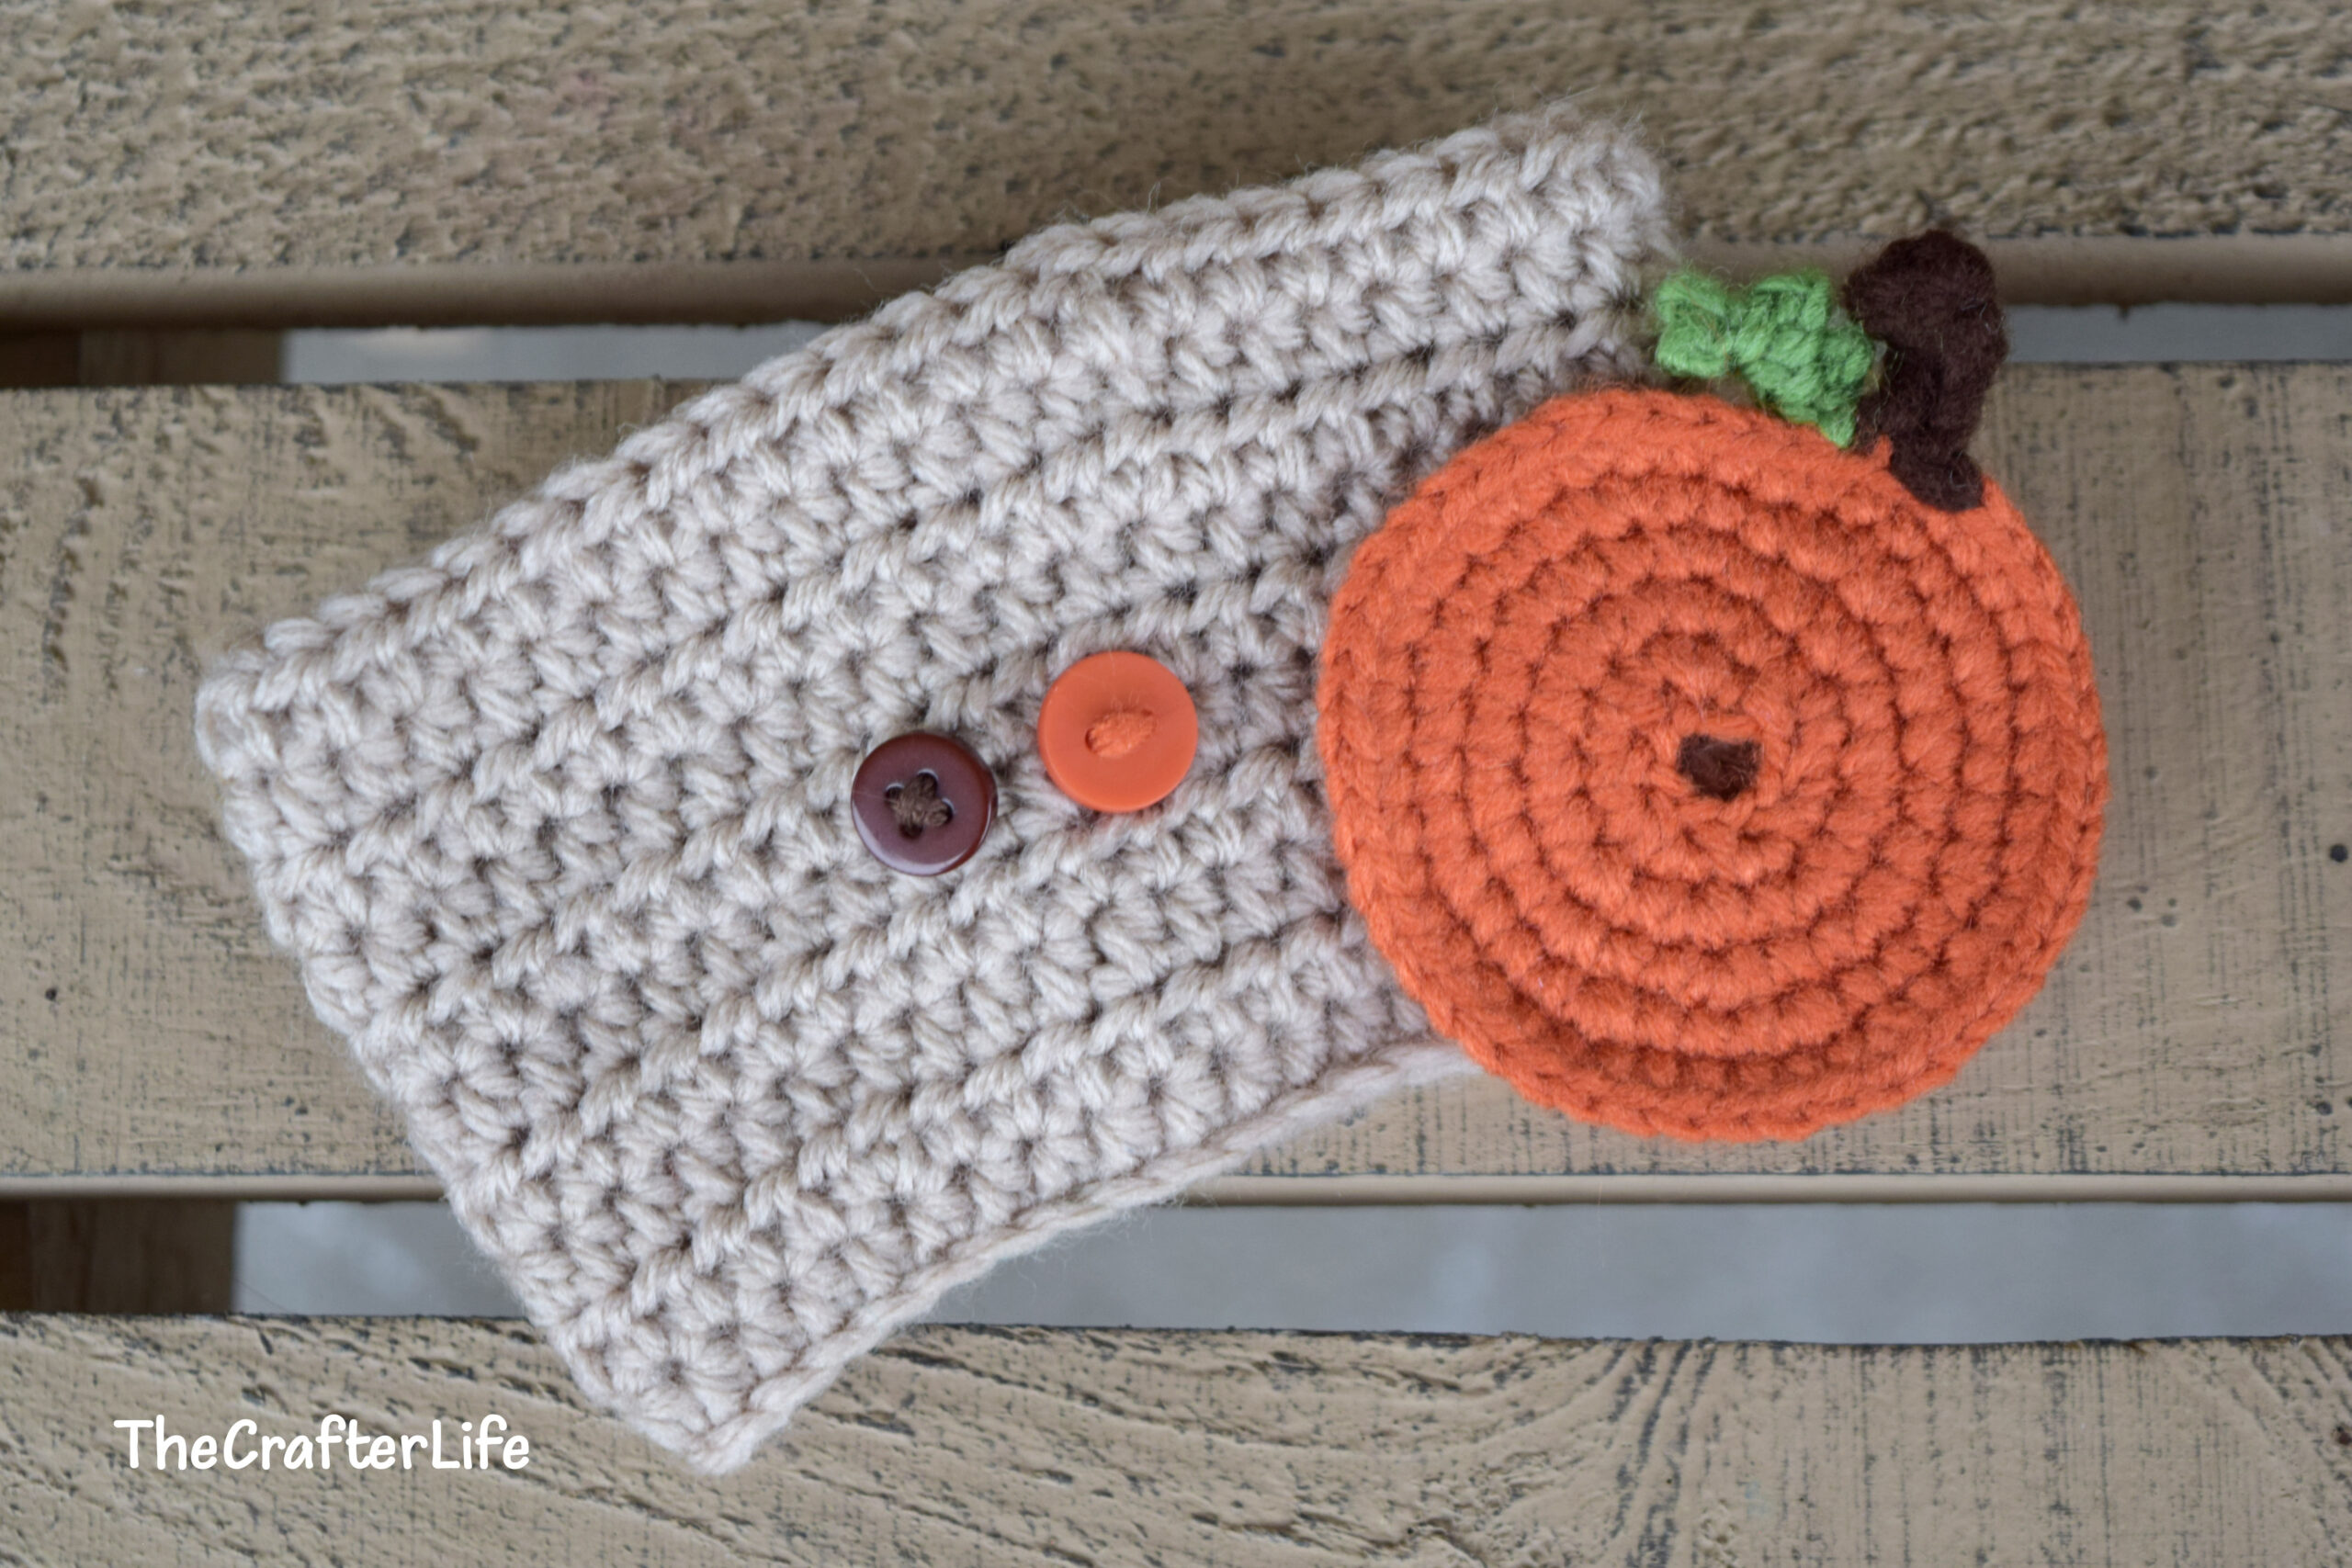
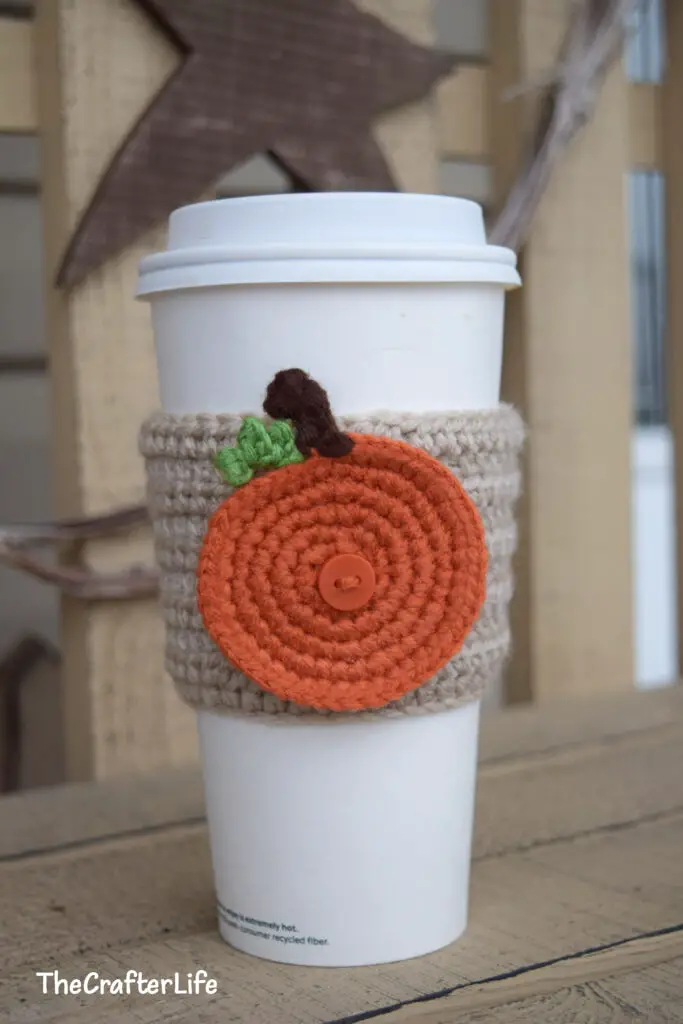
Cute as a Button Hot Beverage Cup Sleeve
HAPPY FALL Y’ALL! I am excited to release my fall line of interchangeable button-on appliqués! Use them to add some seasonal flair to your current project. I originally designed my button-ons for a headband, but I thought these fall designs would also be perfect on a hot beverage cup sleeve. Use them when out and about or when enjoying a quiet day at your home. I am providing the pattern for the cup sleeve below, as well as the links to the patterns for the headband, pumpkin, and the sunflower. I hope you enjoy making these as much as I did!
Be sure to follow me on Facebook, where I will be posting as the button-on appliqués are released.
Hot Beverage Cup Sleeve
This cup sleeve pattern is written to fit most standard-size cups/travel mugs that have a diameter of about 3 inches. It can be easily adjusted to fit larger or smaller cups by adding or deleting stitches.
 FINISHED MEASUREMENTS
The cup sleeve has a diameter of about 3 inches and is about 2¾ inches tall.
MATERIALS
– Size G/6/4.00mm crochet hook or size needed to obtain gauge
– Worsted weight (4) acrylic yarn in your main color choice (I used Loops & Threads Impeccable yarn in Fern for the green sleeve shown and Red Heart Super Saver yarn in Buff for the tan sleeve shown.)
– Scissors
– Tapestry needle for weaving in ends and sewing eyes & wrap onto sleeve
– Stitch markers (Optional – if needed for counting/marking stitches)
– Measuring tape
– ½-inch button(s) in the color you need to match your button appliqués (if you are making this to use with interchangeable button-on appliqués)
– Lace weight (0) yarn or sewing thread in button color (if you are making this to use with interchangeable button-on appliqués)
– Thin tapestry needle/sewing needle (if you are making this to use with interchangeable button-on appliqués)
ABBREVIATIONS
– ch = chain
– chs = chains
– hdc = half double crochet
– sc = single crochet
– slst = slip stitch
– sp = space
– st = stitch
– sts = stitches
GAUGE
5 hdc = 1 inch
7 rows of hdc = 2 inches
PATTERN NOTES
- The cup sleeve is made in rows of half double crochet stitches that are stitched together at the end to create a seam. You can adjust the size of the sleeve by adding or deleting stitches in order to fit larger or smaller mugs.
DIRECTIONS
Body of Sleeve
*Use your 4.00 mm hook and main color worsted weight yarn.
*If you aren’t sure what size sleeve you need for your cup, after working the first few rows, wrap the sleeve around your cup to see if it will reach. Take out or add stitches to each row of the sleeve, accordingly.
Row 1: Ch 40, hdc in 2nd ch from hook and in next 38 chs across. (39 hdc)
Row 2: Ch 1, turn, hdc in each st across. (39 hdc)
Row 3: Ch 1, turn, 2 hdc in first st, hdc in next 12 sts, 2 hdc in next st, hdc in next 12 sts, 2 hdc in next st, hdc in next 12 sts. (42 hdc)
Rows 4-5: Ch 1, turn, hdc in each st across. (42 hdc)
Row 6: Ch 1, turn, 2 hdc in first st, hdc in next 20 sts, 2 hdc in next st, hdc in next 20 sts. (44 hdc)
Rows 7-8: Ch 1, turn, hdc in each st across. (44 hdc)
Row 9: Ch 1, turn, 2 hdc in first st, hdc in next 21 sts, 2 hdc in next st, hdc in next 21 sts. (46 hdc)
Rows 10-11: Ch 1, turn, hdc in each st across, at the end of Row 11, do not fasten off. (46 hdc)
ASSEMBLY
*You will now join the ends of the rows to create a seam. Before doing so, double check that your sleeve will fit properly around your cup by wrapping it around the cup and making sure the both ends of each row meet without too much or too little slack. If it doesn’t fit, you will need to take out your rows and adjust the number of stitches accordingly. If it fits, follow the directions below to create the seam and finish your cup sleeve.
With your yarn still on your hook at the end of Row 11, fold the sleeve so the first and last stitches of each row meet, ch 1, and then single crochet the corresponding row ends (the first and last stitches of each row) of the body of the sleeve together, to create a seam. Make sure to insert your hook through both corresponding ends of each row as you work your single crochet stitches. Once you have the seam complete, fasten off and weave in the loose ends on the inside of the sleeve. Turn the sleeve right-side out.
***If you are using the sleeve with the button-on appliqués, attach your ½-inch button(s) to the front of the sleeve on the outside using matching thread or lace (0) weight yarn and a sewing needle or thin tapestry needle. If you are sewing on more than one button so you have different colors, make sure to sew them close enough together so the button-on appliqué will cover the other buttons when it is attached to its own color button.
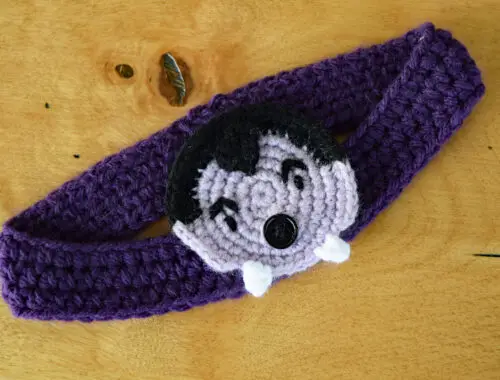
0-3 MONTH HEADBAND
For the 0-3 month headband shown, I used Red Heart Soft yarn in Off White. Here is the link to the pattern for the 0-3 month headband.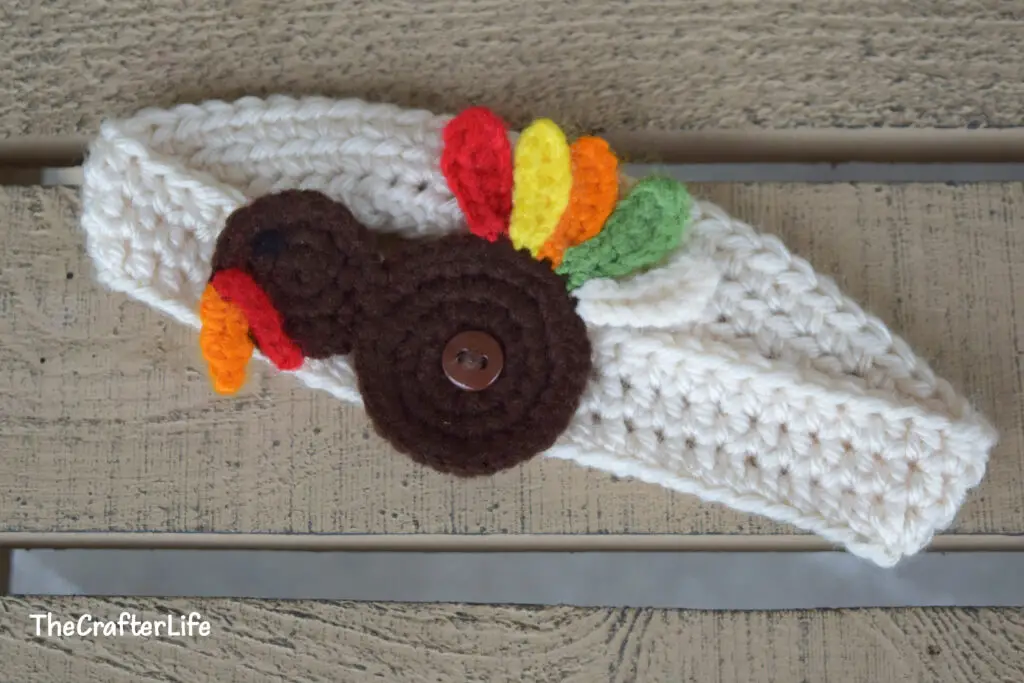
Pumpkin Button-On Appliqué
For the fall pumpkin button-on shown in the main picture, I used Loops & Threads Impeccable yarn in Pumpkin. Here is the link to the pattern for the pumpkin button-on appliqué.
Sunflower Button-On Appliqué
Here is the link to the pattern for the Sunflower Button-On Appliqué.


The pattern and photos of this item are the property of TheCrafterLife. This pattern and design are subject to copyright, and are for personal, non-commercial use only. You may not distribute, sell this pattern, or claim it as your own under any circumstances.
You may not sell my patterns or claim them as your own. You may make items to sell (i.e. on Etsy) from my patterns but I ask that you link back to my site and provide credit for the pattern. You are welcome to share my patterns on social media as long as you link back directly to my site by providing the link. No copying and pasting of any patterns will be allowed under any circumstances.